Wordpress blog EN
DIY so coco
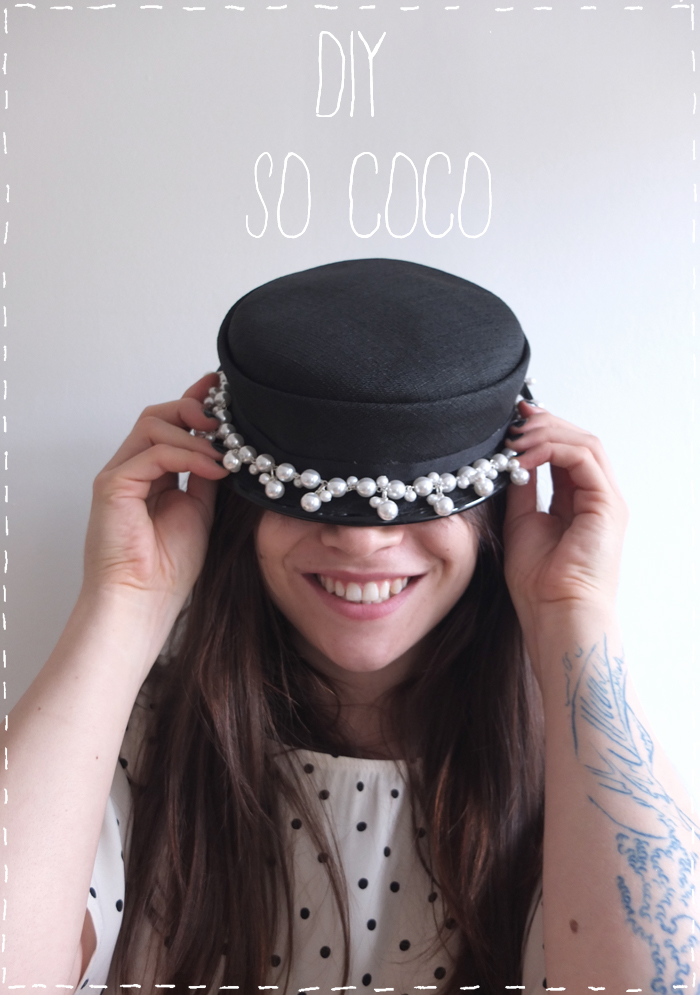
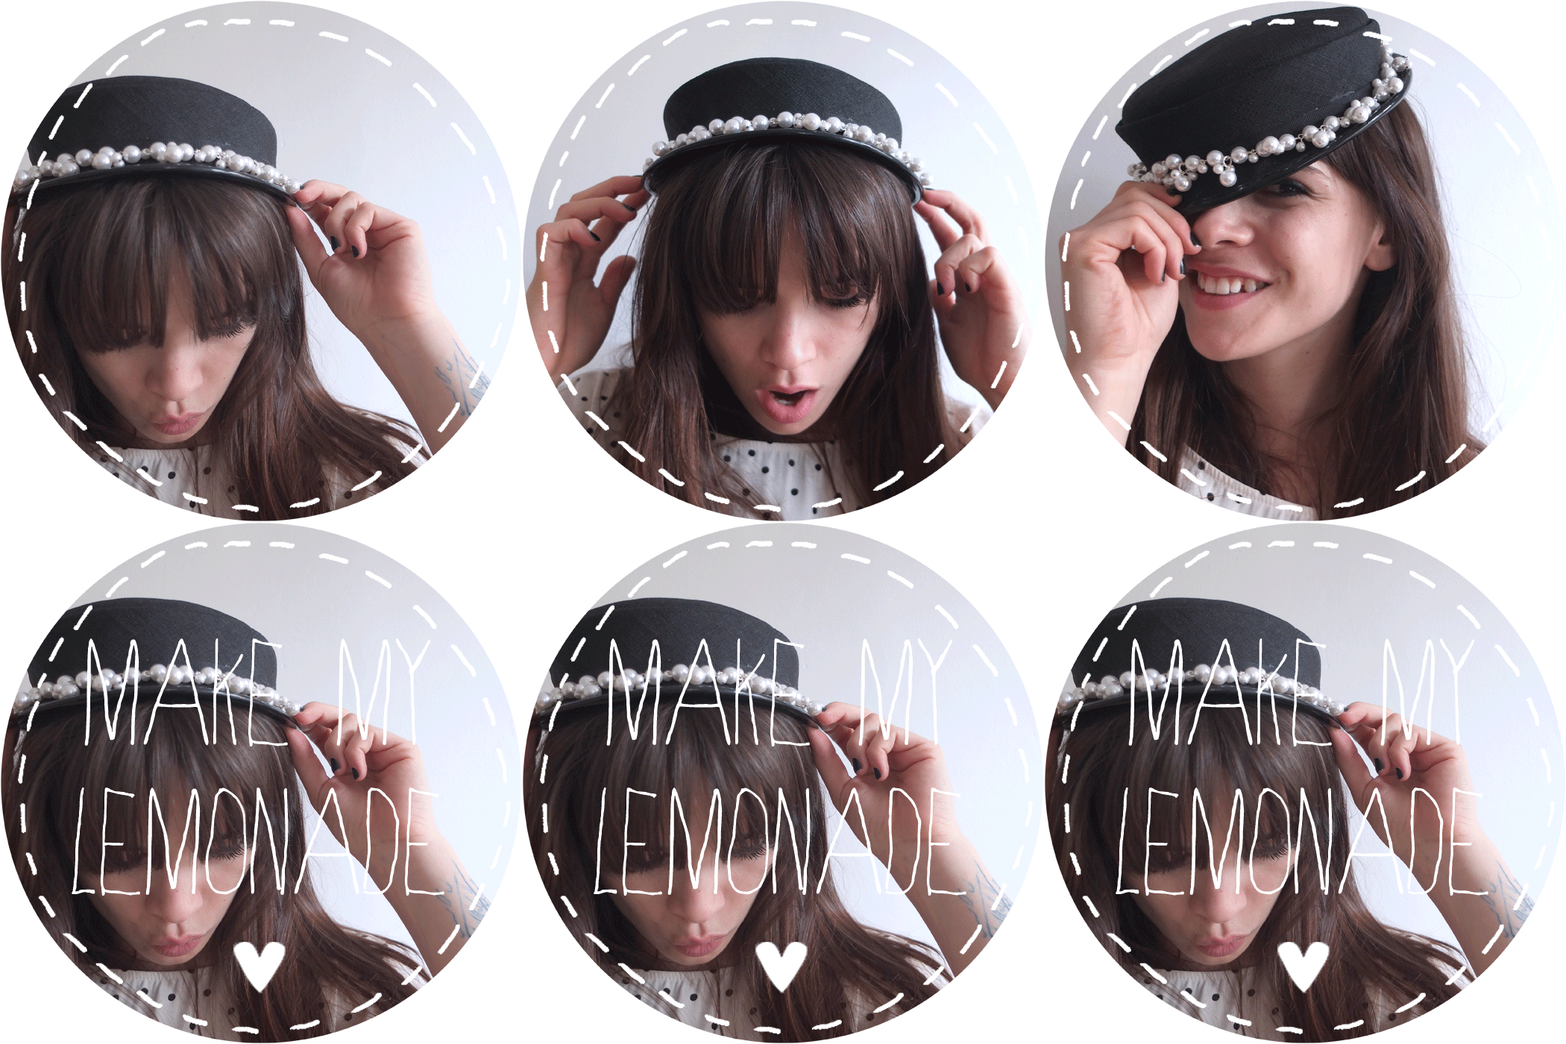
As promised, the DIY hat very very "Maison Michel", again, I know but this brand is so inspiring, I'm an absolute fan of their whole collection... But the price is always a real concern, because a little hat at 760euros is complicated at the same time. Maison Michel is Chanel's hatmaker, so as usual, luxury craftsmanship goes hand in hand with a crazy price tag. So instead of crying foul, let's look at things differently and be inspired... As a little anecdote, I tried on this hat a few months ago at a hatmaker's in Paris, who has all kinds of hats. My boyfriend wears a hat every day, for a year and a half it's always the same model, and every 6 months it's the same ritual, sometimes felt for winter, sometimes wicker for summer, and all the while I'm trying on absolutely every crazy hat in the store! And last time it was this Maison Michel hereSince then, I've been trying to find a similar base to make a DIY...
 For this DIY you'll need :
- Ring stems,
- Nails,
- Set of three pliers (one flat, one round and one sharp)
- White pearls (two sizes),
- Rings,
- And a small flat hat (found on etsy...) and a comb (optional)
To begin, thread a bead onto a ring stem, fig. 2. Using the cutting pliers, cut about 1cm from the bead so that there's enough room to create a loop with the round pliers, figs. 3&4. Open the ring of the second stem and hook it onto the first, fig. 5. thread a bead, cut, loop etc., fig. 6. Repeat the operation as many times as necessary so as to go all the way round the hat like a rosary, you see?

Then, using the nails, thread on a large bead, cut and loop figs. 1,2 & 3, just as you did with the rings on the stems... Do the same with the small pearls fig. 4. Open a ring, fig. 5 and create small clusters by threading a small pearl, a large one and a small one, then close the ring fig.6. Take up your pearl necklace/chapelet and hang your cluster between two pearls on the necklace fig.7, then alternate with a single small pearl fig.8.
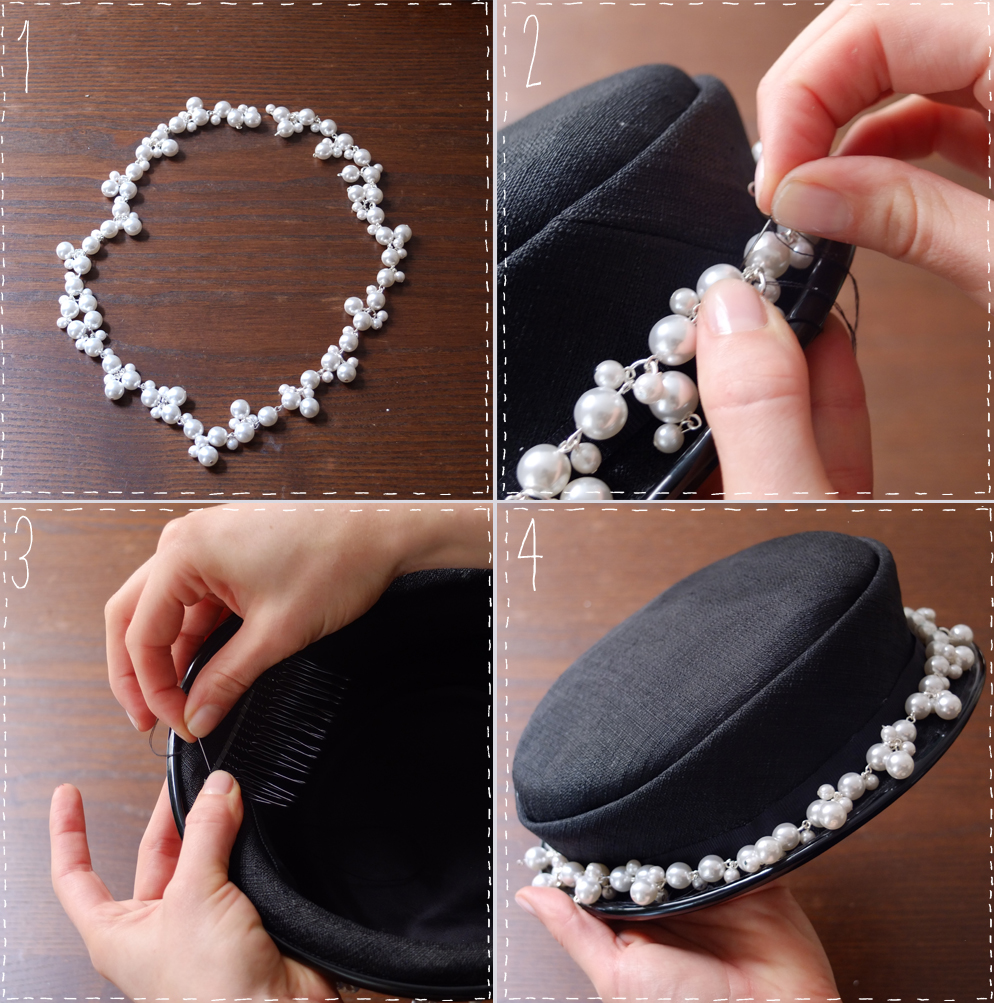
You now have your pearl necklace fig. 1... Attach the beginning of your necklace to the end and fix it to the hat with a needle and thread, making small hand-stitches at the four cardinal points fig. 2. Then, if you want to wear it on the back of the head like I do, sew a small comb into the inside of the hat fig. 3. And TA-DA!
 [:]
[:]
It's my party
Oyé my little chickens!
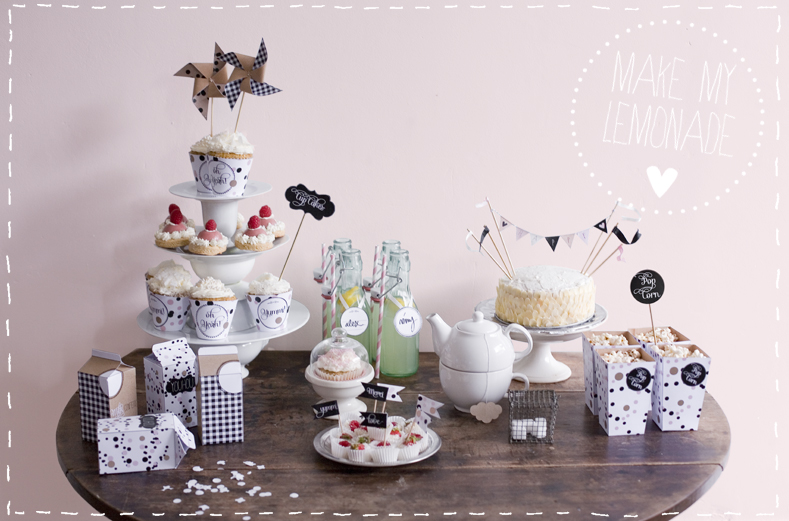
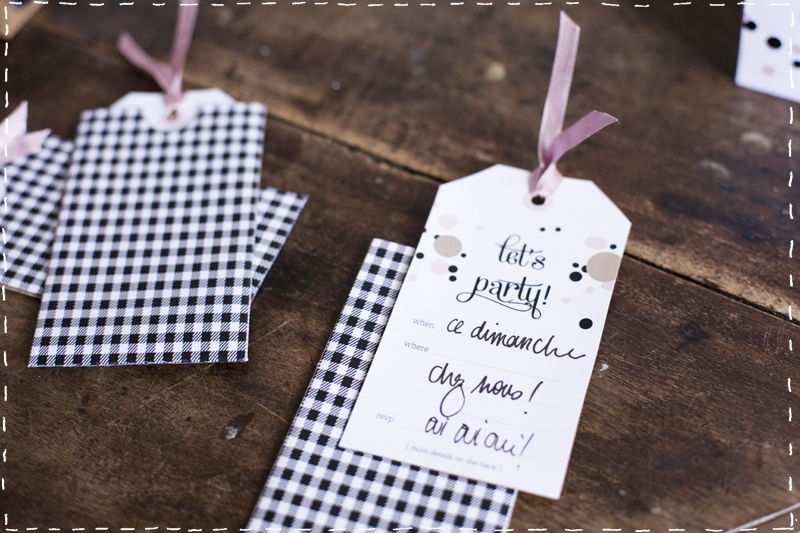
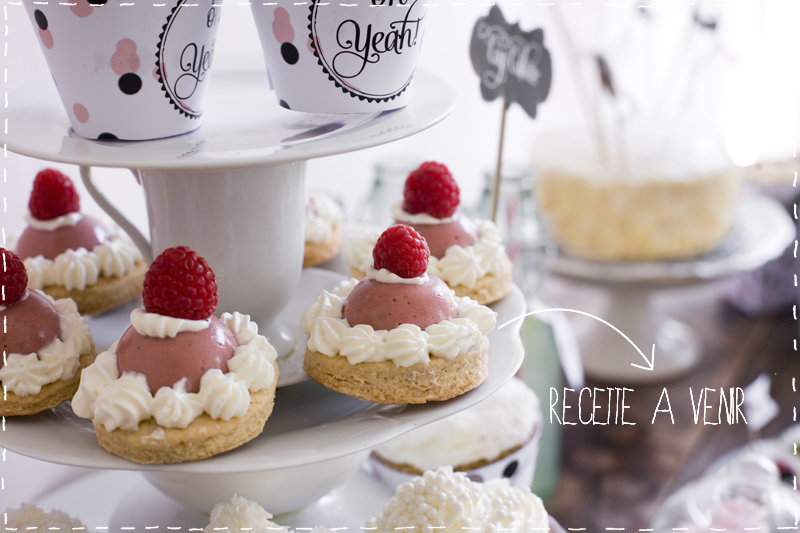
I promised you new things for this week, well not DIY in the classic sense of the word, at least in my opinion, because I don't think there's a D.I.Y. manifesto anymore... Anyway, I wanted to get back in touch with my first articles on this blog about "the art of the table"... And it was also a pretext for reinterpretation. Let me explain, a few weeks ago Laure Faraggi author of a book on "sweet tables as they call them, asked me to run a workshop for the book release, and so create a kit for a sweet table... I know you're staring at your screen with big round eyes... I had no idea what we were talking about either, and then I caught a glimpse of a sweet world of marshmallows, macaroons and satin bows. So... I said to myself, this isn't my world, we agree, but I'd loved preparing our Christmas 2011 so much that I thought why not, it's a challenge and I'll meet people from behind my screen... And Laure was so passionate about it that I decided to go for it. I hope you like it, and I've attached a kit for you to download, because if, like me, almost all your loved ones were born in June, July and August, it might come in handy if you're short of inspiration...
Ps: Unluckily, a quasi-diplomatic incident occurred with the prints of this kit on the evening of the launch, so no workshop for me, but for those who were present that evening: a thousand apologies, I hope I can make up for it with these few images.
the KIT is DOWNLOAD IT HERE
For the windmill, you need to print the template on the kit on fairly thick paper and glue the back with a colored sheet or, as here, kraft paper. Cut along the notches fig. 2, using a needle, drill holes in each corner fig. 3 (always on the same side of the notch) and in the center. Fold the pierced points over the center of the mill fig.4. Using mini Parisian fasteners (which I found in the scrapbooking section of Rougié & Plé), thread each of the holes (points and center) fig.5 then turn your mill upside down and open the Parisian fastener fig.6. Equip yourself with stickers and a skewer fig.7. Place the pick on the center of the mill and fix it in place with the sticker fig. 8. For greater sturdiness, you can also glue the part of the pick that will be in contact with the mill, then stick on the sticker.
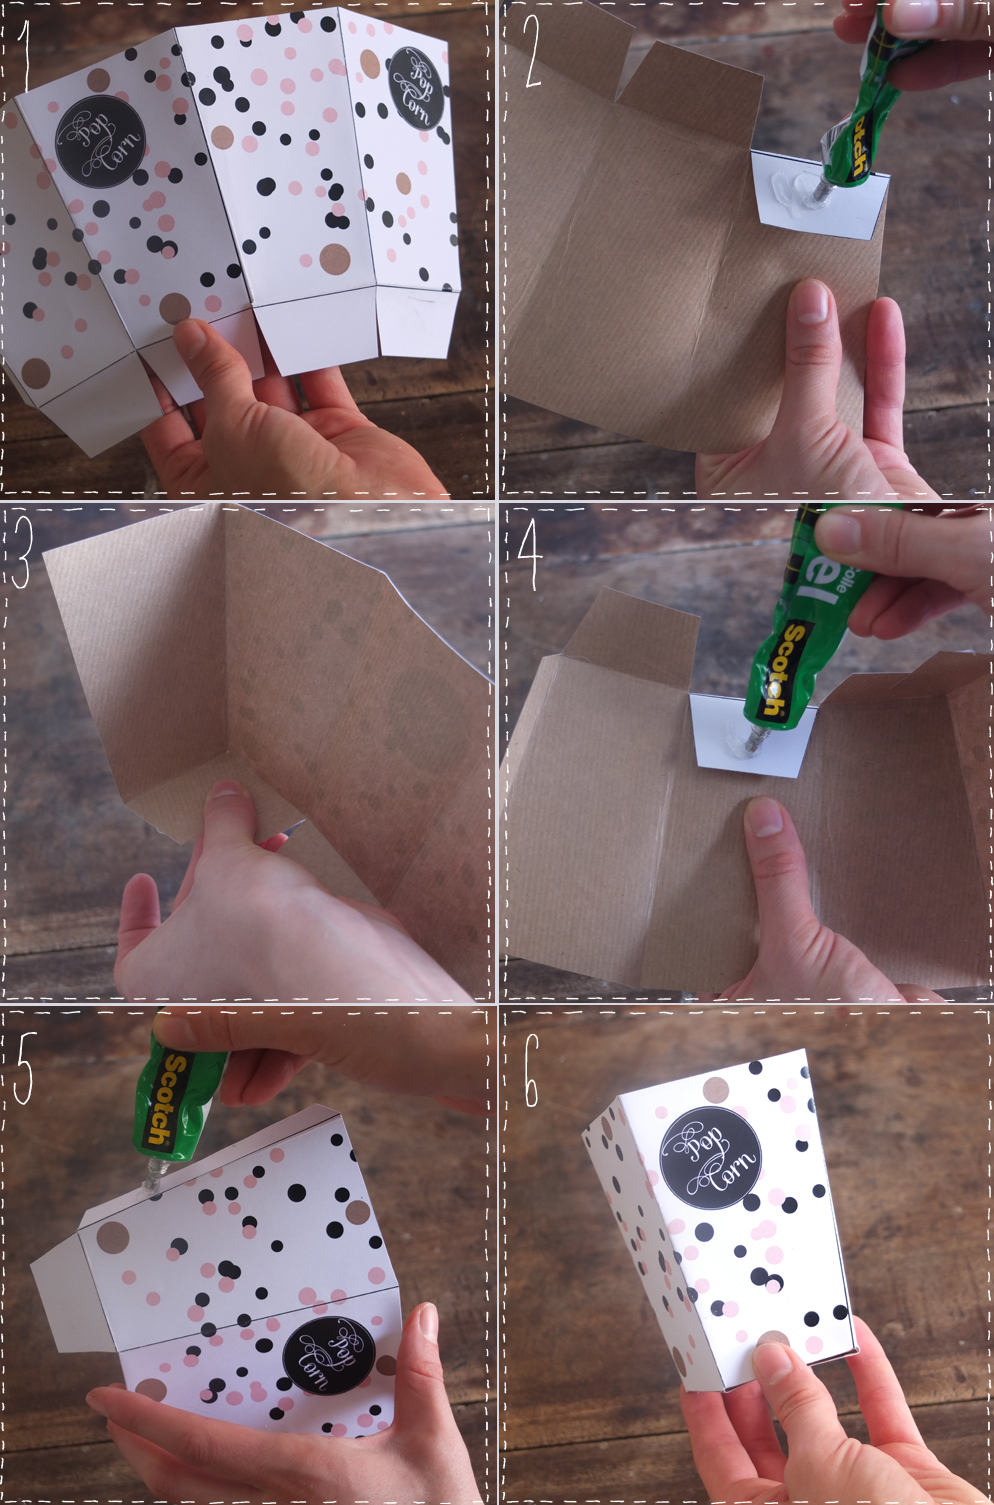
For the popcorn boxes, as for the windmill, I've lined the base with kraft paper, but my attention to detail can sometimes be superficial... so there's no obligation... Start by gluing the first flap fig. 2, and attach it to the one next to it fig. 3. Do the same for the following ones fig. 4. And for the last one and the long flap on the side, hold both of them firmly, just long enough for the glue to set and for your box not to open when full...
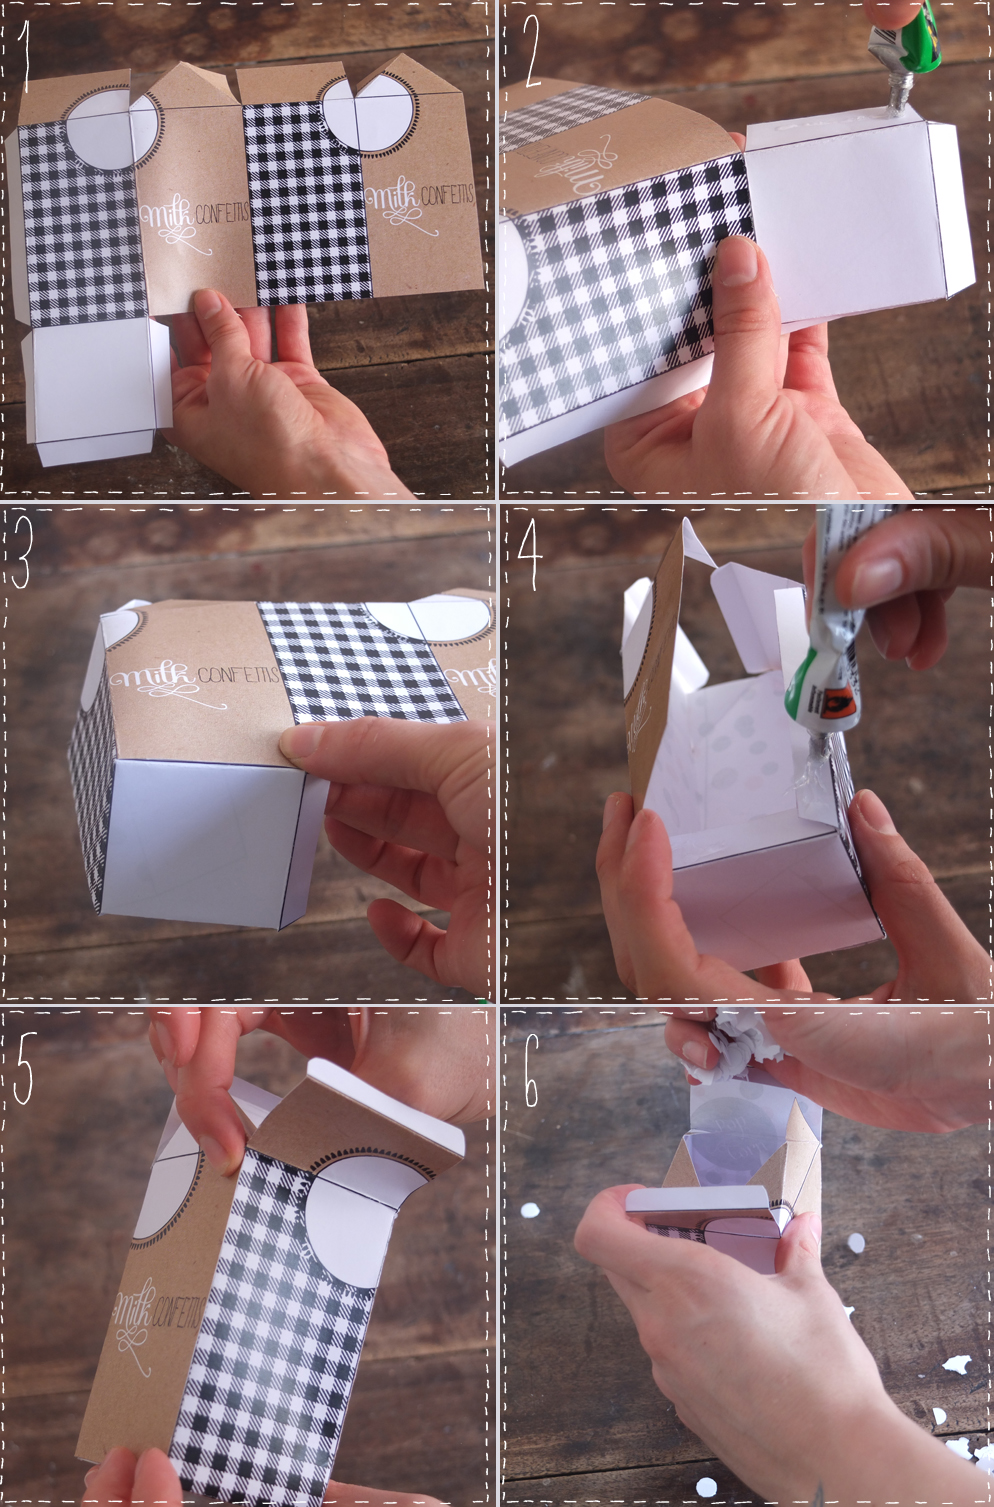
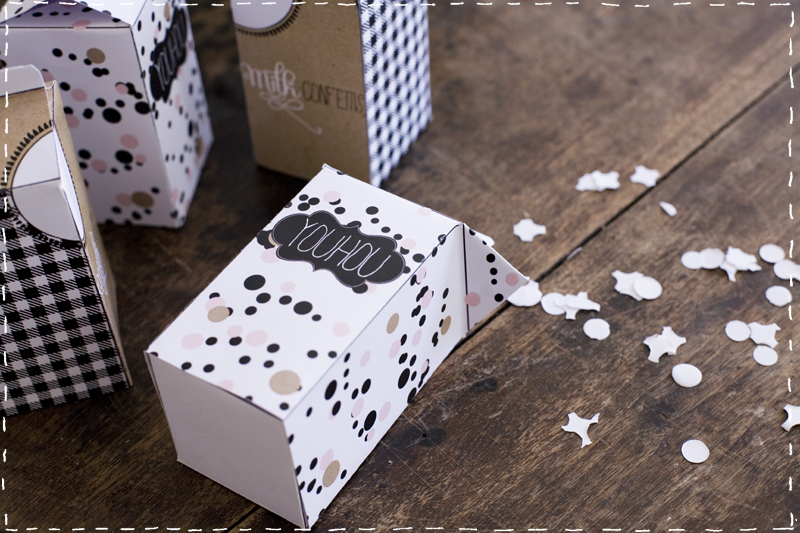
And the little milk carton... Cut out the pattern, printed on thick paper, and bend all the edges - this will help you for the rest of the process. Also bend the dotted lines fig.1. Next, glue the 3 tabs on the base, and attach them to all sides of the brick fig. 2 & 3. Finish with the last tab and the long one on the side, as for popcorn boxes fig.4. Hold firmly for a few moments fig. 5. Fill your bricks with confetti halfway up or more, as you see fit... you're the one who'll be doing the cleaning anyway!
As a bonus, here's a song I love... and it's ready, isn't it?
Thank you Davina for your patience!
HAPPY FRIDAY #17
Hi there!
I'm 6 meters tall, you have to scroll your screen to see all of me, ahah! I like to do this bun + heels combo because everyone tells me "But did you do something? have you lost weight?" And no guys, I'm 1m80, I like to make you think I'm a giant... And when I get home, I take off my Jeffrey Campbells, untie my hair and TADAM the Minimoy that I am, reappears... too much of a scam. But at least I have a choice! And yes, real big girls can't pretend to be small! I reassure myself as best I can (no, no, it's not pathetic). I'm preparing some little surprises for you next week, I don't know how they'll turn out but I can't wait to get started! Oh yes, don't worry, I haven't become a subway poster artist (although it's a job that fascinates me), but some friends I'll be telling you about soon gave me some paper to tinker with and amaze you (well, try ...).
see you soon!
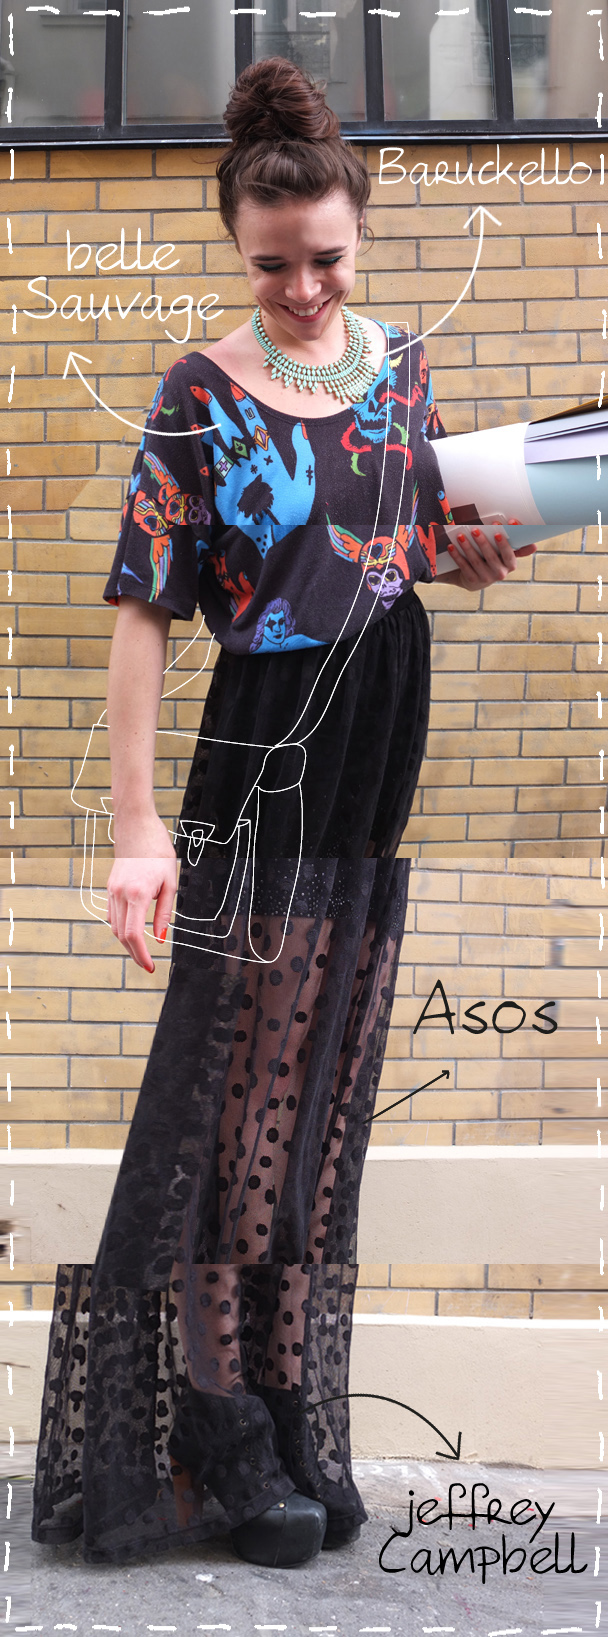
Necklace I love Merci les Baruckellos! Tshirt Belle Sauvage brought back by my lover from London, I love its loose fit and its "ghost train" designs, Transparent skirt Asosperfect for the tropics! And my Lita shoes from Jeffrey Campbell. And as a special guest, a hypothetical leather satchel that I'd love to find without having to take out a loan! Love and kisses!
DIY TUTU
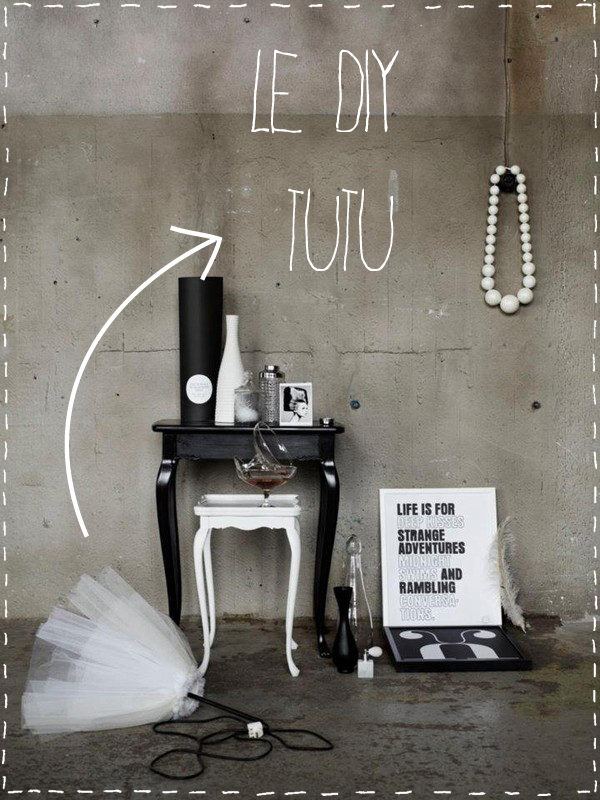
via http://www.theresesennerholt.se/
Hello,
It's Wednesday, it's DIY! A little decoration, because a long time ago, I had also prepared a DIY to put on the head ... YET (you're going to tell me) but that'll have to wait... Some time ago now, while looking for inspiration for our new apartment, I fell in love with this image, which, let's face it, is pretty damn hot. It comes straight from a Swedish website whose name I've forgotten, but if it rings a bell, let me know and I'll do a little editing. Anyway, you're getting to know me and my love of tulle, plumetis and all those pretty, wispy materials, so when I saw this suspension, my eyes turned to hearts, and then I went looking for it on the internets, like a crusade. I finally found it (don't ask me for the website, it's been over a year, I can't find it anymore, but no delivery in France at the time), and its price was unbelievable, so I said to myself: one day I'll make one, it doesn't seem that complicated. That day has come, and you're going to ask me, but what about safety? Well, the tulle is never in contact with the bulb, because the base of this "light" is a lampshade or a classic fireproof ceiling suspension. What's more, I recommend using low-energy, low-voltage bulbs for an even more subdued ambience, if that's any consolation...
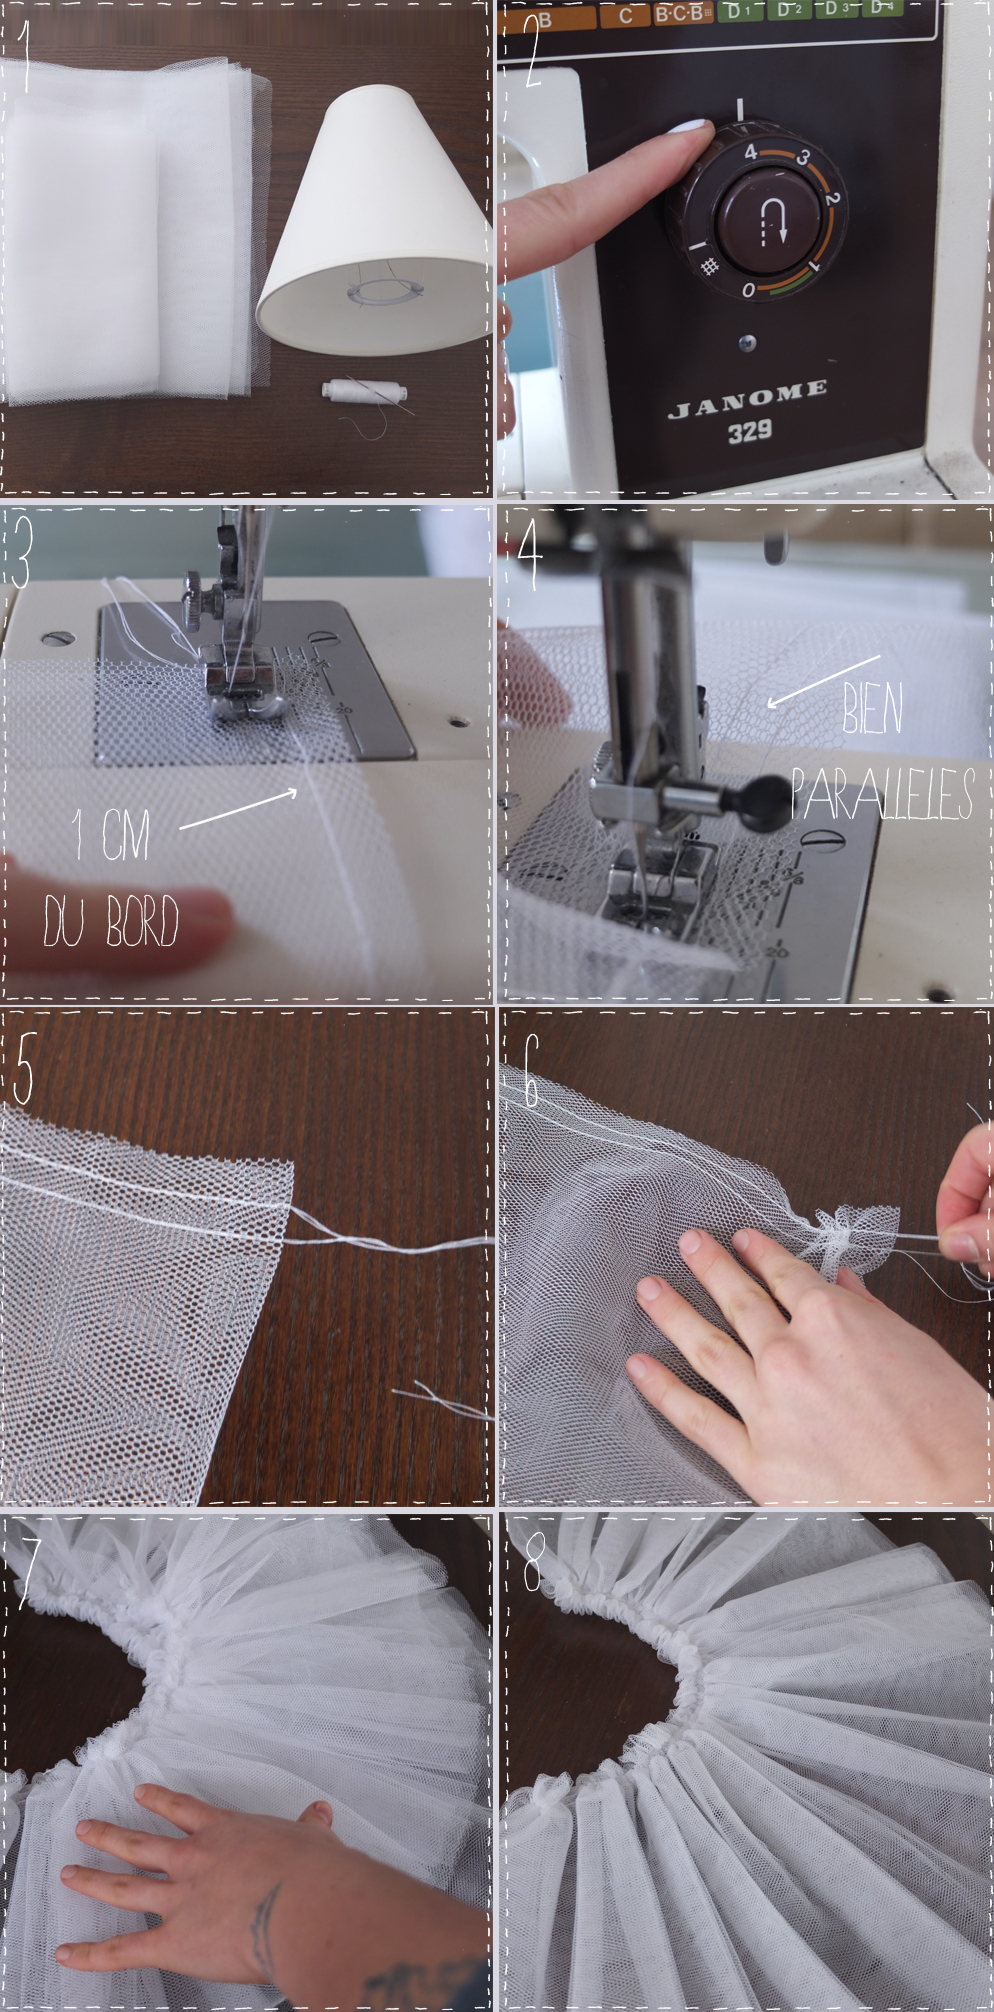 To make this DIY LUMIERE TUTU, you'll need..:
- A classic ceiling lamp shade - they're all flame-retardant on the market (don't be crazy!)
- Tulle that's not too stiff, 2 strips: one a little longer than the shade (about 3 cm) and another 10 cm shorter than the first. The 2 strips should each be about 4.50 meters long.
- Thread and a large needle!
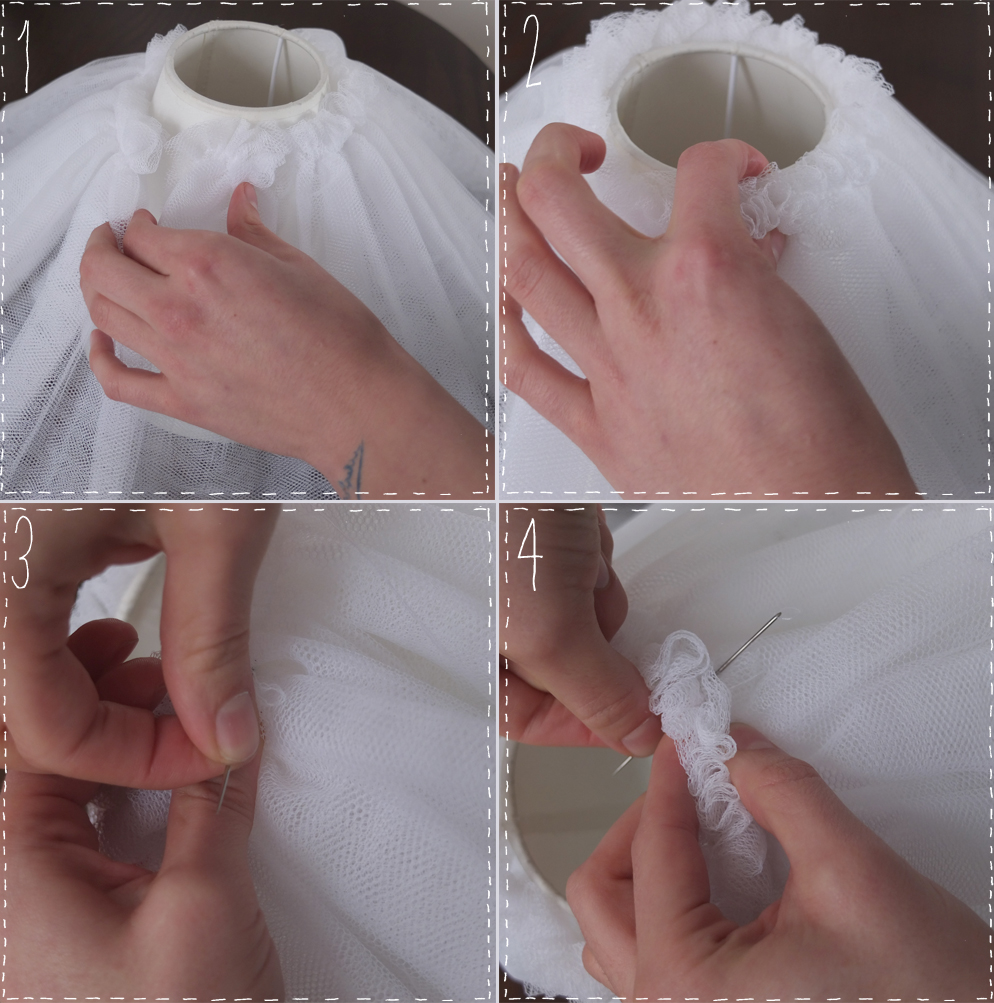
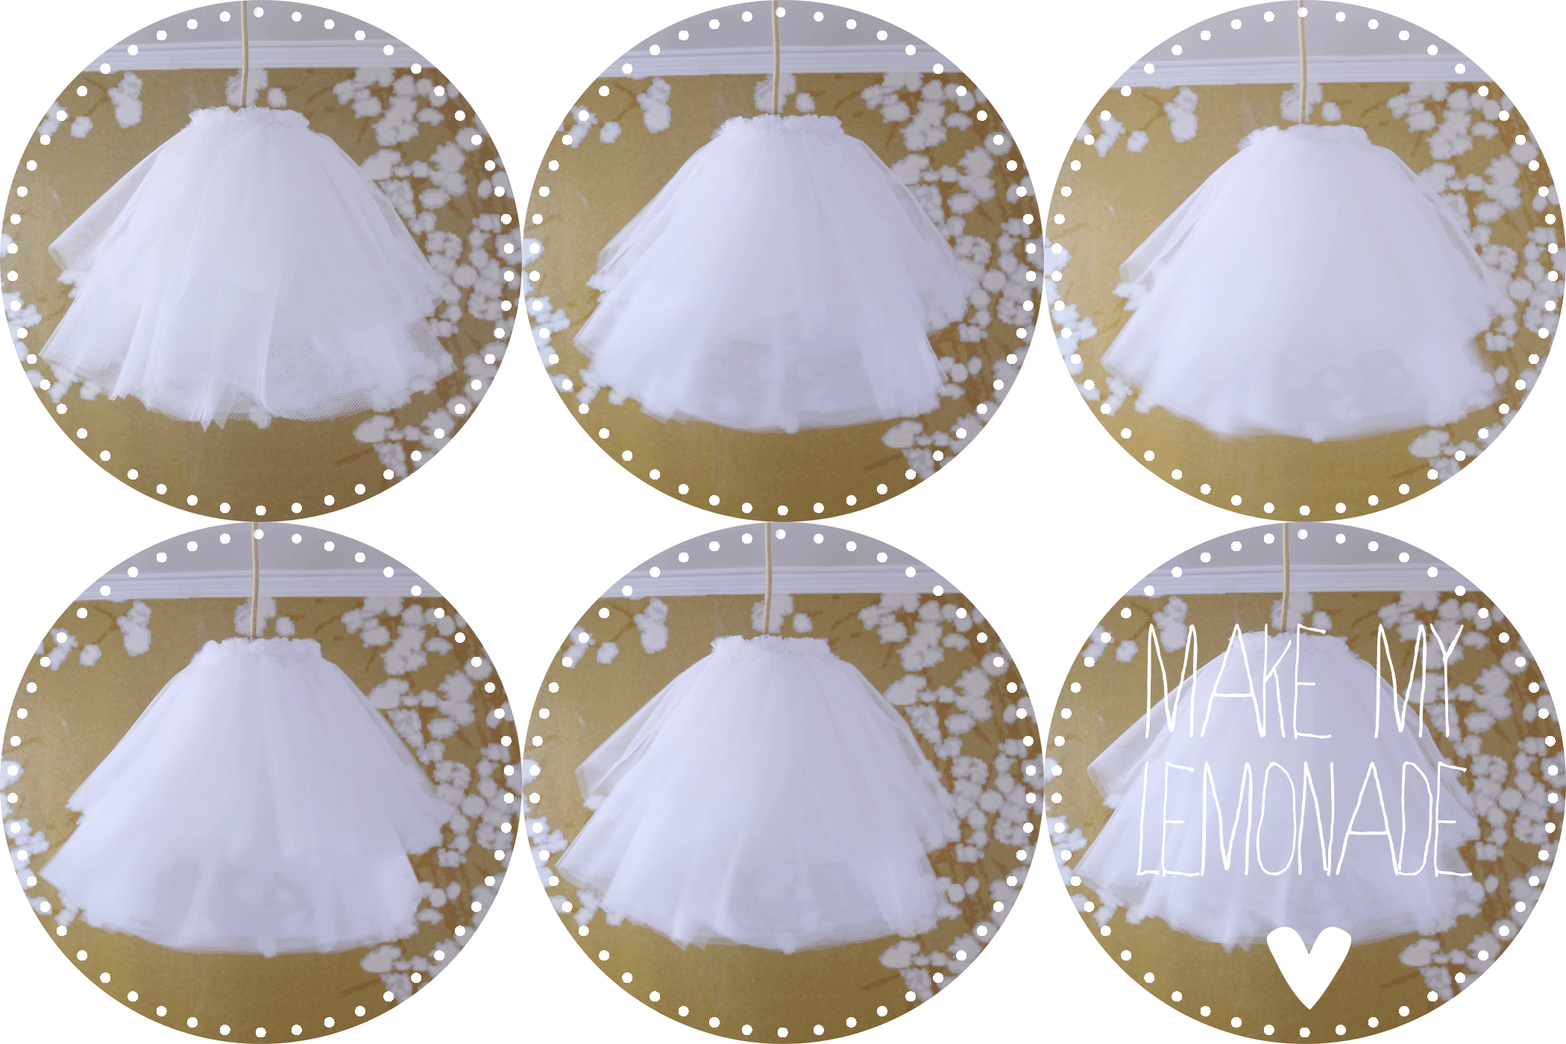
Finally, all that's left to do is place and secure the gathered tulle strips on your lampshade fig.1 & 2. Start with the longest, and using a needle and white thread, stitch through the lampshade to the four cardinal points...fig. 3 & 4. And do the same with the little band! Attach and enjoy, TADAM!
WISH LIST FRIDA
Fiiiioooooooooouuuuu,
I've got to tell you something, I've got solid gold friends, and not just a few, and a lover who's a big hit too... (because yesterday was my birthday and they were wonderful...) Thank you 100,000 times over for your little words that touched me, moved me and all that, I've been such a marshmallow lately... and then 24 is an important date for me. Birthday digression aside; Thursday: Shopping! Frida shopping, of course! Last little digression (come to think of it...): my boyfriend had prepared some Mexican food for us, if that's not being corporate... I think my cravings for colors, flowers and Aztec motifs have grown even stronger this week, like a big Mexico craving for my next "big trip" in 2015? I'll leave you to your clicks and credit cards! See you tomorrow!
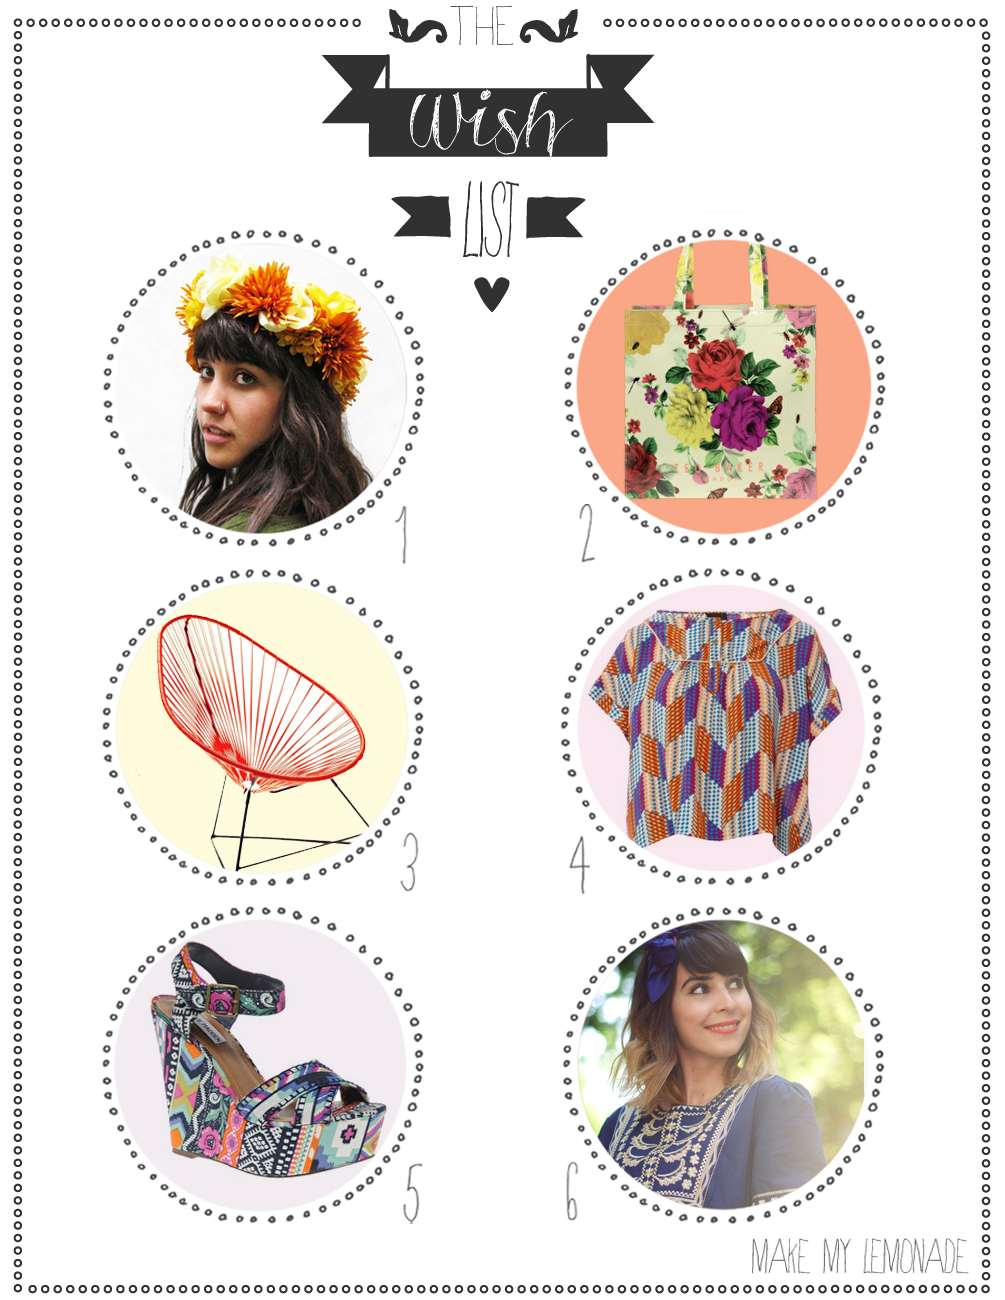
1 Too easy... a ready-made wreath on Etsy 74, 2. of course, a canvas bag Ted baker 47.15€, 3. Frida > Mexico > Acapulco >Acapulco chair chez Boqa still my dream! 259€, 4. a little blouse VeroModa 24.95€, 5. we're talking about these wedges Steve Madden ? 108.60€, 6. embroidered dress worn by the pretty Valentine who had already paid a vibrant tribute to Frida here on Queen's wardrobe 53$.
DIY Frida's hair...
YOUHOU it's WEDNESDAY!
And here's the Frida DIY! I apologize in advance for the quality of the video, I hope you won't hold it against me, but I think if you watch it small it should be fine, I can't explain this little blur yet I did everything the same as for the first one, it must be beginner's luck.... here's a DIY that's a bit HUGE, but once again, it's just an example of what you can do: this comb, but with smaller flowers, or with pompons, I'm giving you the basics, it's up to you to have fun with it... and this headdress looks great with your hair down... I'll show it to you on Friday...
from Make My Lemonade on Vimeo.
To make this hairstyle, you will need:
- 3 plastic flowers of different sizes
- a large comb (if you're looking for one on Etsy)
- 40 cm of pompom (which you will double...)
- and a needle and thread!
To begin, fold your pom-pom strip in half so as to place them in a staggered pattern. Using your needle and thread, fix your fold, fig 1. Then fix your well-filled pom-pom strip on the comb, still using your needle and thread, fig 3. This alone is enough to win me over... fig 4. Let's get down to the nitty-gritty, and more intuitive, of attaching the flowers to the comb. It all depends on the flowers you're going to find: if, for example, you go to H&m, they're great at making pretty fabric flowers, and on those you've already got a brooch clip, so it's very easy to prick your flower onto the band of pompons. On the other hand, if you're stripping a bouquet of fake flowers, stitch a petal or two and attach the flower to the comb, making several passes fig 5,6 and 7. TADAM fig.8!!!
LOVE WISH LIST
The competition is over and you've literally drowned me in a flood of love, yes, I can assure you. I'm not going to be able to answer all your comments one by one, so I'll thank you here! I'm going to answer your questions in bulk, so in the previous article I wore an H&M blouse from the Fashion Against Aids 2010 collection... almost vintage..., I don't think I'll be doing a "hair routine" article for you... What a strange idea, I don't know the secret of hair and I'm not sure it's of interest to many people, but I'll do an article on my favorite treatments that I'm packing in my suitcase this summer... That's it for the main points and thanks again for being so enthusiastic and so numerous, it gives me the boost I need to make this cyber little place a space apart... (well, I'm going to try) I've got lots of ideas for this summer, but lots! I've got to get organized, but I've got boundless excitement to keep me awake, and sharing it with you is just great fun! Without further ado, the love wish list, with hearts, rings and more! Justine B. loves (she's got great taste, so you should like her too), gifts for your lovers with hearts because, well, they can also be very manly, and a brand that I adore to the point of tearing my hair out: Ystérike...

1.95€ gold-plated brass ring, Miss Bibi 2. asos watch €27.15 Asos3. Paul Smith men's tee shirt for Asos78€, 4. collar Ysterike 20€, 5. shoe clips ban.do 25$, 6.heart tights Asos.
Ps: The winner of the contest is Vanessa T... Thanks again!
THANK YOU DIY
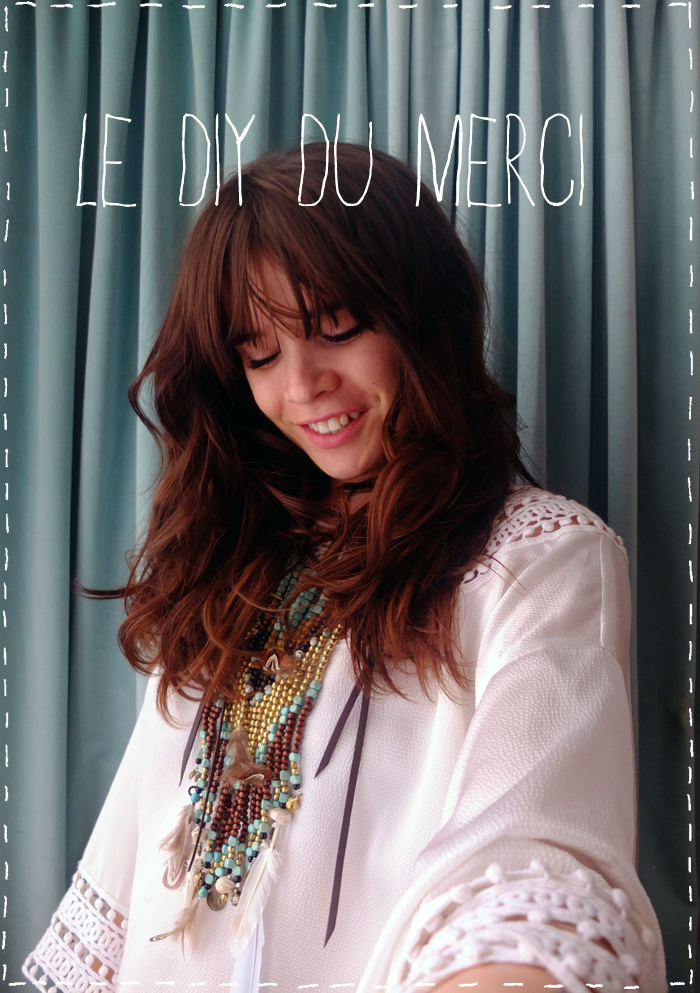
I have the patience of a 6 year old, so I can't help but post the DIY today rather than wait until Wednesday... I just can't... I'm too excited to thank you and as I write this there are 1045 likes on the facebook page, I can't believe it: Thank you, I know I'm starting to bore you by saying thank you every four mornings, but there are worse words... I said I wanted a DIY that wasn't too importunate for this contest... I've done what I could, but I can't completely deny myself, and in fact I love this necklace so much it's going to be hard to part with it, but I'm delighted to let you win it! To do so, just leave me a little comment with your email address and wait until Tuesday 12 midnight for the draw! I need to tell you a bit about this necklace... For those of you who come here from time to time, you know I've got love in spades for all things Indian, bangs, moccasins, beads and all that ... and some time ago I came face to face with this Maje necklacenecklace, which costs a whopping 185 euros, and I thought, "Not bad, but I'm not convinced about the colors", so I emptied my drawers and went to my favorite Chinese pearl sellers: Perles d'or rue de turbigo and banco!
To make this DIY, you'll need:- A 50 cm necklace or chain,
- nylon or cable thread,
- crushable beads and flat-nose pliers,
- feathers,
- leather straps,
- small charms from the same necklace as your chain,
- and at least 4 different colors of wooden or metal beads.
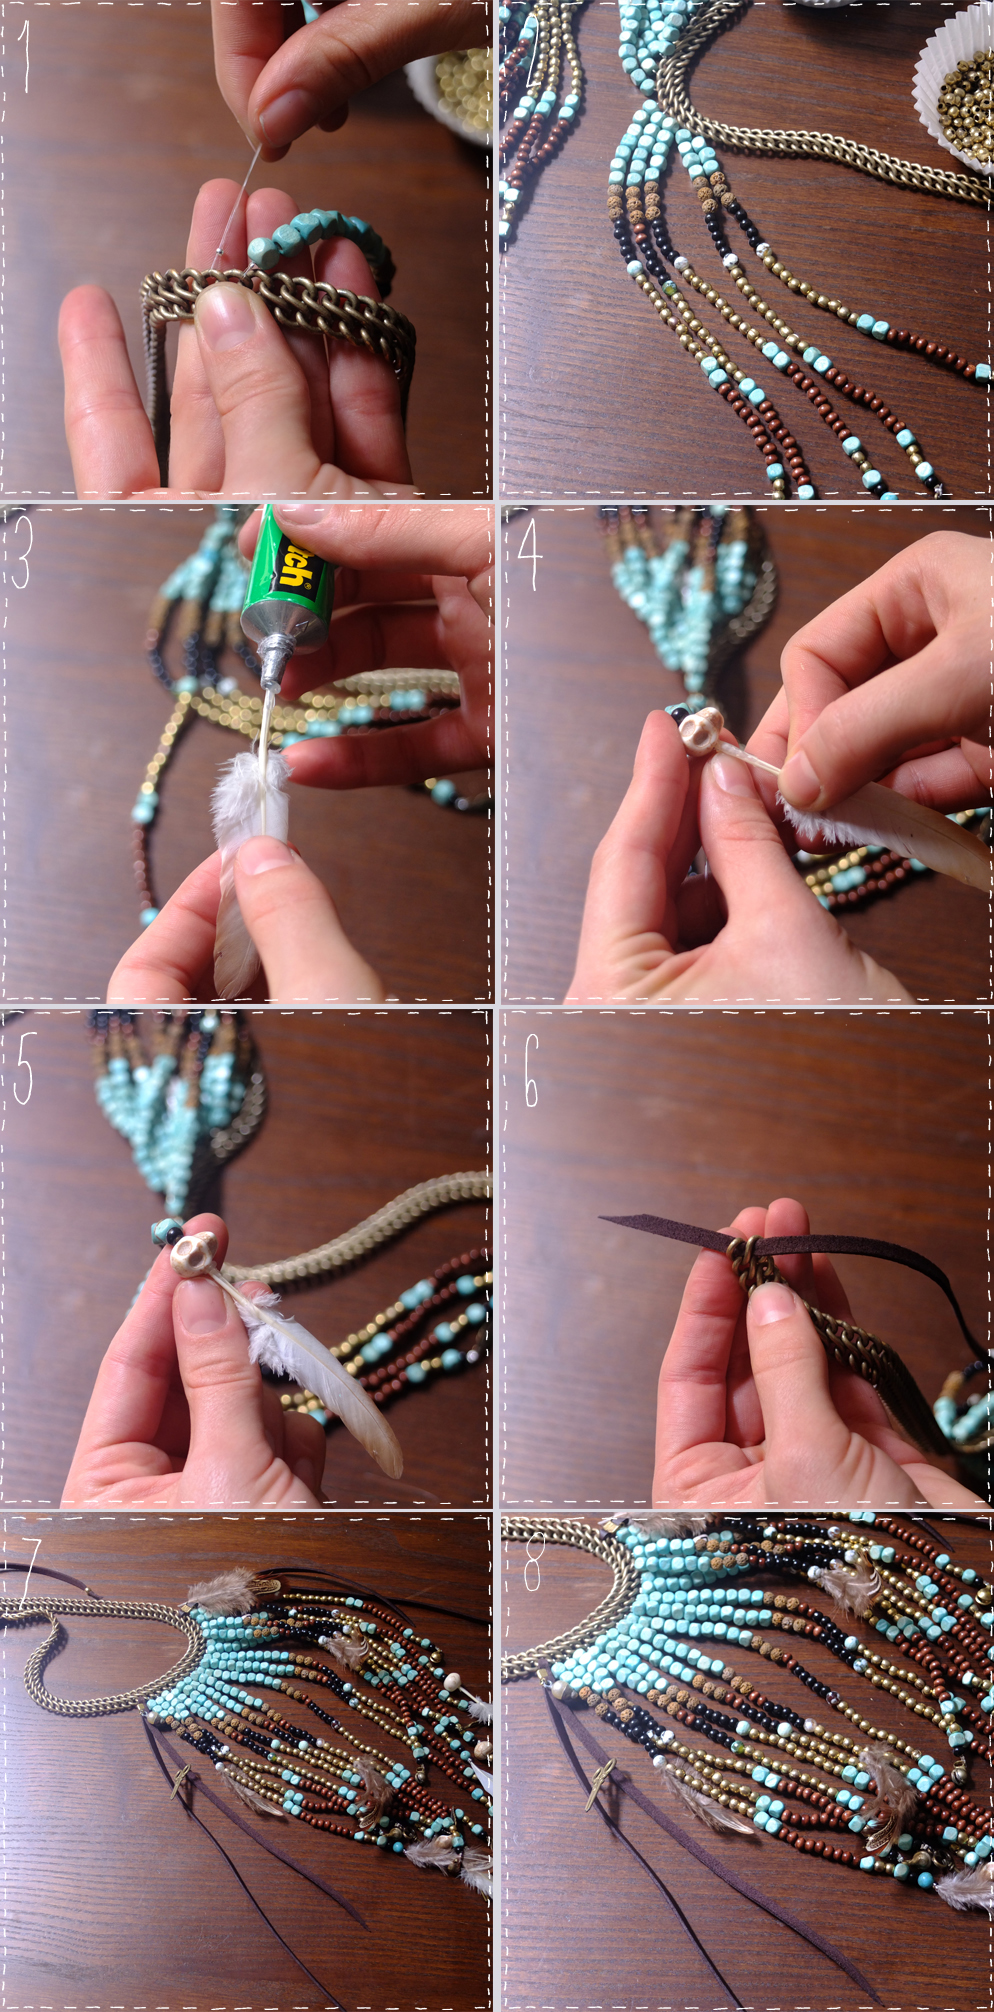
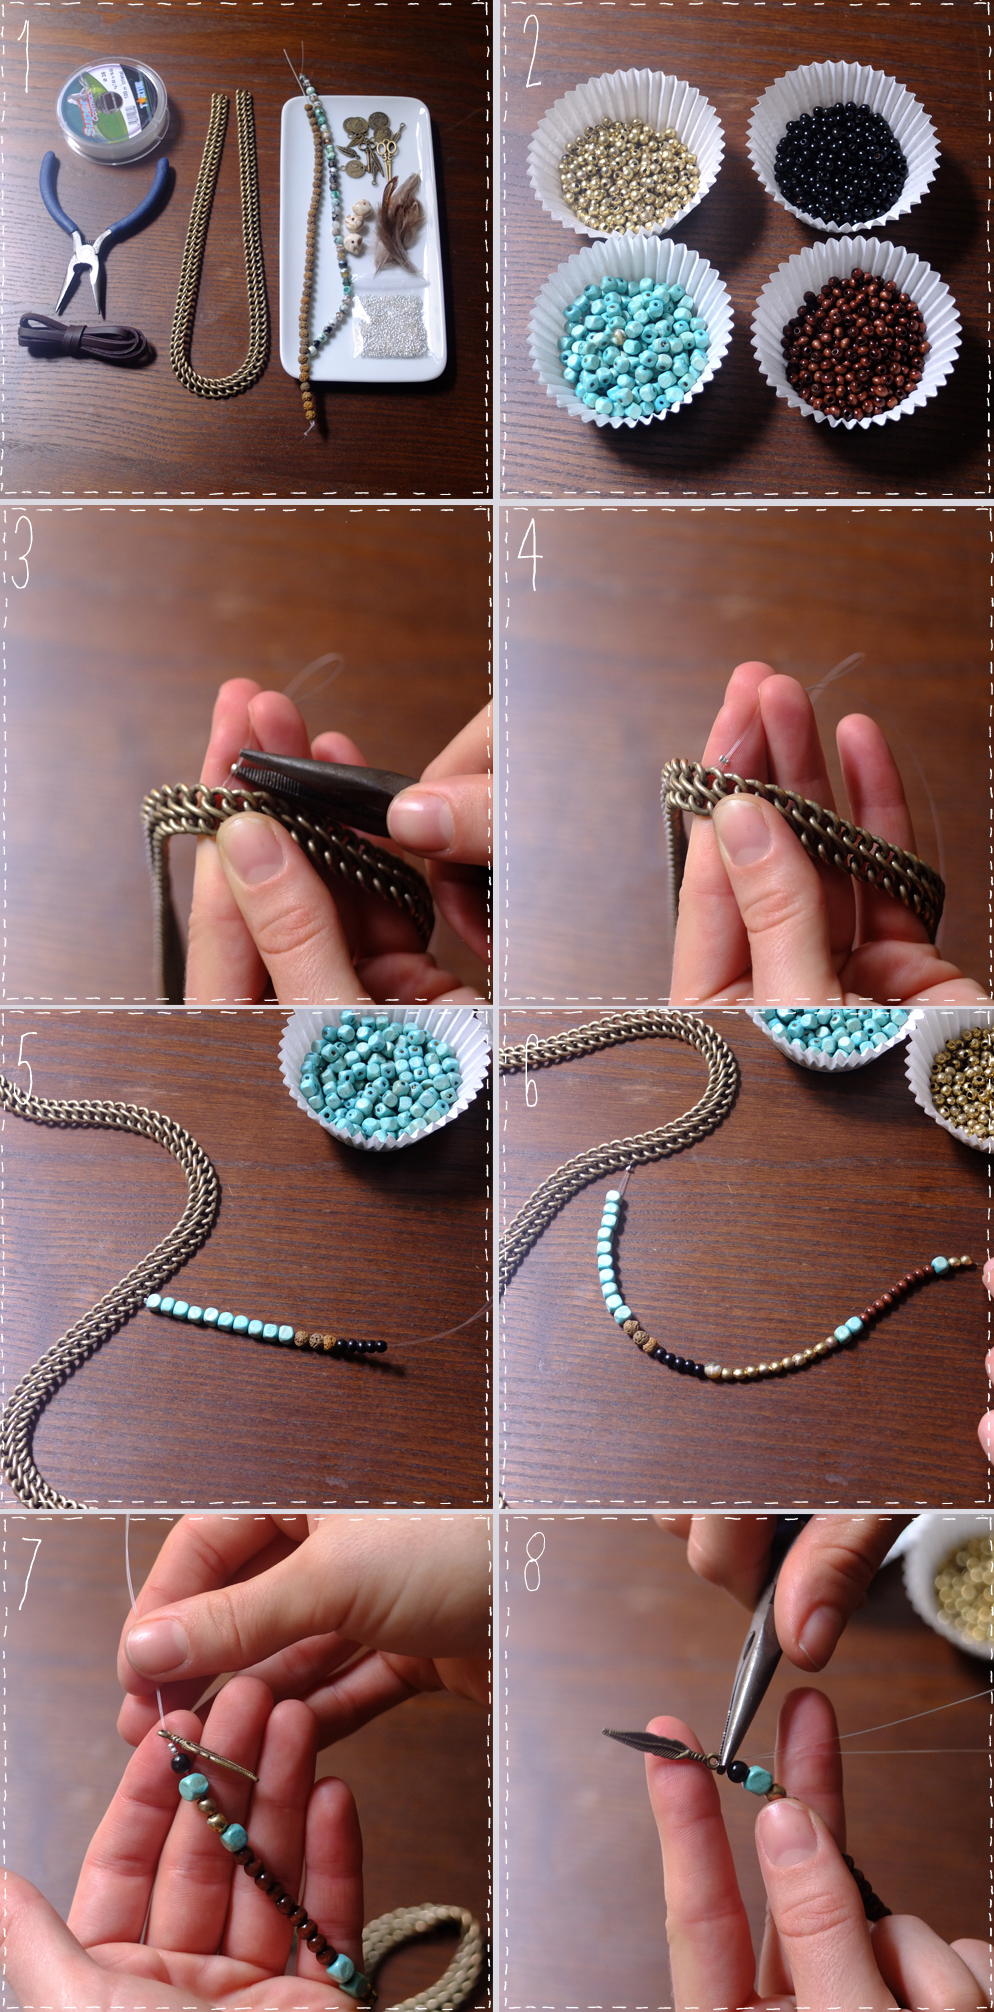 To begin, cut 60 cm of nylon thread or cable, and double it by passing it through a link in your chain fig 3. Then pass a crush bead through the two ends and crush it close to the chain fig 3 and 4. I advise you to start with the longest fringe, the one in the middle of the necklace, i.e. the middle of your chain. Thread the beads fig 5 and 6, you'll find the right pattern ratio on the "pattern". To finish the fringe, thread 2 crush beads and a charm, then pass through the crush beads again and, using the flat-nose pliers, crush everything together and cut any protruding threads.
Repeat the operation as many times as necessary (fig. 1 and fig. 2). And for another variation, to finish the fringe, you can glue the end of a feather and slip it into a bead with a large hole, and finish with a crush bead. As for the leather straps, use them to finish the chain, cut the straps at an angle and pass them through the chain link. As well as a clasp, you can also use them as bangs. All the wooden bead materials come from perles box, the clay, metal and skull beads, the leather straps from Perles d'or and the feathers and chain from La Droguerie.
Thanks again!
[:]DIY Hého du bateau!

Hi, friends,
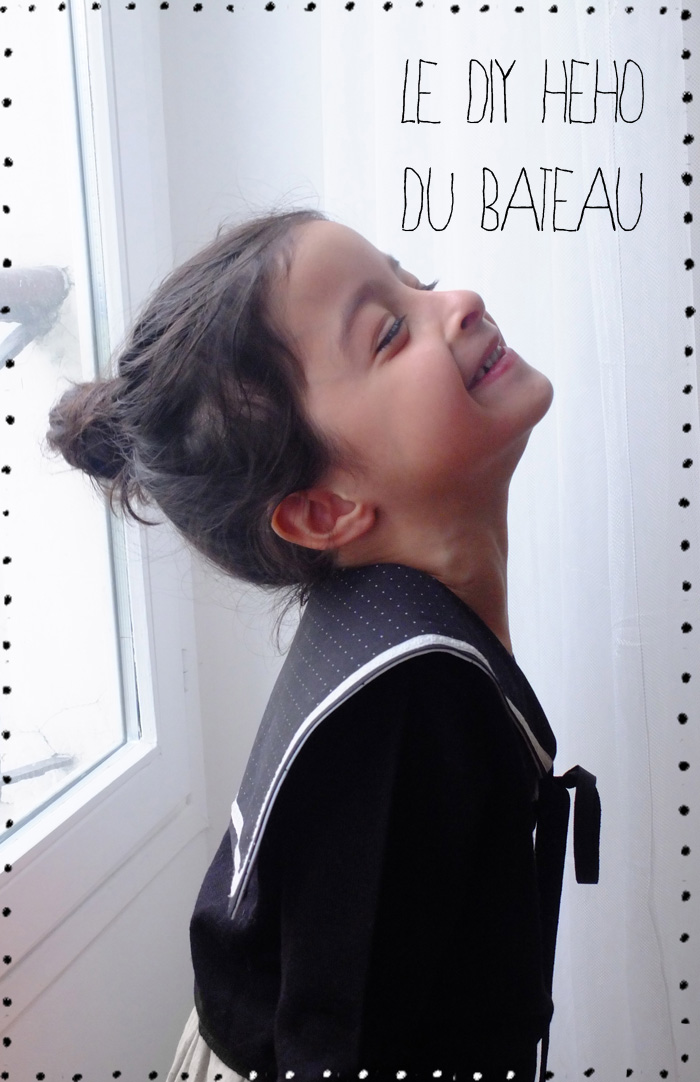
The mid-week DIY, is back with the lovely Zoé, I love little people, and kids fashion let's not talk about it.... Sometimes I wish I were a 12-year-old and could fit into the kids' "plus sizes". Even though children's fashion may not be the best solution for a femme fatale look, I find that the cuts and materials of this little fashion group have nothing to envy adults when it comes to basics and other girly little pieces. Anyway, when I showed these photos of Zoé to Justine B., she said to me: "But you're only going to put a pattern online for kids? well, no, there's a version for kids too! for children (click, click) and for grown-ups (click, click!)
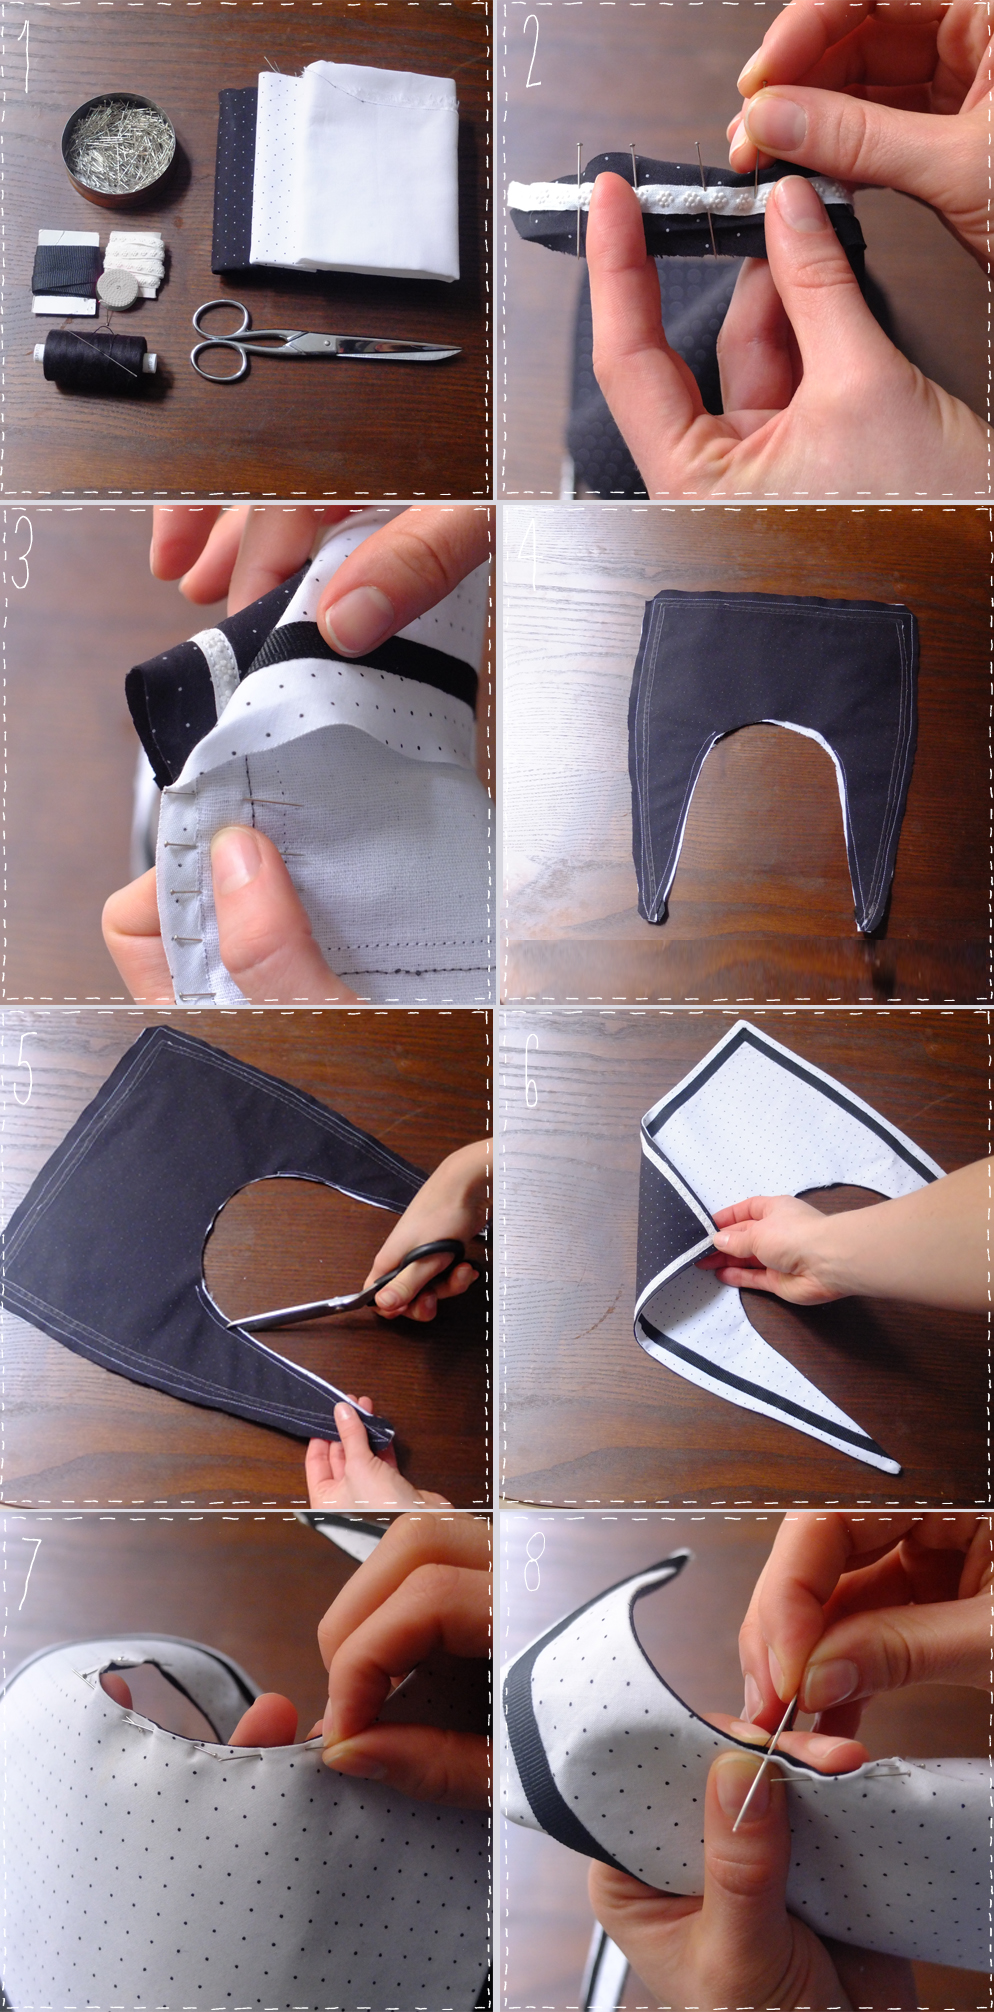 For this DIY, you'll need:
- Fabric ( 2 different ones if you want to make a reversible collar),
- Lightweight fusible webbing,
- Pins,
- Ribbons,
- Scissors, thread and needle.
First of all, download the pattern, cut out the fabrics for both sides, and heat-seal at least one side to the reverse of the fabric. And off you go! Then take out the ribbon and pin along both sides, 1cm from the edge, fig. 2. Do the same with the other side. Then machine-stitch, once the ribbons are attached, pin the 2 sides right sides together fig. 3. Machine-stitch to join the 2 parts, but don't close the shape - you need a hole to turn the collar inside out fig. 4. Scissor the curve of the neckline 0.5 cm from the edge, this will make the neckline round out more clearly fig.5. Then slide and flatten with your iron! tadam it's taking shape fig.6! Tuck in the clean edges of the neckline into a small hem and pin in place fig.7 and finish by closing your collar with thread and needle fig.8.
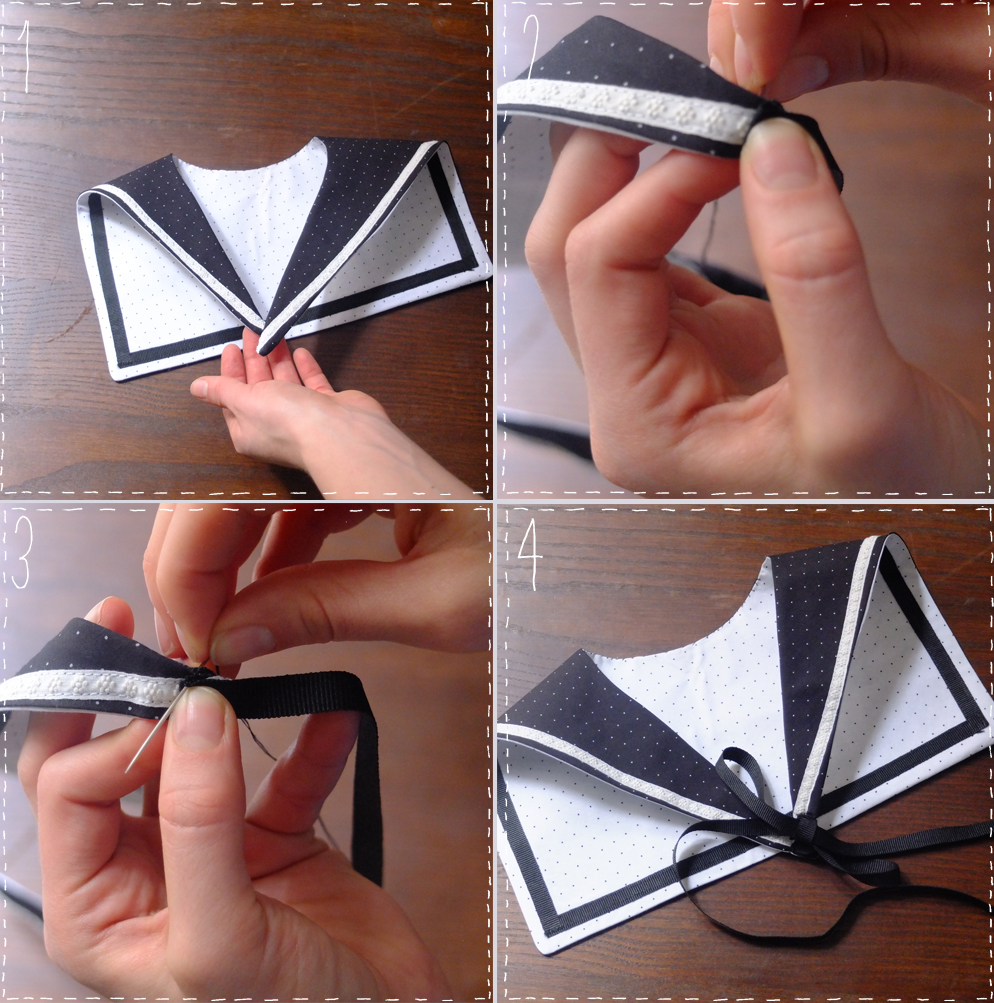
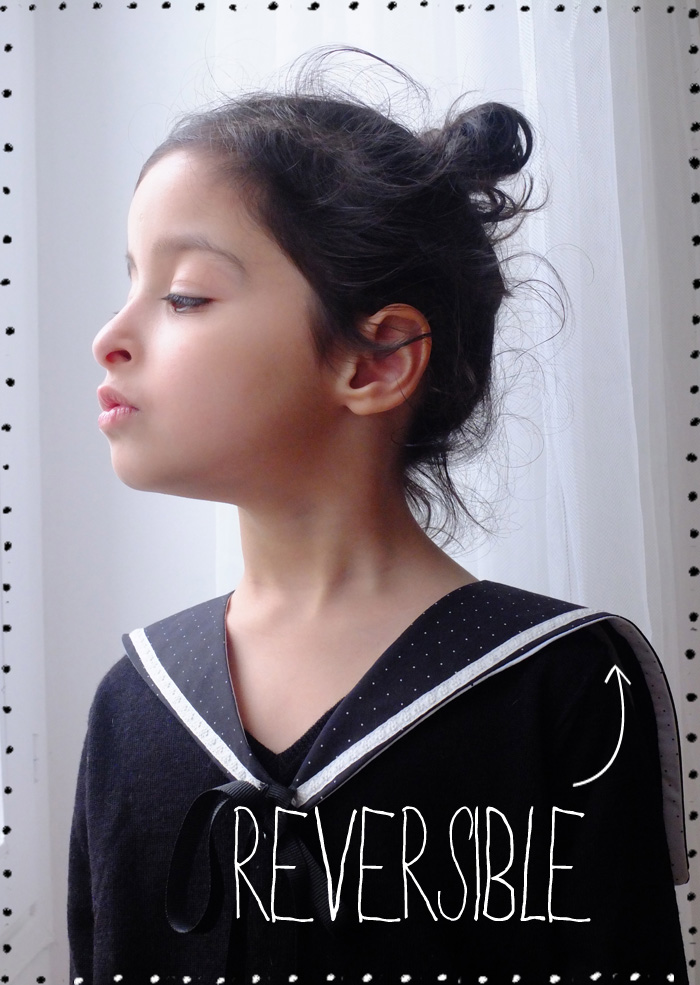
Don't forget to iron the hand-stitched area, so as to crush the seam and make it as invisible as possible. Finally, attach your ribbon to the 2 collar points! Isn't this little sailor collar charming?
 [:]
[:]
THE CANNES WISH LIST
Oyé oyé,
I had to tell you about Cannes, the glitter, the stars, the hair full of hairspray, the glittering jewels, how could I miss all the glitz and miles of red carpet? (I know the answer because I don't have a TV, like myself, and the Internet's on the fritz...) Still, it must be a hell of a thrill to go and see a film in a huge theater dressed up like December 31st, but when it comes to the 2012 budget, the Croisette can do without me, it's sad but that's life. If I ever won the euro million tonight, or just scratched off a Gemini astro, well, I'd run to top shop and buy one of those dresses (a bit pricey, admittedly, but it's Cannes, so I couldn't do any less... and then again, it's all hypothetical...) As always, I'm giving you a little closet schizophrenia, sometimes romantic-goldy feet, or sometimes Björk in her lampion pink dress.
See you all tomorrow!
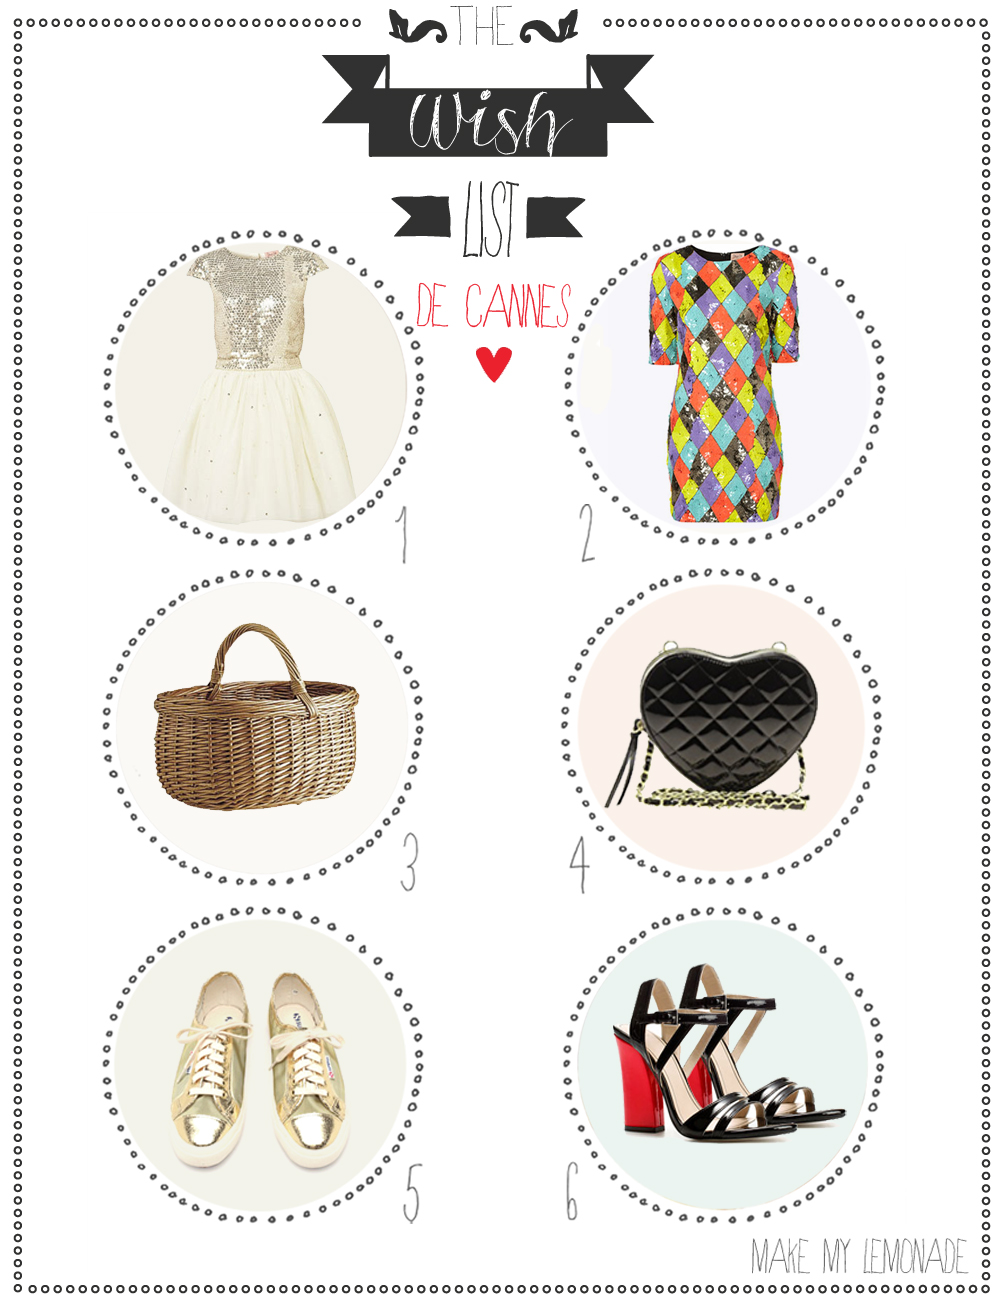
Left silhouette 1.the dress Top shop 160£, 3. the Basket by Jane B. 21,90€, 5.gold sneakers by Netu on Need Supply 85$.
Right silhouette 2.the dress Top shop harlequin 200£, 4. heart bag asos 20.36€, 6.heels Zara 89€.
SUNNY DIY
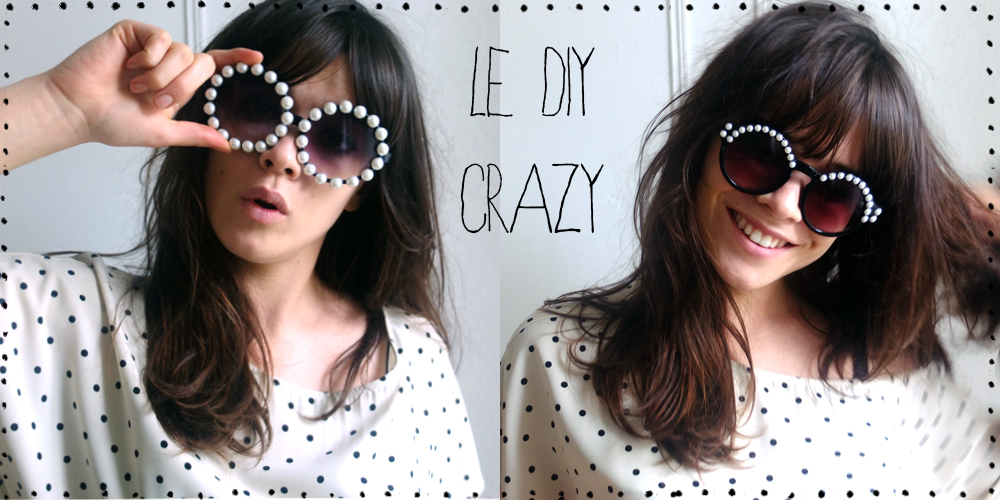
Nonsense, "she's cracked" I know you're thinking that... But I can't take it anymore, I want sun, so I tell myself that by "making" my sunglasses, at least I'll be ready, and I'm not talking about a day of sun, no, I want it to arrive, put down its little suitcases, settle in peacefully and stay for at least 4 months. Otherwise, it's simple: I move out. But I'd sell a kidney to be able to sleep with the window open and not catch pneumonia, or make a bonfire with my opaque tights... Anyway, if he decides to show up, we'll be ready, at least if you've been around. I'm an undisputed Sonia Rykiel fan, my credit card much less so... And a few seasons ago I saw these glasses HEREUnfortunately, I didn't have 350 euros to spend on a pair of sunglasses as crazy as these, but if I'd had the means, I wouldn't have hesitated for a moment! So here's the inexpensive DIY Sonia sunglasses and a softer variation, which of course can be customized ad infinitum... As usual, have fun!
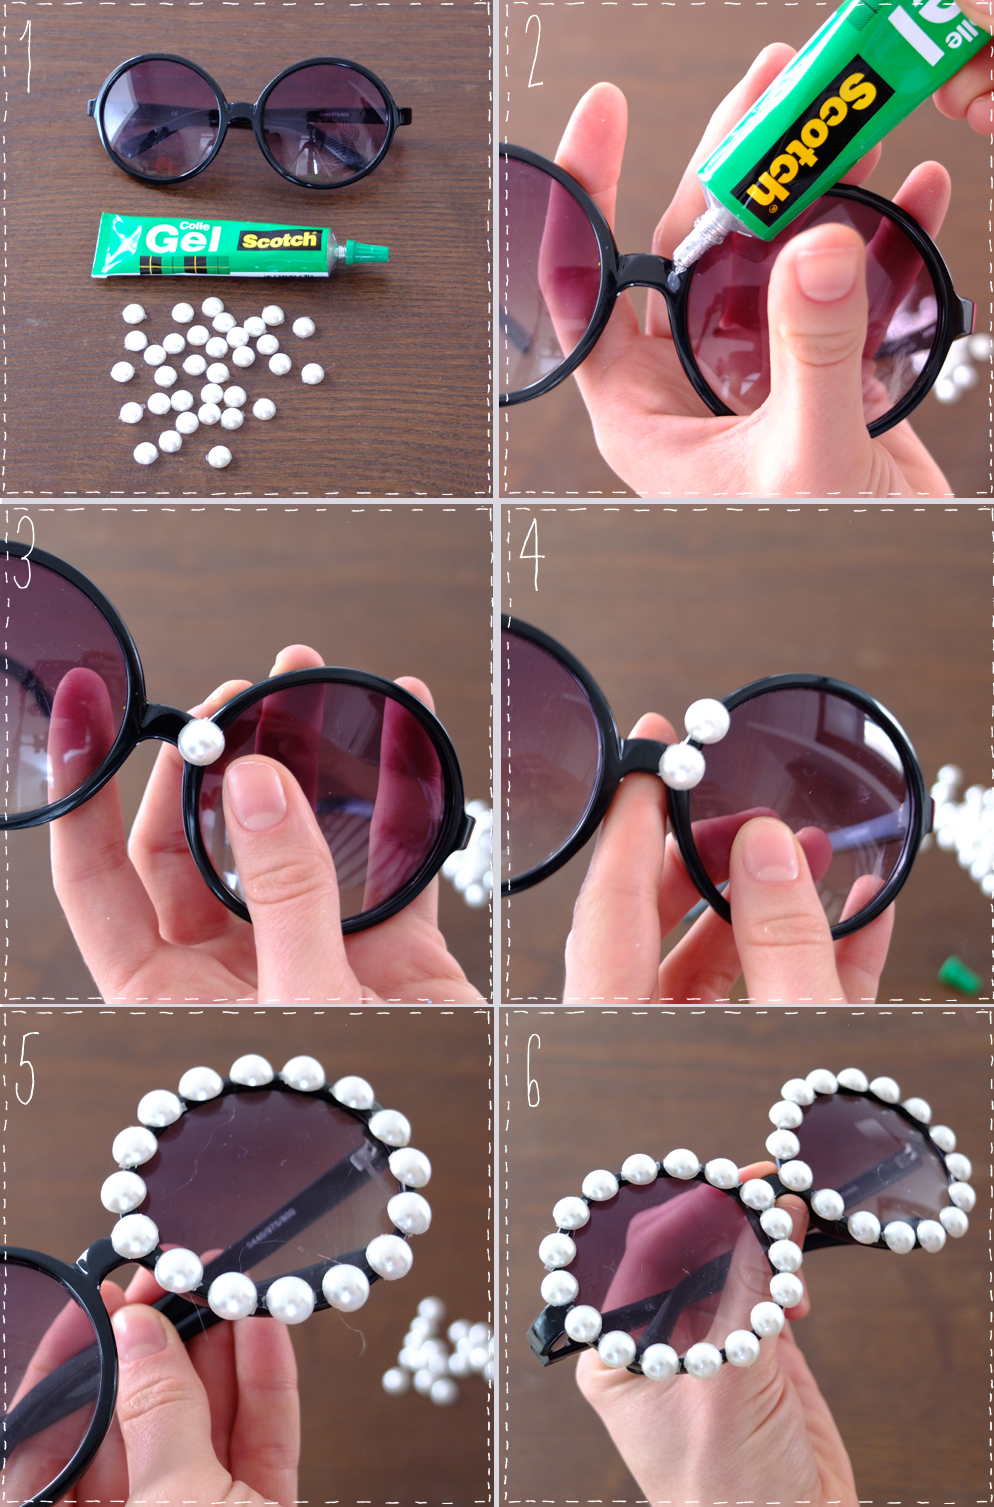 For this unlikely DIY, you'll need..:
-A pair of (cheap) sunglasses,
- Scotch green glue,
- pearly half-pearls (from the drugstore or scrapbooking aisle, but I'll come back to that...)
To begin, grab a pair of inexpensive sunglasses (H&M does this very well, or you can even find some wonderful ones at the market...). Pull out the green glue, and turn your half-pearls over fig 2. To return to the subject of half-pearls, the other day I called the drugstore to ask if I could drop in for a "shopping spree" like in the good old days when I was doing DIY for Muteen magazine. The idea is cool: you advertise the store and in exchange they lend or give you what you need, and I don't know if you've ever been to the droguerie, but it's hell: you buy 3 pearls and 2 sequins and you get 42 euros worth, so a shopping spree is always welcome... Anyway, the person in charge of shoppings tells me that no, he doesn't work with blogs (too bad for my credit card) but that if I want to go to the drugstore, it's 0.60 for half a pearly pearl... Thanks a lot. I was going to go there for you, I was too keen to make this DIY and then my path crossed the scrap booking aisle at rougié & plé, I never thought I'd say this but THANK YOU scrapbooking... yes yes, the 35 half pearl pack: 3.10 € banco! For the trouble I took 2 different sizes ... So yes, the drugstore is sublime, you want to buy everything, but the scrapbooking aisle at rougié et plé is scary, but good for morale because I'm not frustrated or broke... end of this "half-beads" digression, but I still had to tell you about it... Now that you're ready, glue the pearls to the frame with just a touch of glue fig 3,4,5 and repeat the operation on the second glass... fig 6. And I think most people will prefer the softer mount below, well, it's the same thing but with smaller beads! The fastest DIY in history! A thousand baci!

and ok, now I'm showing off with my fake real Sonia with lemon... I'm SO happy!
 [:]
[:]
WISH LIST NEON
Hellllooo,
I hope I'm not disgusting you with neon pink, or making you lose your eyesight, but I think I like to overdose on color. It calms me down with my obsessions and I can move on more easily, like I almost never wear polka dots anymore ... I assure you, at least once, even twice a week (when I'm in crisis) yes yes....I hardly do things by halves when I was a teenager (attention revelation) I could listen to the same song 436 times, at least 378 times I found it went by much faster and after the 437th time I couldn't listen at all to 'tu m'oublieras' by a redheaded artist whose name I won't mention... So now I think I still have a bit of this obsessive repetitive syndrome with clothes, but with you I'm treating myself! And I promise the next theme week won't be a color but an "artist" (and no, it won't be Larusso week...).

#1LE satchel Cambridge Stachel compagny 159.96 €, 2#"Shiap" neon pink lip bag NARS 25€. 3# This chair Marni from the ingenious anticamera project only available in the wind at the Milan boutique, unfortunately... 4# Watch 27,15€ on Asos5#Love U earrings $22 on Etsy, 6# shoes Zara fluo €39


