


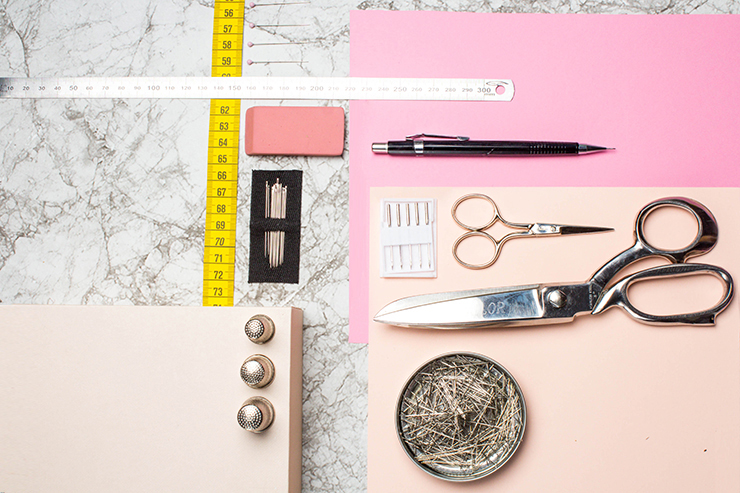
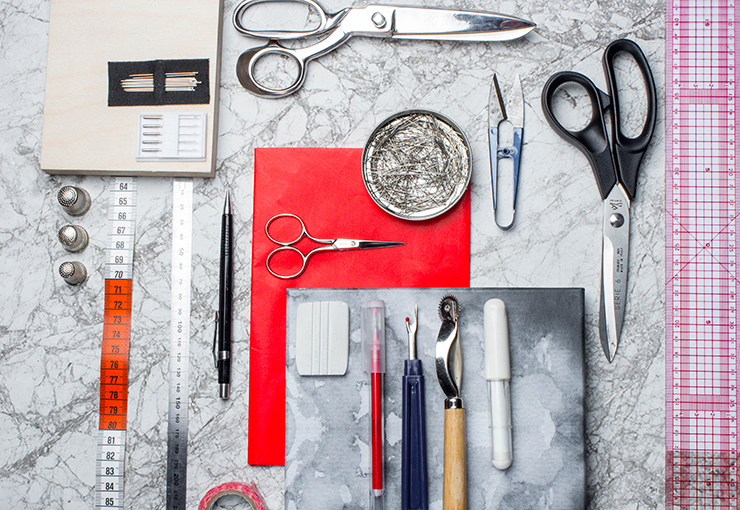
SEWING SURVIVAL KIT
Hello Seamstresses!
You certainly couldn't miss Wear Lemonade! Well, behind these patterns you'll find Lisa, of course, who designs each model, Charlotte, who takes the photos, Tania, who makes the videos and, until recently, Jeanne, who helped us cut the patterns, and me. But who am I? Well, I'm the latest addition to the Lemonade Studio...
Let me introduce myself: Laure G, head of patterns! We're going to do everything we can to make sewing easy for you, to help you if you have any technical questions, and also to guide you step by step as you learn to sew. By the way, if you have any concerns, don't hesitate to write to me directly at [email protected] and I'll get back to you as quickly as I can! And since we have to start at the beginning, you'll need the right tools!
So here are two short lists, according to your current or future level, concocted for you, with a few anecdotes as a bonus...
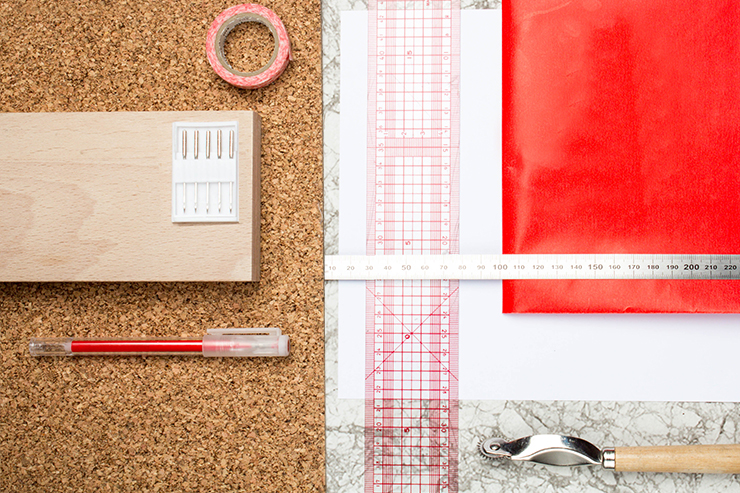
The beginner's kit :
- - A quick-stripper
- - Thread cutter or small embroidery scissors
- - A pair of good paper scissors
- - A thimble
- - Pins
- - Small set of needles
- - Set of sewing machine needles
- - Scotch tape
- - A criterium
- - An eraser
- - A pen
- - A ruler
- - Tape measure
= allow 40 euros
Future expert's kit :
- - A quick cutter
- - A roulette wheel
- - Thread cutter or small embroidery scissors
- - A pair of good paper scissors
- - A pair of fabric scissors
- - A dice
- - Pins
- - Small set of needles
- - Small set of sewing machine needles
- - Tailor's chalk
- - Carbon paper
- - Scotch tape
- - A criterium
- - An eraser
- - A pen
- - Tape measure
- - Japanese ruler
= about 85 euros
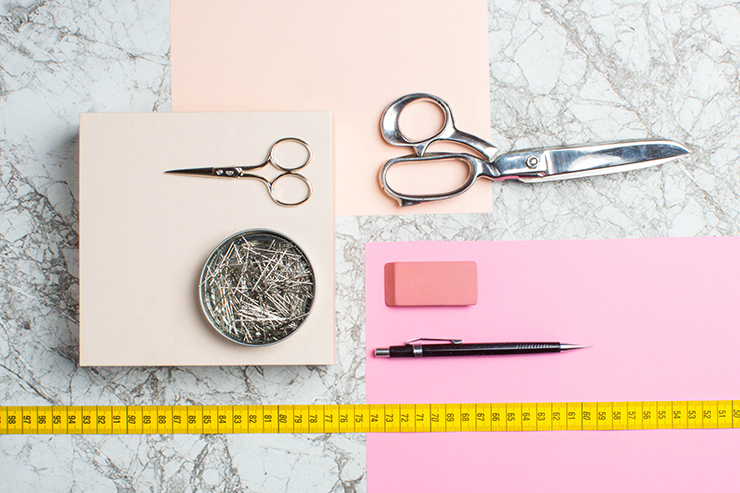
- Criterium, eraser and pen:
A critérium will always be more precise than a pencil because the lead is finer. If you want to mark clamps or pocket locations, you can do so with it, as it washes off quite easily. Apart from this use, you'll need it to modify patterns (e.g. to extend the length of a sleeve). And you'll also need an eraser to erase your mistakes (everyone does) on patterns or certain fabrics. Sometimes you need to use a pen to better see a mark or a notch. Take a brightly colored pen that stands out and just make a small dot or dash. Some pens are erasable, like the one referenced, which can be erased with a steam iron - real magic! Be careful, however, to test on a scrap of fabric, as this sometimes leaves a small mark.
- A tape measure:
No true seamstress without a tape measure! You'll be able to measure yourself and adapt the pattern to your goddess-like measurements! To keep it in good condition, roll it up on itself and avoid contact with materials that are too hot, which will deform or even melt it.
To find it in Paris, you can go to Fil 2000, or Hamon, or you can find it on the Internet. here or here.
- Thread cutters or embroidery scissors:
Smaller and more practical than large scissors, they can be used to cut threads protruding from your sewing work, cut off an excess piece of fabric, help you unstitch faster or notch fabric more meticulously thanks to their fine blades. These multi-purpose tools are a must-have and can even be used to trim your nails... Be careful with the thread trimmer, as the blades are sharp and always stay open! Remember to keep the case in a safe place to avoid accidents.
To find them in Paris, you can go to Fil 2000, or Hamon, or you can find them on the Internets. here.
- Fabric scissors:
Take them metal and a little heavy, the blade will cut fabric better. Good fabric scissors should be treasured and never lent out (you wouldn't lend out your pair of Louboutins, would you?), as they "shape" themselves to their user. You don't cut anything other than fabric, and above all, you avoid shocks! Sharpen them from time to time and wipe them very regularly. Now you're ready to cut works of art like Edward Scissorhands with these shiny little gems. True, the price of real tailor's scissors will surprise you (yes, they're very expensive), but they'll make your life much easier. If you're investing in a pair, go for a good brand like Nogent, Kai, or the more affordable Fiskars or Premax. Tip: remember to attach a ribbon to fabric scissors so you don't confuse them with paper scissors!
To find them in Paris, you can go to Fil 2000, or Hamon, or you can find them on the Internet. here.
- Pins :
They should be thin and nickel-plated (the better). Maybe until now you've been pinning any old way (uhm, uhm... like a certain person in her videos)... Pin them well perpendicular to the edge of the fabric so you can get your work under the sewing machine. Don't worry, they won't break. Tip: unfortunately, now that you've got them, you're putting them everywhere! Between the boxes of pins that fall out or the ones that come off the fabric, you're bound to have some on the floor... So use a magnet (from your fridge, for example) to pick them up. When choosing pins, make sure they're thin and nickel-plated - in other words, Bohin!
To find them in Paris, you can go to Fil 2000, or Hamon, or you can find them on the Internet. here.
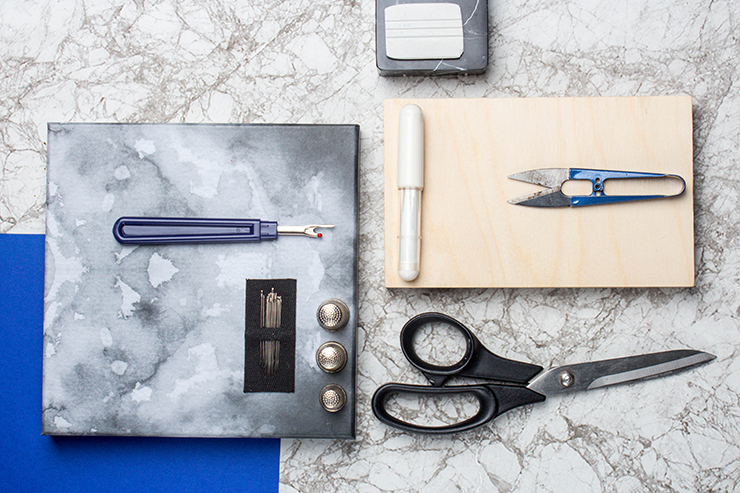
- A decoud-vite :
As the name suggests, this is used to quickly unstitch a seam. To use it, slide it into the seam between the two pieces of fabric, with the little red ball facing downwards. Gently push the seam ripper forward, and it will cut the threads holding the seam together. Be careful, it cuts quickly and well... and sometimes not just the seam! Tip: you can use it to open buttonholes!
To find it in Paris, you can go to Fil 2000, or Hamon, or you can find some on the Internet here or here.
- One die:
Placed at the tip of your index, middle or thumb (depending on how you sew), it helps you push the needle without damaging your fingertips when the fabric is too thick, and prevents the needle from slipping because it's non-slip. A tip? If it's too big (as is often the case), put a little absorbent cotton in the bottom of the thimble to steady your finger. Alternatively, the Prym brand makes dice in different sizes. To find out which size is yours, wrap a tape measure around your last phalanx, remove your finger but keep the tape wrapped, take a ruler and measure the diameter of the wrapped part. Normally it'll be between 14mm and 18mm, but if your name's the Hulk and your fingers are 10cm in diameter and green, I can't help you.
To find some in Paris, you can go to Fil 2000, Mercerie Moline or Hamon, or if not, you can find some on the Internets. here.
- Paper scissors :
With long enough blades, you won't get as tired cutting your patterns, and if you take good care of them and sharpen them well, you can use them to cut fabric without any problem! Take a good look at the tip of the scissors: normally, one end is pointed, the other a little more rounded. The pointed end will help you turn collar points or pocket corners. Afterwards... you can always leave them open under the bed to avoid nightmares, but that's another story...
To find them in Paris, you can go to Fil 2000, or Hamon, or you can find them on the Internet hereor here.
- A set of sewing needles:
Whether for embroidery or hand-stitching, you'll need different sizes to suit the fabrics you'll be using. Some are very specific, depending on their use: for example, curved needles or those with a large point are often used for leatherwork, while very fine needles are used for embroidering pearls, etc. Those with a gold "eye" (hole through which the thread passes) are often a guarantee of quality. Once again, Bohin are very good, but any other brand will do.
To find some in Paris, you can go to Fil 2000, Mercerie Moline or Hamon, or you can find them on the Internet. here or here.
- Tailor's chalk:
Rather than pinning the pattern to a fragile or unwieldy fabric, lay your pattern and weights on it, and trace all around with the chalk. You can use it to mark notches and pocket or clip locations. Generally, mineral chalk marks can be rubbed off, while sublimable chalk can be ironed off with steam.
To find some in Paris, you can go to Fil 2000, or Hamon, or you can find some on the Internet. here or here.
- The roulette wheel:
Admittedly, this tool could be used to cut a pizza... But its main use is to raise a paper pattern on cardboard, or even better, to raise a pattern on fabric if used with carbon paper. See the "carbon paper" paragraph for instructions on how to use it. Preferably one with a wooden handle, which fits better in the hand and will last a lifetime! Yes, sometimes it can also be used to scratch your back.
To find one in Paris, you can go to Fil 2000, or Hamon, or you can find them on the Internet. here or here.
- A set of sewing machine needles:
As with embroidery needles, you'll need different thicknesses depending on the fabric: denim, silk, cotton, stretch...Keep the boxes to store them by type, at worst you can slip them into a piece of aluminum or carefully folded paper if you break the box. If you're just starting out, take "standard" needles that will allow you to sew materials that aren't too thick and basic (cotton, non-stretch synthetics, linen). Can't remember the needle size? Don't panic, it's often marked on the domed side of the needle. If your needle "pulls" threads when you sew on the machine, it may be dull. To find out, remove the needle from the machine, run the tip of your fingernail over the point of the needle, and if there's any roughness, throw it away as it's no longer usable.
To find some in Paris, you can go to Fil 2000, Mercerie Moline or Hamon, or you can find them on the Internet. here or here.
- Carbon paper
It has many possible uses. In sewing, it's best used to save time when raising patterns. Take your pattern board, cut roughly around (not on) your waistline, leaving plenty of room. Iron your fabric, unfold the carbon with the colored side against the fabric. Place your pattern on top. Using the famous roulette wheel, "roll" on your waist lines to raise the pattern. Don't forget to indicate pocket and clip placements, as well as notches. That's it! Warning: don't iron over the ink, as this will fix it to the fabric. Water, on the other hand, will erase it.
To find some in Paris, you can go to Fil 2000, or Hamon, or you can find some on the Internet here.
- A Japanese ruler
Be careful, it really has to be (it's not a joke, fake rulers do exist)! The Clover brand (Japanese, of course) is easier to find on the net. Why this one and not another? Why take the original? Unlike conventional rulers, it's extremely flexible, so much so that you can (almost) measure a circle with it. Another special feature is its grid pattern, with perpendicular and parallel lines spaced at 0.5 and 1 cm intervals. This makes it easy to modify hems and seam values. Like the tape measure, avoid contact with hot materials, as it melts and deforms easily. But you can also use a normal ruler if you're a beginner!
To find one in Paris, you can go to Fil 2000, or La Papeterie du Textile, or you can find one on the Internet. here or here.
See you soon!