


MEXICAN LEG DIY

Hola my little cats,
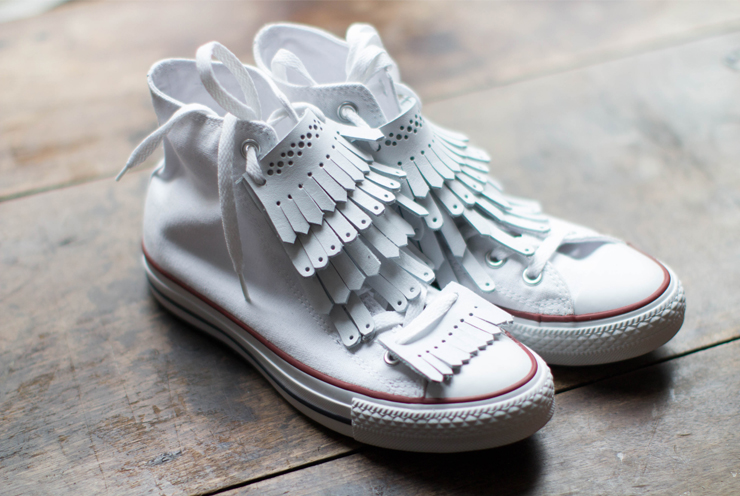
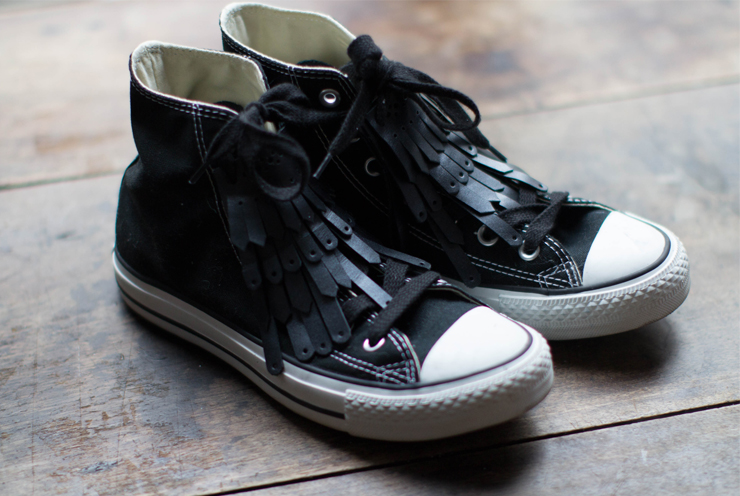
Today is Wednesday, so let's get back to our good "Wednesday DIY" habits! Remember my love of Mexican paws? Mexican what? Yes, those fringed golf paws! Remember my trip to Maurice Manufacture, when I was finally able to put an exact name to these little marvels that would drive any shoe crazy... And today, we're going to teach you how to make your own fringed tabs, to wear alone or cascaded as a sort of ruffle for your shoes... A few weeks ago Sarenza asked me to imagine a DIY for Converse. For the occasion, the team at the famous e-shop wanted me to get involved with the mythical Chuck Taylor, which will soon be celebrating its 100th anniversary, not a wrinkle... I could tell you so many anecdotes about these shoes that rocked my adolescence... So it was with undisguised pleasure that I lent myself to the game of customization on a white pair and on a black one... I think it's impossible for me to choose my favorites....
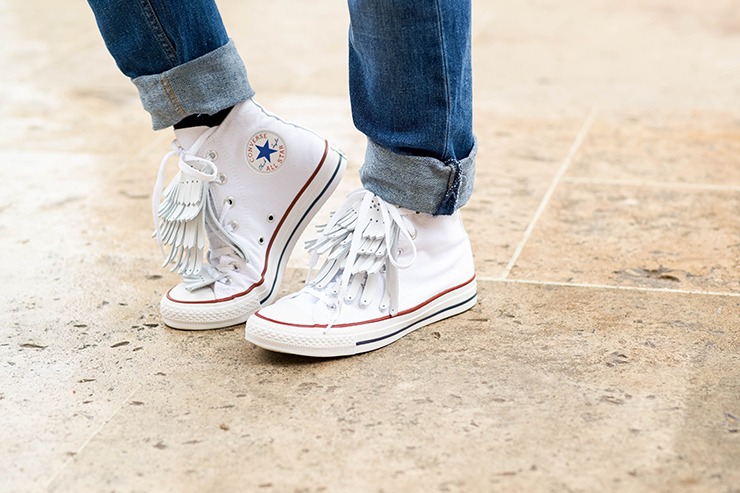
The problem now is that I want to put it on all my shoes! At the Studio, I see the bangs travel from shoe to shoe, I think I've contaminated them... But I love wearing them on cascading converses to make them less teenager, more pointed, almost chic!
Time: One hour
Difficulty: Super simple, but don't neglect the materials.
Cost : About twenty euros
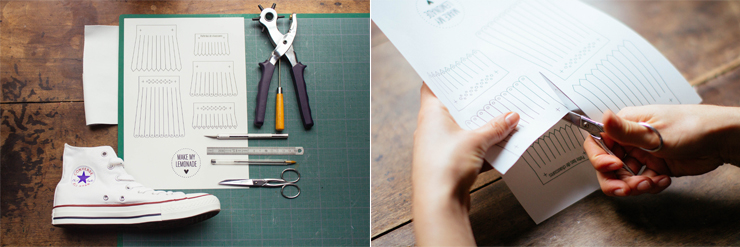
For this DIY you'll need:
- - A pair of Converse or any other shoe - it's universal!
- - Download the leg pattern here,
- - Punching pliers
- - Thick leather (you can find perfect scraps at Sacré Coupon Cuir, rue d'Orsel),
- - A scalpel that cuts very well, or it's time to change the blade,
- - A pencil,
- - A ruler, metallic is better,
- - Scissors.
To get started, download, print and cut out the patterns for the Mexican legs.
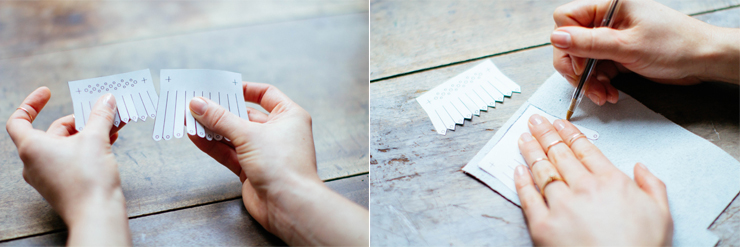
Transfer the patterns to the back of the leather with your pencil, remembering to cut out the slots in the paper beforehand. You don't have to trace the whole slit, but you can trace the upper end of the slit and join it directly with the ruler during cutting.
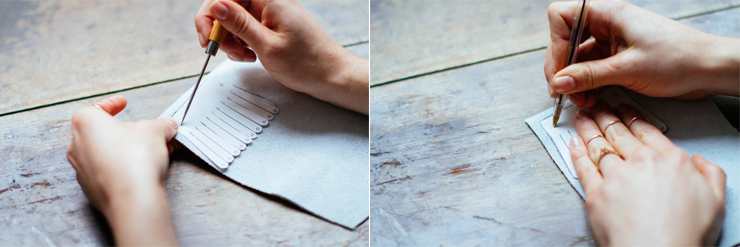
Use the punch, or a large needle, to mark the holes on the back of the leather and iron the mark with a pen.
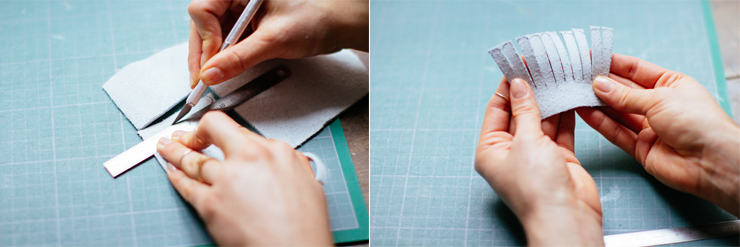
Grab your scalpel and start cutting around the legs (remember to protect your backing). Continue with the bangs!

For rounded bangs, use small scissors to cut out the curves - this will be easier than with the scalpel. Again, use a punch or large needle to mark the holes at the bottom of the fringe. Take your perforating pliers, choose a rather small diameter and punch!
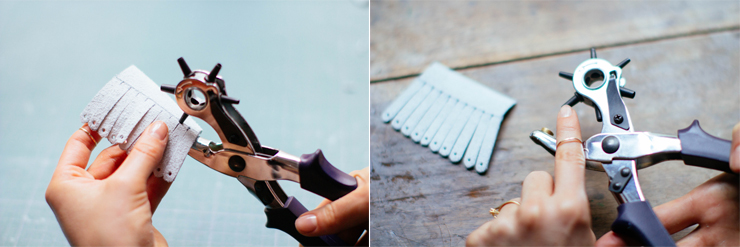
Do the same on the top of the bangs. Then change to a larger diameter to perforate the top of the fringe, where the laces will pass.
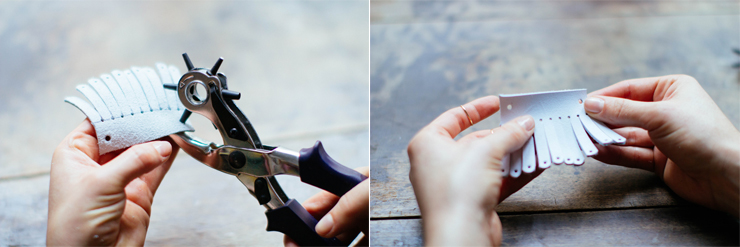
Punch the two holes at the top, and Ta-Da!
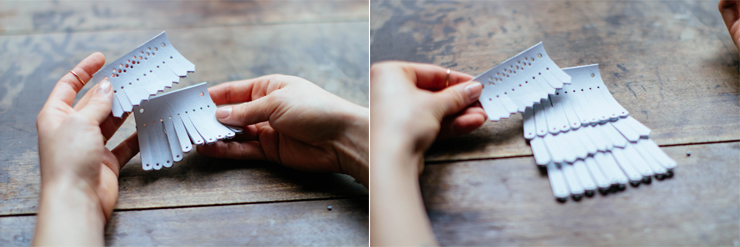
Continue in this way with the other fringe sizes, overlapping them so that the top holes coincide.
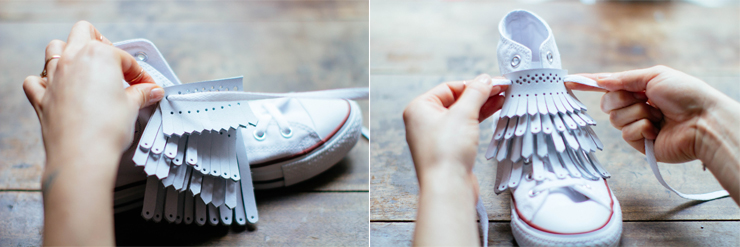
Thread the bangs onto the laces at the second-to-last eyelet.
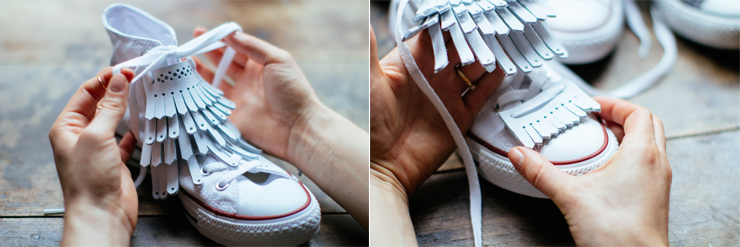
Tie a knot (I hope I'm not teaching you anything) and TA-DA! For the smaller fringe, thread it onto the very bottom of the laces to dress up the front of the shoe.
You can find the English version here.