


DIY LIGHT BOX


- wine cases, which you can buy empty (or full) at your local wine store, the same as for the butterflies in the last week !,
- a sheet of frosted glass, cut to fit the sliding lid of your crate, 4mm thick (cut to size at Leroy Merlin),
- a drill,
- a connection cable with a plug and a switch such as this one,
- a small screwdriver and an electrical domino (very important)
- a neon light that fits into the box lengthwise or diagonally,
- self-adhesive mirror film or aluminum foil (but mirror stickers reflect light better),
- ready-made black stickers, or black Posca in various sizes,
- double-sided,
- a small paint roller,
- sweet note files to download here,
- tracing paper,
- masking tape and a small can of colored paint (optional).


First, let's make some holes! Drill three small holes in the back or on one side to cool the light box (I used an 8mm wood drill). Now's also the time to drill a hole or two in the bottom of your box, in case you want to hang it up later!


Then drill a hole on one side of your box to slide your power cable through, again using the same drill bit. Then take a piece of self-adhesive mirror film and cover the inside of the box. The mirror film will reflect the neon light evenly; the sides are optional, but if you want better reflection, I recommend covering them. And don't forget to re-drill the cooling holes with a screwdriver or scalpel.


Peel off the protective film, and let's get painting! For the side of the box that will be glazed, place masking tape on the edges to hide the little notches that will make your light box look like a wine crate. Then gently cover the slice, and off you go again, back to painting!
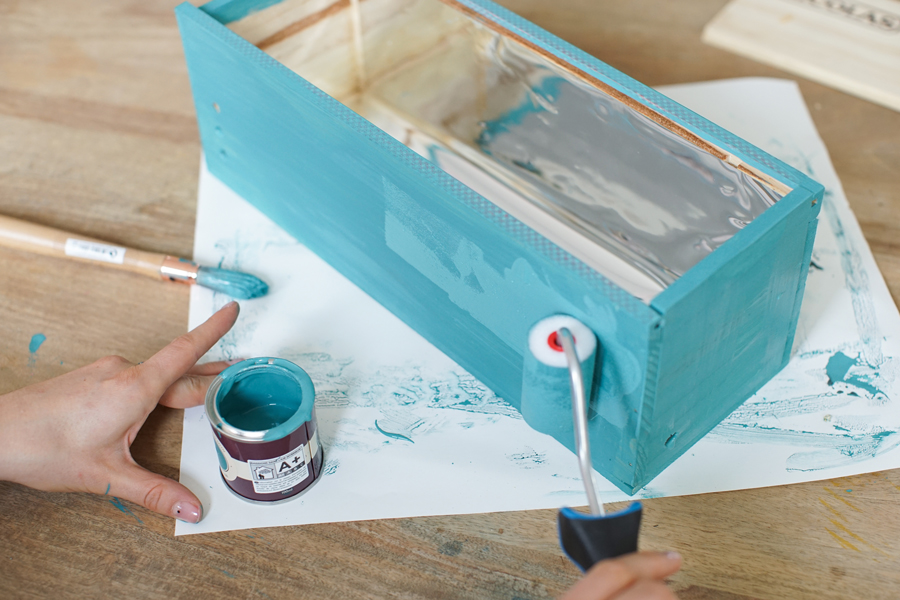

You'll need a small brush to clear the corners, as a decorating specialist would say... and your small roller for the rest of the box. I'd advise you to apply several coats, as wood tends to drink a lot of paint! While the paint's drying, let's get on with the fun part - the lighting. Grab your neon, your deco and your cable!


Strip your neon cables with wire cutters and pass the power cable through the hole in the side of the box.


Assemble the cable to the neon using an electrical domino. I know it sounds a bit scary, but I assure you it's not the end of the world! Pass the two wires of the power cable through the two holes on one side of the domino and do the same on the other side with the neon wires. Cut a piece of sturdy double-sided tape to secure the neon to the bottom of the box.


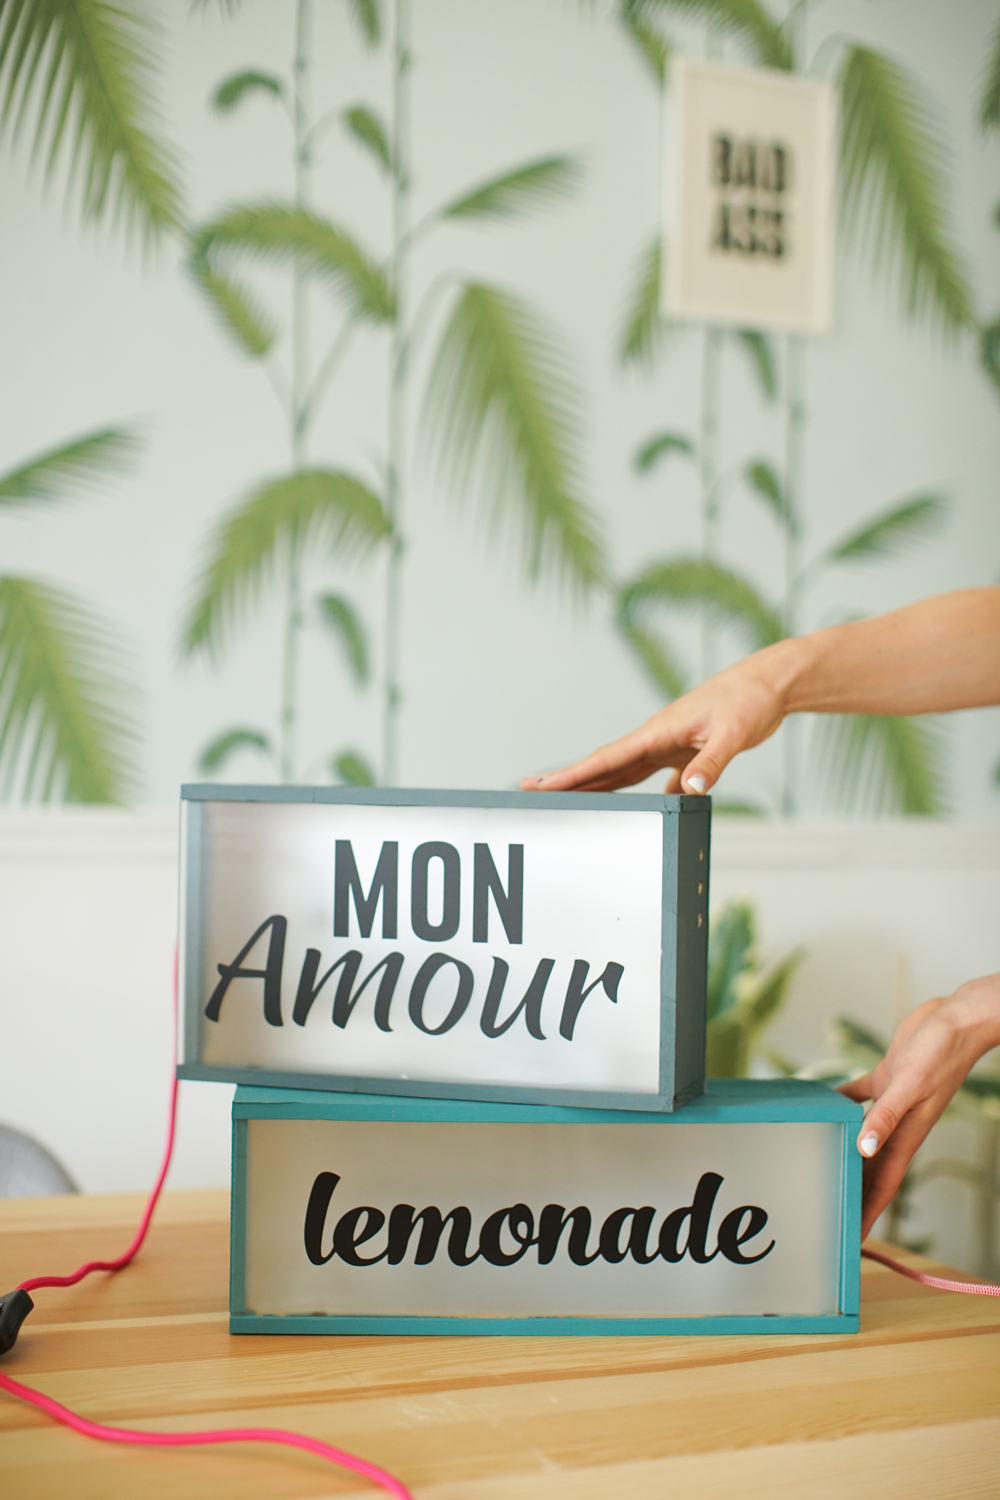
Hold for a few moments, until the tape has set, and close the box with the frosted glass! It's really taking shape!


Now print out your sweet note, take a sheet of tracing paper and transfer the note. But feel free to write anything you like! Make us dream, I'm curious to know what you'd like to write on your walls! Now grab your black Posca and iron on the lettering! For those lucky enough to have a silhouette cutting machine, you can also do your lettering directly in black sticker!


Don't forget to fill in your lettering, be patient and do several layers - the result will be all the more beautiful! And TA-DA!
