Wordpress blog EN
WISH LIST GRAAAAOU
LA folie les amis!
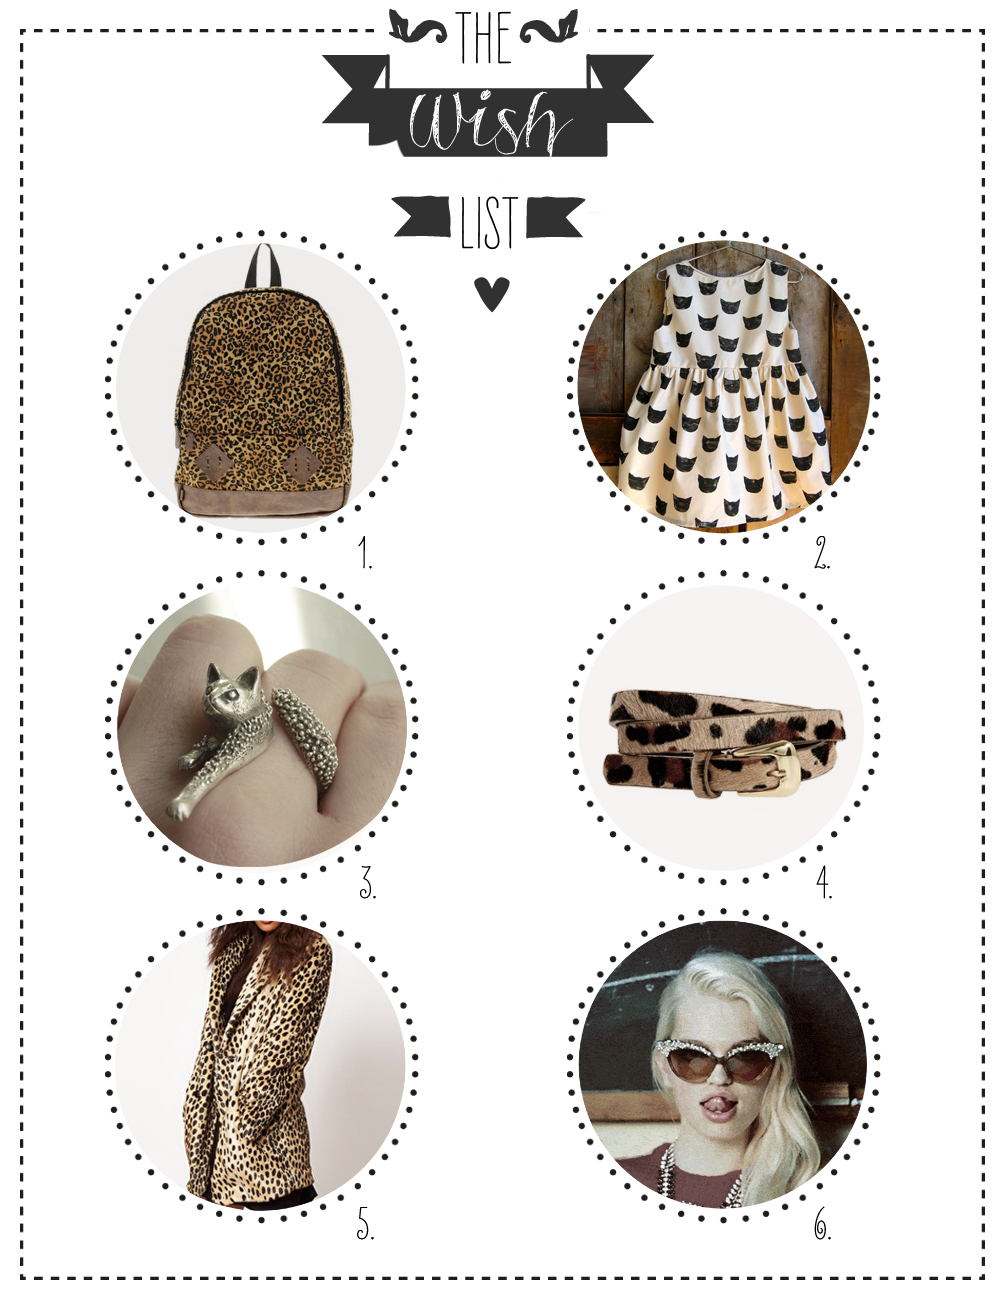
I juggle, I juggle, I have a thousand lives in one (just add a few hours each day, I beg you god of the agenda!!). I also have a lot of cravings, but that's like everyone else... I have leopard cravings, big leopard cravings even, like this little Asos coat (sold out... does that count?) Whatever happens, I'm moving heaven and earth to find the leopard piece that will hit the spot this Friday (someone's whispering in my ear that I've probably got something that should be perfect!) Can't wait to show you! And I saw that you'd fallen for the kitten ring on last Monday's post, so I haven't really found the same one, but I'm giving you the address of MY cat ring, which could be its big sister, on the pépite de site. l'Exception... and another favorite from an online shop you probably know: Shop Rebelle where I found a pair of rhinestone cat-eye glasses... I never said this week would be about discretion....
LOVE U. ( I'll reply to your comments very soon, I won't forget you!)
1# Backpack Asos 35.54€ - 2# Dress Leah Goren on Etsy119€ - 3# Love cat ring 125€ at L'Exception - 4# Leopard belt on Asos 25,59€ - 5# Stingy synthetic fur coat on Asos 79,62€ - 6# Cat rhinestone glasses at rebelle shop 65€.
SMALL WISH LIST
My little butter hearts,
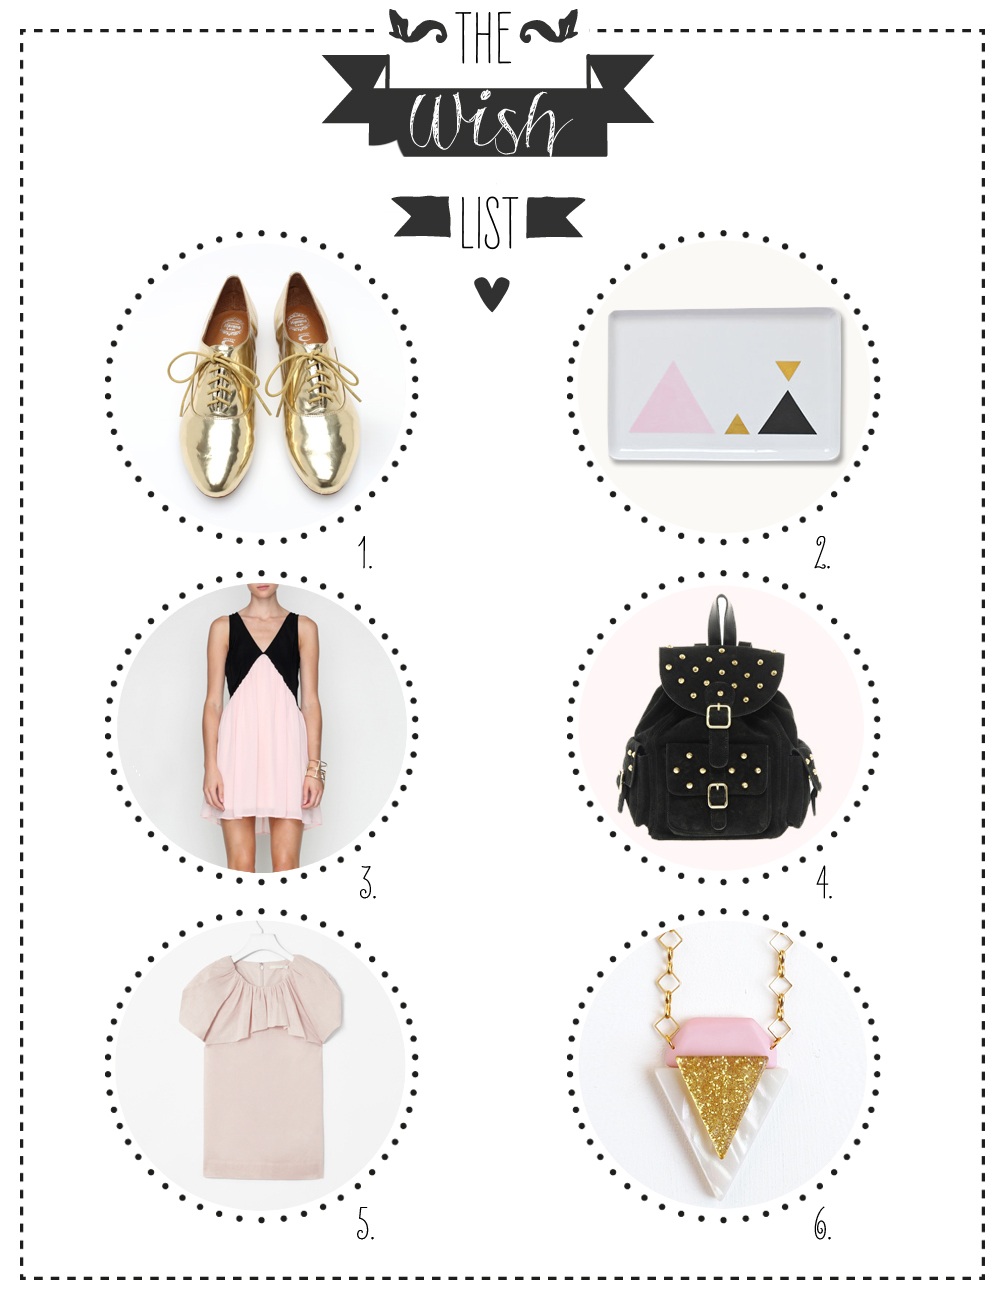
I'm fighting tooth and nail with a super capricious sewing machine (it's not mine, mine is too good, too nice and very easy to live with, personal message: I miss you come back soon). In any case, I hope to finish the DIY thank you in time for tomorrow, so you won't be disappointed, I promise! In the meantime, I've put together a little wish list to tide you over, something a little sweet but not too sweet either. I've got a hankering for powder pink, black and gold, which I think is really original in decorating and not necessarily too girly, provided you have an open-minded lover... (but that's something you have to work at!). I'm off to get behind this machine and my camera! Love and kisses!
1. Gold Derbies like mine! Jeffrey Campbell 110$ - 2. ceramic tray Asleepfromday 24€ - 3. Dress Need supply Co 68$ - 4. backpack Asos 78,19€ - 5. ruffled top Cos 49€ - 6. brilliant necklace Après ski 36€.
[:]
LES GENS BIENS #6 FRED
Happy Saturday!
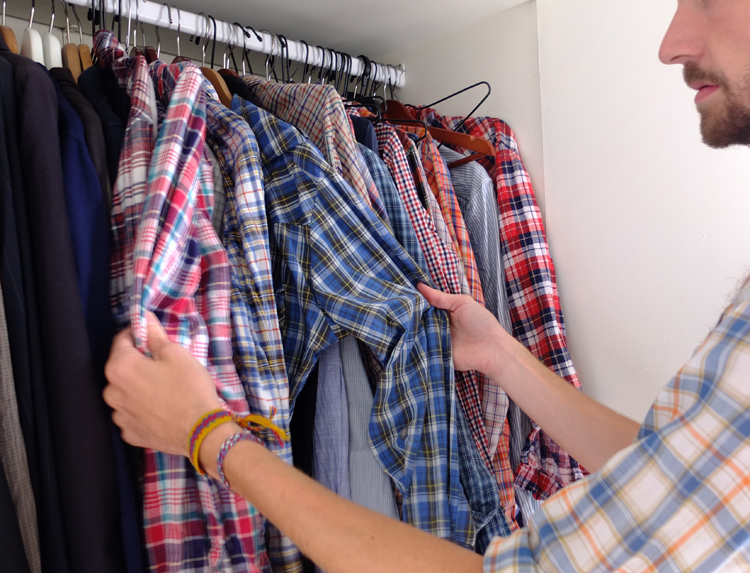
Well, if it isn't "les gens bien" again this week! I'd be spoiling you right now if I told you about Mailast week I had to tell you about Fredtoday... Fred is this incredible aesthete who teaches you how to do your hair with nothing at all, who teaches us how to make a charming mess of our hair... and above all, who tells us that we don't need to end up suffocating from Elnett to have a chignon that rocks. In short, it's thanks to Mai that I met him at a party, full of people who already knew each other. I was alone, lost, clinging to my cell phone like a lifeline to give me composure, and Fred appeared, he teased me and bim bam boum, as our meetings went by, I discovered him to be such a nice guy, sweet, funny, simple, frank, a beautiful person whom I'm lucky enough to introduce to you, I feel like telling you that I've got a thousand ideas from him... I hope to be able to show you some of the crazy and unique things we're trying to put together... Fred may do the hair of super stars, princesses and all that, but he's someone who takes life as it comes and whose only aspiration and ambition is to be happy. I find that, as well as being a "nice guy", he's certainly a walking inspiration, enough to calm my ardor to devour the world.... Without further ado FRED!

Hello Fred, just to get to know you better, can you tell us what's the first thing you do in the morning, just after you've opened your eyes?
I touch my...biiiiiiiiiip....nan just kidding :-) Then I roll out of bed and hit the floor, and of course I do 4h30 of yoga :-)
"Existential question: If you had to reincarnate as a woman, who would you be? Diana Ross from the supreme era or Jean Seberg from the Breathless era?
Diano Ross all the way! Wigged from morning to night, sequined from head to toe, I'd be Crazy!
"Question from Elle: What's in your backpack?
Clips for styling anyone anywhere, my camera, and notebooks for jotting down fabulously awesome ideas :-)
"Substitute question: If you weren't allowed to wear a checkered shirt anymore (like deprived of dessert), what would your signature look be?
HO MY GOD ....
Marinière, I think... stripes, stripes, stripes!
"Survival question" If you had to take only one woman into a bunker in December 2012, to style her hair forever ( or almost) who would it be and why?
Madonna..... because I figure she'd have a lot of crazy stories to tell me...
"What job would you have hated doing as a child?
Butcher, what can I get you, little lady??? hands full of blood.....;bbbbeeeuuurururrkkkkk , vomiting all day.
"Fashion blog question" the fashion flashback: you said: I'd never wear that, and yet you did... what was it?
Ephrem pants ... velvet even! houlala...
"If you had the chance to bring back a missing personality for a date, who would it be?
Frankly, I don't know what to tell you .... :-( I'm skipping !!!!
"Question Doudou" What do you make yourself to eat to cheer you up?
Free-range chicken, fried potatoes, green salad, strawberry tart.... perfect dinner.
"Question vitale" are you more of a blue card or blue overalls type?
Bleu de travail , c'est sexe nan ??
"Question: It's clean" What's under your bed?
boxes with wigs, extensions, my cleaning lady gets scared sometimes ... hihihi
"Question: Backpacker" the worst trip you could ever have?
A thalasso weekend at La Grande Motte.

"Question from hell" What recurring question do you hate being asked?
And heuuuu....t'got a hair salon where I can come see you to do a brush ??????
"Unspoken question" What question (never asked) would you like to be asked?
I'd love to be asked..... "Will you marry me ???? ".....
attention Violonnnnnnnnnnn !!!!!! nananiniiiiiiiiiiinannaniiiiiiiiananananananaaaaaaaaaa

Good beauty plan?
Don't look too closely at yourself in the mirror, and make love as much as possible....I'd better get started...!!!
Shopping tip?
I don't do any... or only second-hand clothes... in New York....bref I've got rotten shopping plans!
Good eating plan?
Chez ANAHI rue Volta , Argentinian meat that'll knock you on your ass ...
Culture?
I love the HUNE bookshop in St Germain, the Louvre at night on Fridays, the Marais galleries at weekends...
NECKLACE CHOCO BALLS
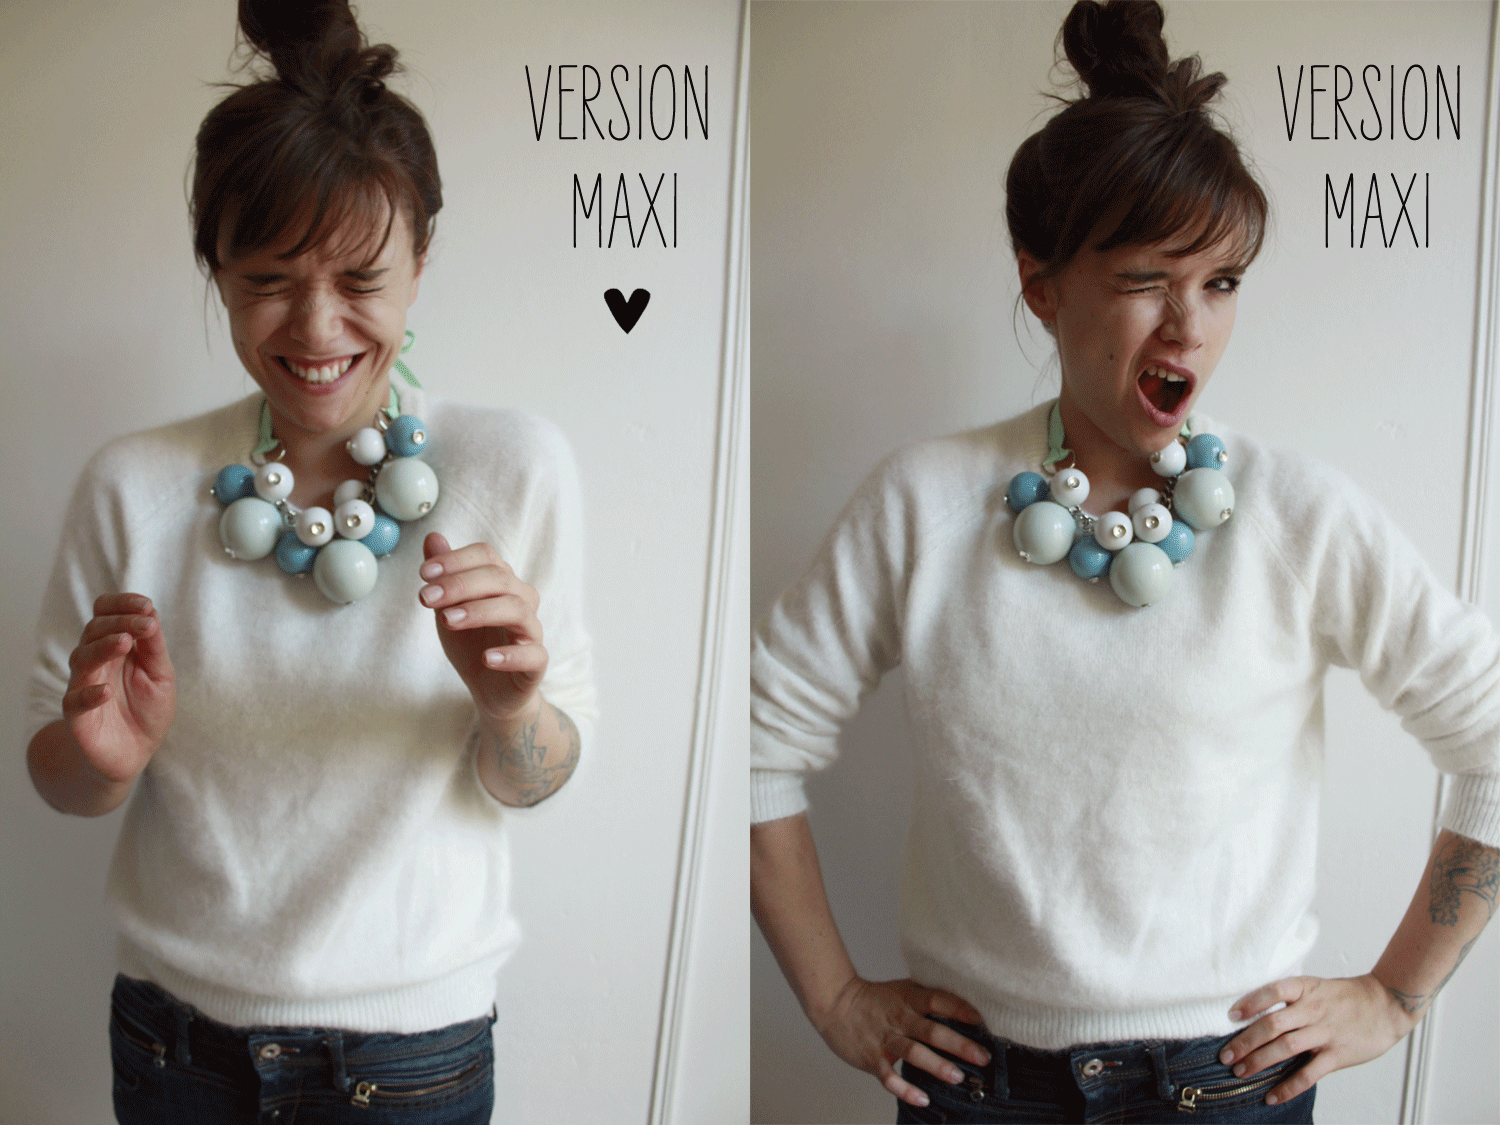
I'm laughing to myself as I write the title, I was looking for something catchy and then I decided to continue my trend of messing up names, I don't remember if it was my brother or my friends who first said this expression but it's entered my lexical field of "annoyance", imagine the context: "AH! I've just spun the tights I bought 2 hours ago, I've got the CHOCO balls" in short. That said, this necklace is very easy to make... I like it, I admit it, and I thought of you, who may not be as crazy about atomic necklaces as I am, so I've made a second mini version for you (too nice...). I apologize for making yet another DIY necklace, but there are so many possibilities! But that's because my sewing machine went away for summer training and still hasn't come back (really: it's broken, I'm sick of it, it's as if someone had ripped out my heart or my iPhone... without it, I'm naked...). Still, when she gets back, I've got BIG plans for you... Yes, like "sewing class" videos to help you progress in your DIY, from the little dress to the crazy tote bag... I'll stop telling you my life story and start making "choco-boules" necklaces.
First of all, to make this necklace in its Maxi version, you'll need..:
- Ceramic beads (3 sizes), which you'll find at Perles d'or for very little money (I'll give you the address at the end of the article),
- long metal rods,
- rings,
- hats (to prevent beads getting loose on the rod),
- A bit of chain, about 20cm,
- 2 leather goods rings (optional),
- 1 meter of ribbon or grosgrain,
- flat-nose pliers and round-nose pliers,

Attach the two large rings to the ends of the chain (this is optional - you can skip this step, but I find these rings finish the necklace better) Fig.1. Take the ribbon, cut it in 2 (i.e.: 50cm x2) and double it to make sliding knots on each side of the necklace Fig.2 &3. Now let's get down to business: using the flat pliers and small rings, hook the pearls onto the chain. I recommend that you first insert the ring into the chain and then slide the pearl through, as this will make it easier. Fig.4 & 5. Hang all the larger beads first Fig.6, then the medium-sized beads alternately Fig.7 , and finally the smaller beads Fig.8. and TADA!
And for the Mini version of this necklace, you'll need..:
- A large ceramic bead,
- a rhinestone bead (from the drugstore),
- 90cm of small-link chain ( not too small... ),
- a ring and flat pliers.
To begin, thread the large ceramic bead onto the chain Fig.2, then the rhinestone ball Fig.3. Using the flat pliers, open the ring and insert one of the chain links, then close the ring Fig.5 and Tadam a minute sautoir necklace!
To find all this material, you can go to Perles D'or 64 rue de Turbigo Paris 3e métro République (I confess I was quite happy to find the ceramic beads!), where you'll find lots of other things, but I'll tell you about them again very soon (for this DIY, you'll find the rings, the rods, the rods and the little chain). And for the rest of the material, go to Fil 2000 at 65 Rue Réaumur 75002 Paris (the ribbon, the big chain and the big rings)... Have fun!
[:]MOVE TO EAT #1: CUCUMBER
Oyé my little chickens!
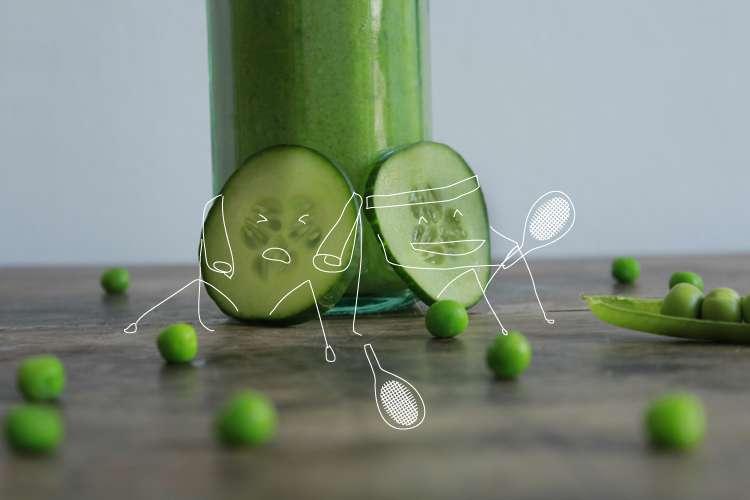
I'm very happy to tell you about a new project! You know, I'm a big fan of the "I'm a big eater but I want to be atomic", or another very similar concept: "I want to burn your retina with my goddess body but buenos kinders are my best friends". So the other day, Renaud, the community manager of the club med gym, contacted me to propose a small collaboration: imagining recipes around "sports food": there will be 10 of them! I can't tell you that since my return from New York, one of my resolutions has been to "eat better" and "try" to move around more, like all those hot New Yorkers who work out at the gym and wolf down cupcakes without feeling guilty right afterwards... I said yes, the principle of indulging without succumbing to caloric suicide still appeals to me, but beware, friends, ok for a healthy and dietetic recipe, but don't go overboard either: diet for sure, but gourmet above all...
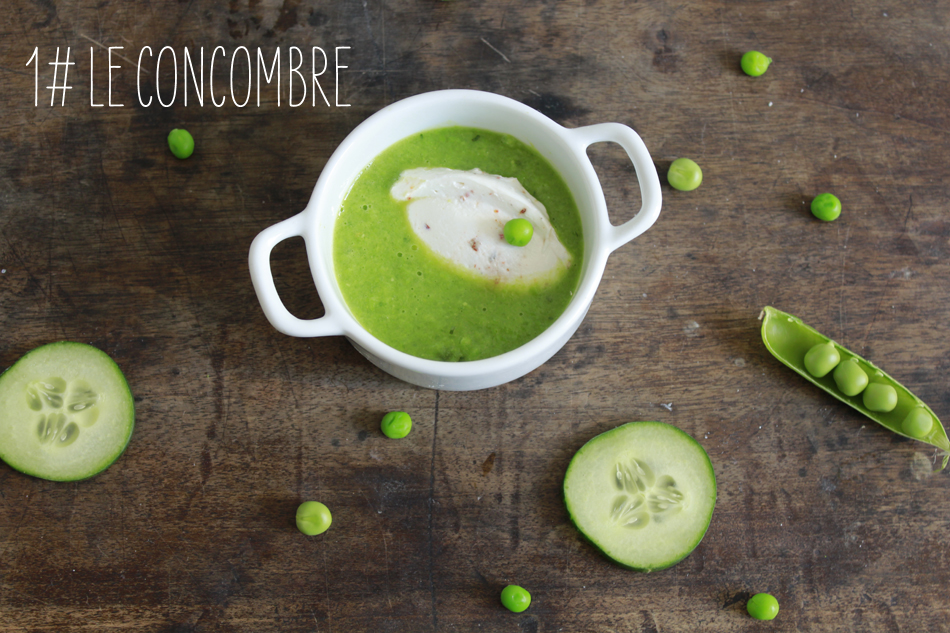
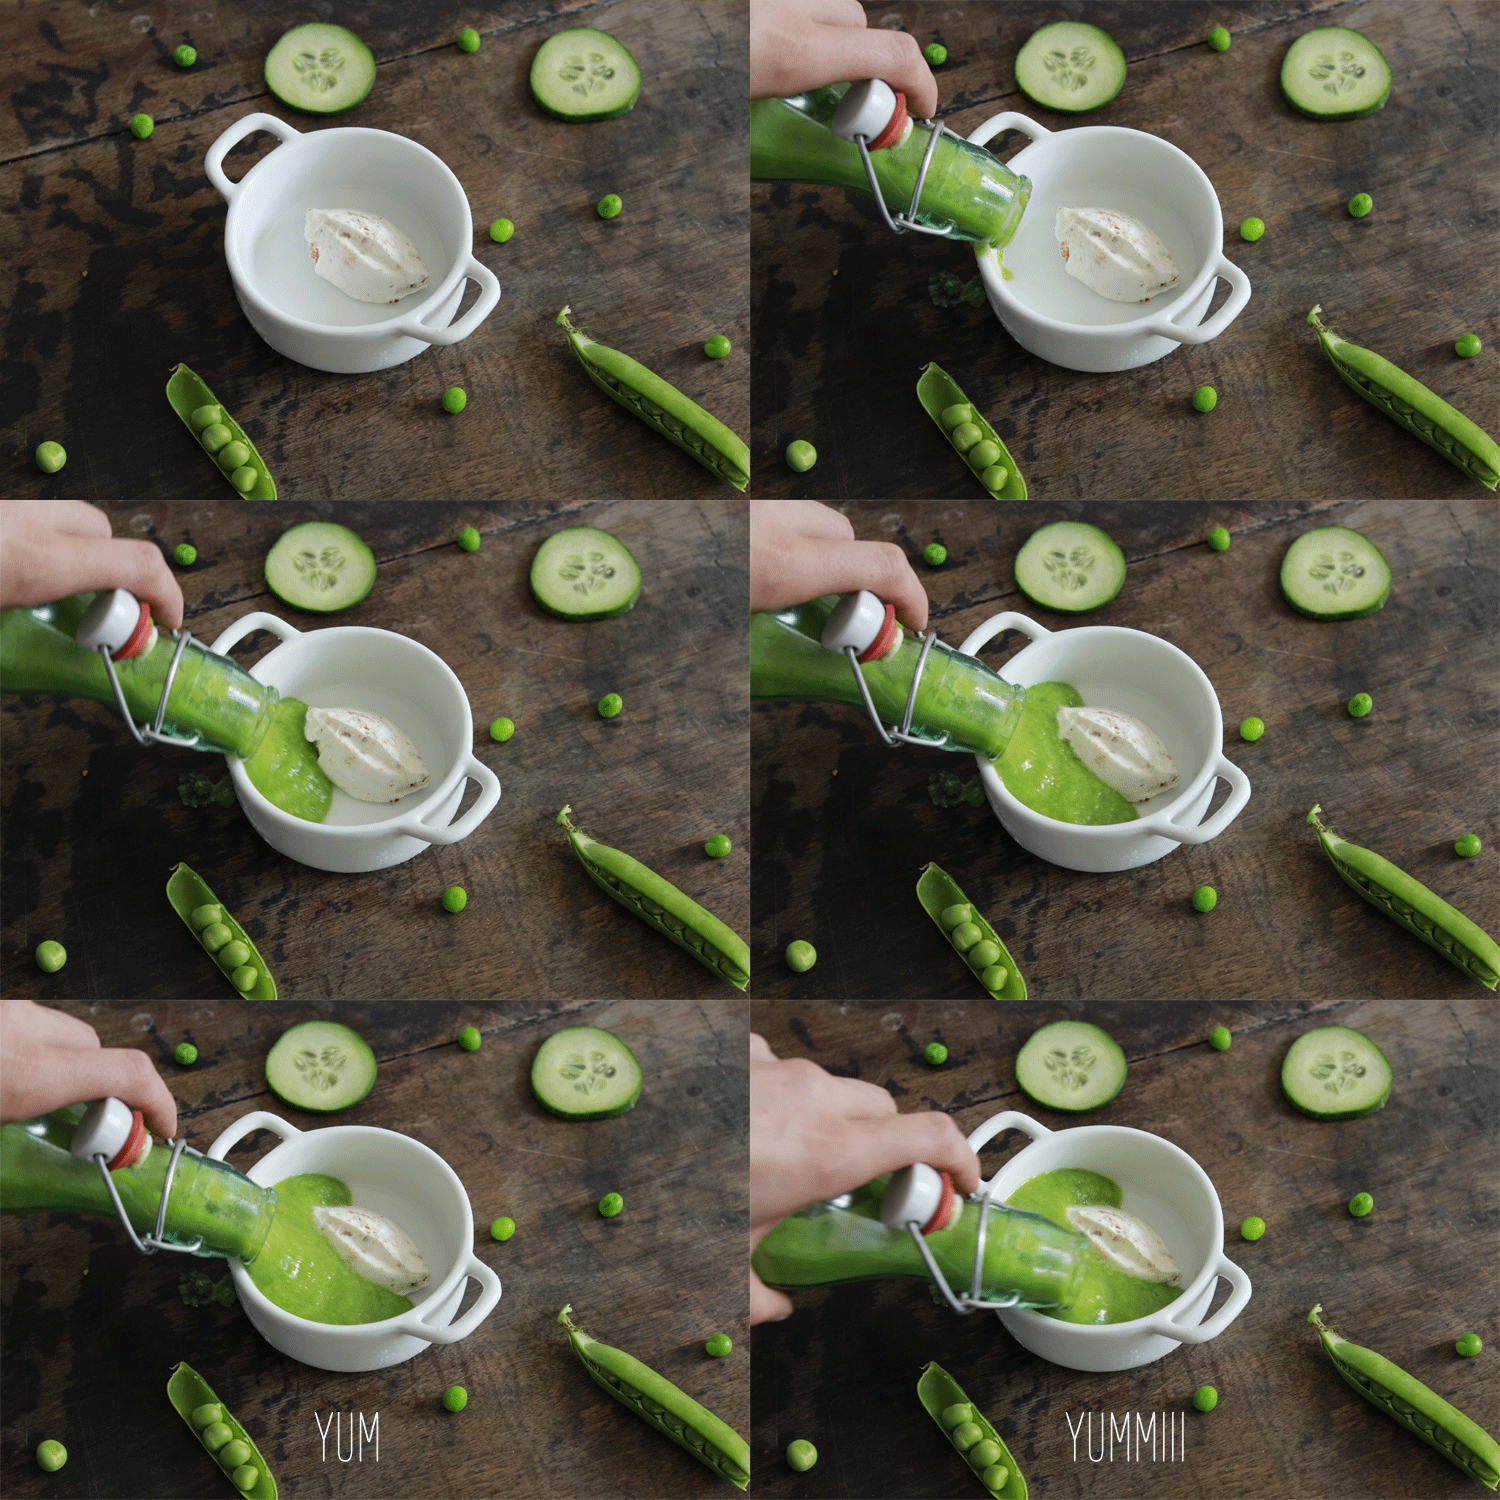
For this cold soup "cucumber versus pea and its desert island of 0% spicy fresh squares" you'll need (for around 4 people):
- 1 large cucumber or 2 small ones
- 130g peas (frozen or fresh, but never canned!)
- a few sprigs of fresh mint
- 1/2 liter vegetable stock or 1/2 liter water with a Kub or here!
- 1 fromage frais 0% or other light spreadable cheese
- 1 tsp sweet pepper.
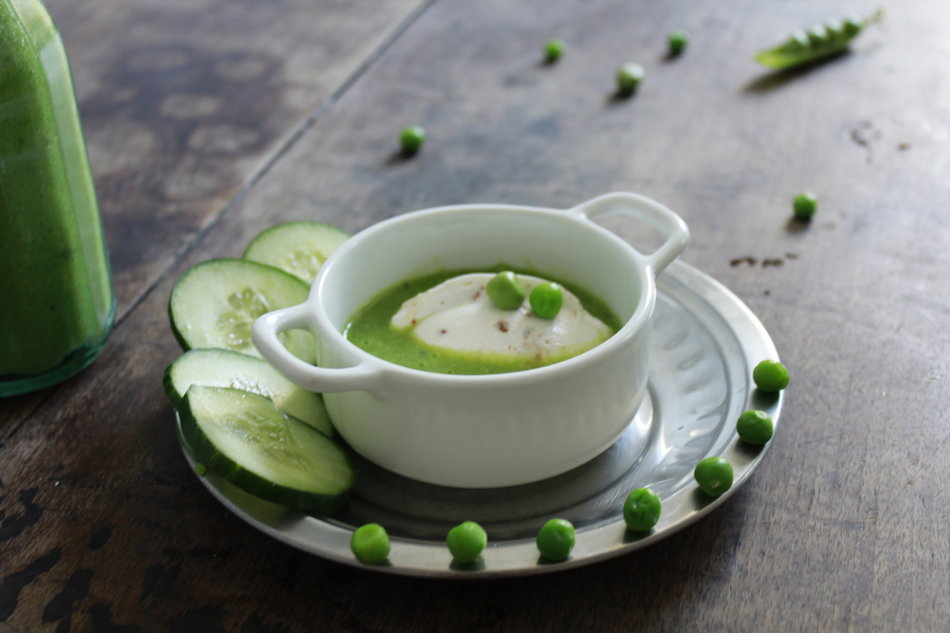
It's a super-easy recipe, but you're going to tell me that peas aren't super-diet, right? But when combined with cucumber (water in the form of a vegetable), peas become a friend. However, if you're skeptical, I'd advise you to enjoy this little soup at lunchtime, when peas (aka FECULENTS!) are allowed, if at all. To make this recipe, fill a saucepan with half a liter of stock (or gold kub) and bring to the boil. Cook the peas with the mint (reserve a sprig for later) for 15 to 20 minutes. Meanwhile, clean the cucumber, peel it and cut it into cubes. Once your peas are cooked, drain them and save a little of the water from the stock. Now, take out your blender and blend together the cucumber, peas and a few chopped mint leaves, a little salt and a little pepper. If the cucumber doesn't give off enough water for the blender to work properly, add a few centilitres of stock and try again. TA-DA you now have your soup, which you can chill for a few hours. Meanwhile, mix your fromage frais with the sweet chilli pepper in a small bowl and use two tablespoons to form dumplings, which you'll place in the center of your plate when you're ready to serve! Enjoy!
DIY COL CIRCUS
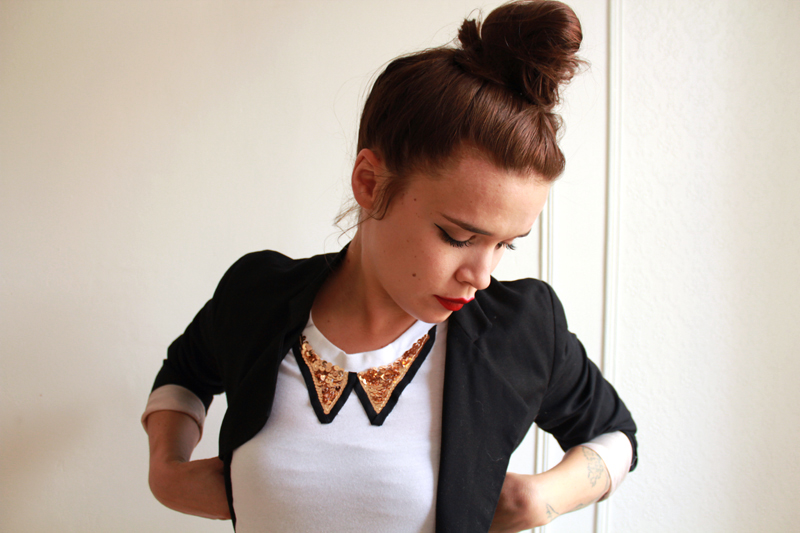
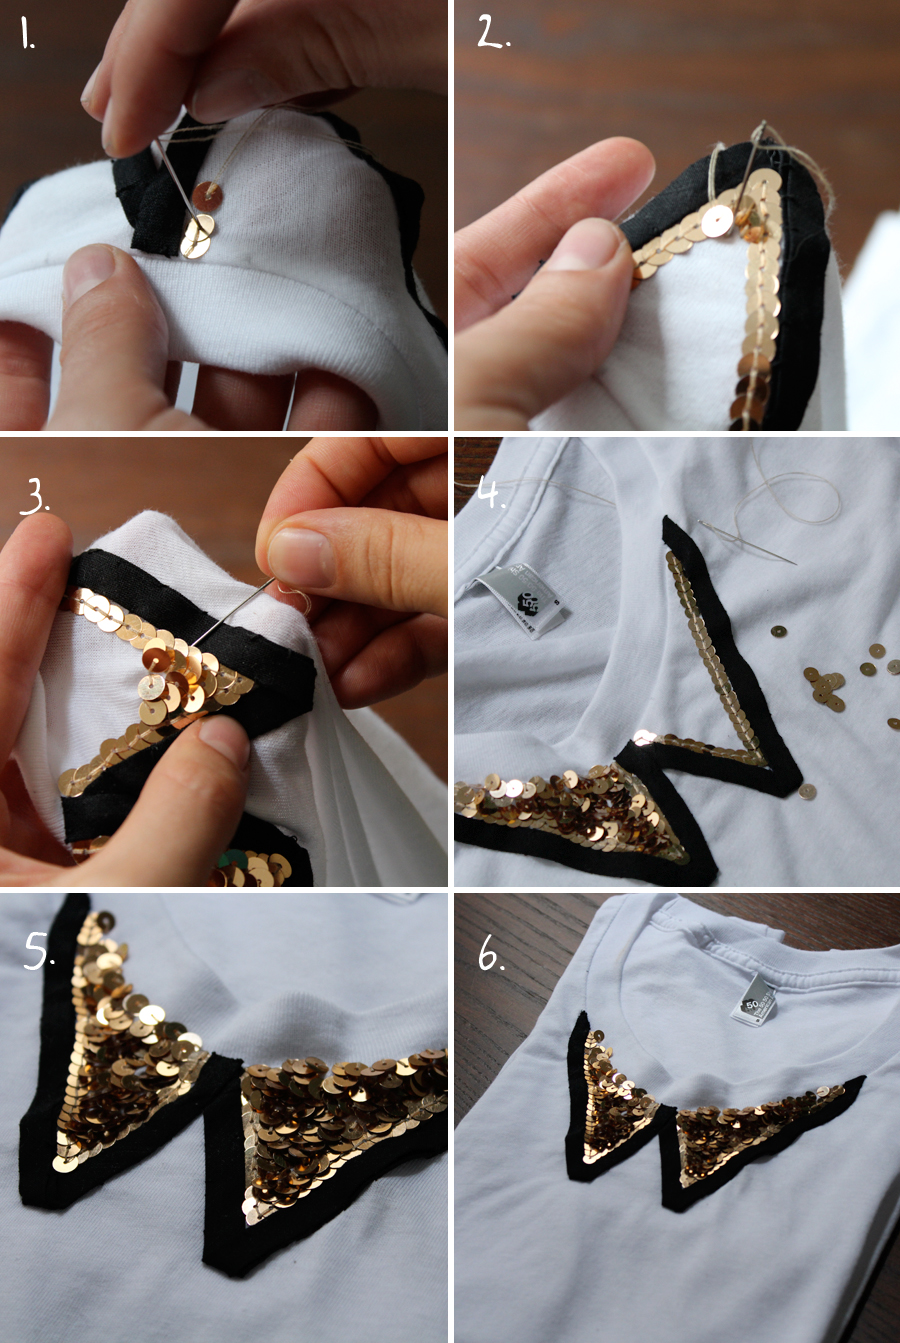
A little back-to-school DIY, to get you going again slowly, and also to make you feel better about embroidery... The other day, I was on my way to I don't know where, but I came across a young woman wearing a plain white tee shirt with a collar with gold flaps framed by two black stripes... Was it silkscreen? embroidery? H&M? or Zara? I didn't have time to analyze it properly or stop to ask her, she was already gone... Too bad I forgot where I was going... "I've got to have that shirt, I've got to have that shirt" echoed in my head. I'm going to get that tee shirt (even if it's a Zara, at least mine will be mine)... I like the idea of customizing an all-white tee shirt, like the classic of classics... I know there are a thousand and one ways to customize this basic, but I wanted to try this version and I'm a bit proud of it! I think that with a nice lipstick and a blazer, the white tee shirt can be super chic!
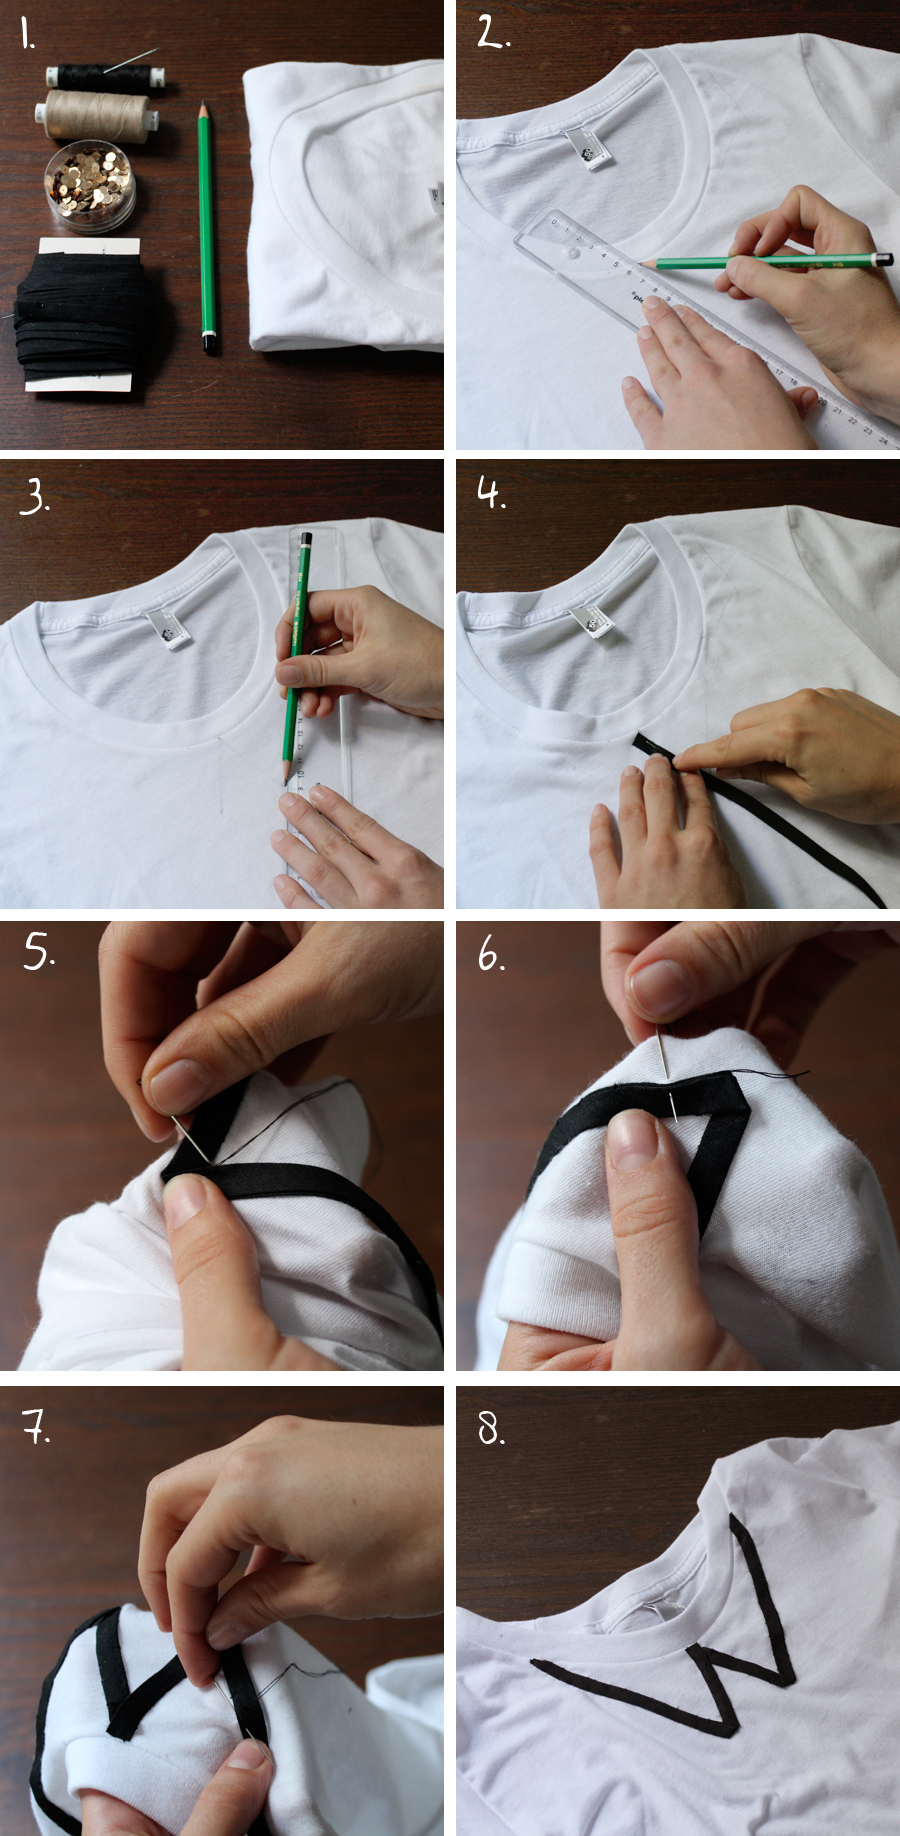
To make this Circus collar tee shirt, you'll need..:- A close-fitting white tee shirt,
- Gold sequins (here I prefer mast, I think it's more chic)
- Black bias tape (1 cm wide)
- black and beige thread
- needle
- pencil and ruler.
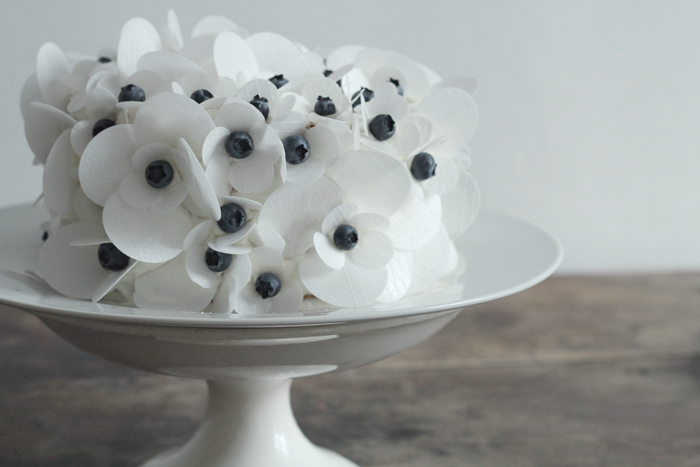
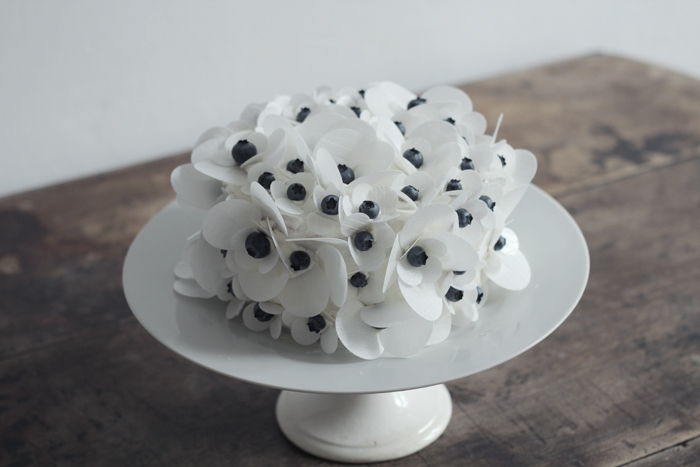
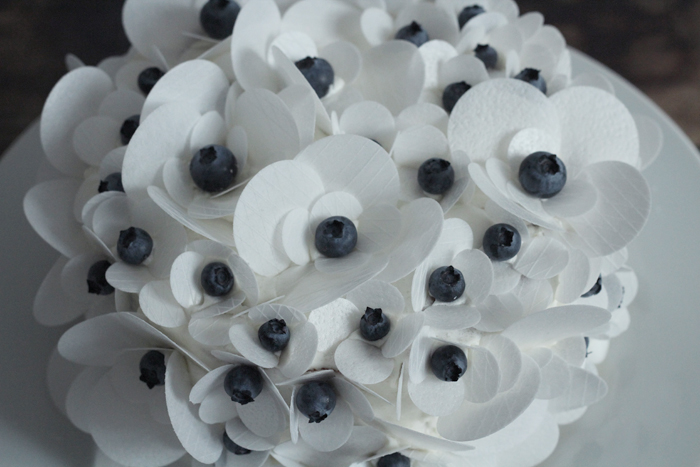
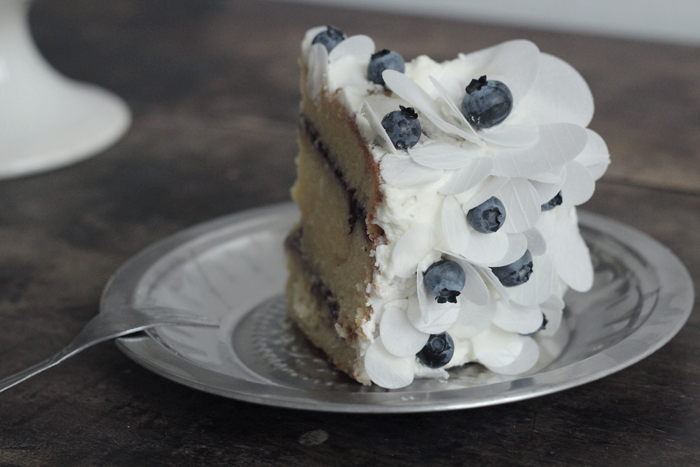
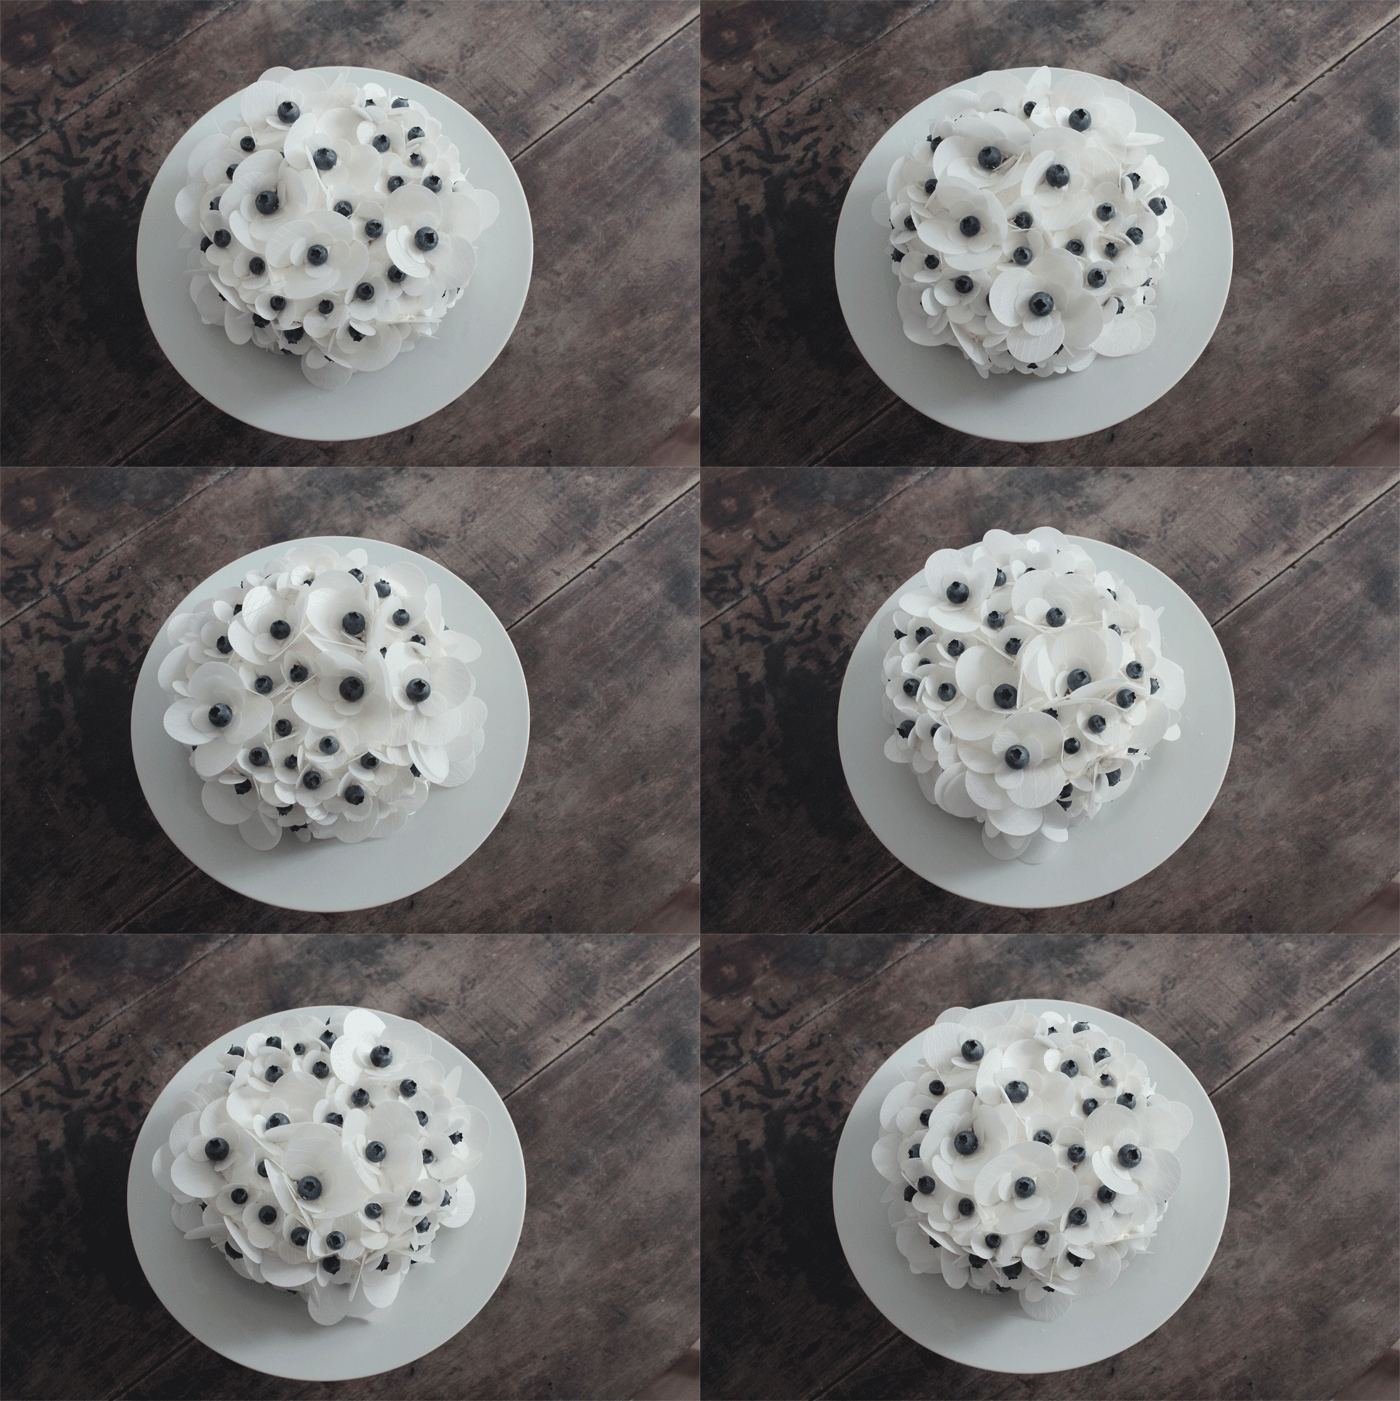
The bathing cap cake...
- 180 g special dessert white chocolate
- 25 cl whipping cream
- 110 g melted butter
- 225 g sifted flour
- 160 g caster sugar
- 3 eggs
- 1 heaped tsp yeast,
- 200g tub of blackberries or low-fat blackberry jam
- a small tub of Philadelphia
- 80 g powdered sugar
- 20cl cold whipping cream
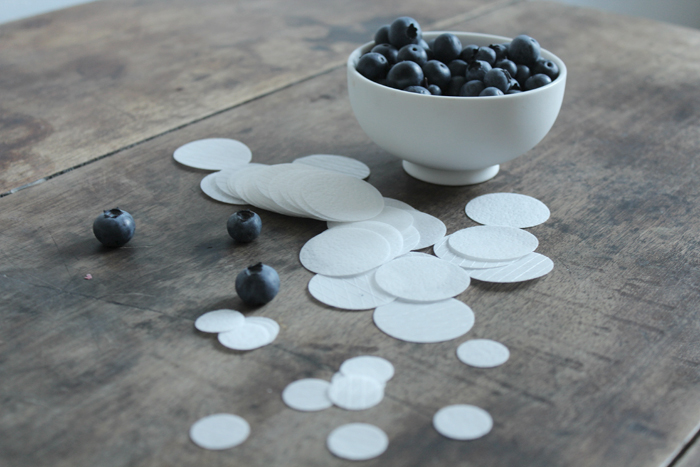
- 4 sheets of unleavened paper
- a punnet of blueberries
BACK-TO-SCHOOL WISH LIST
Oyé Oyé,
It's back-to-school time, and while I can't afford to buy a brand new schoolbag and colored pencils, I want to redecorate my apartment... And I have to say, I've fallen in love with urban outfitters' new "apartment" category. It's simple, I want to buy almost everything... it's wrong and then, of course, I saw things across the Atlantic that caught my eye, so I'm full of desires and not necessarily the budget, but maybe you are... I don't know about you, but September is my favorite month, I think I've sniffed my notebook protectors too much as a child... September means the return of friends, new clothes, I can't wait to put on tights and all that... you know I'm full of contradictions... I've been bugging you for weeks about the sun and how fed up I am with opaque tights, but now I can't wait to wear them with my new boots... What do you expect when it's time: it's time! I'm so excited! Indian summer be damned, I want the tights and a corduroy jacket. In the meantime, here's my back-to-school decorating wish list...
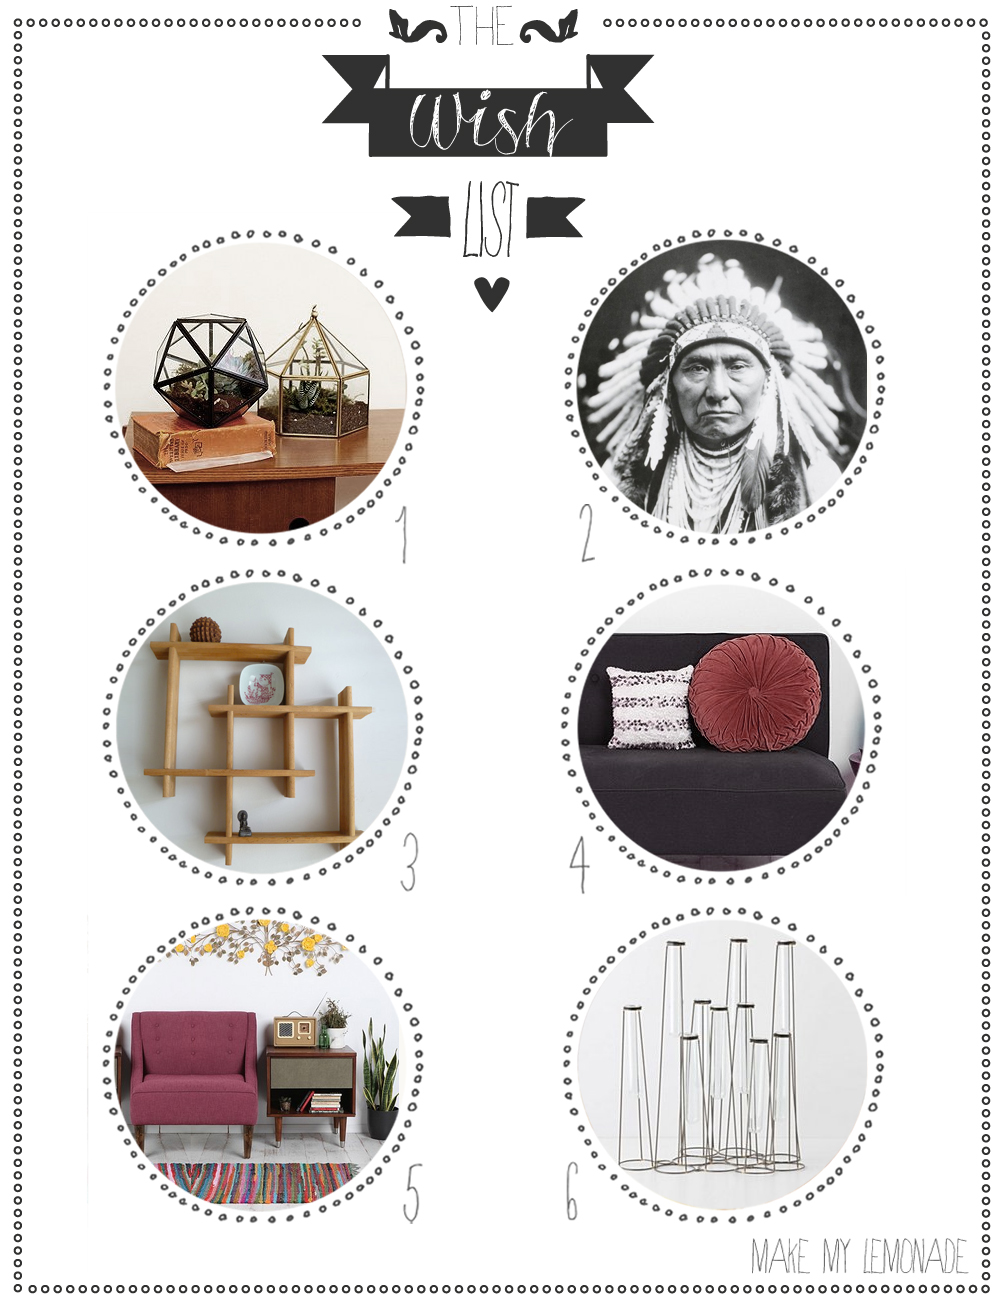
1# Terrarium Urban Outfitters ( it's mine!) 39$, 2# Indian poster la redoute 25,49€, 3# Vintage shelves on Etsy39€, 4# Round velvet cushion Urban Outffitters 34€, 5# rug Urban Outfitters from 14$, 6#Vase Antropologie 68€.
aircraft wish list
My little cats...
Today is a serious day. I'm packing my bags. I realize that I'm almost over super ready. I don't even feel like I've forgotten anything crucial. But I realize that I'm far from being an airplane scout... I don't have the chew-gum for my ears, nor the moisturizer and lip-stick, still less the sweater that goes with it, nor the jogging (?).... At the same time, I've read so many different things about air travel that I feel like you'd have to travel in your pajamas to fit in. I remember images from the beginning of the aeronautical era, when travelers were all dressed up in their Sunday best, because well, it wasn't every day you got on a plane: ok, I admit I'm nostalgic, but not too much, I'm not sure that hanging around in 12cm heels in an airport is a good idea, but maybe there's a happy medium? Airport fashion god help me, pleeeaaase. I may seem like an airport novice, but I've already traveled quite a bit (I'm not kidding...) But I feel like my brain is like a magic slate when it comes to airports, and every time I travel I get as excited as if it were my first time! I won't tell you about the time Justine B and I had a 12-hour stopover in Moscow, which was epic, but next time I promise!
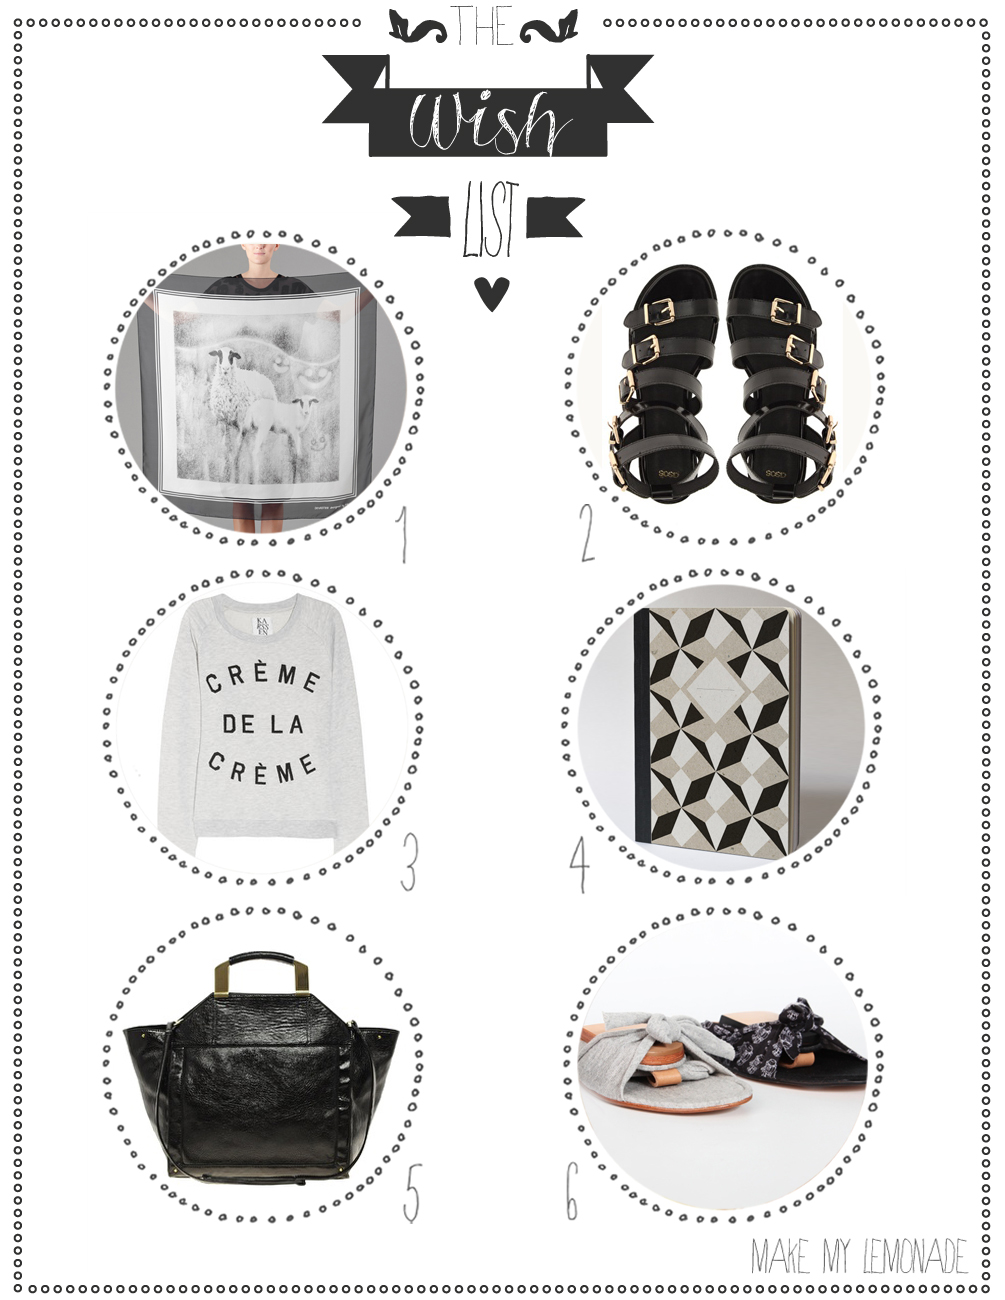
I really want a Dévastée scarf from the site l'exception at €109 but 100% silk and made in France! Flat sandals Asos 55.30€ because they're hot... the sweater of your dreams "la crème de la crème"! Zoe Karseen net to wear 94€... A notebook tiger paper 14€ if you don't know this brand yet, go for it, it's a jewel! And when you're on a plane, it's nice to have an all-purpose bag! Asos 54.30€ to store your life and moisturizer... And my discovery of the season: if your feet have swollen on the plane and look like paupiettes in your Asos sandals, slip them on! pleat...jersey and leather sandals that fit everywhere, especially in your asos tote bag... but I'll tell you more about pleats soon!
DIY "Louis Vuitton" + CONTEST!
THANK YOU!
It is with barely contained emotion that I write this post... 2057 likes this morning on facebook so it's decided, every 1000 ( can you believe it!?) I'm going to give you a chance to win a DIY... I'm sure this pace will slow down, but let's make the most of it! And today, as well as winning you the "Louis Vuitton" bag, you'll also be able to win the Etsy vacation notebook (so cool!) with lots of DIYs, lemonade recipes from the all-too-strong "j'veux être bonne"and lots of other things to keep your little fingers busy during the vacations (even if you don't win: go to the esty's blogthere are plenty of other surprises every day...) I'll tell you an anecdote about the scale of the "thing" the other evening, after giving in to the call of the Mexican down the street... We were sitting on the terrace when a very pretty woman came towards us, determined and laughing out loud (my lover said: who is she? she knows us, but I can't remember who she is...) and I fluttered around with my nose in the wind, not even knowing what he was talking about... And then the shock, the extreme blush: "I've just read your latest post, I'm following your blog, you've got to keep going!" she runs off... OH MY GOD! Ok ok, everything's fine, just breathe, just long enough for me to come to my senses (and for my lover to laugh at me properly). She comes back like a fairy on her bike and we chat, she's so cool! All this to say that it's great to meet you... 2000 Thank you, you're the best! to win this bag, it's easy: just leave me a little comment! kisses!
EDIT: I'm new to contests, but this one's open until Friday evening!
 To make this DIY, you'll need....
- A leather hide or even very thick transparent oilcloth...
- A cutter (preferably new...) or an exacto (a kind of small scalpel)
- Thick thread (cord) and a leather needle (so much simpler...)
- green scotch glue
- and the pattern you've downloaded HERE!
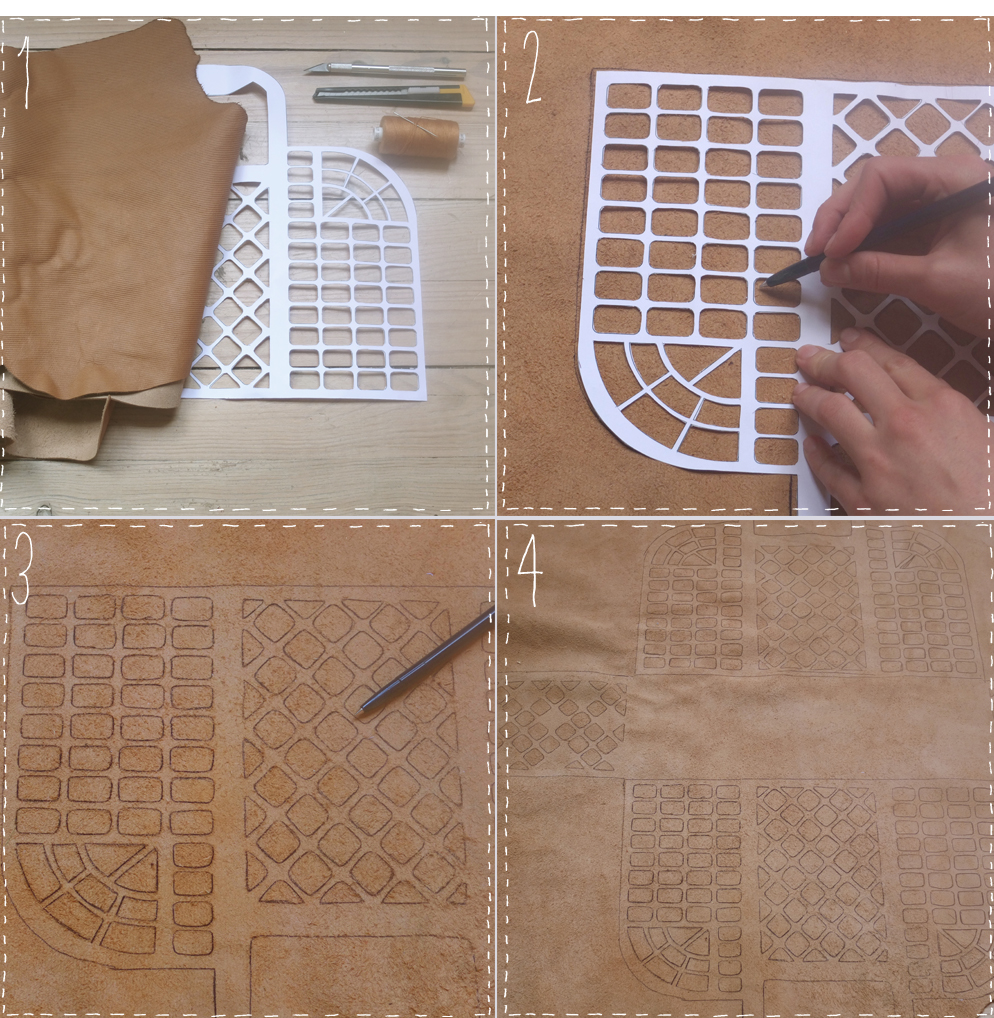
As you'll see, it's a super-easy DIY, you just have to be patient - yes, it's a bit long, but most of you are on vacation... Start by transcribing the pattern on the skin (on the back, it's better) fig.2 & 3. Then draw the other parts of the pattern so that your bag is in one piece fig.4. You'll have to be clever, and think about the rest of the bag before drawing the first part...
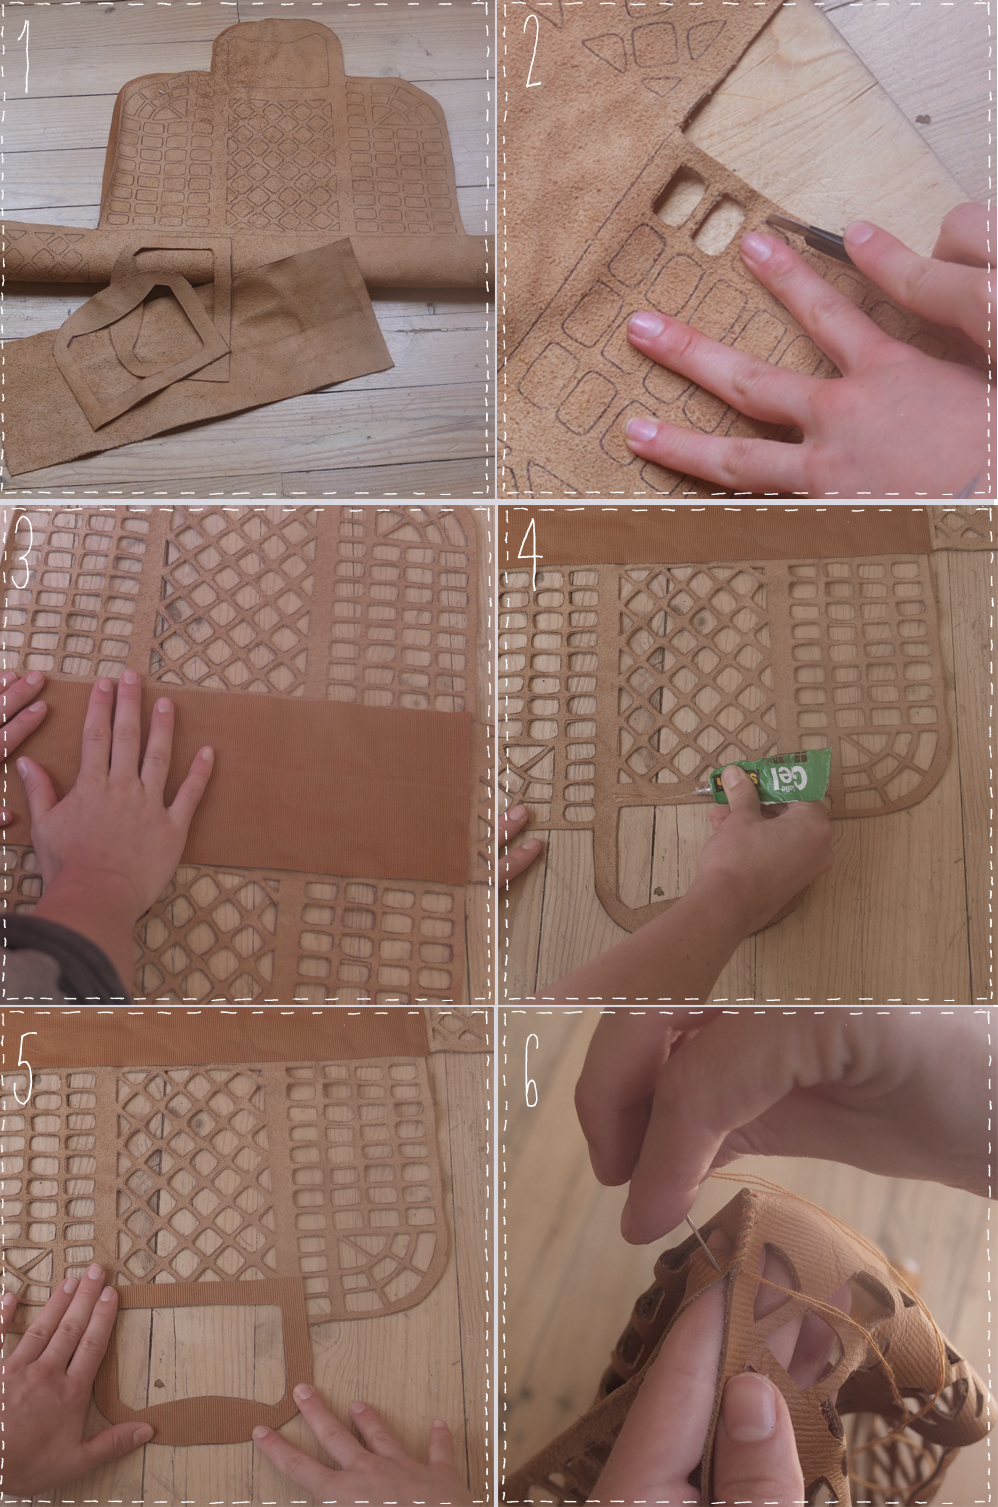
Now you've cut your bag, the bottom reinforcement and the handles fig.1. Now it's time to get down to business: sit back and relax in the sun, or make it a rainy-day activity... Get out your chopping board and cut out each little square fig.2. I can tell you're freaking out, but to be honest it took me a good two hours, plus I was watching movies, so if I can do it.... you can too, I promise. Once you've got your whole bag openworked, glue the various reinforcements and place them on the bag fig. 4 & 5. Finish the first part of the bag by hand-stitching each side (indicated on the pattern). AND TADAM you've got a bag with holes!
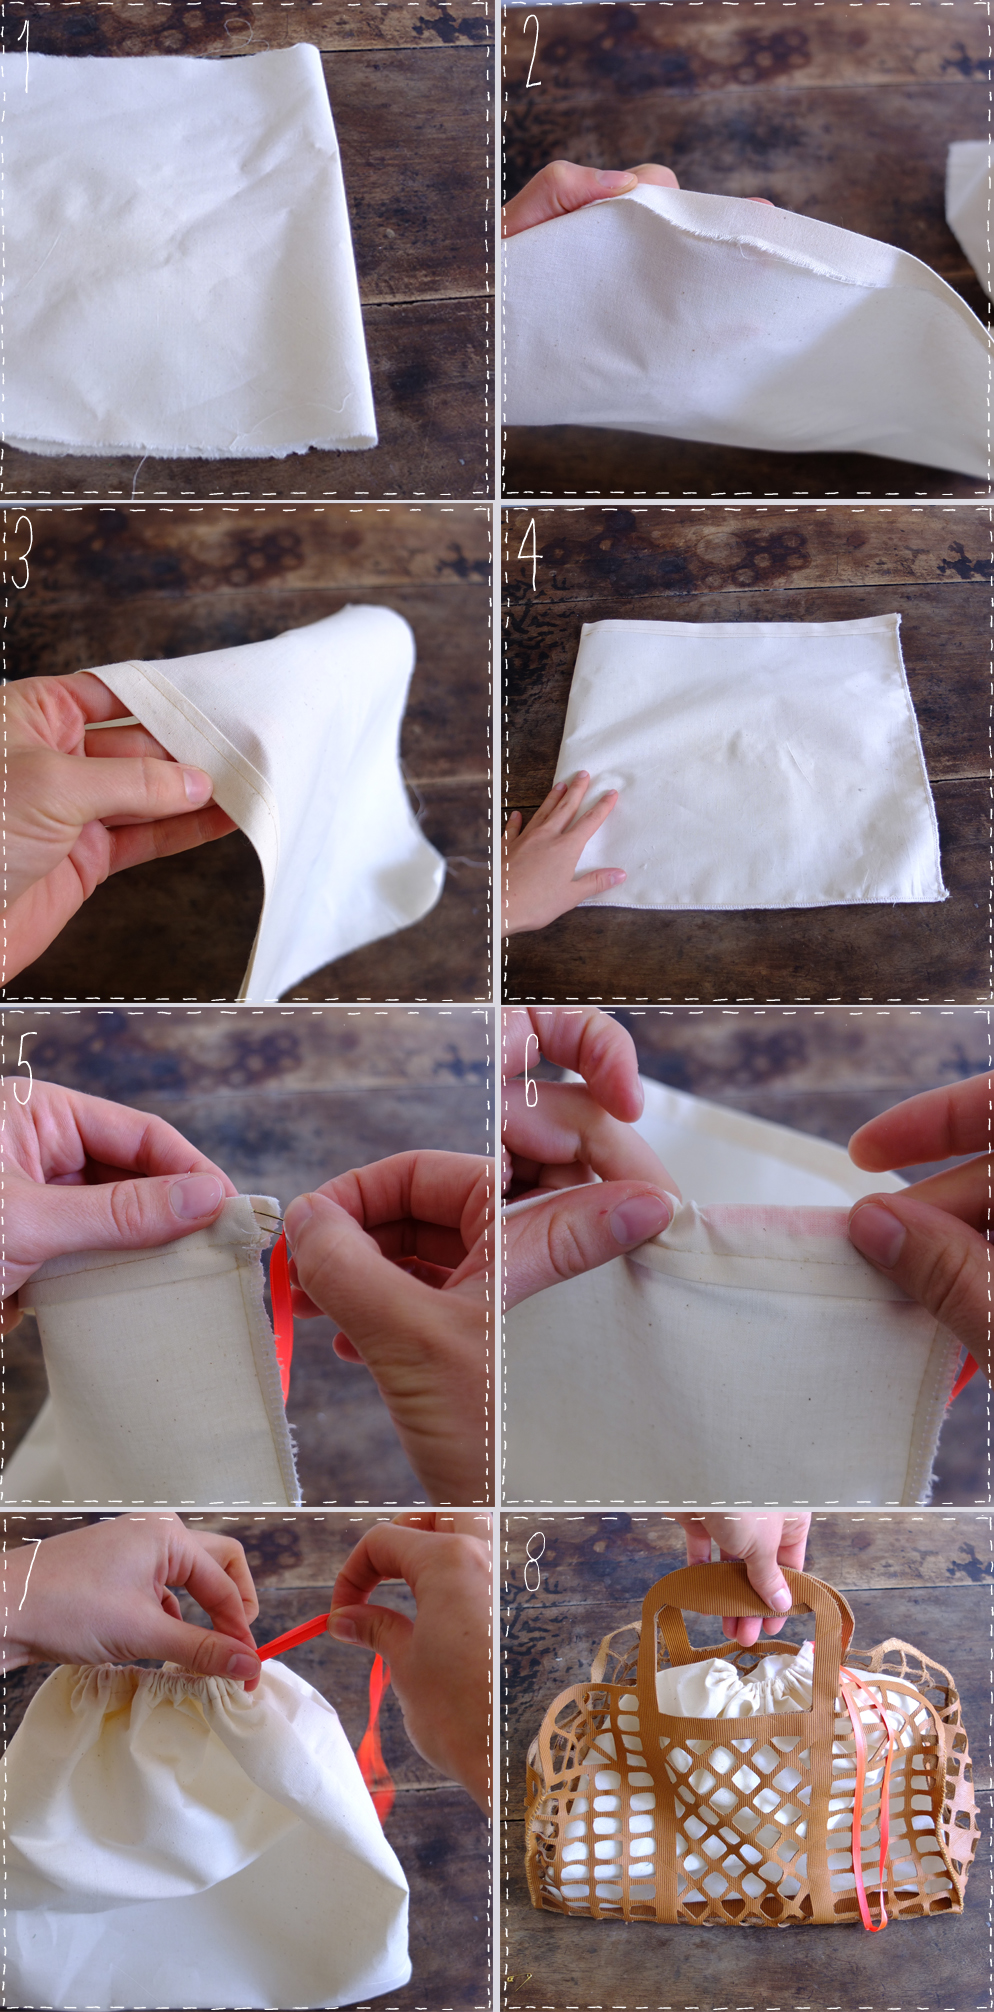
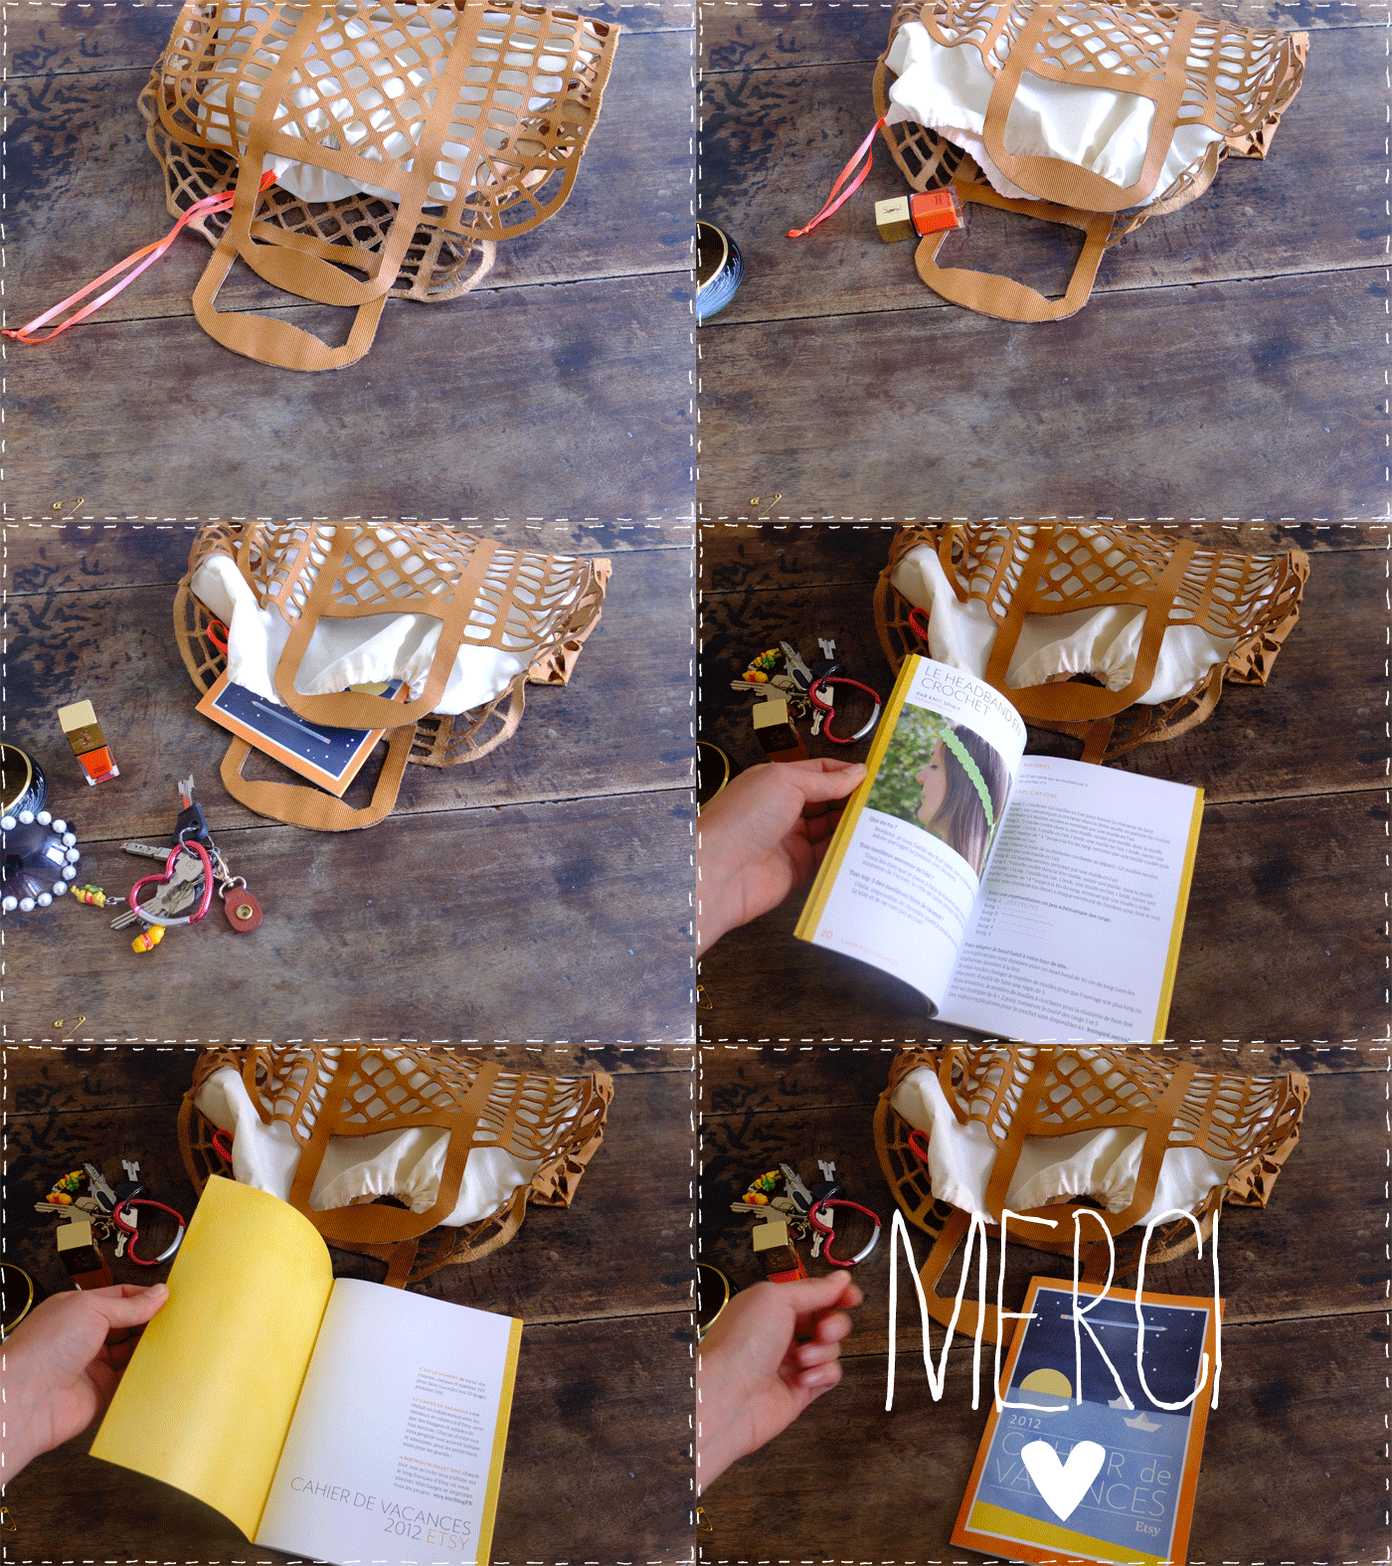
To finish off your bag, so as not to lose any of your belongings, I've prepared a little pouch in beige patterned canvas with a neon pink/orange cord. It's really very, very simple: just cut a 37cm x 70cm rectangle. Fold your rectangle in half lengthwise (i.e. 35cm x2) fig.1. Use your iron to make a first fold (along the whole length) fig.2, then make another fold on the first one, and you've just made a hem! easy, and stitch (for too close to the edge) fig.3. Keep your machine on, and sew the bottom and side of the bag (up to the hem, important for the rest...) Then, using a safety pin, hang your ribbon or cord and slide it into your hem fig.5&6. Turn your pouch inside out, fill it with all your belongings and pop it into your leather bag.... TADA! This is a DIY inspired by the great bag My jelly bag by Louis Vuittona much stiffer bag, inspired by our beach toy bags of yesteryear... aaaah Marc Jacob.... plus you're free to make it bigger, just go to your printer and enlarge the pattern (I've prepared the A4 pattern for you... I know you a little by now).
[:]THE DIY SWIMSUIT
Hola!
I started to build up the suspense yesterday with this DIY, and I hope we won't be disappointed. I told you I couldn't believe it myself, not so much the realization itself, but the fact that I'm showing off my swimsuit on the Internets! Yes, I know you can't see much in the photo, but you should know that I don't show my bikini to just anyone... no, no. For the record, in the course of my blog review, I got lost on Alix de the cherry blossom girl who needs no introduction... and I saw there this little swimsuit from H&MI'm going to try to make another one for my "yeah beach" week. The h&m one had high-waisted panties, so I thought it'd be easier for you if we kept it simple with elasticated bikini power panties.... and as usual have fun, I did it in water green because I'm mono-maniacal about certain things, but I could have done it in polka dots, so go wild (and send photos!)! Oh yes, and don't worry, the post is a bit long, but that's because I wanted to go into detail, just to be clear, it's really easy, fingers in the nose, the promised bikini!
You'll find the pattern HERE here, it is a Size M , but I give you a tip on how to adapt it to your size!
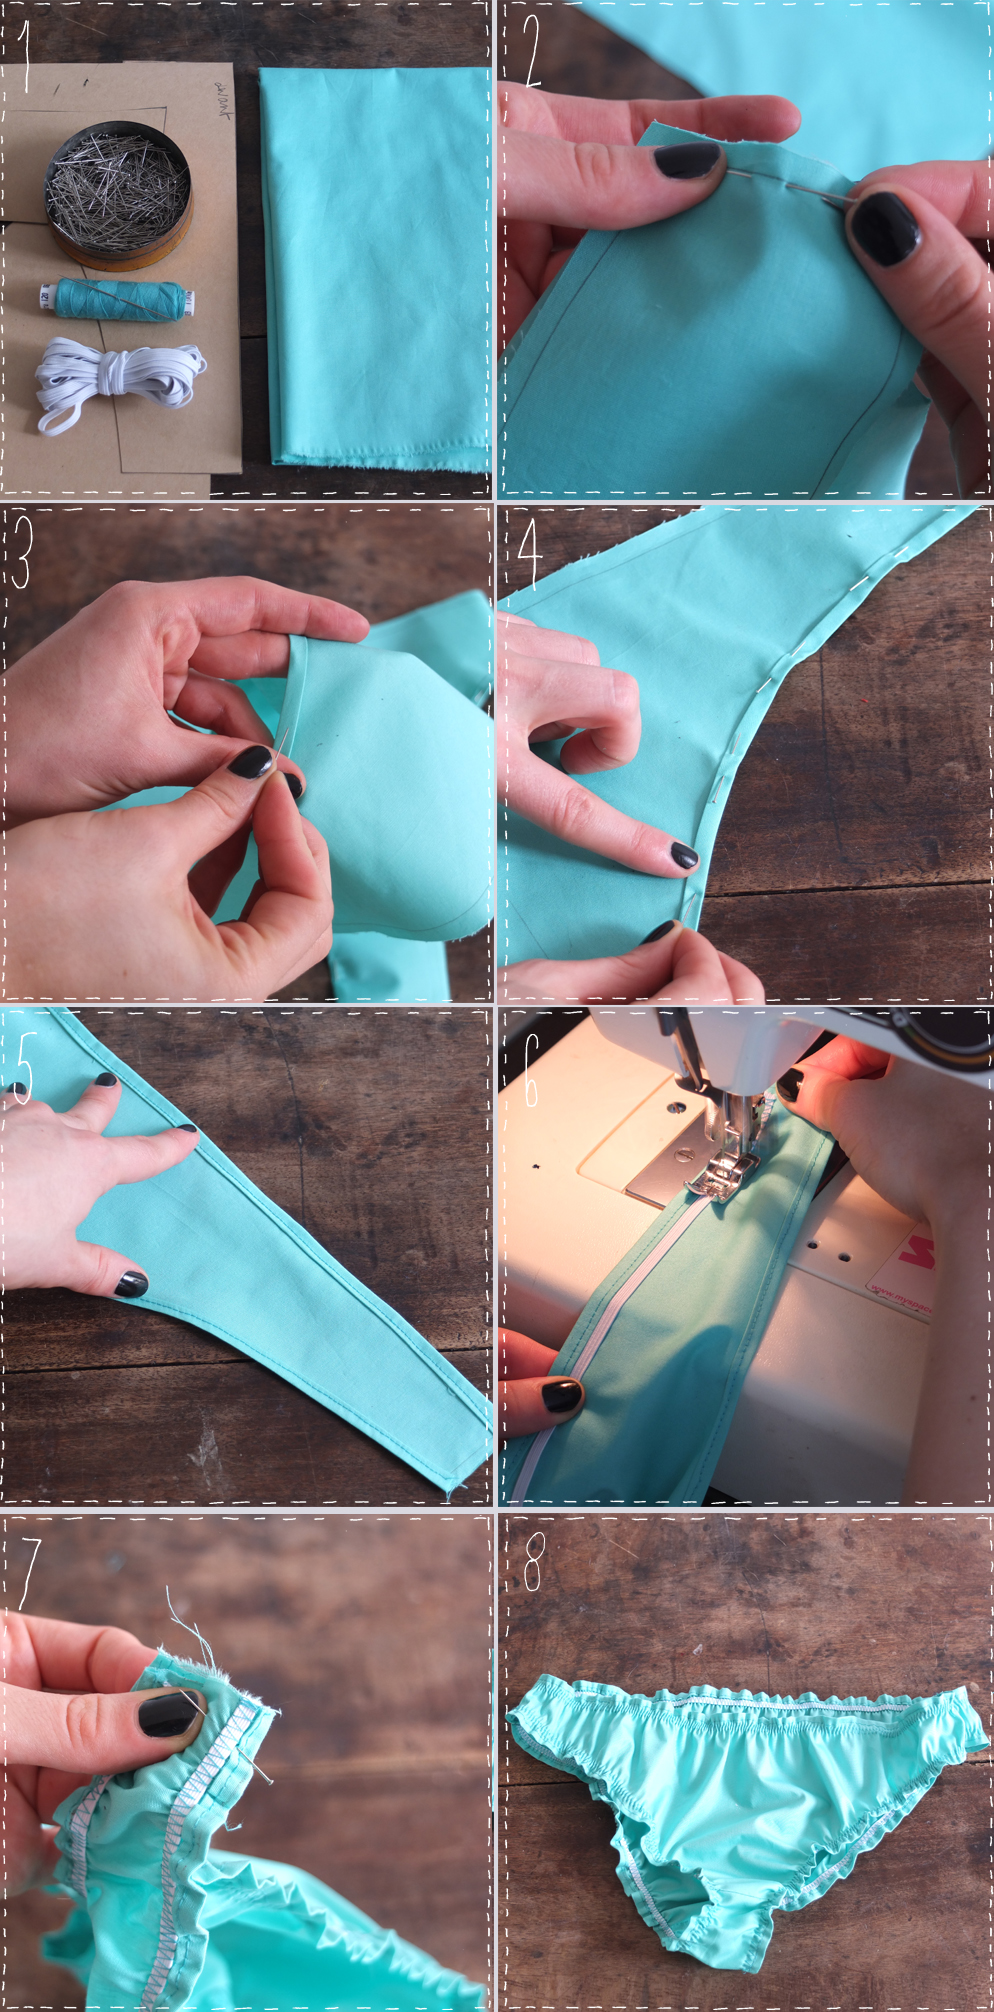 to make this Killer Death Bikini, you'll need:
- fabric about 1m, 1m20 to be on the safe side!
- thread to match your fabric, and a needle,
- elastic (approx. 3m)
- pins
- and a sewing machine!
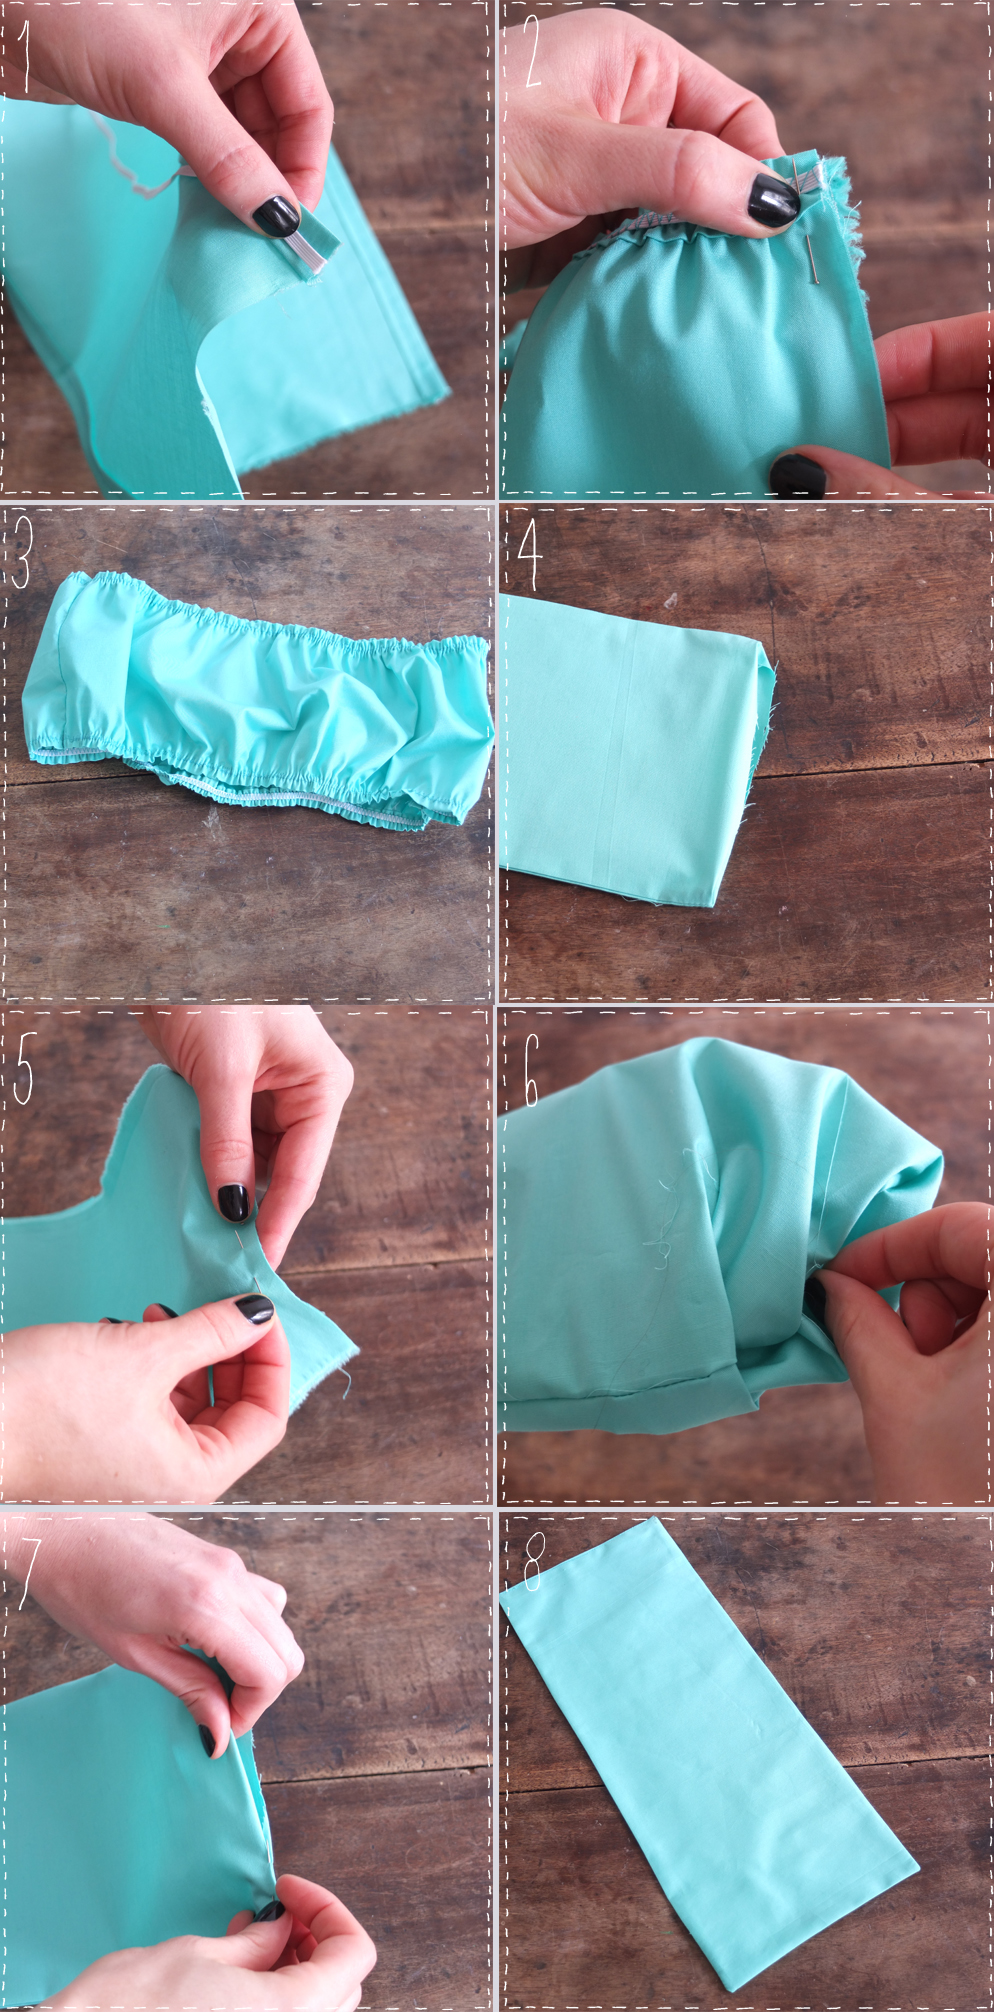
For the bandeau, do as for the panties and stitch the back and front together (just on one side) and hem all the top and bottom lengths, pin and stitch. Then take 68 cm of elastic and, as for the bikini bottom, stitch it to the widest Zig Zag stitch on your machine, pulling (gently) fig.1, then do the same for the other side. Close your headband, pin it (fig. 2) and stitch: TA-DA your headband is ready fig. 3!
Now for the knots. Take your large rectangle of fabric, fold it in half fig.4, and pin 2 sides (length and width) fig.5, then stitch. Next, slide this rectangle of fabric fig.6, to close your band, tuck the edges inside fig.7, pin and stitch to close. Iron well to ensure a flat rectangle fig.8. First part of the bow finished.

Next, take the small rectangle, fold it in 2, pin and stitch it, fig.1. Slip it along its entire length, fig.2, and iron it, so that it's neat and smooth fig 3. Take your large rectangle, place it on the front of your headband and with your small rectangle, form a ring to create the knot, fig. 4. With needle and thread, close this ring with a tight hand stitch fig. 5. Then attach the upper sides of the knot to the headband fig.6. And repeat all these operations for the little knot on the back of the panties, and I recommend you attach the four corners of the knot to the bikini! and TA-DA a brand-new, home-made cotton swimsuit!

It was windy as hell! lots of kisses!
[:]BEACH WISH LIST
Ola les guapas!
Well, no DIY today, but tomorrow, I'll keep you waiting, I know, but it's for a good cause, I'm tweaking, tweaking... you won't believe your eyes (well, I can't always believe what I'm about to show you myself). That's all I'll tell you... mystery! I'm already back from my vacation and I'm really keen to get going again, especially since the sun seems to be shining (choco balls). So I'm packing and unpacking and re-packing for my big departure, I can't take it anymore, I'm hopping around but I promise before I go I'll prepare some pretty things for you and then a little gift before I go too, just to keep you busy during the vacations... I'll say it again, but thank you for coming here in ever-increasing numbers, you've no idea of all the super over-cool projects this little blog brings me, touch wood, so that it lasts, there you have it, that was my Care Bear moment! Thank you, thank you, thank you!
A thousand kisses!
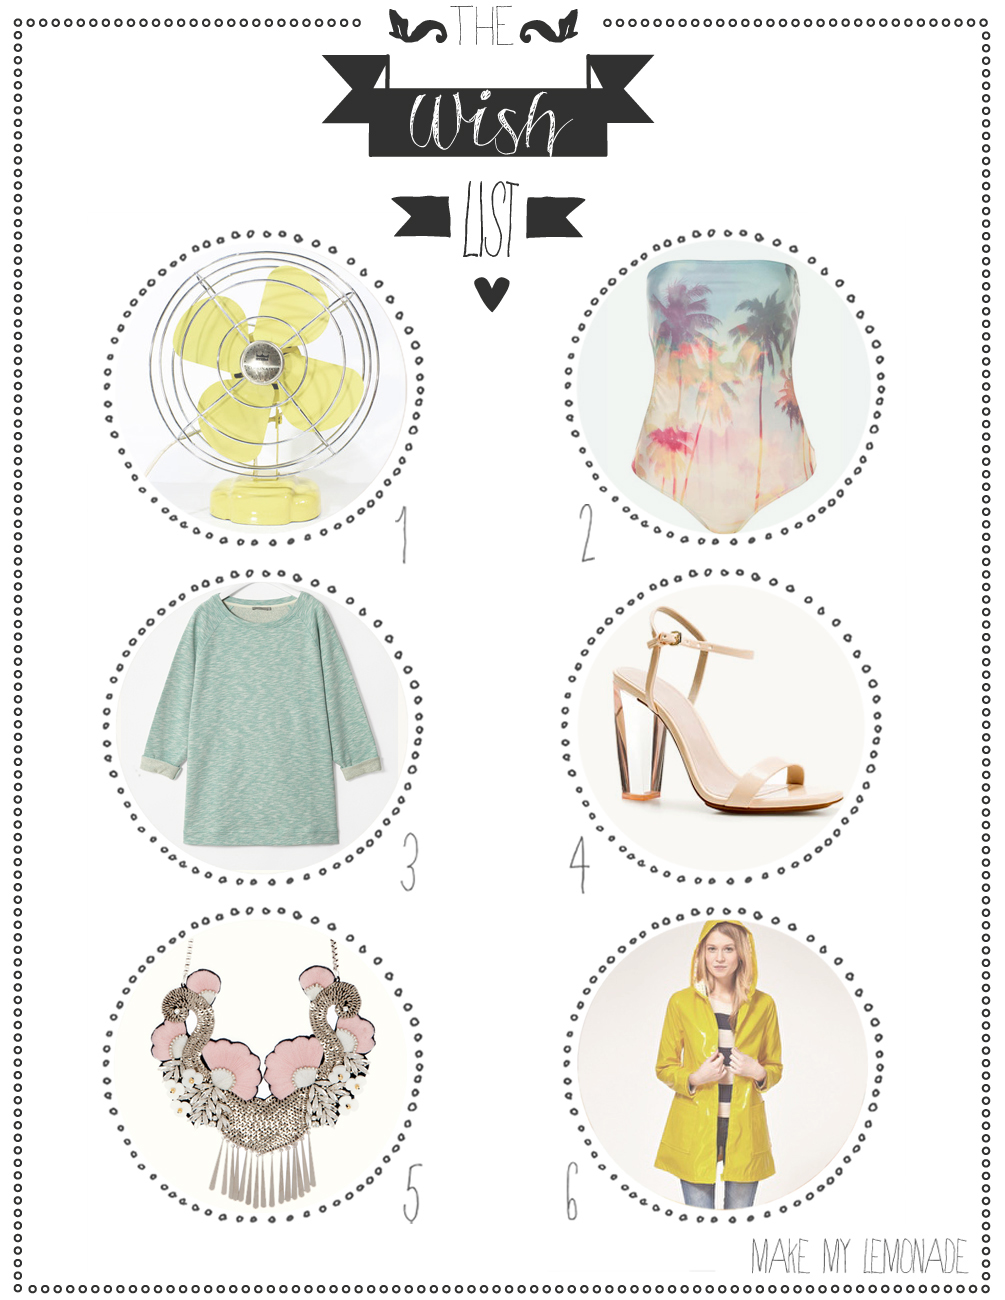
1# Vintage fan 60€ on Etsy. 2# Swimsuit top shop 46€. 3# Sweat dress COS 49€. 4# Plexiglas heeled sandals Zara 49,99€. 5# Sublime necklace Entirely hand-embroidered! Galia Bijoux 240€. 6# And a raincoat because you never know... Asos 69,13€.


