


DIY du merci #9
Hello my little cats!
A small DIY, without sewing, a small DIY, which looks barbaric like that but it's just at first sight, you'll have to get over your prejudices with yourselves "I have two left hands", "I'll never make it", "I have psychomotor problems with my ten fingers" ... I don't even want to hear you say things like that, trust yourself a little please. you haven't even tried!
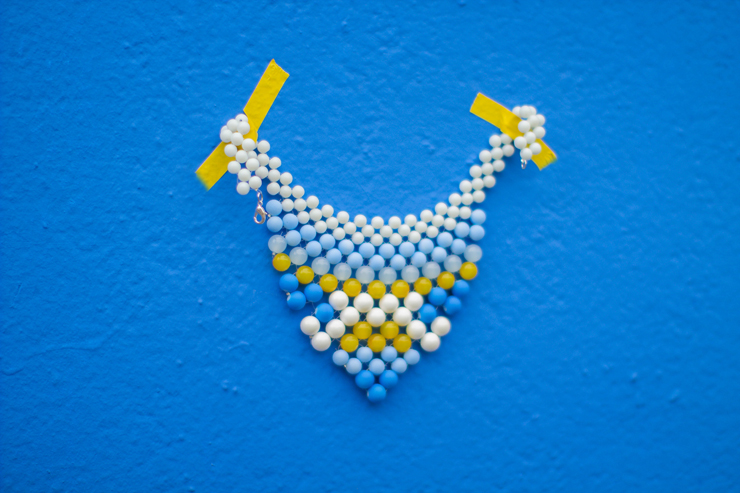
Anyway, for the record, I came across a similar necklace on the internets a long time ago, and on my trip to New York last year I saw it and bought it straight away (I'm wearing it now). here). I love these colors, I think it's becoming obvious that I'm a color addict at the moment... and I said to myself, what the heck, I'll have some more. So I looked at it, dissected it with my eyes and I'm offering you a little DIY on this sunny Sunday, so that you can make your own, with your fingers, your own variations on the same theme... You'll see that the design of the DIY article has been modified a little to make it more "user-friendly", with the large photos of the new design. I didn't want you to have to scroll through all the steps to see the explanations... I hope you like it!
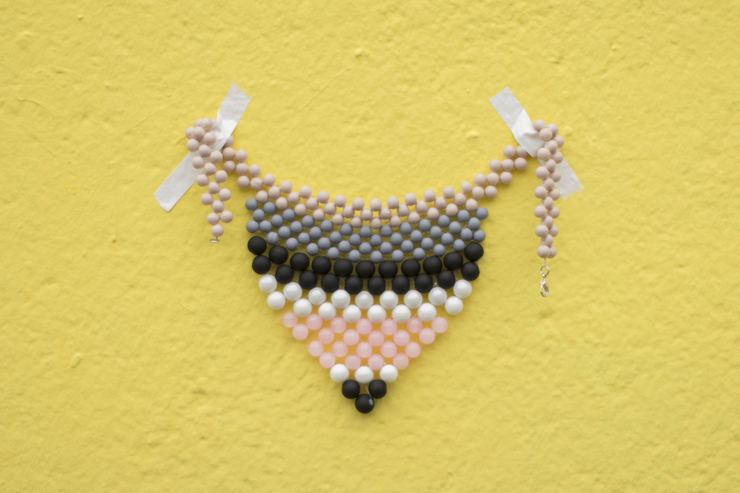
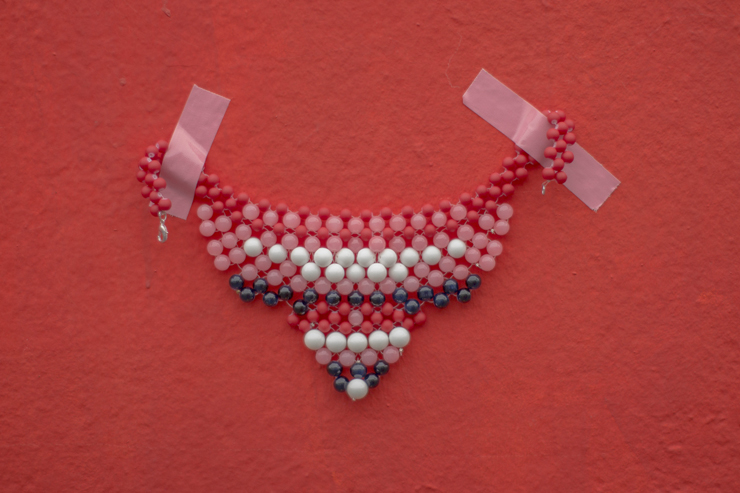
And what would a DIY du merci be without a little contest to win 2 of these 3 necklaces... 2 for two of you and one for me! I love them all, so it's up to you to choose the one you like best... Leave me a comment with your favorite necklace color and tell me what you'd like to see more of around here! Thanks again for your loyalty, I've got some surprises in store for you! And a huge contest next week for the 10,000 facebook followers! I'll draw the two winners on Wednesday at 8pm!
To make this DIY, you'll need:
- - beads of different colors and diameters (at least two different sizes),
- - nylon or cable thread,
- - a clasp, two rings and a dozen beads to crush,
- - and flat-nose pliers.
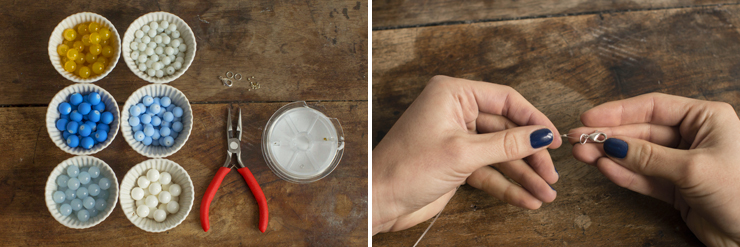
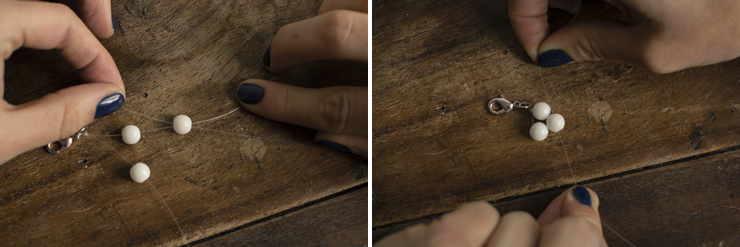
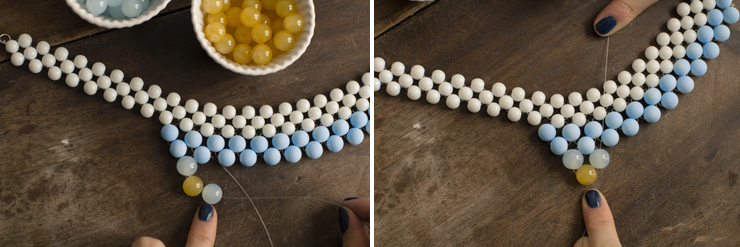
To begin, thread the first crush bead through the nylon thread (90cm of thread), the ring (attached to the clasp), then pass the thread back through the crush bead. Slide the thread over 45cm to double your thread.
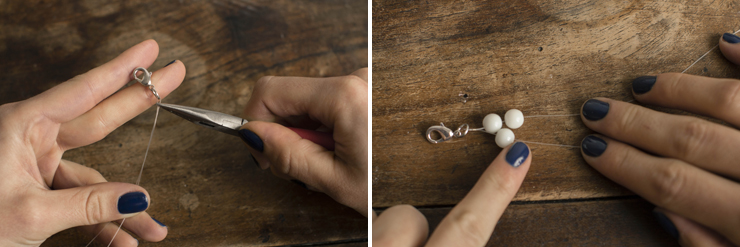
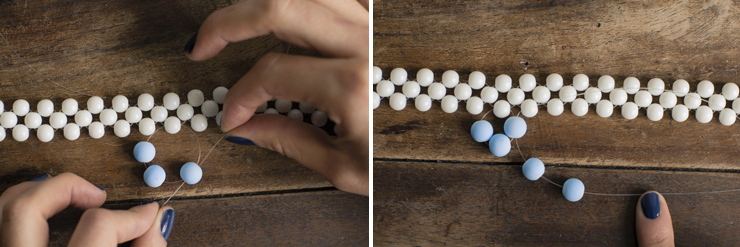
Crush the bead, and start threading two beads on the top wire, and one on the bottom wire - so far, so good...
Take the lower thread and thread it "against the flow" (or in the opposite direction to the first thread...) through the second bead on the upper thread. Then pull gently, to tighten. It's easy...
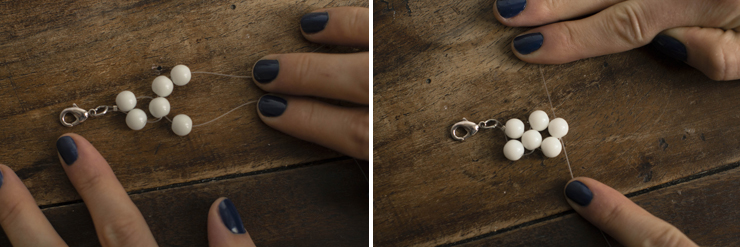
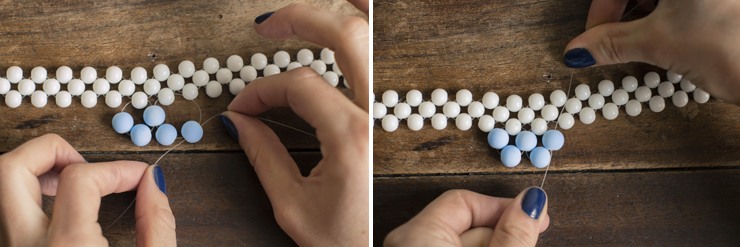
And repeat the operation: two beads on the top thread, and one on the bottom thread. Pass the lower thread through the second bead on the upper thread, "against the current", and pull gently...
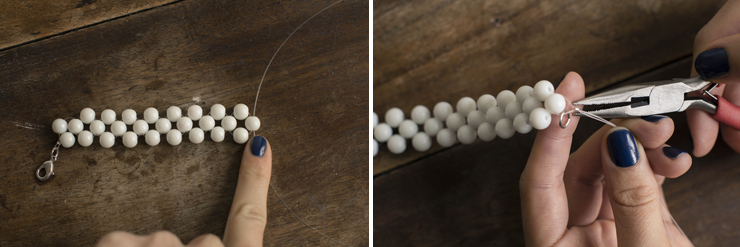
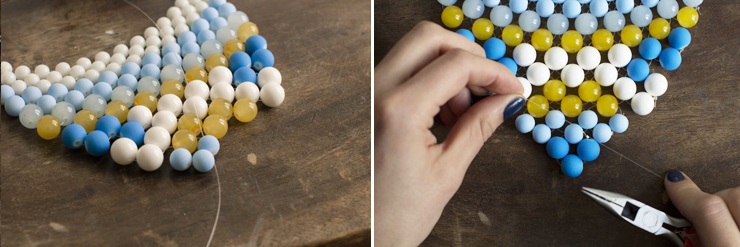
Continue along the whole length, about 36 cm, depending on your neck size. Once you've finished your first row of beads, thread a ring through one of the two wires and thread one or two squeeze beads through both wires, squeezing them to complete your first part of the necklace.
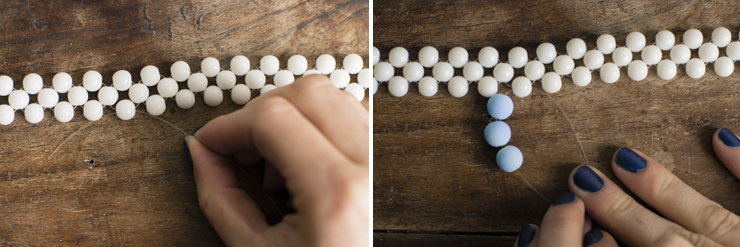
Thread a new, shorter thread (approx. 65 cm) through a bead about 10 cm from the beginning of your necklace. Slide your thread halfway through and string 3 beads of a different color.
Using the same principle as before, take the thread without the bead and pass it "against the current" through the third bead. Gently pull the top thread through the neighboring white bead, and thread two beads with the bottom thread.
Take your top thread, pass it "against the current" through the second bead and pull gently. Don't forget to pass the top thread through the neighboring white bead, which is what links the two rows of your necklace.
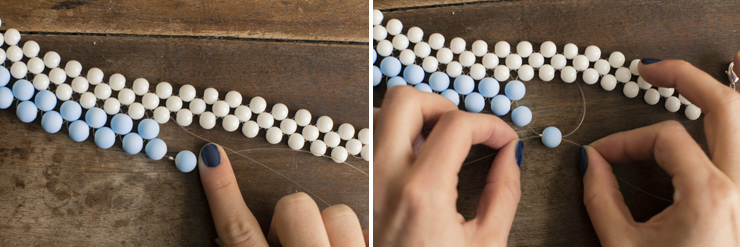
And to finish off your second row, but this will also apply to subsequent rows, I'll give you a trick for securing your two rows. Thread the first bead, a crush bead and the second bead. Pass your top thread through the second bead and also through the bead to be crushed.
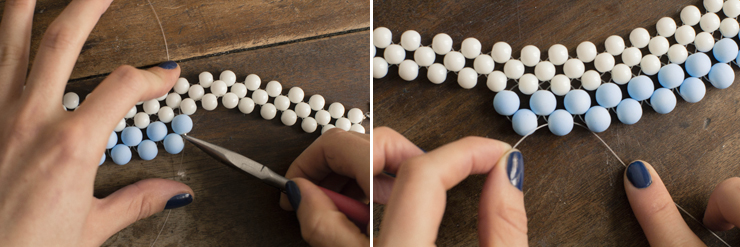
When your two wires are "against the grain" in your crush bead, use the flat-nose pliers to crush it to finish your row and cut off any protruding wires. To start your third and subsequent rows, start offset to give the appearance of a triangular breastplate. Don't start in the first bead, but in the second, and don't weave all the way through, but stop at the penultimate bead.
Then it's the same principle, now have fun with the colors, alternate, create rhythms... it's up to you....
And don't forget to finish with a bead to crush, squeeze hard and TA-DA! If ever I wasn't clear enough, I've put together a little IKEA Illustrator manual for you to download. here... Enjoy!
Now that you know how to weave, I'm sure you'll ask... I'm wearing Nailmatic "NAVY" nail polish ;)... I'll be waiting to hear from you!
And the winners is: Mia and Anne!
