


SACRED AND MARVELOUS ELEPHANTS DIY[:]
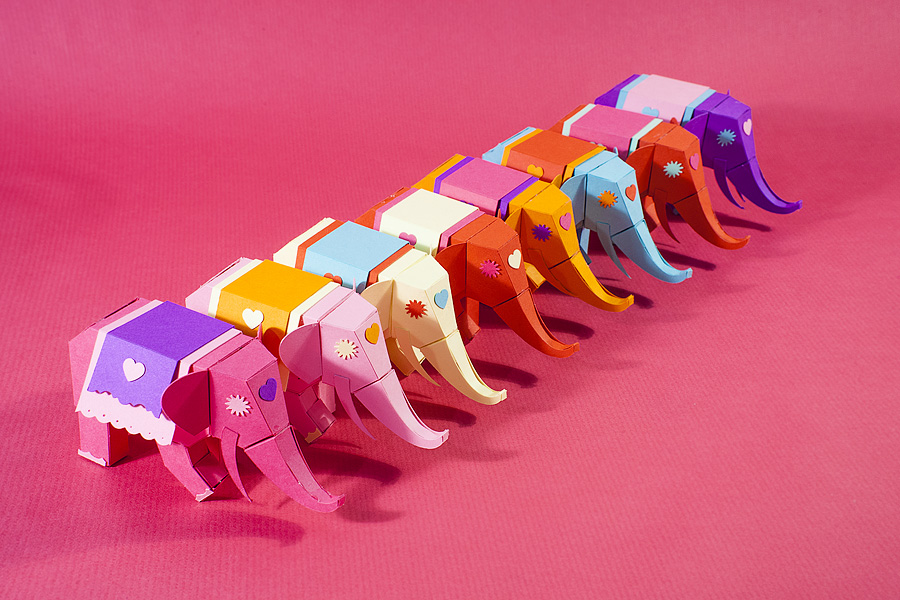
Hello my darlings, if you’ve been following us for a while, you already know about Lorenzo and his incredible paper creations. So for this special Indian week, we went crazy when he told us about his little marvelous elephants! I can’t wait to make a little colorful troop of my own to set on my desk, or spread out in several corners of my apartment, like good luck charms, guardians of my home (but I’m afraid that Frida likes them a little too much to leave them alone). I hope you’ll like them as much as we do, see you tomorrow for the rest of this incredible week!
Hello everyone! I’m thrilled to be back for a DIY that’s a lot easier than the last two. This time instead of an architectural form, we’ll make an animal: an elephant. If you’re patient, you can make an entire rainbow of them easily. Here’s how.
Cost: between 5 € and 20 €, depending on the materials you already have.
Level: easy
Time to make: between 2 and 3 hours for each elephant.
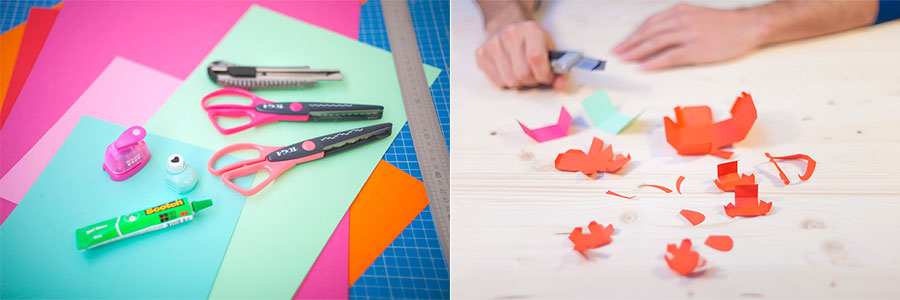
For this paper DIY, you’ll need:
- regular cutting materials (ruler, scissors, box cutter, or scalpel knife)
- glue
- pinking shears (scalloped and others if possible),
- shaped paper punches(heart and sun),
- A4 format sheets of colorful paper (120g/m2 minimum thickness): one A4 for each elephant,
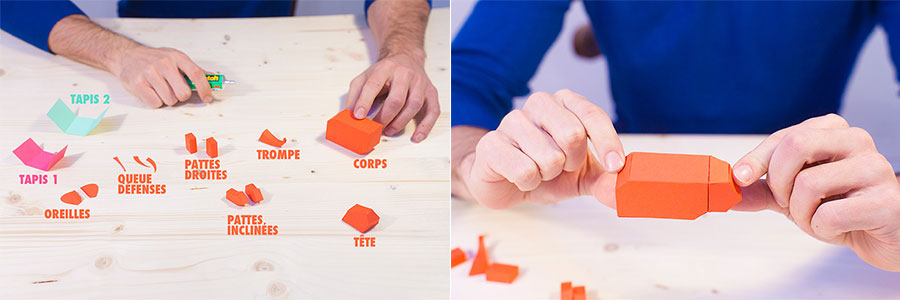
Fold each side, and start to glue the first little pieces: feet, trunk, head, body. These are simple forms, you shouldn’t have any trouble understanding how to put them together following the patterns. For the trunk, bend the paper before gluing it. In this step by step, I’m putting together a red elephant, but I replaced its’ blanket by another elephant’s: a pink and blue. This elephant needs to have it’s head on its’ shoulders. Glue the head to the body.
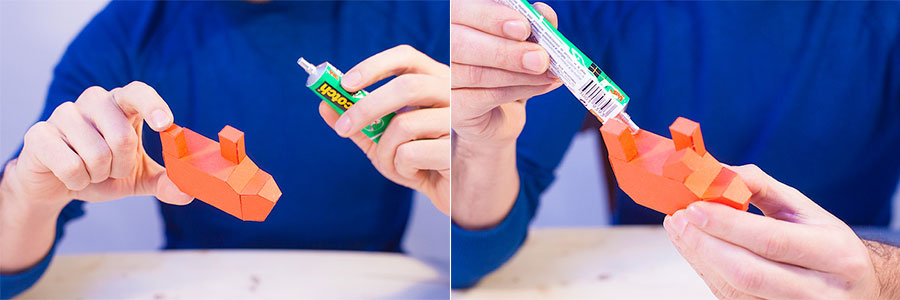
Glue on the straight legs, then the bent ones. Make sure the bent leg glued to the front of the elephant is pointed forward, and that the one behind is going towards the back.
Here’s what it should look like at this point. Glue the trunk to the head.
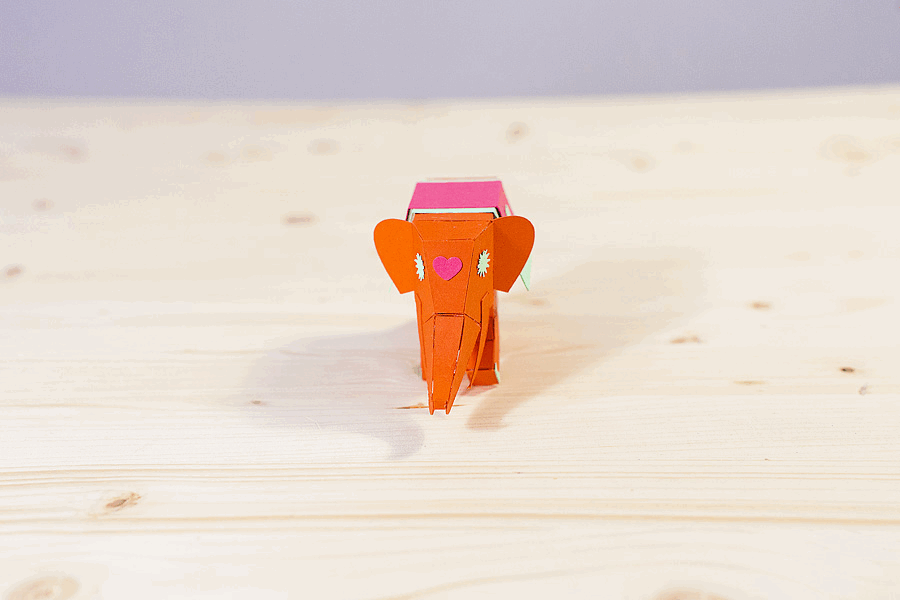
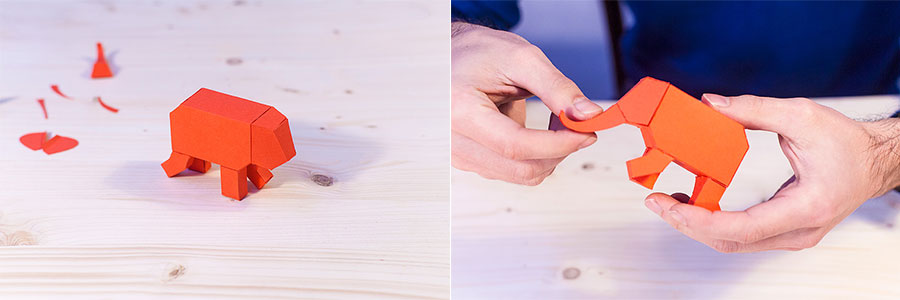
The ears and the tusks. Don’t forget the tail, it's a nice little touch. Give it a slight bend, only glue on the top part.

Now’s the time to use the pinking shears to decorate the ends of the blanket. If you want to be even more detailed, you can poke holes in the scalloped edges using the pointy end of a compass, like I suggested in this article. I suggest using the pinking shears for blanket 1, and an Oriental or Indian shape for blanket 2. Glue the blanket on the back of the elephant without harming it.
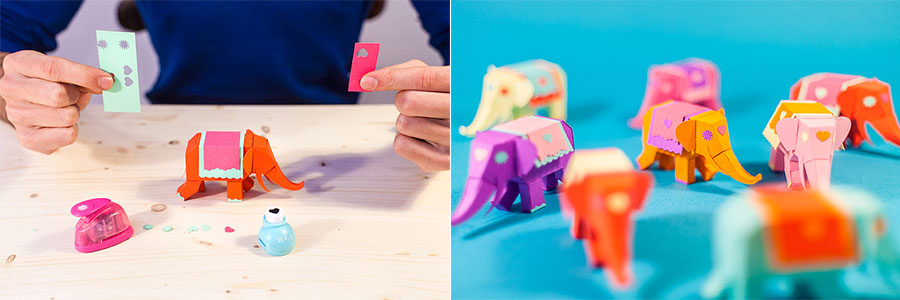
Out of the blanket papers, cut out a heart using the punch (that’s my girly side talking) that you’ll glue on the front of the elephant and the sides of blanket 2. And two suns to make the eyes of your new pet. Nothing goes to waste: you can glue the leftovers from the scalloped edges on the feet to make little nails for it.
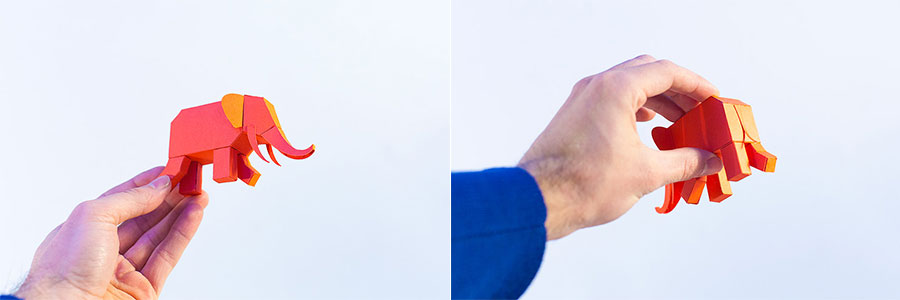
And there you have it!
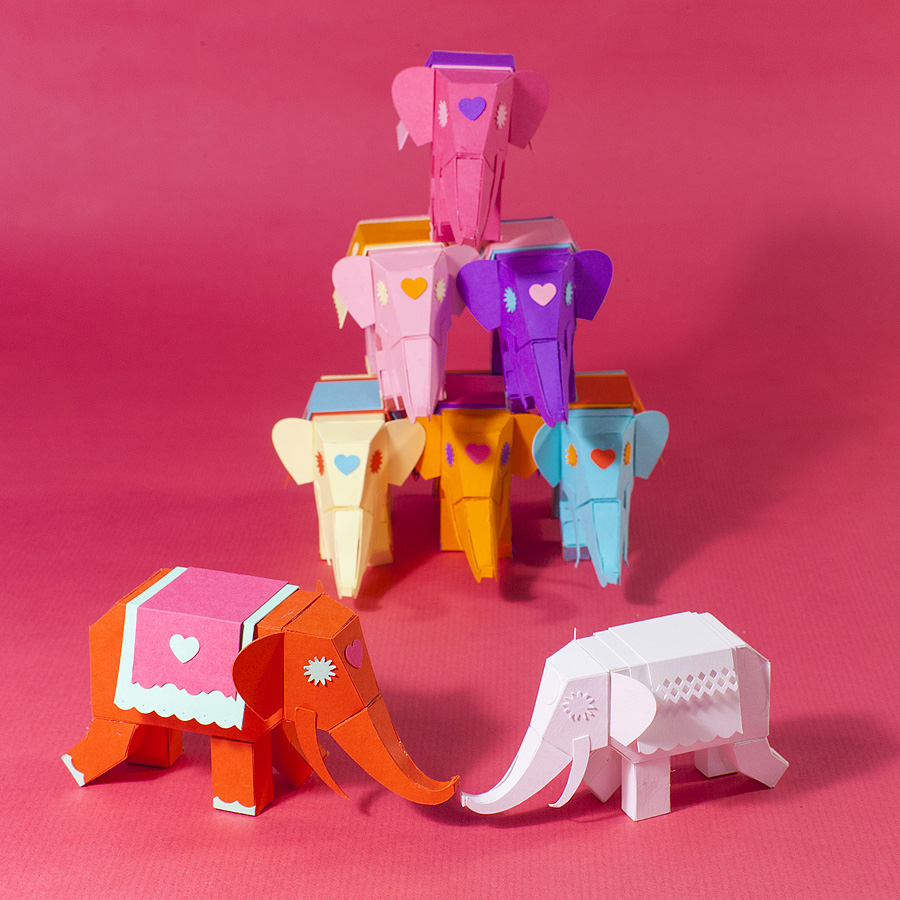
You can make more with other colors, mix up the blankets, and like me, fall in love with your rainbow family! See you soon for new adventures! Lorenzo P.
Translated by Whitney Bolin