The DIY to thank you #9[:]
Good morning my little cats!
A little couture-free DIY, a little DIY that looks barbaric but it’s only at first sight, you’ll have to overstep your prejudices regarding yourself such as «I’m very clumsy», «I will never manage it!», «I have psychomotor troubles when it comes to using my fingers»... I don’t even want to hear anything like that, please trust yourself a little bit. You didn’t event try!
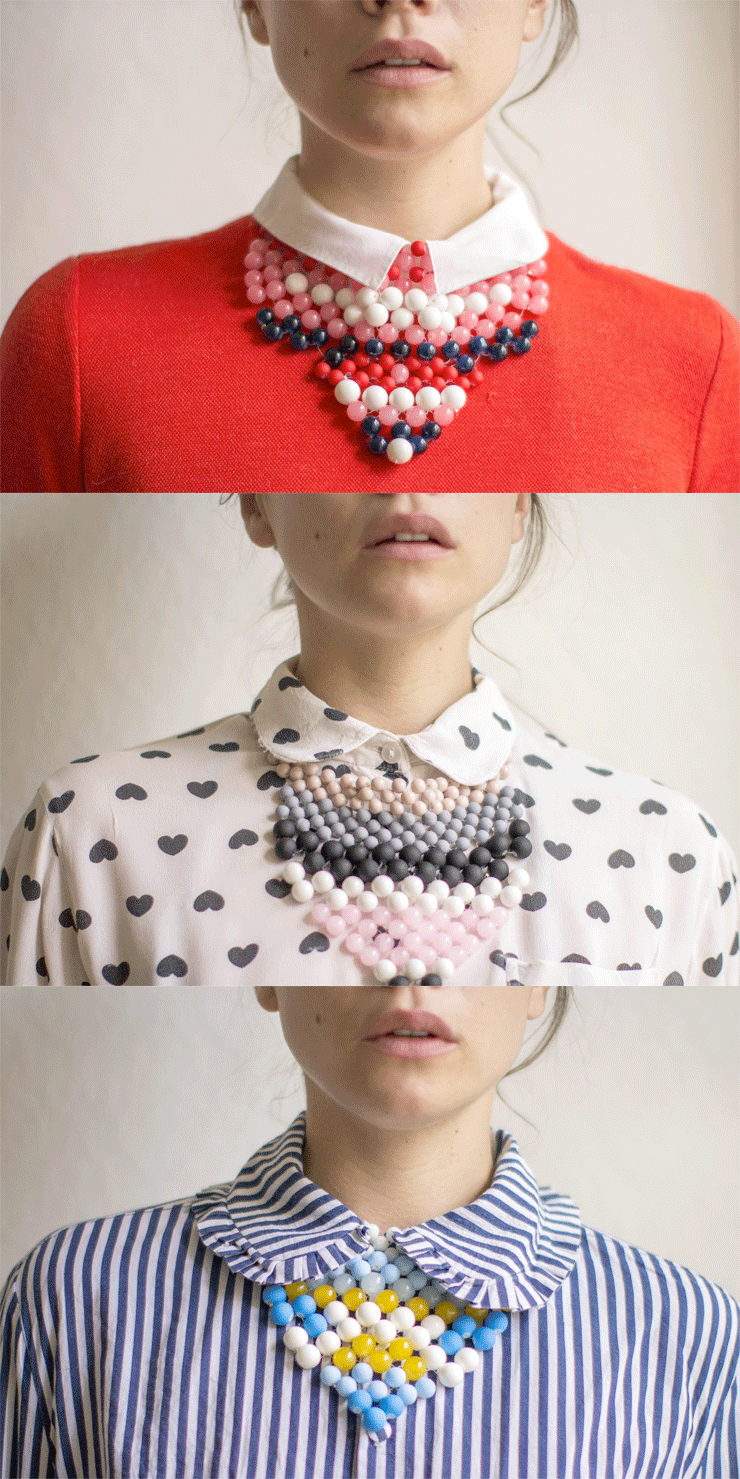
Anyways. For the record I met a similar necklace on the internet a long time ago and when I was in New York last year I saw it and I immediately bought it (I’m wearing it here). I love those colors, I think it’s becoming quite obvious that I am a color addict lately... And I thought never mind I want more. So I observed it, I analyzed it and I can now offer you a little DIY on this sunny sunday so you can make yours with your little hands, your own variation of the same theme... You will see that the structure of the DIY post has been a little bit modified to have more «ergonomics», with the new design and the bigger pictures I didn’t want you to have to scroll through all the steps to read the explanation... I hope you’ll like it!
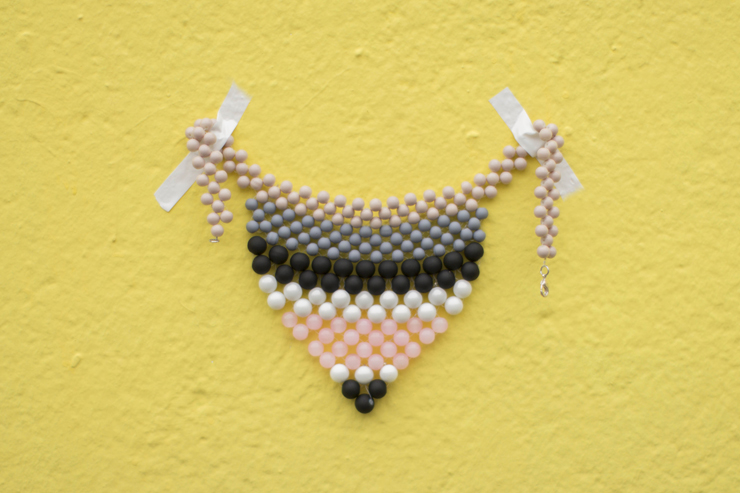
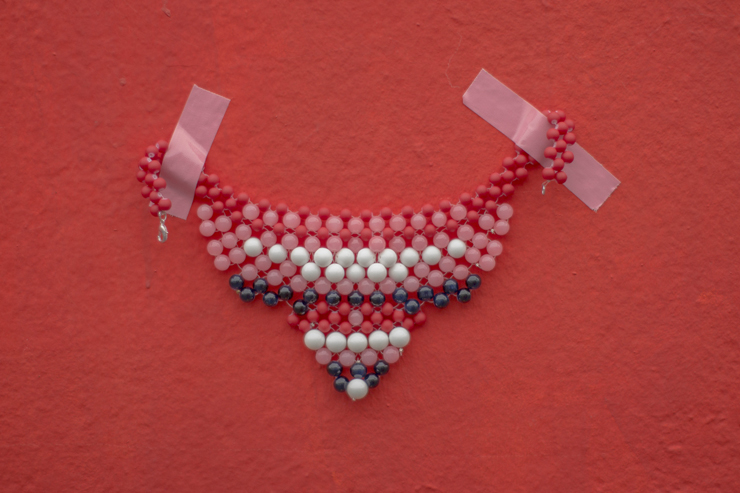
And would it be a DIY to thank you without a little contest to win 2 out of the 3 necklaces..? 2 for two of you and one for me! I love them all, you will choose the one you prefer... Leave me a comment with your favorite necklace’s color and tell me what you’d like to see on the blog more often! Thank you again for your fidelity, I’m preparing surprises for you! And a huge contest for next week to celebrate the 10 000 followers on facebook! I will pick two winners on wednesday at 8 p.m.!
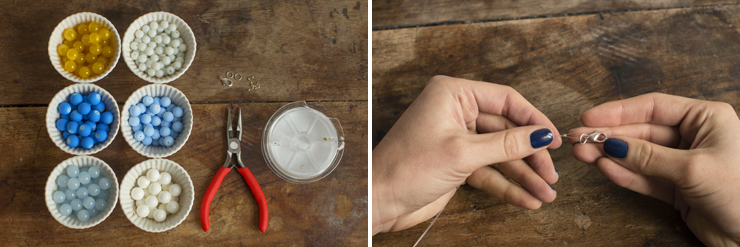
To make this DIY, you will need:
- beads of several colors and diameter (at least two different sizes),
- Nylon thread or necklace cable wire,
- A clasp, two jump rings and a dozen of crimp beads
- Flat nose pliers.
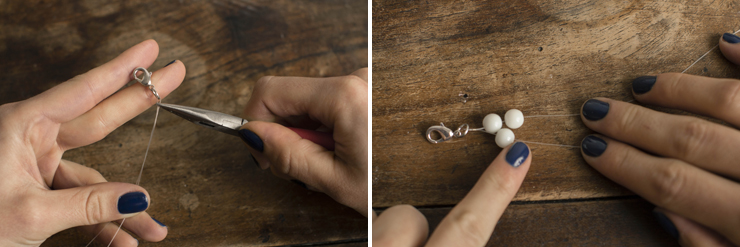
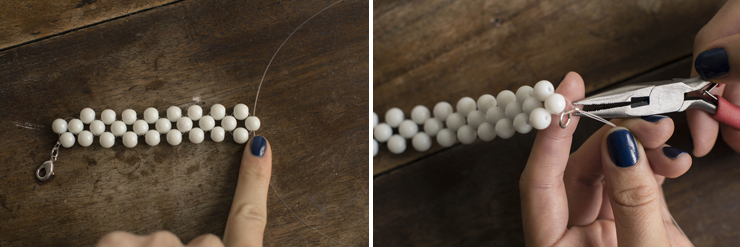
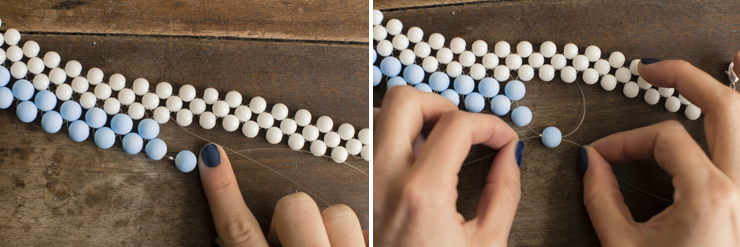
To start with, thread a first crimp bead on the nylon thread (90 cm of thread), then the jump ring (attached to the clasp), then re-string the thread into the crimp bead. Slide the thread over 45 cm in order to double it.
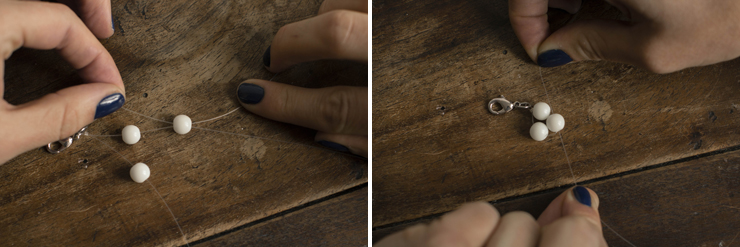
Flatten the crimp bead and start threading two beads on the top thread and one bead on the bottom one, so far so good...
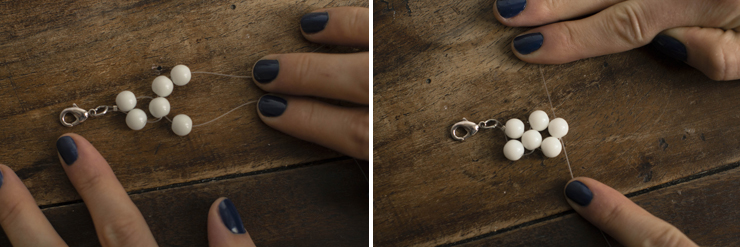
Take the bottom thread and «countercurrently» (or, on the opposite way from the top thread) thread it into the top thread’s second bead. Then pull gently in order to tighten it. Easy...
And start all over again: two beads on the top thread, one on the bottom one. Then rethread the top thread into the top’s second bead «countercurrently» and pull gently...
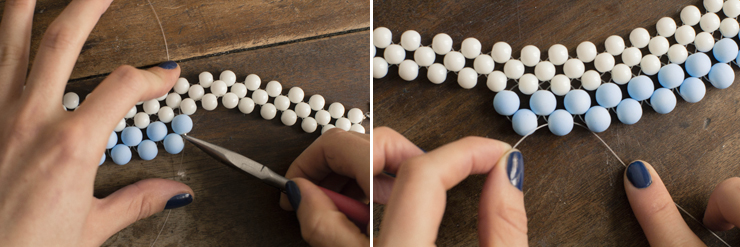
You keep going lengthwise, on about 36 cm but really it depends on your collar size. Once your first row is complete, put a jump ring on one of the two threads and thread a couple of crimp beads into both threads and flatten them to finalize the first part of your necklace.
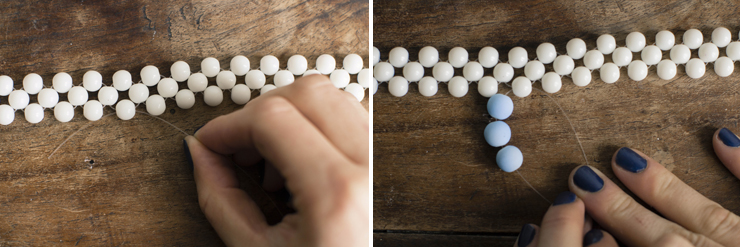
Thread a new but shorter nylon thread (about 65 cm) into a bead at about 10 cm from the beginning of your necklace. Slide your thread halfway and thread 3 beads of another color.
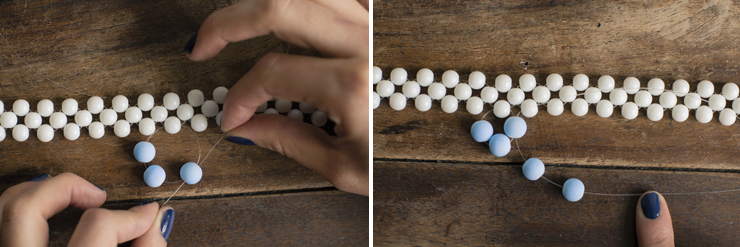
On the same principle as earlier, take the empty thread, thread it «countercurrently» into the third bead. Pull gently the top thread, rethread it into the next white bead, and add two beads on the bottom thread.
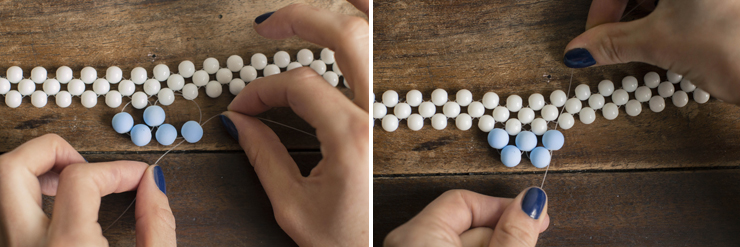
Take your top thread and thread it «countercurrently» into the second bead and pull gently. Don’t forget to threat the top thread into the next white bead, it’s what makes the link between the two rows of your necklace.
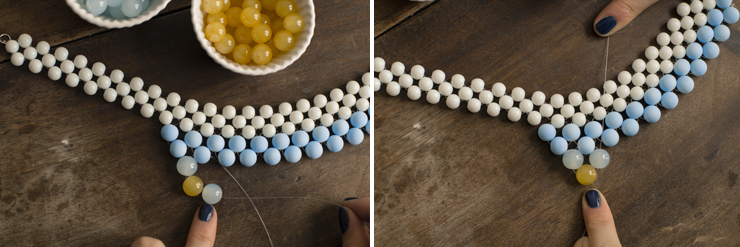
And to finish you second row I’m giving you a tip to fix both of your rows (but it will work the same way with the next ones). Thread the first bead, then a crimp bead and the second bead. Thread your top thread into the second bead and into the crimp bead.
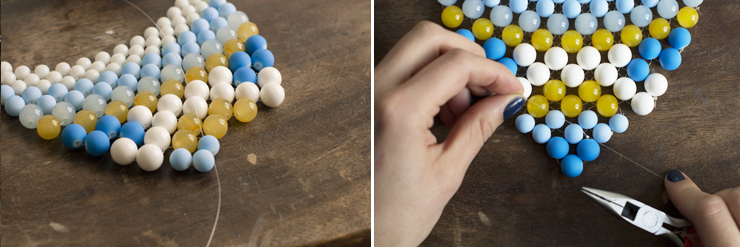
When both threads are «countercurrently» into your crimp bead, flatten it with your pliers and cut the exceeding threads. To start your third row and the next ones, start forward to give to this dickey a triangular aspect. Don’t start with the first bead but the second, and don’t weave until the last bead but stop with the last but one.
Then it is the same principle, now have fun with colors, alternate, create rhythms... It’s your go...
And don’t forget to end with a crimp bead, flatten hard and TA-DA ! In the case I wasn’t clear enough, I made you IKEA instructions on Illustrator that you can download here... Have fun!
Now you now how to weave I’m sure you’re going to ask me... I’m wearing the «NAVY» Nailmatic nail polish ;) ... I’m waiting to hearing from you!
[:]


