DIY DIAMONDS
Hello!
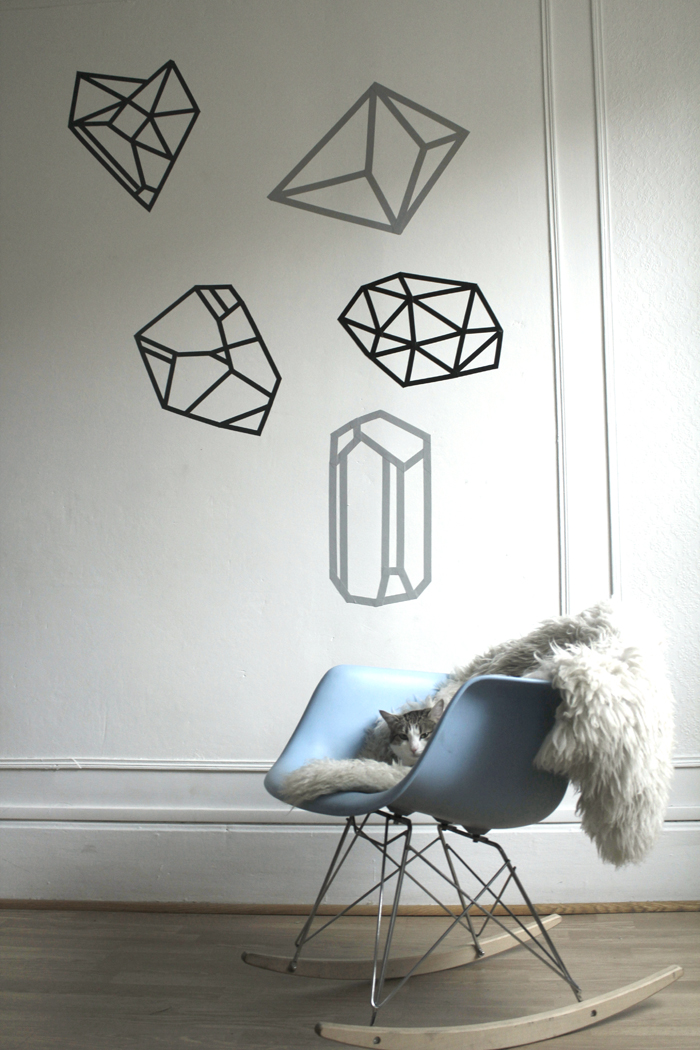
Wednesday's DIY is here! Today I'm veering more towards a geometry class than true diamond bling. As you'll begin to notice, I'm a huge fan of Scandinavian design - the retro feel and pure lines that we've all noticed invading our internet browsers...and this DIY is no exception, coming about when I stumbled across this image on the internet. I said to myself, "wow, that's too cooool, I have to do that!" and then the decorating tyrant with whom I live crushed all my big ideas and said "you're really going to repaint one of the walls in our apartment just for a blog post?". And so, I realized that maaay have been a step too far, so to please everyone (in particular my darling loved one...because yes, I would quite have liked to repaint one of the walls in the living room...) I'm going to show you how to create the opposite of this image. What's more, this version is definitely less permanent and restrictive - yup, don't say I don't think about you my darling students who aren't reeeally allowed to repaint your apartment. Just grab a bit of gaffer tape or masking tape and you're ready to go! It's not exactly high voltage DIY, but hey, I know that not everyone has Mike Gyver with his ten fingers...so ENJOY!

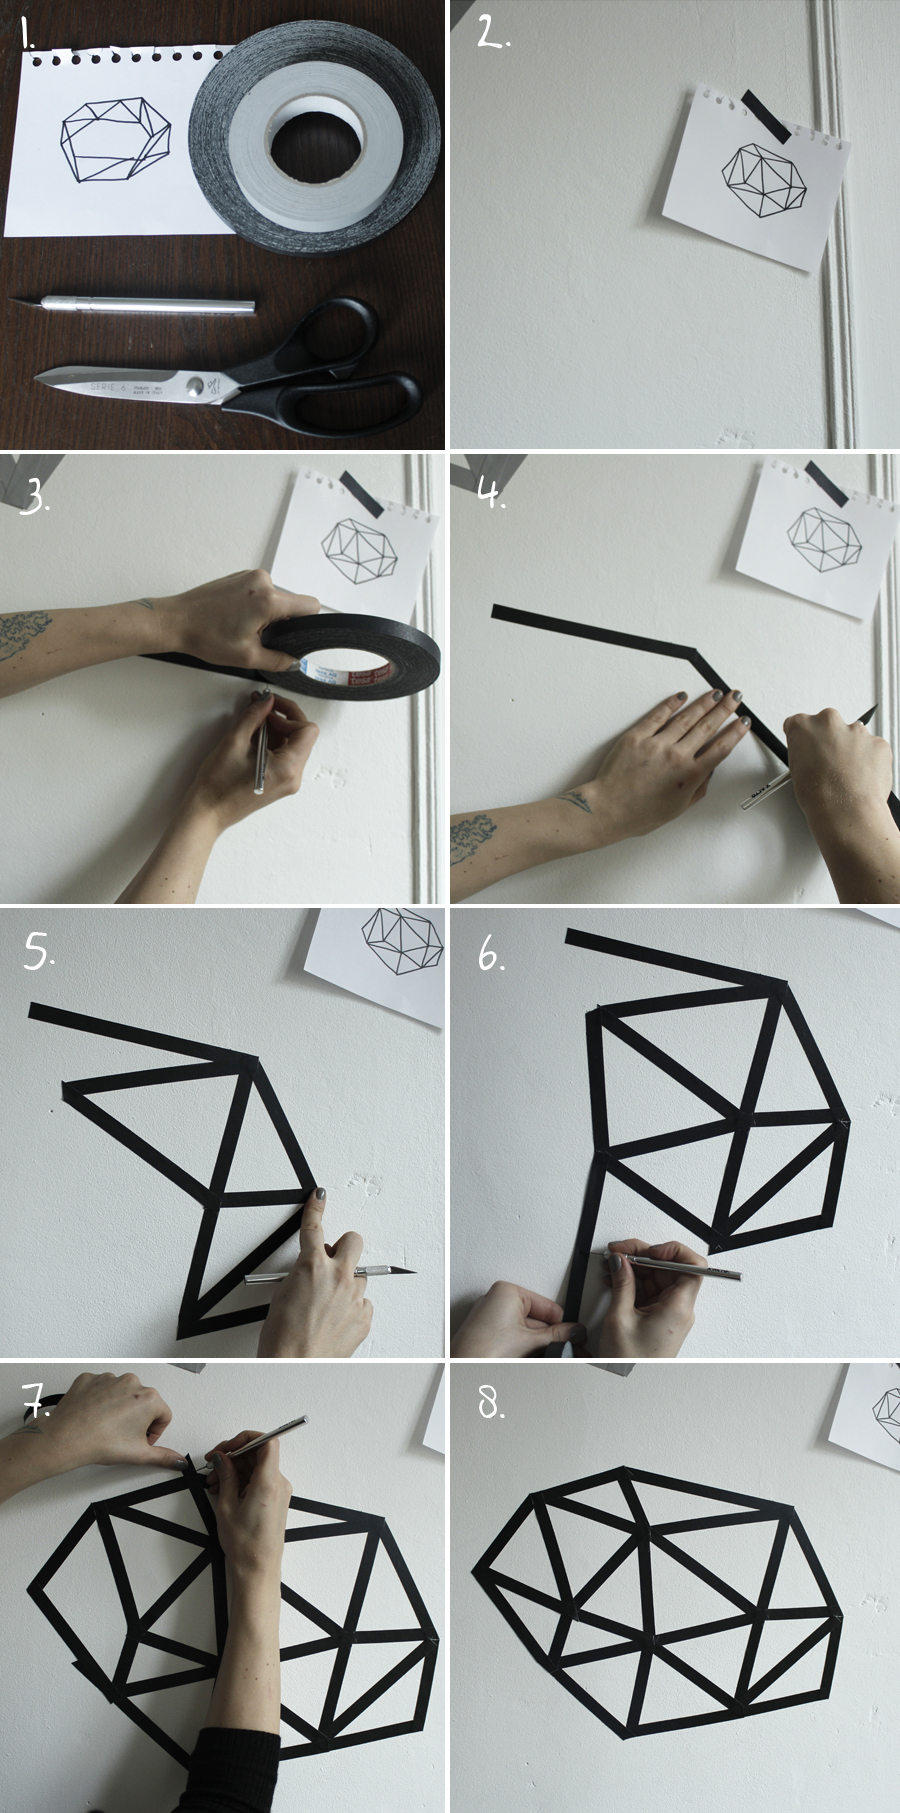
To carry out this DIY, which couldn't be simpler, you need:
- - Scissors
- - A sharp blade (e.g. a Stanley knife)
- - Colored gaffer tape (you can buy it from Rubans de Normandie, Paris 75003)
- - Or sticky masking tape (but make sure it sticks well!)
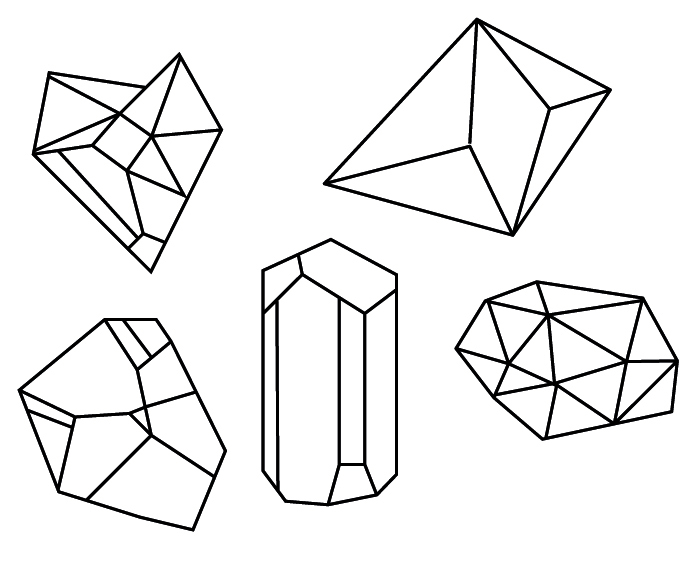
- - And templates of the crystals, which you can download HERE.
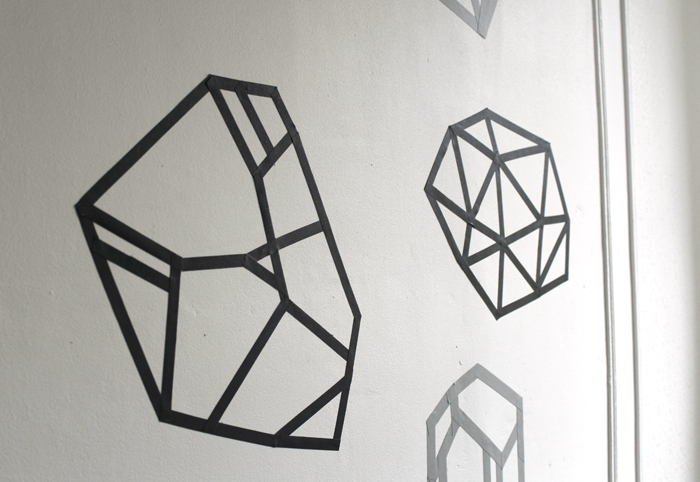
To start, choose the place on the wall where you want your crystals to be, and stick your template near you so you always have the pattern in your mind, fig.2 . Unroll your first lot of tape and place it on the wall. Choose where you're going to start from on the sketch of the crystals and create a larger version using the tape, fig. 3,4,5 & 6. The great thing about this DIY is you don't need to be precise at all with your traces of the crystals. You can let your imagination run wild and reinvent shapes! The key is to stay with shapes with broken up lines, and that the ends of each line form an angle with another. In order to get a clean finish, with your knife cut away any irregularities so that your shapes have a clean and sharp finish (just cut gently on the surface, there's no need to slash up your wall!)fig.7 and TA-DA fig. 8! Of course you could always create these diamonds with a bit of masking tape and by painting over it you'll achieve an effect not far from the original source inspiration, or you could even make them with crazy colored tapes...whatever you do, have fun with it!!!
And here is a little bonus:
[:]


