DIY OF THE THANK YOU #7[:]
My kittens!
Last night I was having dinner with some friends and I have to say they teased me quite a lot... Based on nano attack about my verbal tics and my dyslexia to name but a few... One told me "I read you even called your reader "my chestnuts"..." Yes it's true and I'm proud, I'd love being the chestnut of someone, or worse the butter cookie, so I'm asking you: do you have a psychological problem with me imagining you as little chestnuts, isn't better than a big potato? Although I could totally call you my little sweet potatoes, I wouldn't have any trouble with it. If I'm going too far into silly nicknames, you have to censor me.
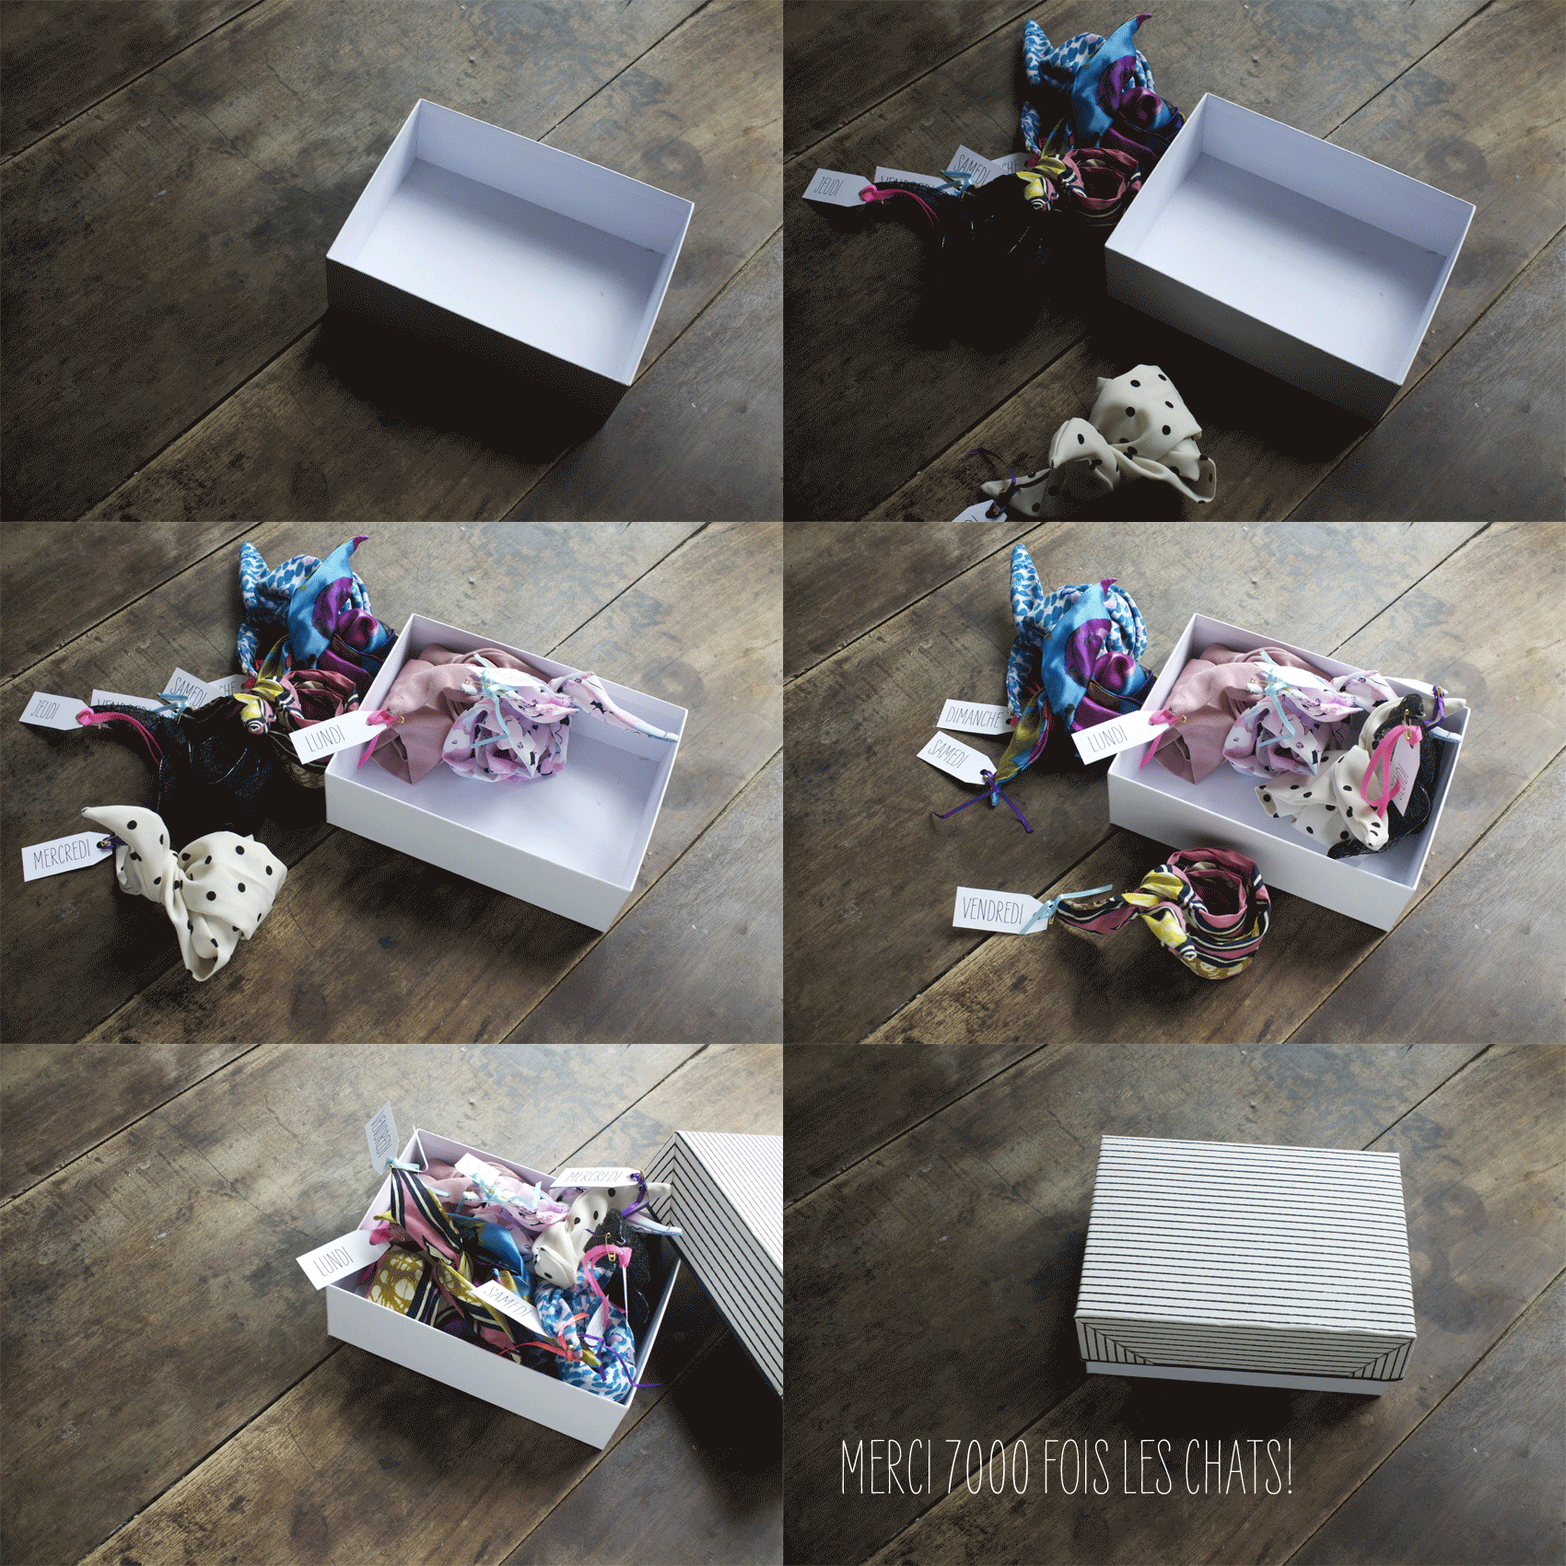
Anyway! Editorial questioning aside, back to our today's topic... Since the beginning of the blog, I celebrate, I honor even, you fidelity and your love with a little contest every 1000 followers. And lately I've been running late, and I sincerely apologize for that... Life really is rich and I had work all over my head! How I'd like to be wonder woman, or to have a magical time-turner to be able to live 48h in one day (any reference to Harry Potter is pure luck). I'm giving you a little DIY/contest to tell you THANK YOU one more time. Thank you for your words, your emails, your support, your winks and your pictures... Even though I don't have the time to answer you lately, I'm working on it and I want you to know that I read you with as much delight as ever. To start catching up, I give you the opportunity to win seven (one for every day of the week!) head bands aka "knot that holds by itself", you simply have to write a comment telling me what is your worst nickname ever... I'll pick the winner on saturday at noon and I'll put it at the end of this post! It's your turn now and I love you bien fort!
To make this DIY you'll need:
- a rectangle piece of fabric 74 cm x 21 cm,
- Some wire (quite flexible) 130 cm,
- A pair of scissors,
- Some thread and a needle, and a marker,
- And the PATTERN ( PATRON ).
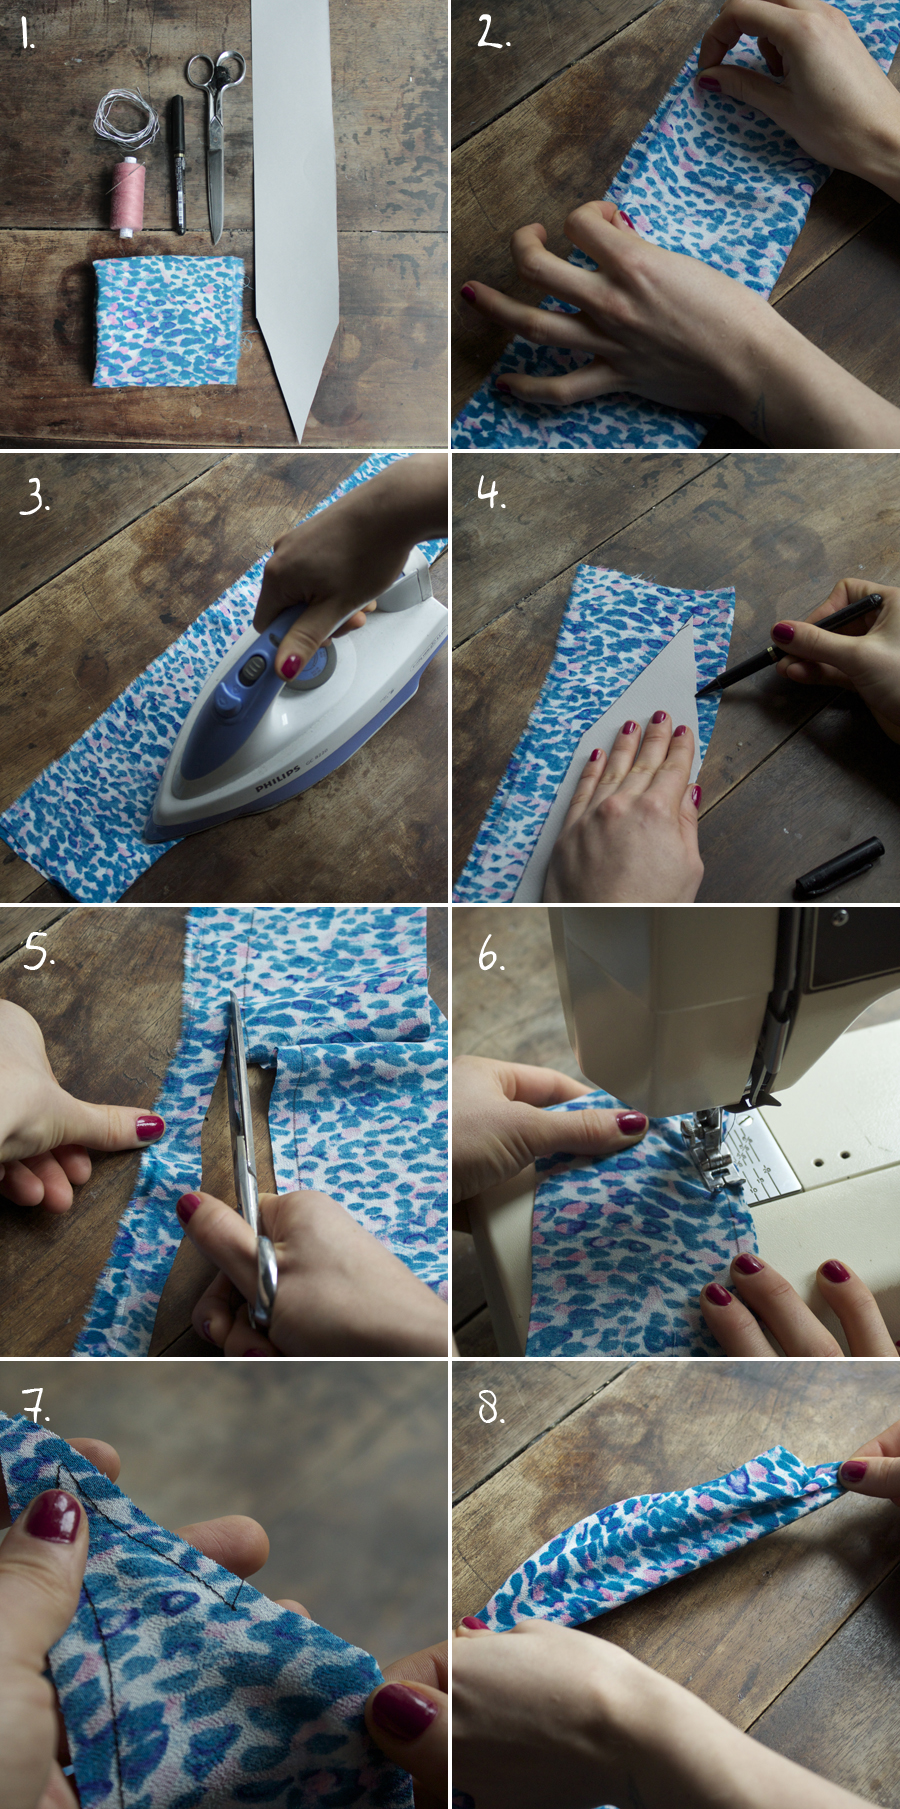
To start with, fold the fabric into two (right side against right side) lengthwise fig. 2. Well flatten this fold with your warmed iron fig.3. It will help you to precisely draw the PATTERN (PATRON) of your headband afterwards. Take you pattern drawn on a thick paper and copy it on the wrong side of your fabric. Take the fold as a base to limit the number of your stitches (yes, I also find you solutions to spoon-feed you...) fig.4With your scissors, cut 1cm away from the drawing of your pattern, it is your sewing reference (cut both layers of fabric together) fig. 5. Then with your machine, sew the head band following the drawing, you can pin both sides together before starting if it can reassure you fig. 6. Small tip: to be able to slide and put the wire into your head band, do not start sewing at the beginning of the drawing but plan to start your stitch about 3 or 4 cm away from the edge, you'll close this hole with a hand stitch later fig. 7. Turn the headband on the right side by sliding everything through the hole we just mentioned fig. 8.
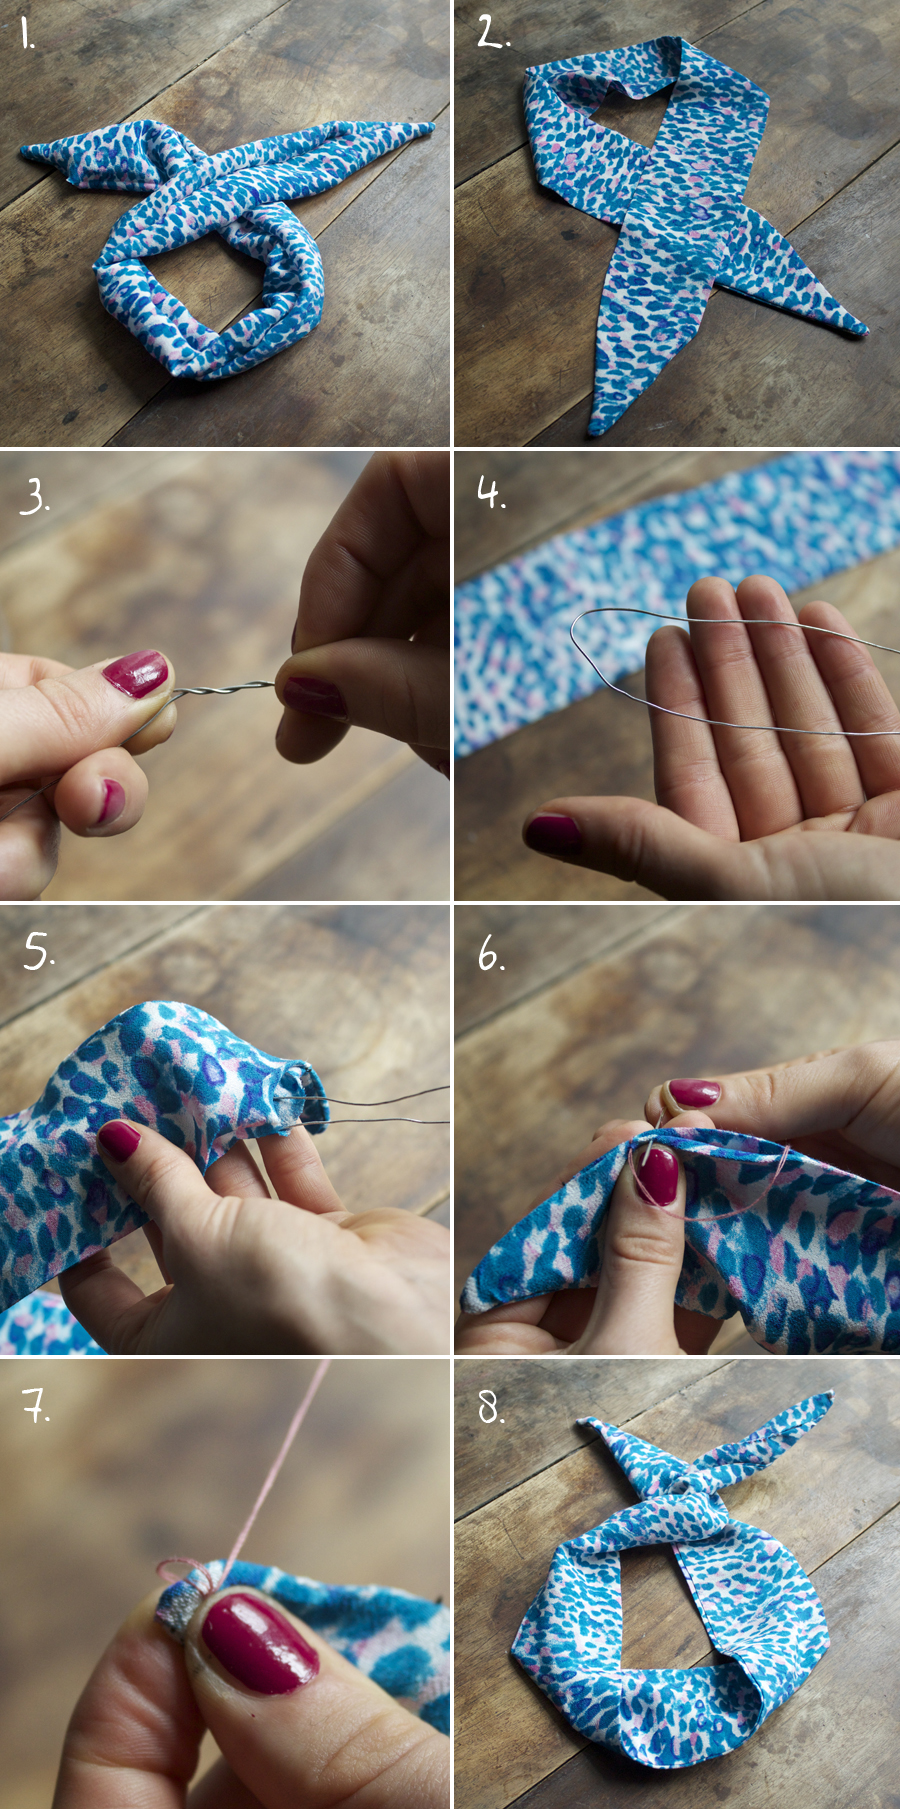
Here you are with a beginning of headband...fig.1. Not bad but not crazy either, plug your iron to flatten down the seams fig. 2, it starts to look like something. Take the wire and make a circle, and to close it twist both ends together fig. 3. Fold this circle into two in order to get a sort of french baguette out of wire (sorry for this comparison) fig. 4. And start putting the wire into the intended headband's hole fig. 5. Once the wire entirely inside, close the hole with your thread and needle fig.6. And small advice: for a better shape, do a hand stitch on both peak ends of your headband, being careful to take the wire into it so it will stay into your knot's peak... Fig. 7. and TA-DA! Fig. 8... Have fun !
The winner of the contest is Alexandra and her lovely nickname "crotte de nez"... Thank you for your participation! Love!
The winner of the contest is Alexandra with the adorable nickname of booger...Thank you for your participation! love!
[:]


