Wordpress blog EN
DIY Shoesing
Oyé oyé,
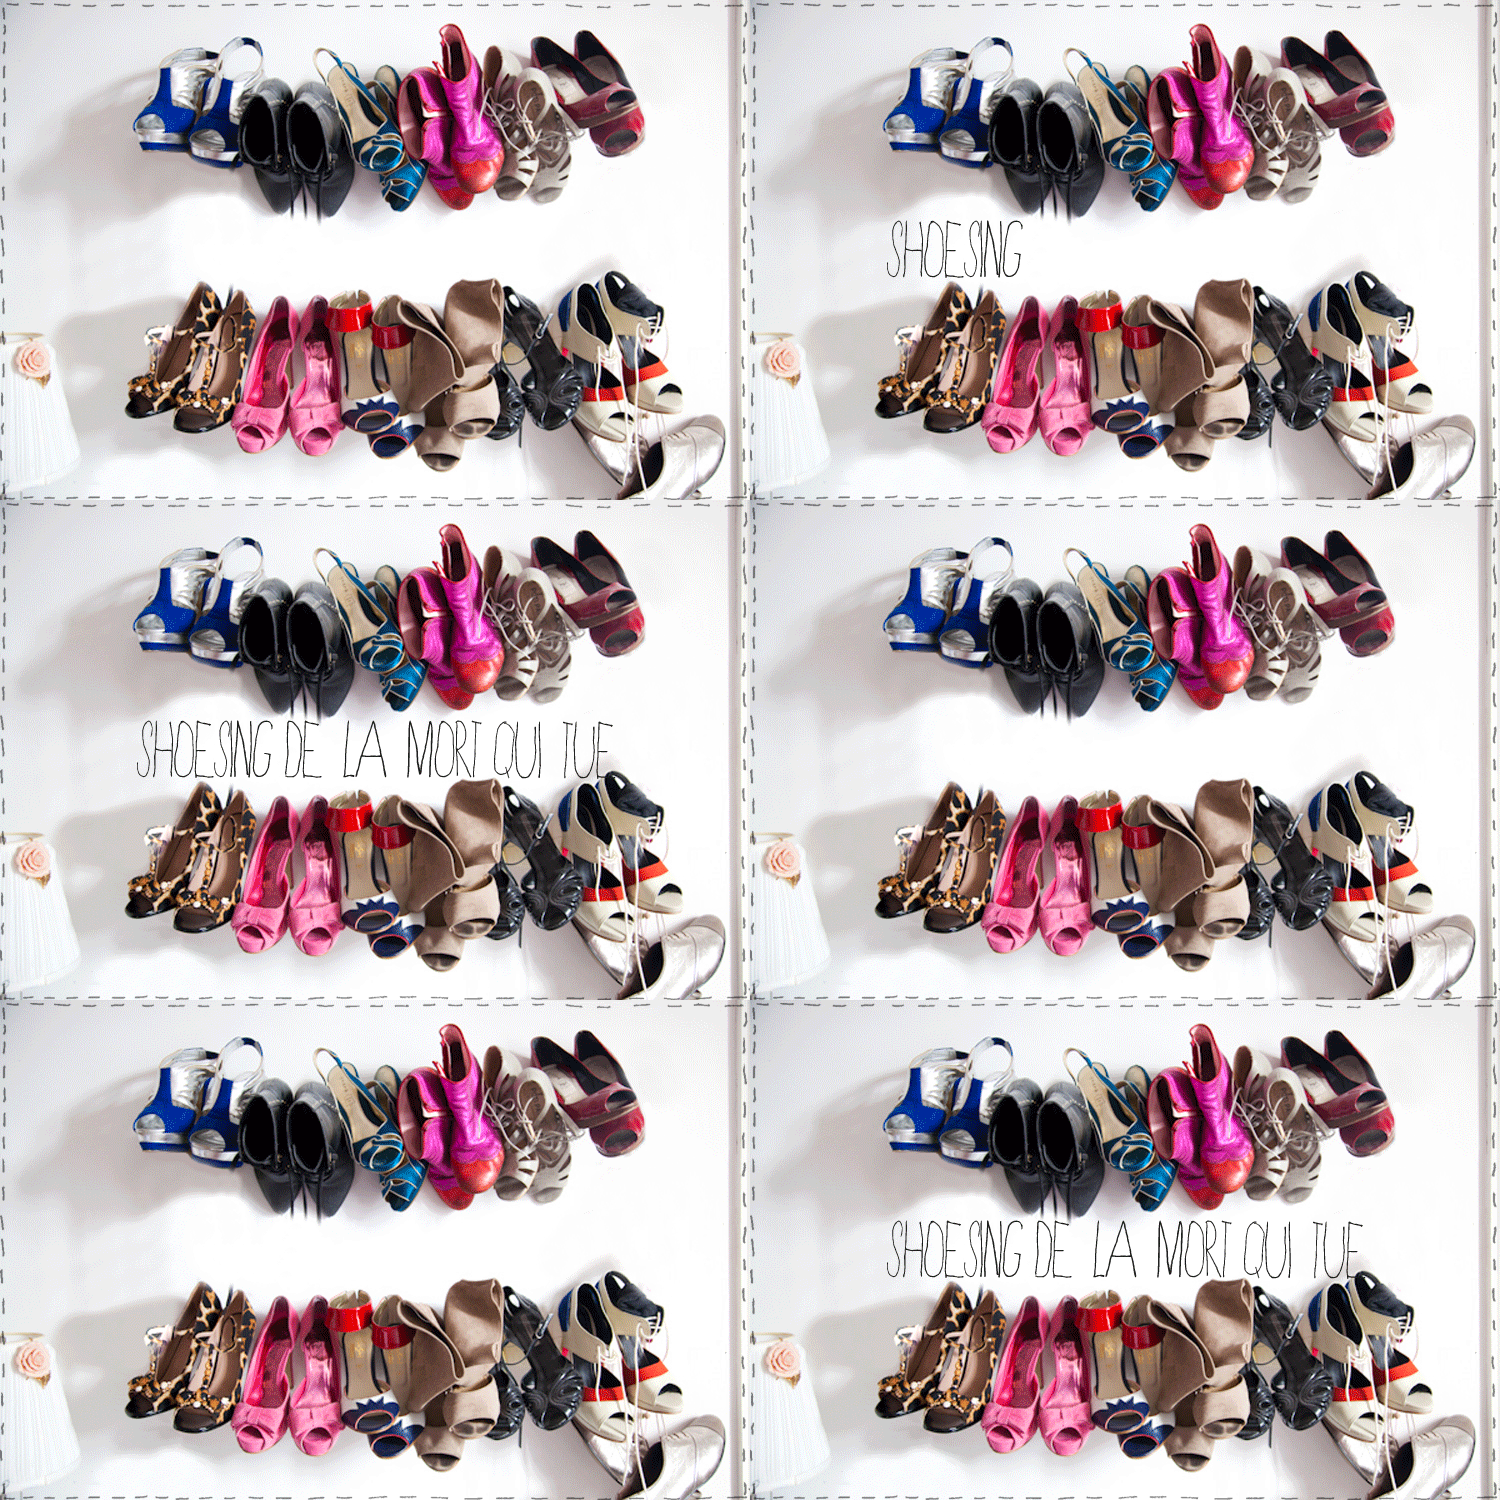
I'm so excited to present this DIY! This photo was taken in my old apartment, which I told you about last week... Since then, my boyfriend has made it very clear to me that it's out of the question for my shoes to sit in our bedroom like hunting trophies... When I've got a huge dressing room like Carrie's (if possible), we'll talk... Anyway, I love this way of storing shoes, you can see them clearly (they're all you can see...), it's precise and you know right away what to wear with them... Today, my shoes are stored in immaculate white boxes with their polaroids stuck on them, which is very control freak ... but hey, at least they don't get damaged ... I see them less, I miss them a little, but one day soon, they'll be an integral part of my decor again, I can feel it... To console me and ease his guilt at curbing my girly decorating desires, my man was kind enough to pull out his drill and make some holes in our bedroom wall to show you how to make this DIY, just long enough for the photo, eh ( I know, when I have an idea somewhere...) Admire his powerful and convinced hands.... Super-easy DIY, all you need is a drill and a man (or if you know how to handle an instrument, just the drill...). for this Shoesing de la mort qui tue, you'll need:
- a drill
- wire cutters
- wire
- 2 or 4 screws and dowels (depending on a 1 or 2-level shoesing...)
- hammer
- a man (optional)
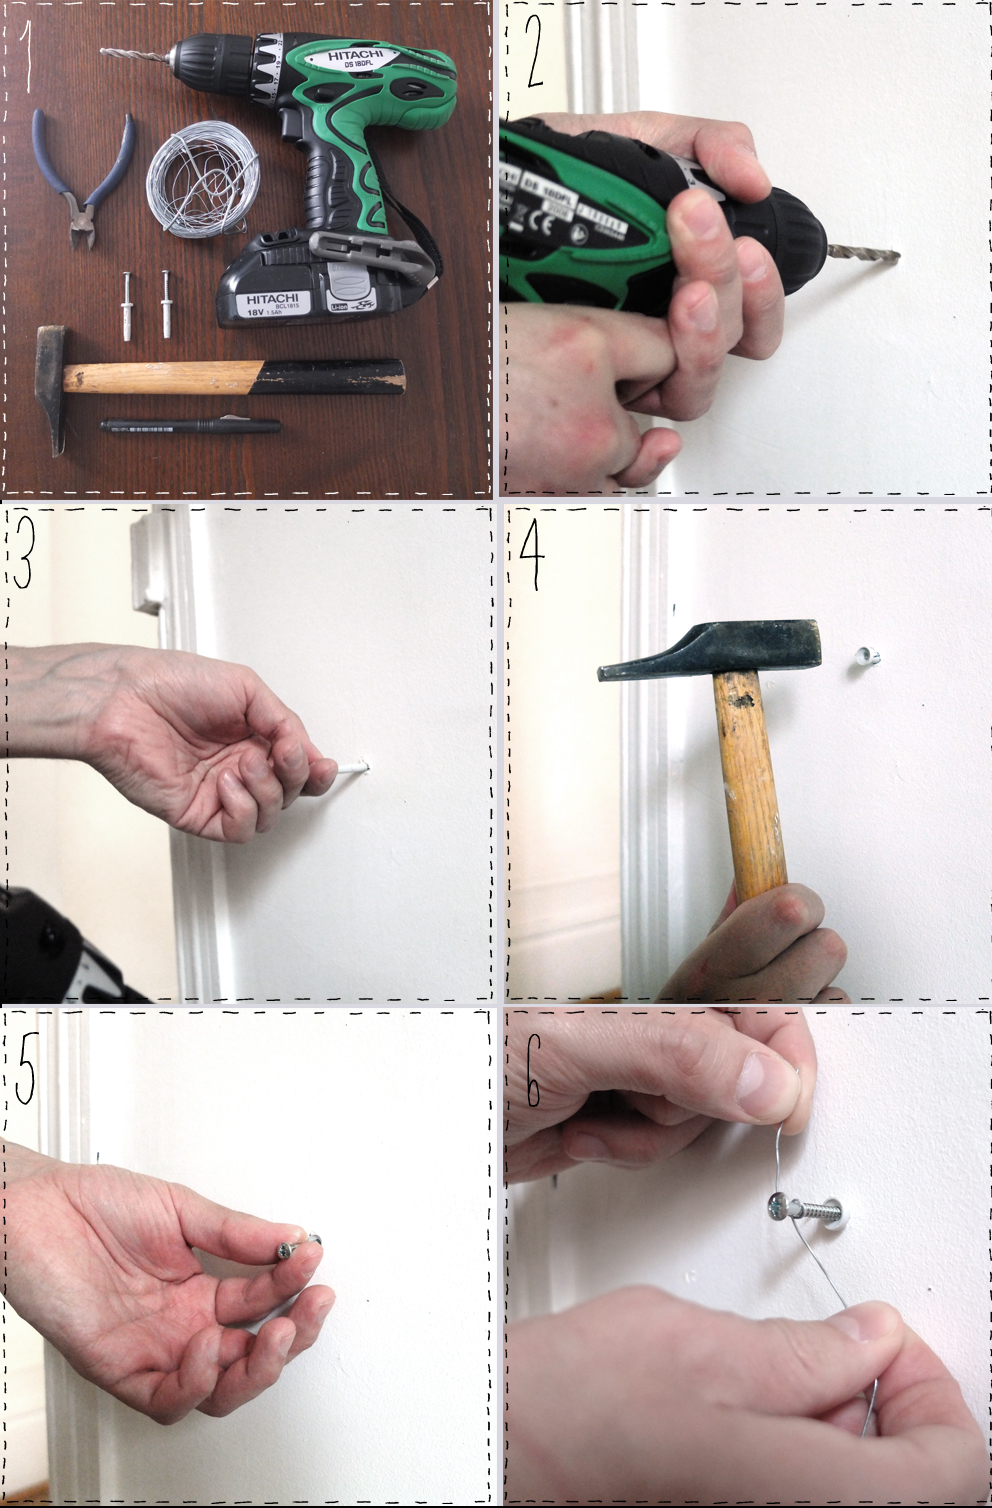
To start with, mark out the places to be drilled on the wall. To avoid overloading the wire, I suggest you mark out the holes 1m / 1m20 apart. Using the drill with the appropriate bit for the plug you're going to use, drill the marked holes (2). Slide the plug into the hole and hammer it in ( 3 & 4 ). Screw the screw into the dowel, which should protrude from the wall by about 3.5 cm (5). Cut a large piece of wire and wrap it tightly around the first screw (6). Finally, repeat this operation around the second screw, tightening the wire and wrapping. TADAM! For this DIY to be a real success, I'd advise you to use fairly sturdy dowels and screws, not huge ones either, but something solid enough all the same! And now you'll be able to admire your wonders at any time... One day, I'll tell you about my addiction...
SOFT CUP CAKES
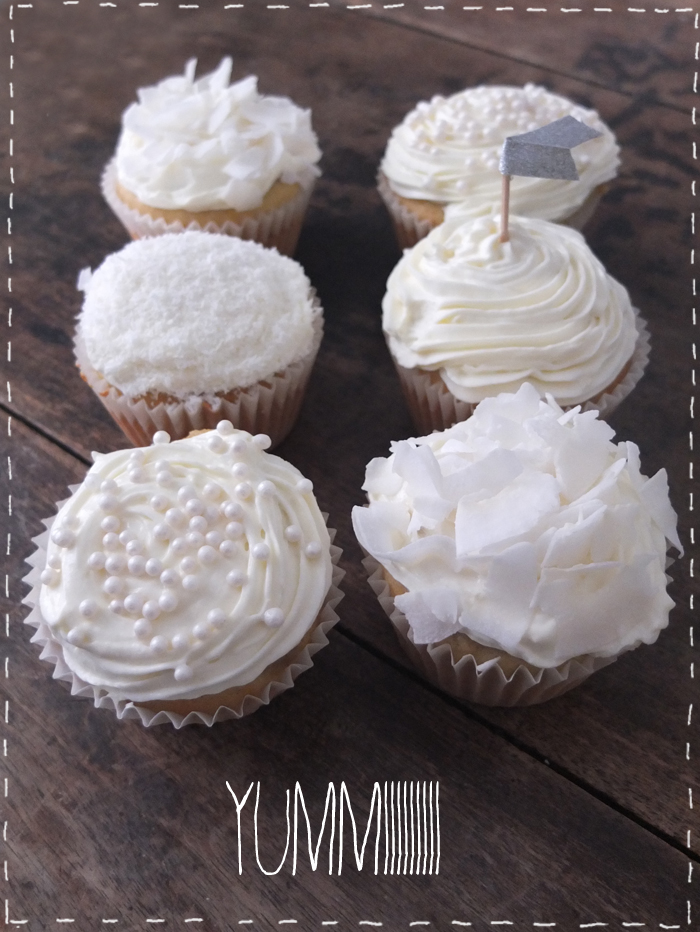
Hello everyone,
I hope your weekend was more relaxing than mine... I've put together a little recipe for fluffy cupcakes, if I do say so myself. For those of you who follow me on twitter I was looking for a frosting recipe without butter, because I find that traditional frostings often give you a mouthful, and I feel like I'm just eating butter and don't want to tackle the cake underneath. I know, my cupcake pretensions are pretty high, but what can I say, I love it when it's not just pretty, but tasty too! So I've come up with a tasty, light alternative (in the mouth, of course... otherwise it's close to caloric suicide) for the icing, and a new cupcake recipe that's just as moist as you'd like it to be, and very easy to make...
 For 9 cup cakes, you'll need..:
- 3 eggs,
- 100g butter,
- 180g flour,
- 1 pinch salt,
- 90g sugar,
- 3 tablespoons milk,
- 1 sachet yeast,
- 1 capful of orange blossom.
Start by heating your oven to 200°C. Sift the flour and yeast together and set aside. Beat in the 3 eggs and sugar, the mixture will turn white, at which point add the milk, salt and orange blossom, then mix well. Gradually add the powder, flour and baking powder. Finally, add the melted butter and mix until the dough is smooth. You can garnish your cupcakes with fruit, such as pears (as shown here... one pear is enough, cut very finely). Pour the batter into 2/3 of the cups, and bake for 10 minutes, checking with a knife blade.
 For the glaze:
- 400g Philadelphia or St Môret cheese,
- 20cl liquid cream,
- 30g powdered sugar.
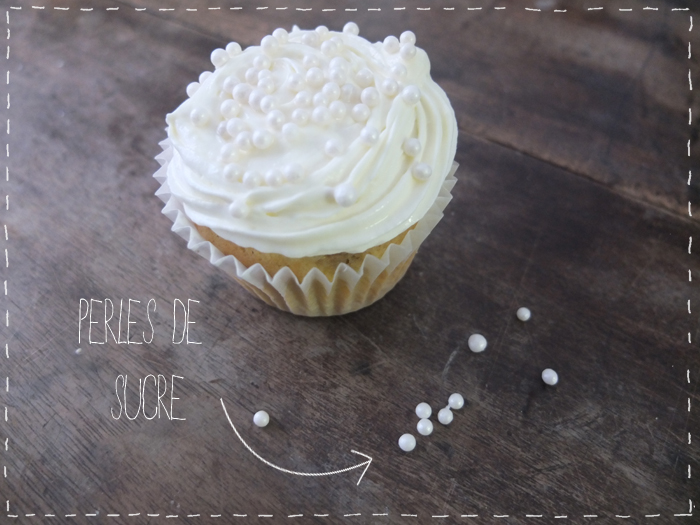
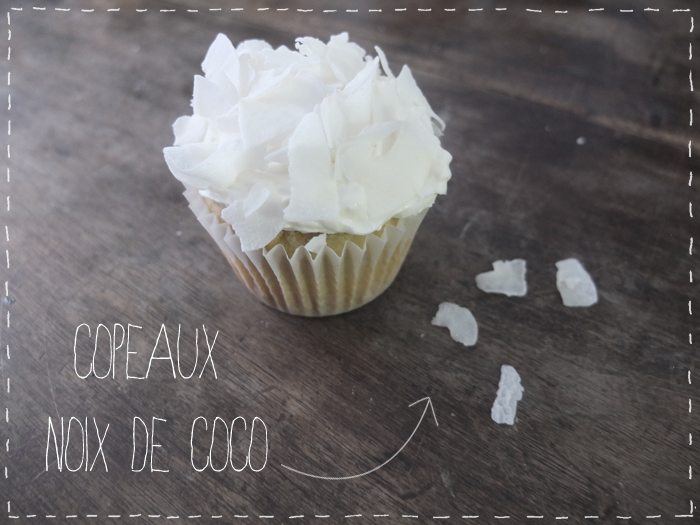
Using an electric mixer, whip the cold cream until stiff. Once the whipped cream begins to thicken, add the powdered sugar a little at a time. Still using the mixer, whip the Philadelphia to loosen it, then fold it into the whipped cream. You can add coloring at this point, to make them funky, but like me, you can also decorate with coconut shavings, coconut powder or even sugar pearls or beads... Enjoy!
Shopping Polka!
Hello butter hearts,
here we go with the silly nicknames, don't get me wrong, I'm all love, but with the ton of incredibly encouraging and enthusiastic comments you've left me, I can't help but be a sugar lump at the moment... I think my therapy to cure myself of peas is starting to pay off, we're almost bordering on overdose. Fighting evil with evil, or rather peas with peas, is starting to work (but I promise I'll have little relapses from time to time...) These are my confidences from a polka dot addict in rehab... In the meantime, I'm trying to win you over with this little wish list, so if you're not dying of instant love for this polka-dot satchel, don't bother... No, it's okay, you can stay, it's good because it's you! Thanks again, see you very very very soon...
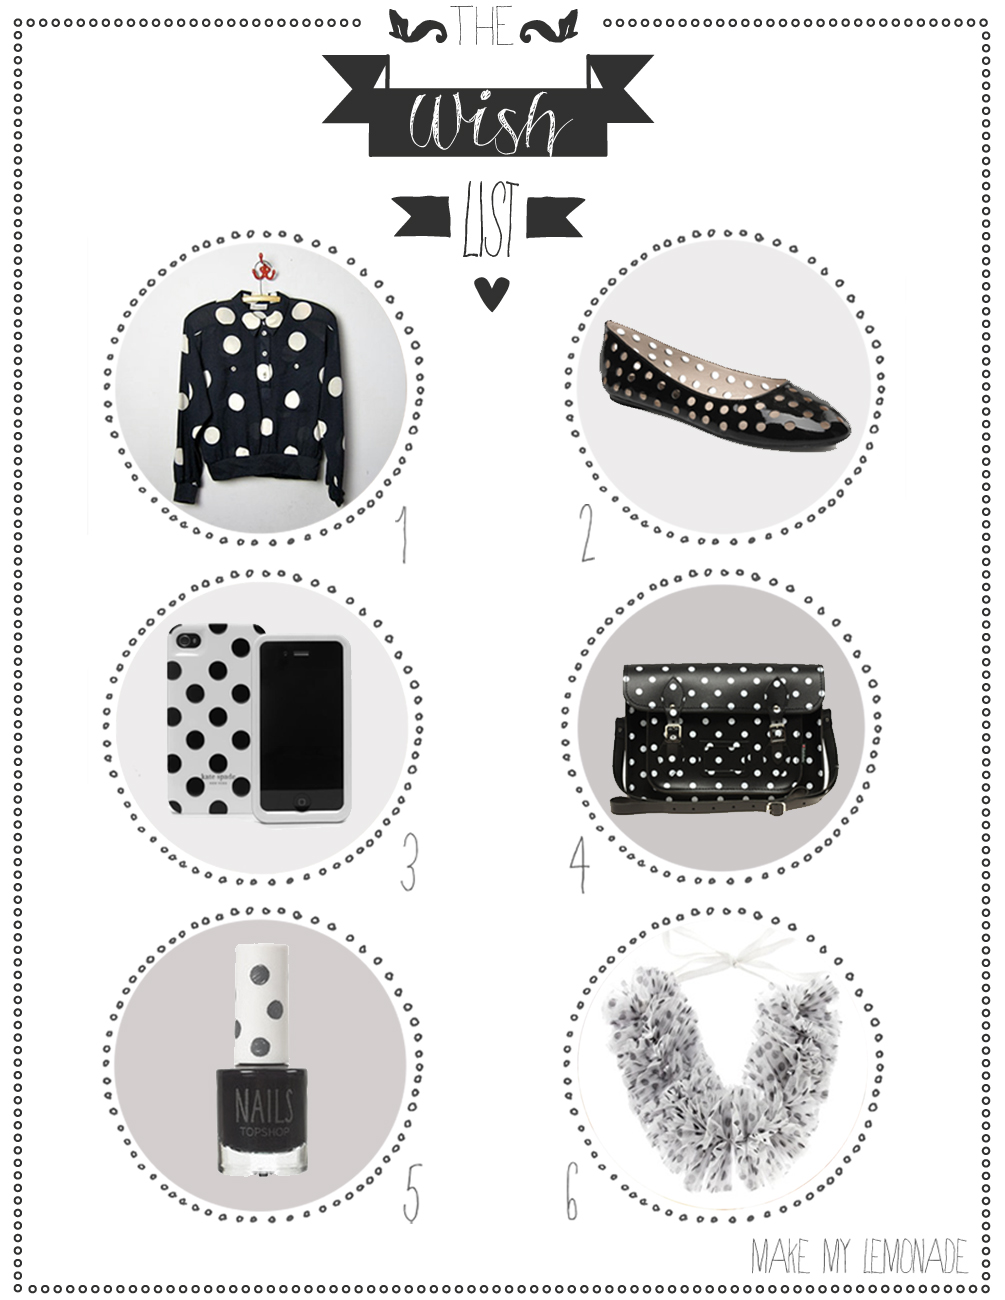
1# polka-dot shirt! Etsy 30$. 2# Mellow Yellow shoe on Sarenza79€. 3# Iphone 4 case Kate Spade40$. 4# satchel Asos 130,53€. 5# Nail polish Top Shop. 6# Frilly necklace Asos 23,73€.
DIY Polka dot!!
Screams of hysteria! I'm as excited as a flea! More and more of you come here every day, Thank you for reading! Thank you is the word I use most in early 2012 happiness! And I think there are more and more of you too, thanks to my fairy godmother! Valentinewho is a little jewel, a joy, a laugh, in short, Thank you!
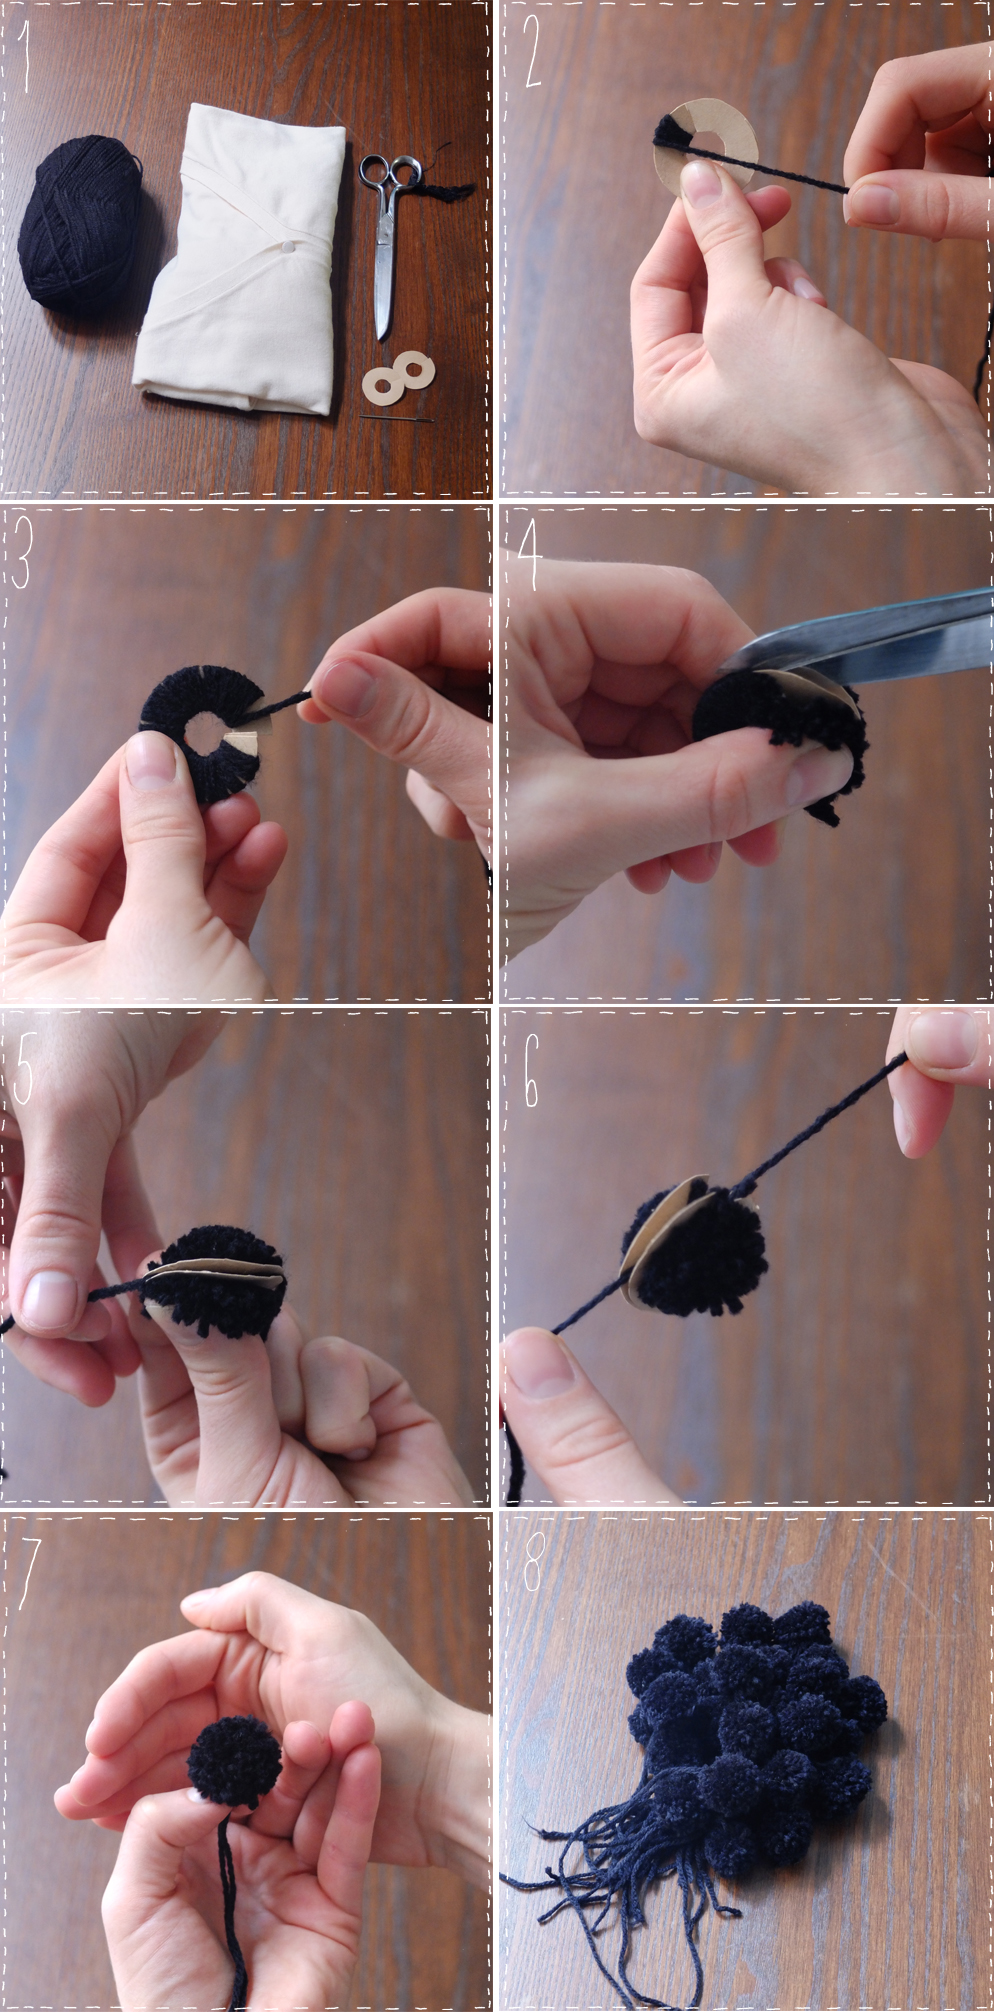
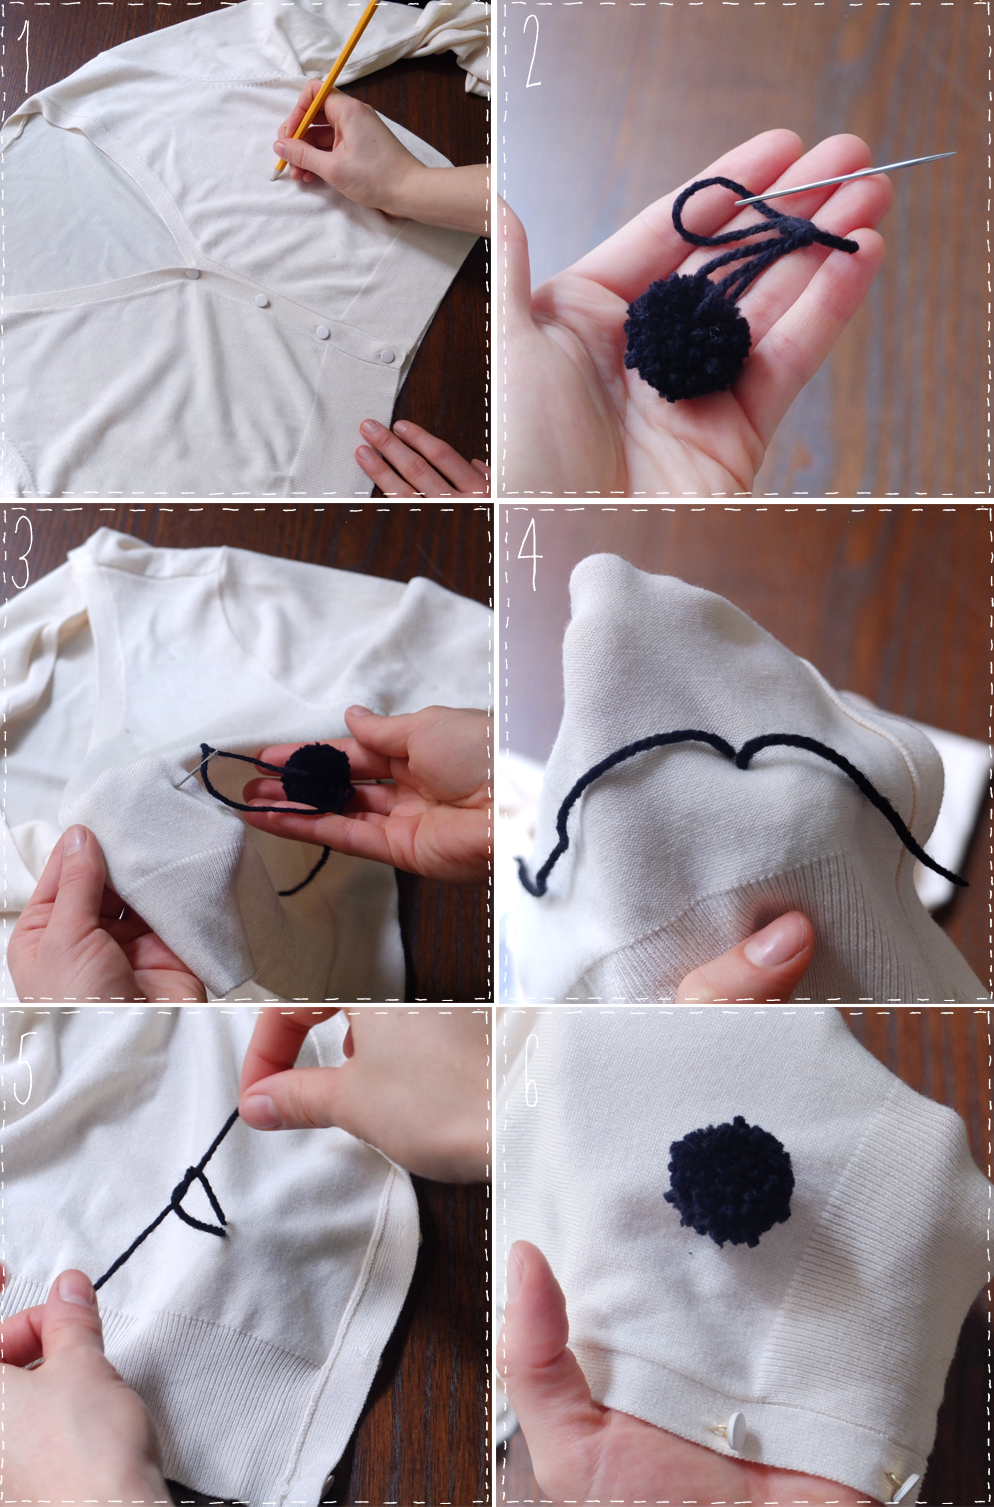
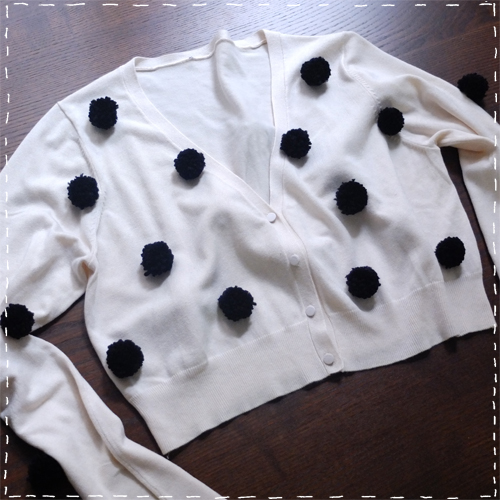
This cardigan is so cute, I want to wear it every day (I must admit I wore it all weekend... and today too). It's perhaps the simplest DIY I've suggested so far, but it's applicable to all your knits. And even for children's clothes (I'd love to see it on a little girl...).
First of all, you'll need..:
- 1 ball of black wool and a large needle
- 2 pom-pom circles approx. 3 cm in diameter
- 1 good pair of scissors, a wooden pencil
- 1 small cardigan or sweater, anything in need of a makeover...
 [:]
[:]
Wish List!
Happy Thursday this way...
It feels like spring when I get off work and it's still light out, which can only be a good sign! I can't wait to get out of my bare legs (I like the word "jambette", it's better than "jambon"...) in little studded spartan shoes and twirl around with my nose in the wind! I'm not getting too excited either: 3 weeks ago it was 0°C, but after 2 lunches on the terrace and a 3rd one in the pipeline, I can only say, wax up girls, it's spring! Hair problem aside, I've just discovered the Asos brand Sister JaneI can't tell you how much I dream of owning the whole collection... I'm only showing you this adorable dress, which is my biggest crush, but the whole mini-collection is really coherent, affordable and at a very good price. die of love in chains. On Asos, I still found this oversized elastic ball girdle from my childhood. I find it crazy, halfway between a revival of "La fête à la maison" with the Olsen sisters and a Sonia Rykiel fashion show... I'm all about love, and I won't even mention the piano clutch, which for me is an obvious choice... see you tomorrow guys for more light, futile and absolutely necessary adventures.
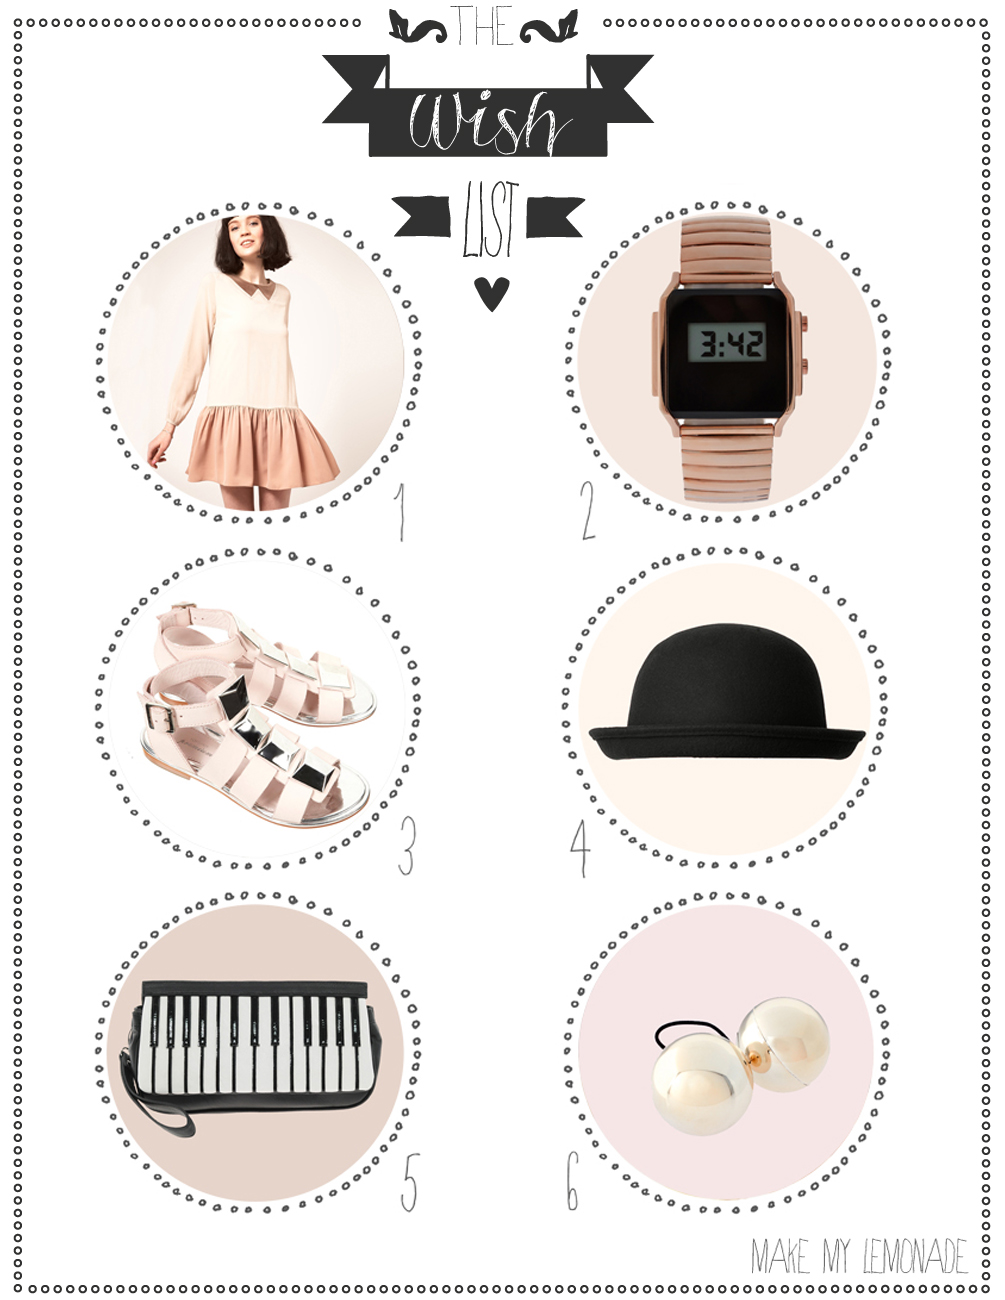 1# Dress Sister jane for Asos 92,30€. 2# Watch Asos 29,01€. #3 shoes Top shop 88€. #4 Melon hat 20€ Monki. #5 Piano clutch bag Asos 32,96€. #6 elastic over size Asos 6,59€.!
head band Del Rey

Peace & Love readers,
Today I'm offering you a very Lana Del Reysquien DIY - yes, it's a style in its own right, if her voice and mouth (and eyes and nose) are anything to go by, please, this girl's got a style all her own. Part mad men(ien) pin-up, part chew gum-chewing bad girl in a Scott bomber.... There's something about her that fascinates me (a little), I must admit, and above all, she's got some crazy floral headbands! If you too fancy a flower crown remastered by me, listen to the following. The article is long but the DIY is super easy...
Go to Video Games and download theBOSS HEAD BAND"....
To do this, you'll need- 80 cm of cord (or a ready-made elastic head band)
- scissors, glue, pen.
- thread and needle.
- thick fabric (not too frayed), tulle and tarlatan (butter cloth).
- and 2 or 3 H&M fabric flowers - it's only 2.95€.
 Start by tracing 9 discs on your thick fabric (gabardine or denim style), cut them out (2&3). Get out some small pins, and you'll see how simple it is (4). Fold your disks in 2, then in 4 (images 5 & 6). Using a pin, prick the tip of your folding and remove it from the pin, repeating the operation 3 times (7&8). Don't hesitate to alternate your folding on the right side and on the reverse for greater color balance. Draw your thread and needle, and join your 3 folds where you stitched (9), making a loop for added strength (iron a second time where you stitched: 10). And repeat the operation with your other 2 folding skewers, without cutting the thread, following your first assembly (11 & 12). To form your "Anemones de fleur" flower (aptly named), stitch the first petal and the last, doubling this stitch... ( 13) and turn over TADA! you can do the same with tarlatan or even tulle.
 Trace your flowers on the tarlatan, cut them out (1&2), keeping only the smallest for now. Using glue, attach the petals one on top of the other to form a bud (4,5&6). Wrap this bud in another flower to form a small purse (7&8). Now form your flower, glue the base of your bud and multiply the layers of flowers ( 9&10), pinching them in your fingers, once all the layers are arranged in staggered rows, make a stitch with the thread and needle to secure the whole (stitch right up to the bud) turn over TA-DA bis!
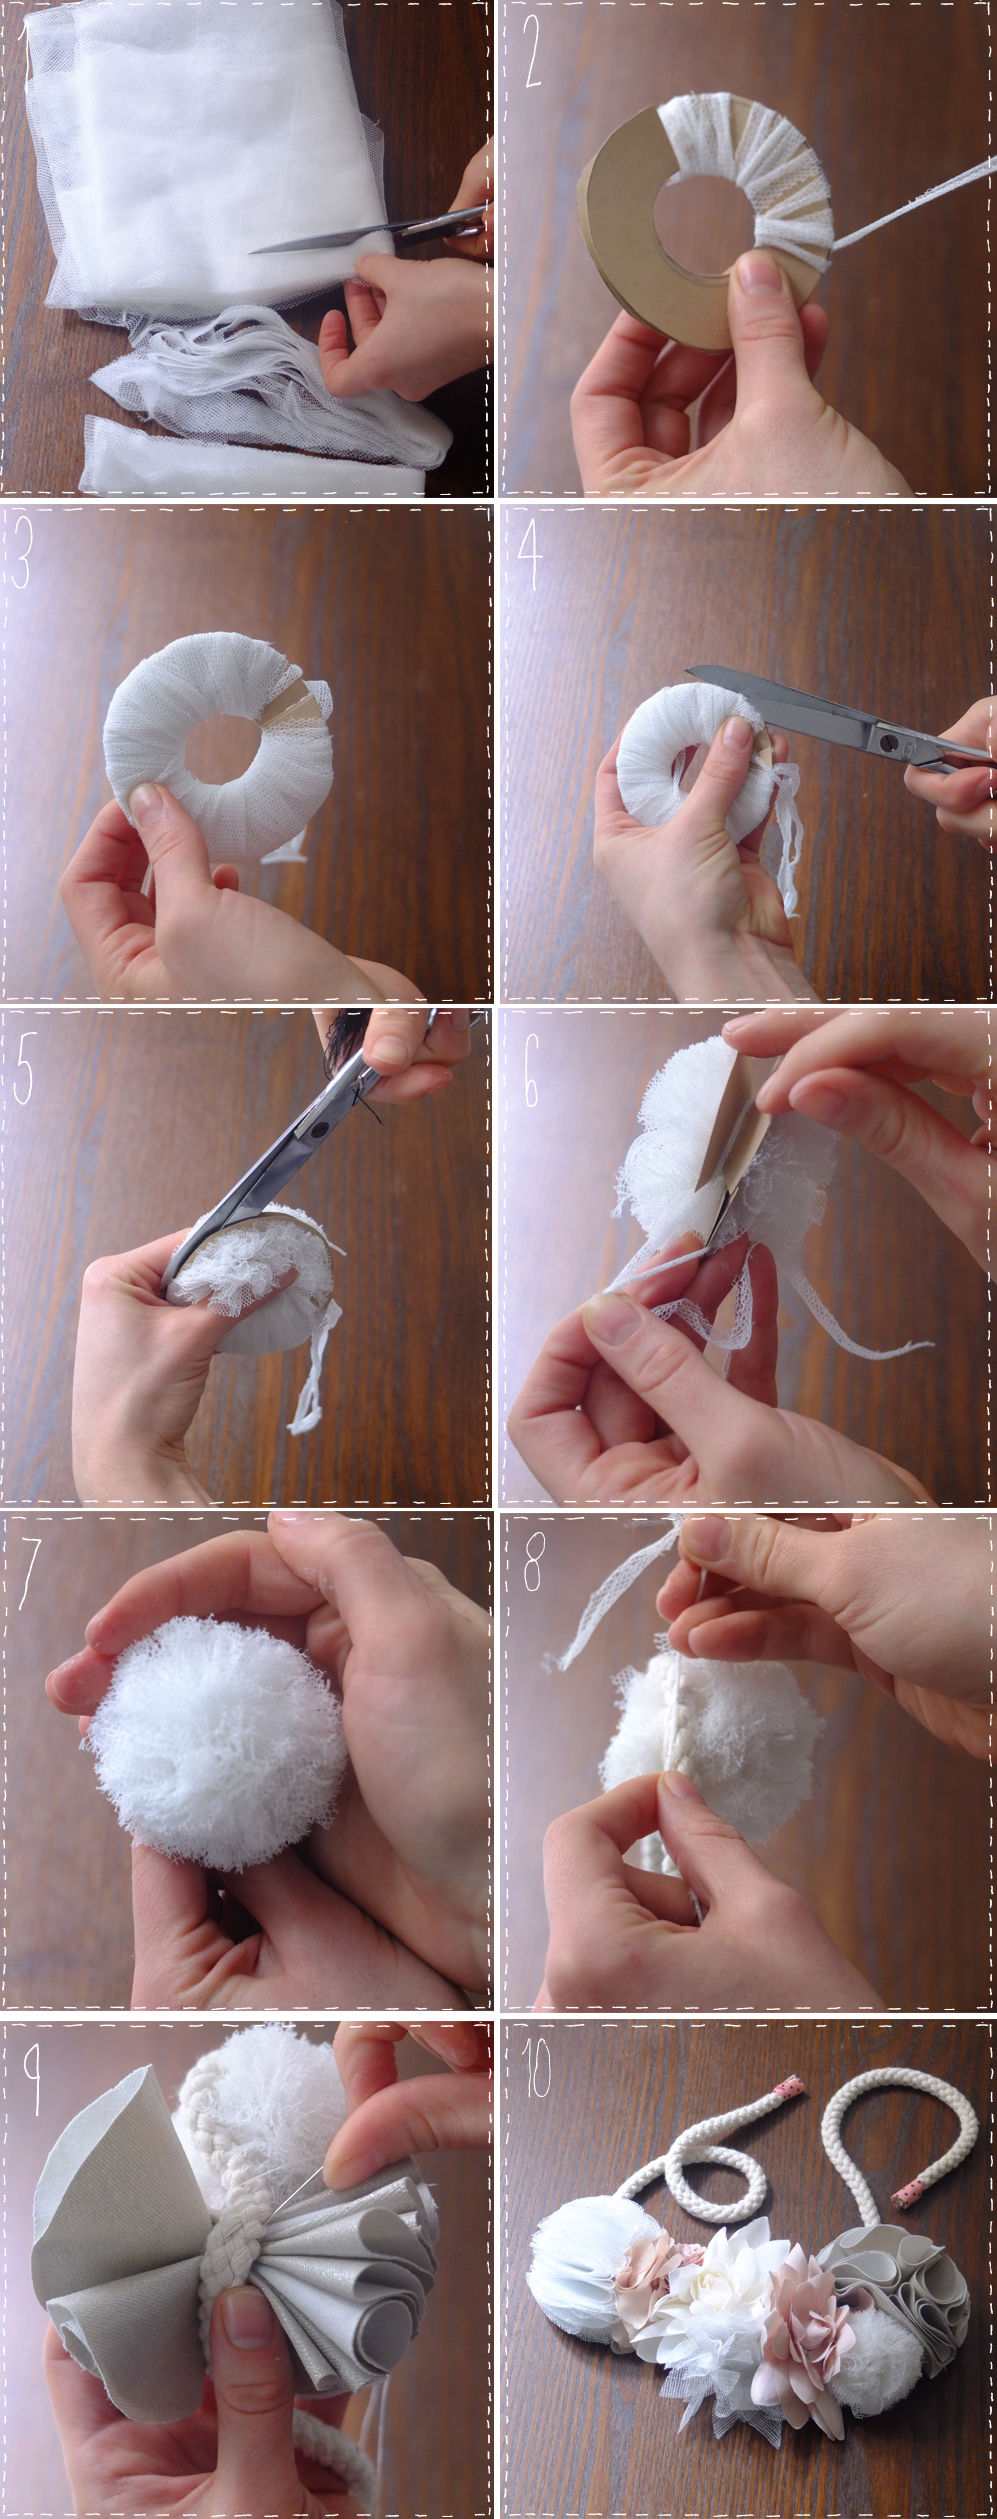 Last flower style: the tulle "pompon". To begin, fold the tulle evenly and with a pair of good scissors, cut strips of tulle. I won't teach you how to make pompons, but you'll see that I really like pompons (more on that later...) Take your 2 cardboard disks and start wrapping the tulle around them (2), working your way around several times - the pompon needs to be supplied all the same (3). With the scissors, cut between the 2 cardboard disks and hold the tulle firmly (so that it doesn't escape...4&5). And with a strip of tulle or string, secure the pom-pom by tying a knot between the 2 cardboard discs (6). Remove the cardboard and TA-DA ter!
Then attach each flower to the cord or elastic headband, either by tying knots (pompon 8) or by stitching them with the needle and thread (9)! and off you go to tell your story... see you soon!
 [:]
[:]
Home-made chocolate bars!
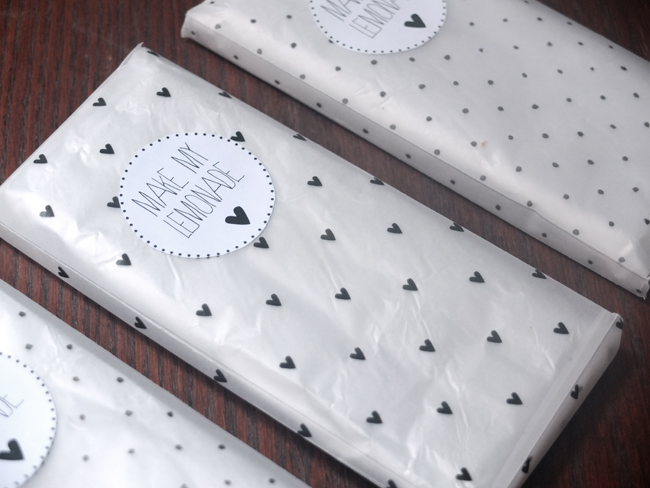
I hope your weekend was restful and soothing, and that you're fresh and ready for an express week that will once again go by faster than lightning. Today it's chocolate time, just to protect yourself from the last of the cold, snug in your little bulge. I'm so nice! Don't freak out, it's really not complicated - all you need is a bit of space and a kitchen thermometer (probe type). But as for space, I've got a kitchen that looks like a thimble and I've done it! Idid it! Don't worry, make room and prepare your ingredients! To work with chocolate, you generally need to temper it if you want to do it properly... Tempering chocolate results in a clean, shiny surface that breaks cleanly, unmoulds perfectly and keeps well. I've attached all the explanations for tempering chocolate. Mercottewho will explain better than I can the whys and wherefores and, above all, the hows...
Variation N°1: Milk chocolate with meringue filling for 2 or 3 bars:- 3 egg whites
- 180g caster sugar
- 1 pinch salt
- 400g milk chocolate (dessert chocolate)
Before you start tempering, prepare your meringues. To do this, simply remove your eggs from the fridge about 15 minutes beforehand. If they're too cold, this doesn't always work. Once the yolk and white perfectly the pinch of salt and you're ready to go. Beat the eggs until stiff, adding the sugar little by little. The mixture should set fairly quickly, and your meringue will be set when the mixture forms horizontal stalactites on your mixer (about 4/5 minutes). On a sheet of baking parchment, shape your large meringues with a tablespoon. It doesn't really matter what shape you give them, as they'll be crumbled into crumbs to garnish your tablets... Bake for 50 minutes at 110°C. Once your meringues are ready, crumble them into small pieces and set aside. Now you're ready to start tempering. YOUHOU TOO PARTY. Once the chocolate has reached the right temperature, apply a first layer of chocolate using a silicone brush, then cover the entire surface with a small ladle or spoon. Leave to cool on the window for around 5 to 10 minutes. Once the chocolate has set, fill the mold with the meringue powder, compressing the meringue so that there are as few air bubbles as possible. Finish with a final layer of milk chocolate. To smooth the whole, use a spatula to remove any excess chocolate. Leave to cool at room temperature for a few hours, or if you're in a hurry, pop them in the fridge...
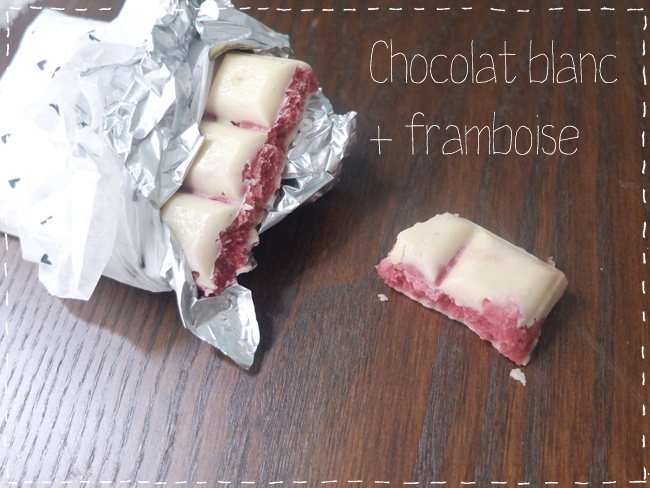
- 300g raspberries (frozen is perfect)
- 5cl heavy cream
- 1 tbsp caster sugar
- 1 tbsp cornflour
- 1 tsp agar agar (or 3 sheets gelatin)
- 400g milk chocolate (dessert chocolate)
DIY The feather duster bag!
Hey guys!
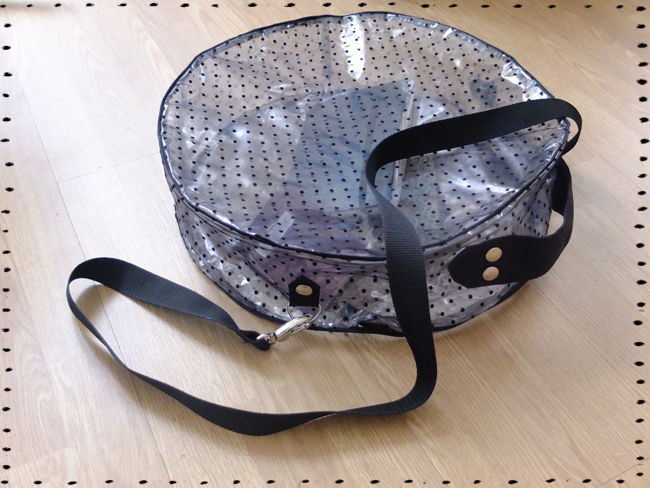
Today, a DIY with a twist! yes, yes, a little dexterity but not too much either, the transparent polka-dot bag (neurotic me?) you're going to tell me that a transparent bag is a funny idea, privacy-wise we're approaching level 0, but look at the practical side of things, you'll find everything at a glance without even opening your bag. If, like me, you're unfamiliar with the concept of a purse: a purse? what's the point? I've got a handbag... well, when it's 3 a.m. and you're looking for change at the bottom of your dark bag to pay for your cab, and the meter is running... Think of me and my translucent bag, it's like backlit! I could tell you all about the many practical benefits. But to be honest, it's just too cool! Roll up your sleeves, and what's more, it's a bag that'll cost you next to nothing... so you can take a cab home more often...
For this bag you'll need..:- 1 meter of transparent oilcloth (thick, I insist!)
- 1 meter of black plumetis tulle
- 3 meters of black piping
- 1 zip of at least 30 cm
- 30 cm cotton or gabardine fabric
- 1 rivet clip + 6 rivets.
- 2 snap hooks, 2 rings and webbing (all optional if you don't want a shoulder strap, but just want the small handle).
Download pattern HERE.
To begin, trace the pattern on the waxed canvas, pin the duster to the waxed canvas and cut 1 cm from the line (2 & 3). Pin the piping to the line along both sides of the bag, then machine stitch (4). For the depth of the bag, repeat the operation: trace, pin, cut and stitch. Join the 2 ends of the depth to create a closed circle. Pin the depth strip to one side of the bag (5). Next, prepare your martingales and handle, now it's time to attach them to the bag's depth, using rivet pliers for the martingales into which you'll have passed the rings before folding them in half and securing them (6 &7). The same goes for the handle, which you can machine-stitch before securing with rivets, just to be sure (8&9). Now pin and stitch the zip between the 2 martingales, centering it in relation to your handle. Finally, pin the second side of your bag to the bag depth strip (on the reverse side, of course) and stitch it in place as if nothing had happened. You've just assembled a zip, by the way - congratulations! Turn your bag inside out and TADAM! To finish things off nicely, you can fix the strap (approx. 120cm, it's up to you) in the loop of the karabiners with a double stitch for added strength. Hook the snap hooks into the rings, and you've got a round (top), transparent (crazy), polka-dot (hot) and shoulder bag (the best)!
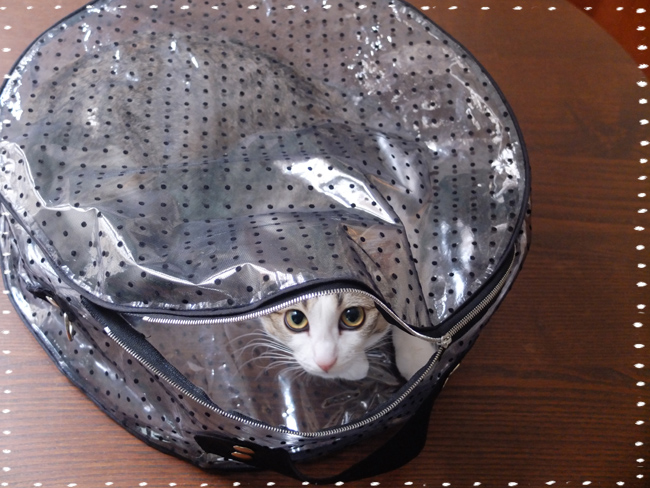
 As a bonus, you can also use it as a cat bag... All kidding aside, Frida is just suffering from sacotomania, the handbag disease, you know...
 [:]
[:]
HAPPY FRIDAY
Today you can notice the improbable mix of prints, I'm not usually very patterned but here I know the ethnic/leopard/grandpa jacket combo spoke to me so I wish you a HAPPY FRIDAY and I'll be back soon for new culinary, shopping and DIY adventures... baci!
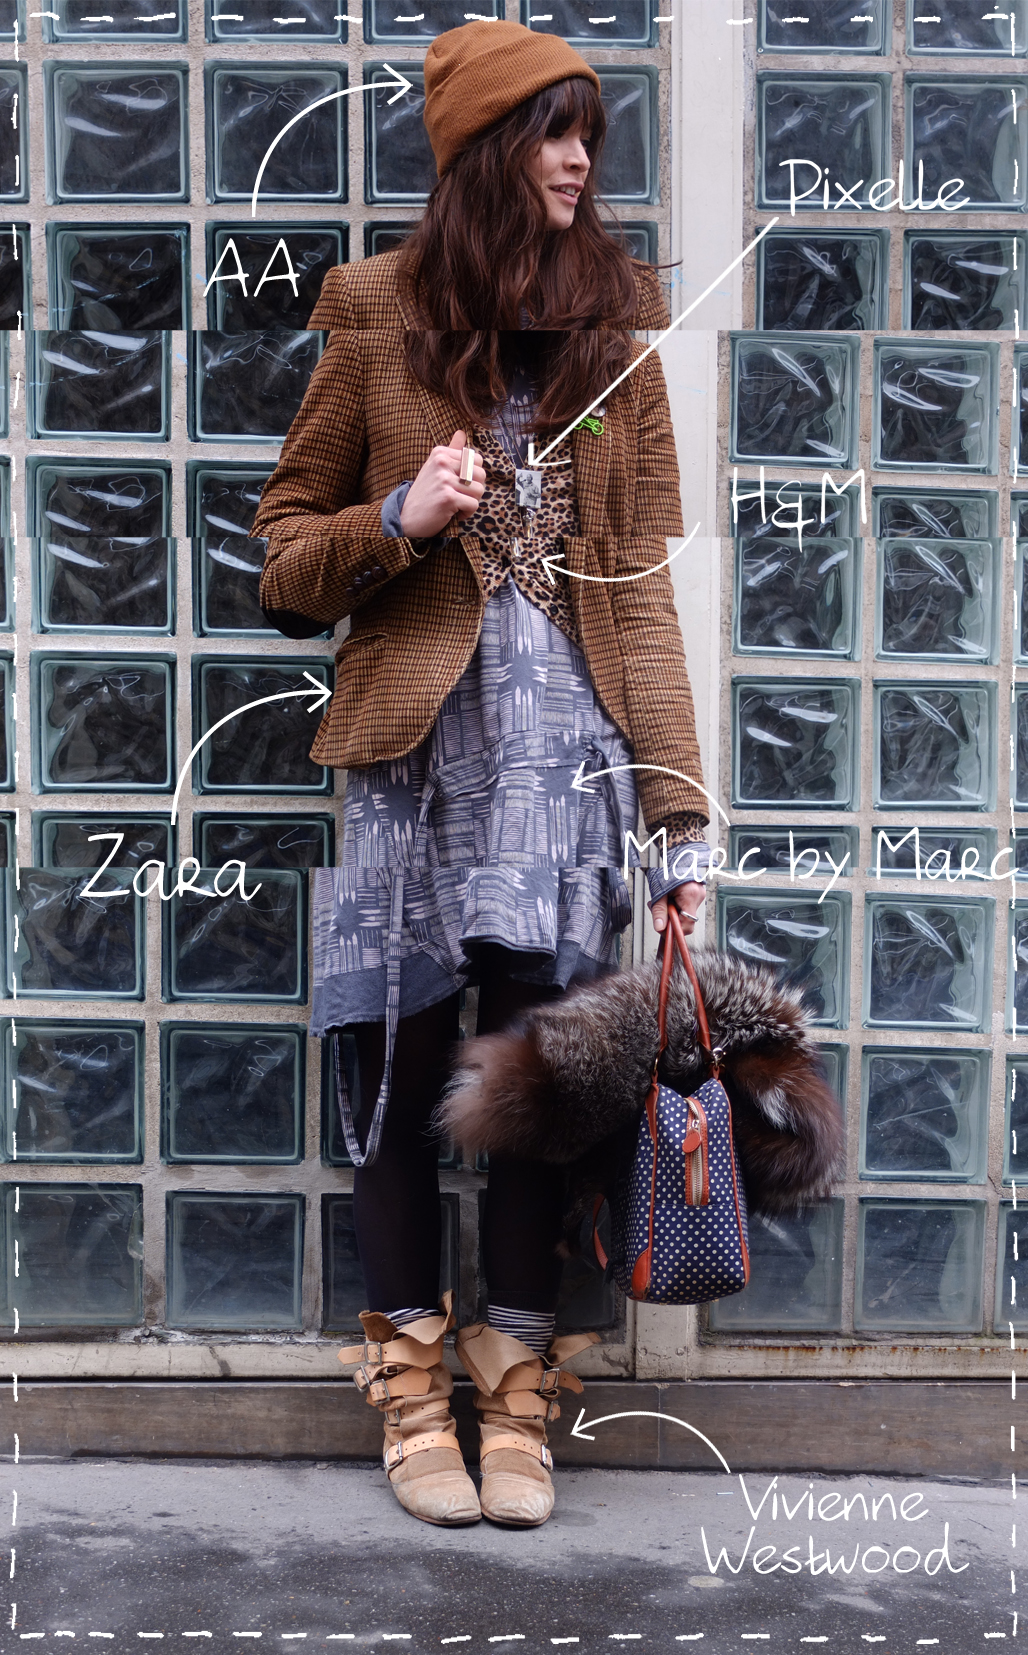
Bonnet American ApparelDress Marc by Marc (old old old), Leopard Vest H&MJacket Zara d'amour que j'ai depuis des années, Echarpe moumoute VIntage, Sac My suelly Pirate Boots Vivienne Westwood and Nelson Mandela Necklace and Ring Pixelle from my friend Léa!
DIY My favorite dress!
 Apart from turning into a giant plague incubator this weekend, I've come up with an atomic DIY... tell me about it! If you ever panic while making it, if there's the slightest problem understanding the explanations, leave me a little comment and I'll come to the rescue!
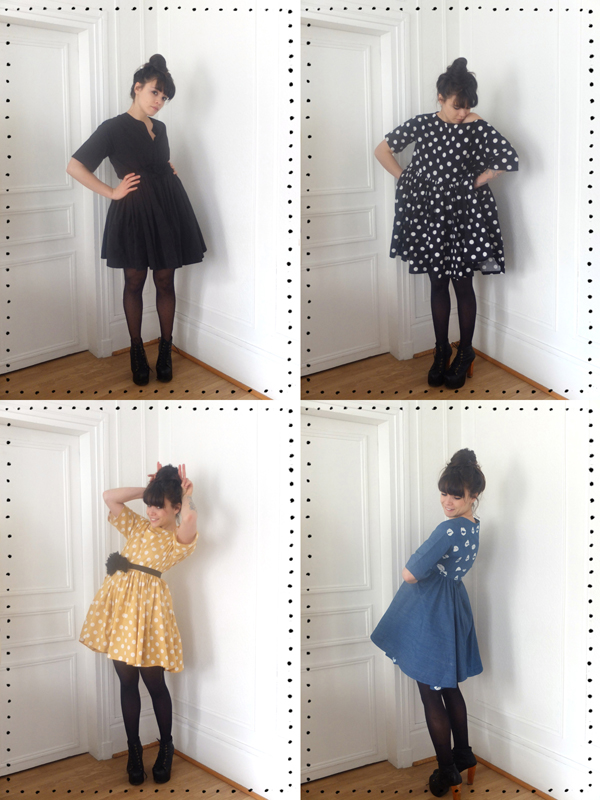
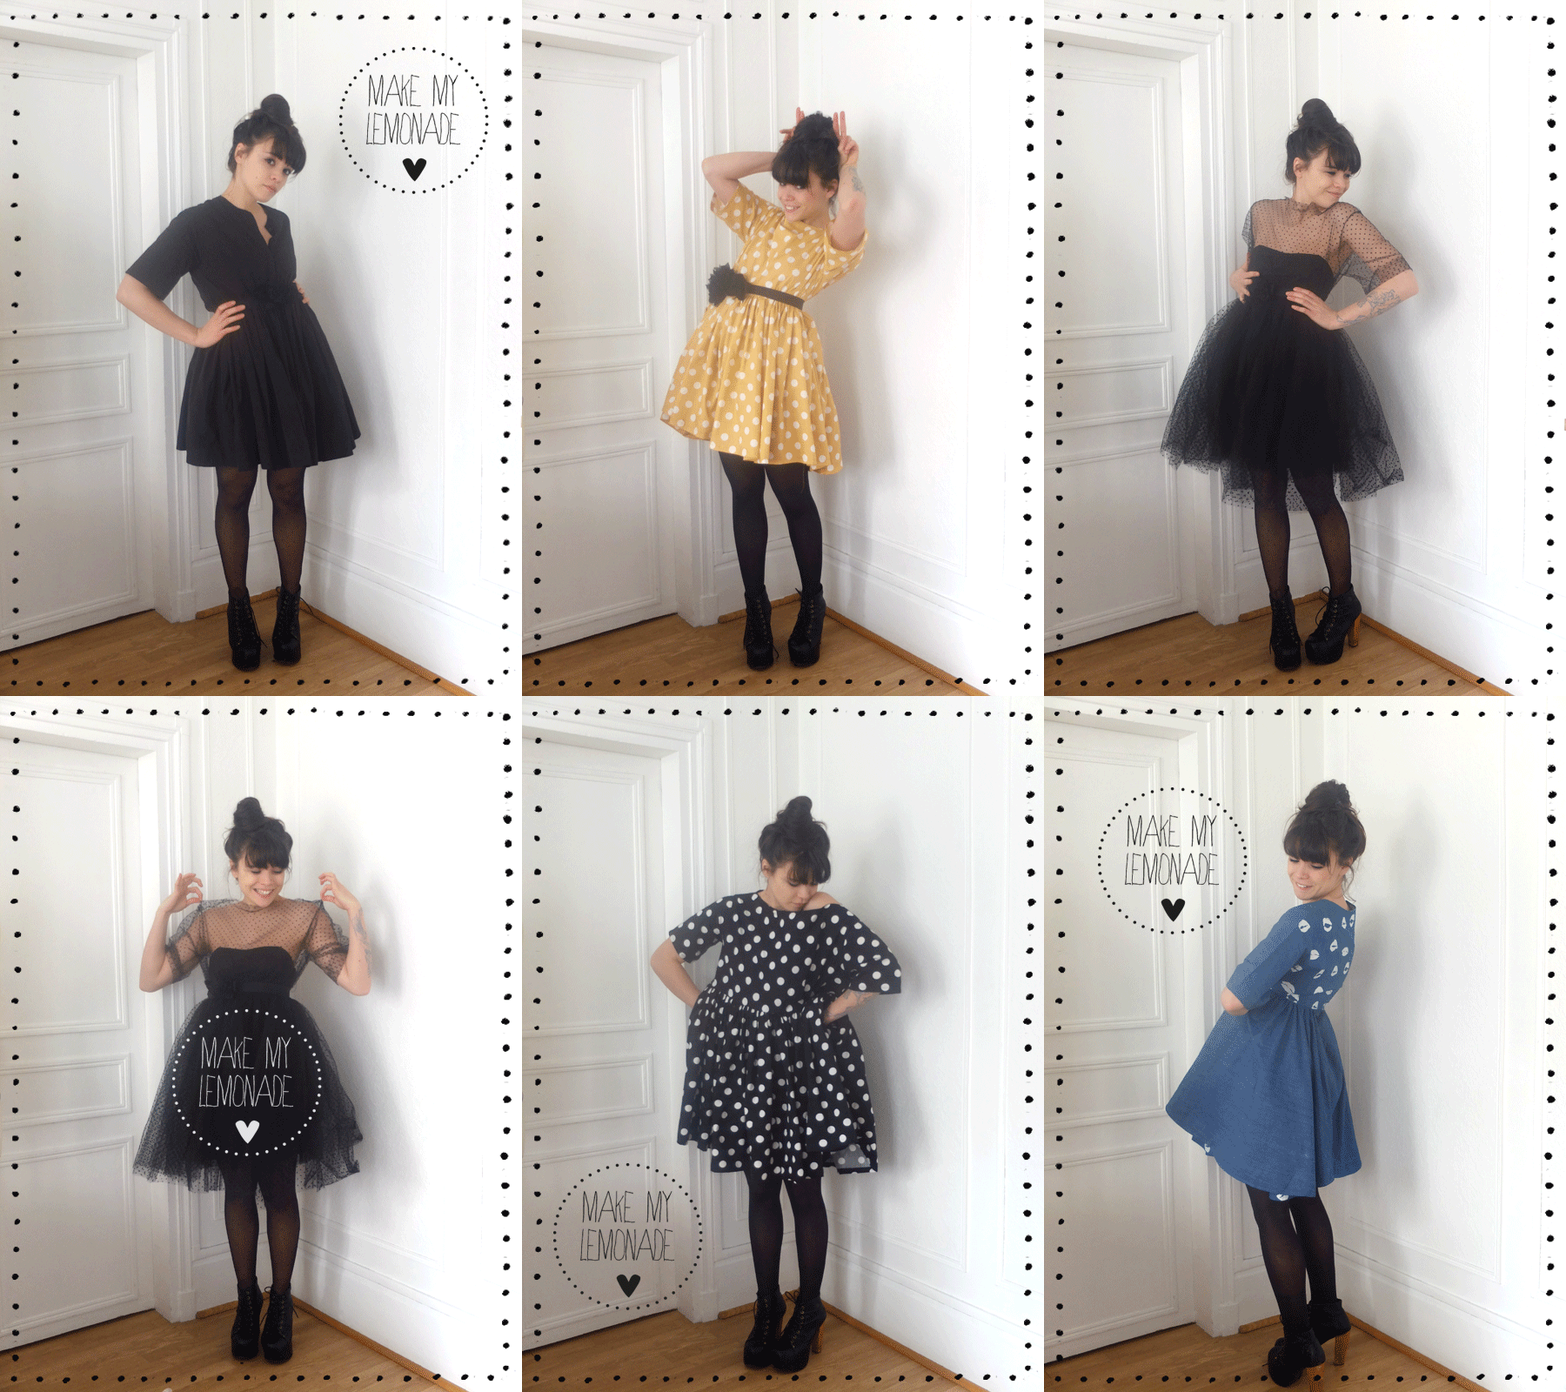
You'll see I have a serious problem with this dress, I love it so much I made 5... I know it's a lot... and I also have a serious problem with polka dots... Anyway I've made you a simplified pattern of this dress... (nice) and easy explanations (so nice!) So yes I know, don't panic, you don't have to make this dress in one go, just start a few hours and come back to it a few days later, no dress binge... we're patient and it pays off! Super-easy pattern, no real back or front, symmetrical sleeves, bust, back and flounce, so it's ULTRA EASY!
Download your patterns HERE and THEas well as INSTRUCTIONS!
A4 BONUS part 1, part 2, part 3 and part 4 !
 [:]
[:]
DIY cupcake tower
Hello guys,
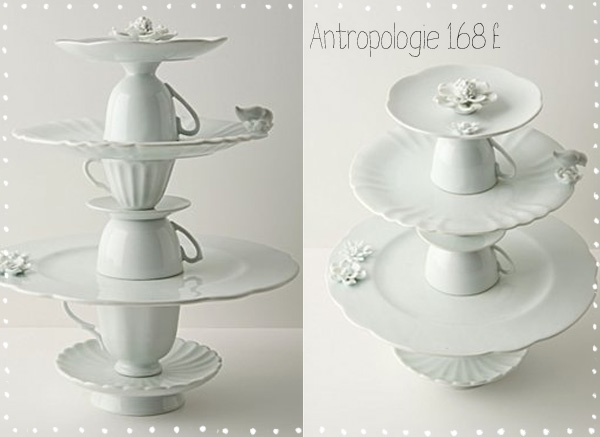
Tuesday is DIY, (it doesn't rhyme, too bad). Last month I was lucky enough to go to London with my boyfriend, to shop, see exhibitions and eat well! It was a bit like my London baptism, and I really took in the sights, coming back recharged with ideas and a thousand desires! I don't have an unlimited budget either, but many things appealed to me without breaking the bank (you can be proud of me), and as I wandered around this sumptuous "antropologie" boutique, which is a feast for the eyes and the mind, I came across this infernal tower of cupcakes, or little pastries... top of the range, except for the price, the weight and the space it would have taken up in my suitcase. Nevertheless, one picture with my iphone later, I keep it in a corner of my mind. I get back to Paris, call my crazy friend Camille and say "kitten, I'm sending you an mms, tell me if it's feasible?" Camille is a ceramics pro and tells me Araldite! I say to myself Araldite, Araldite? it must be a new expression meaning "eureka" I google it anyway and I understand that it's THE glue, the real thing for ceramics... I've got the solution to my challenge, I'm off to la vaisellerie specialist in cheap white crockery in Paris.
You'll need..:
- 3 plates of different diameters and designs, - 3 cups of different sizes and designs +2 coffee saucers -a small soup tureen, - a tube of araldite + a marker.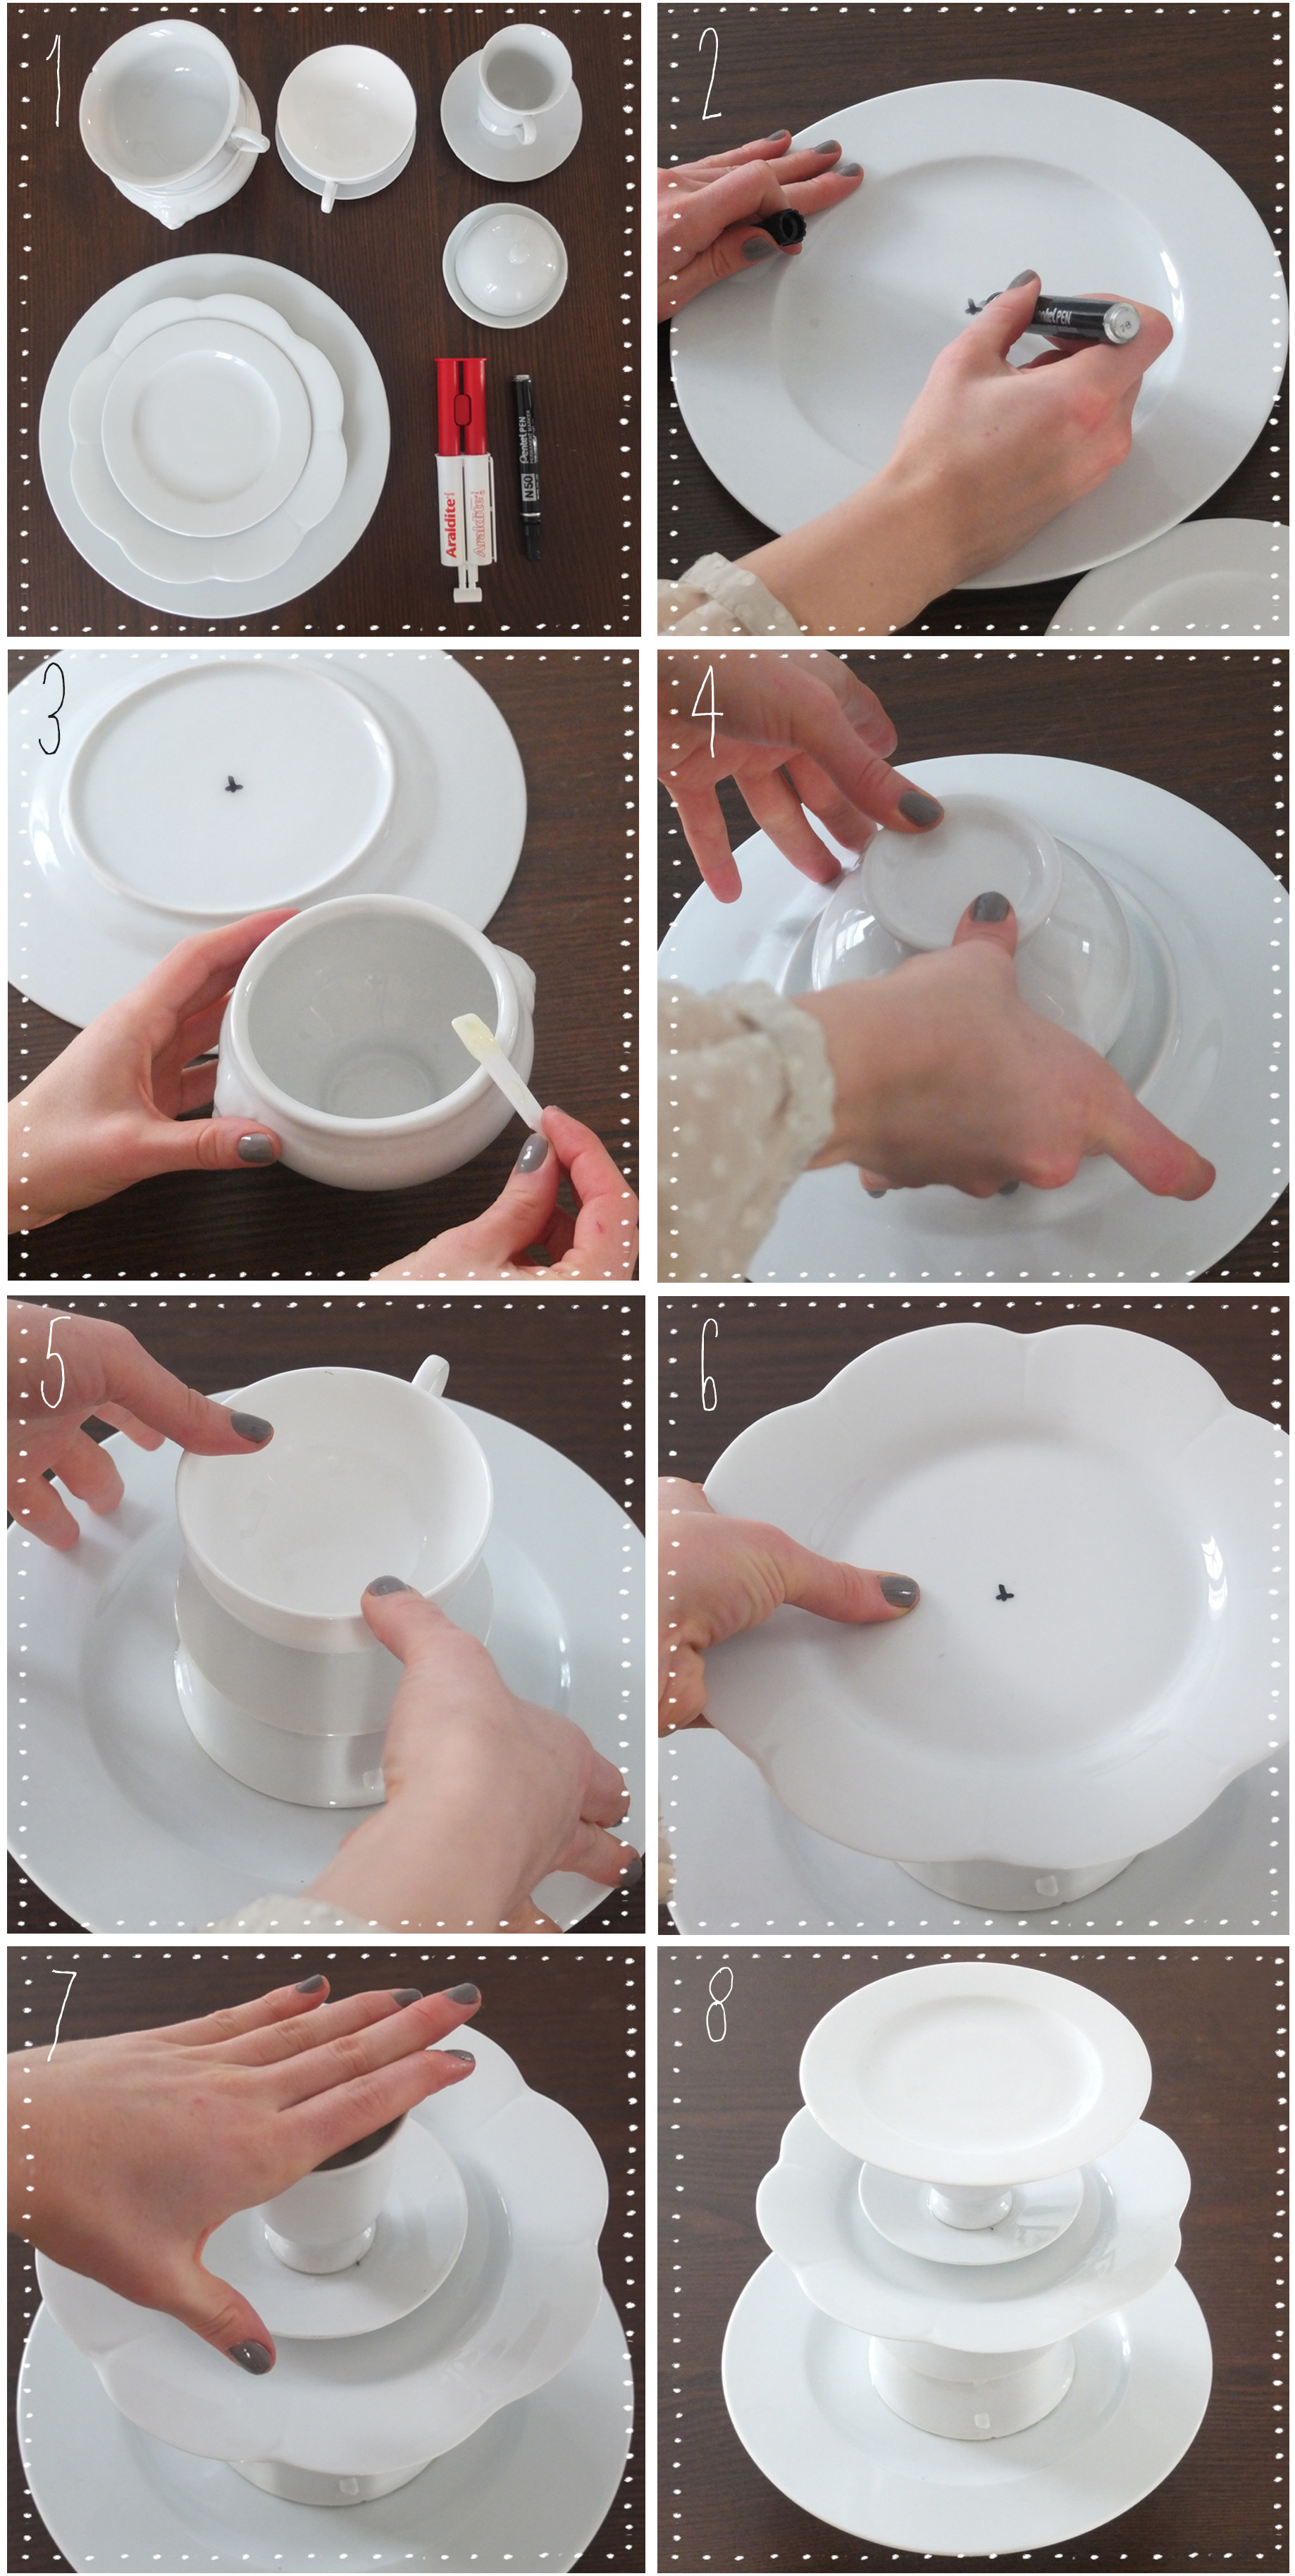
First, mark the center of each of your elements to help you find your way around when applying the glue. Next, open your 2-component glue and follow the instructions carefully. Coat the surfaces that will be in contact, and place the elements one on top of the other, applying light pressure. The glue will set in 4 minutes, dry in 20 minutes and your tower will be ready to use in 2 hours! All this for the sum of 29 euros. For an even more retro look, and especially if you're not in Paris, I'd advise you to hunt for your elements in attics.
Lisa

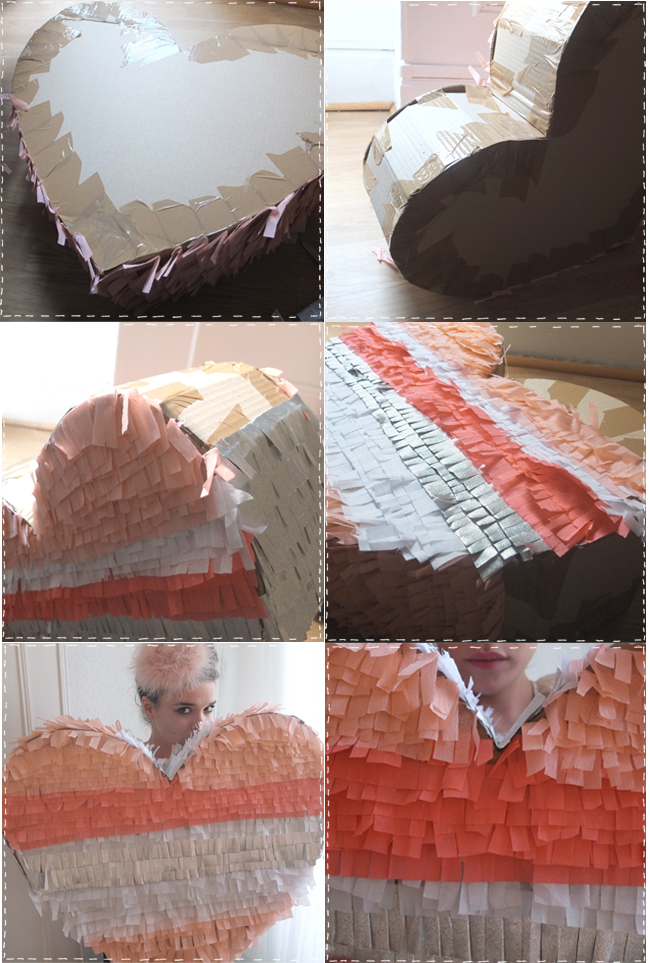
Love Pinata
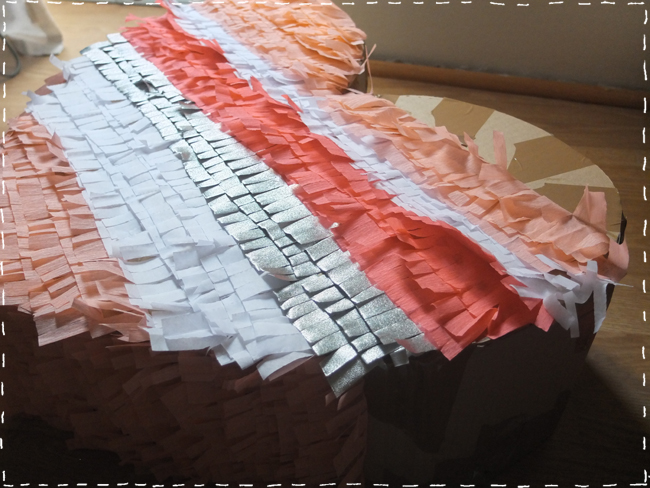 On Sundays, normal people sleep, rest and laze around, but even if I go to bed at 4 a.m., I get up 5 hours later, refreshed, and I make a heart-shaped pinata. I know, I wonder too... All that to say, I wanted to have a little party, a simple Valentine's "lunch" (pinata = simplicity, I know my subconscious makes mysterious shortcuts). I know that the big day is the 14th, but friends, I've got a job, and preparing a lunch (while it's still light, so I can take nice photos) is complicated, and besides, I'm 2 months behind Christmas, so I can be 3 days ahead of Valentine's Day... I'm getting away from the subject of Pinata, I'm not making you a classic DIY, because that's for the wonderful blog Oh happy day I've reworked it a little to make a heart, but you'll see, it's very simple and so pretty. As for mine, I haven't garnished it with candy, confetti etc., I'd like to keep it until the 14th to give it to my best friend, who shares my fascination (worryingly) for pinatas. I just hope she doesn't read this post before Tuesday...
