Thursday is embroidery!
A little back-to-school DIY, to get you going again slowly, and also to make you feel better about embroidery... The other day, I was on my way to I don't know where, but I came across a young woman wearing a plain white tee shirt with a collar with gold flaps framed by two black stripes... Was it silkscreen? embroidery? H&M? or Zara? I didn't have time to analyze it properly or stop to ask her, she was already gone... Too bad I forgot where I was going... "I've got to have that shirt, I've got to have that shirt" echoed in my head. I'm going to get that tee shirt (even if it's a Zara, at least mine will be mine)... I like the idea of customizing an all-white tee shirt, like the classic of classics... I know there are a thousand and one ways to customize this basic, but I wanted to try this version and I'm a bit proud of it! I think that with a nice lipstick and a blazer, the white tee shirt can be super chic!

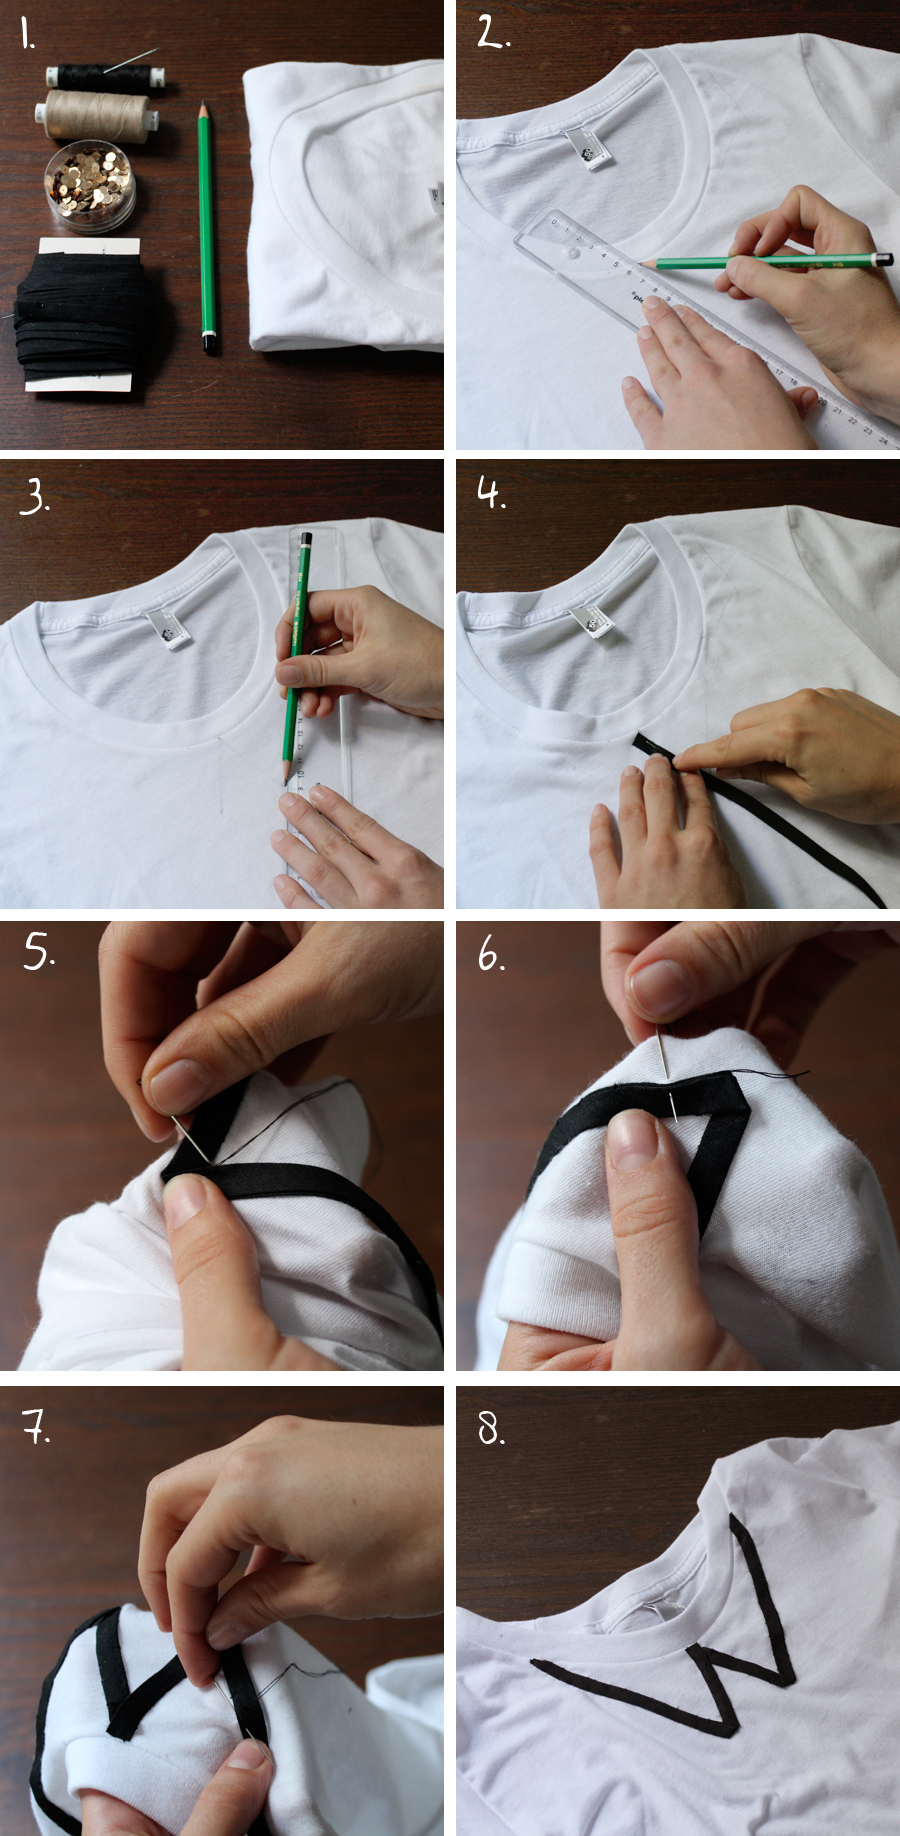
To make this Circus collar tee shirt, you'll need..:
- A close-fitting white tee shirt,
- Gold sequins (here I prefer mast, I think it's more chic)
- Black bias tape (1 cm wide)
- black and beige thread
- needle
- pencil and ruler.
First of all, mark out the location of your black bias: here I've made point shapes 4 cm wide and 5 cm high, with the outer edges dying down to the collar fig. 2&3. Then pick up the bias and pin it along your pencil line fig. 4. Thread your black thread through the needle and attach the bias to the tee shirt. For added strength: attach the bias to the inside of the "collar" and to the outside figs. 5, 6, 7 & 8. Now you've got your collar outlined, I suggest you give it a little ironing here to flatten it out a little and make your work neater.

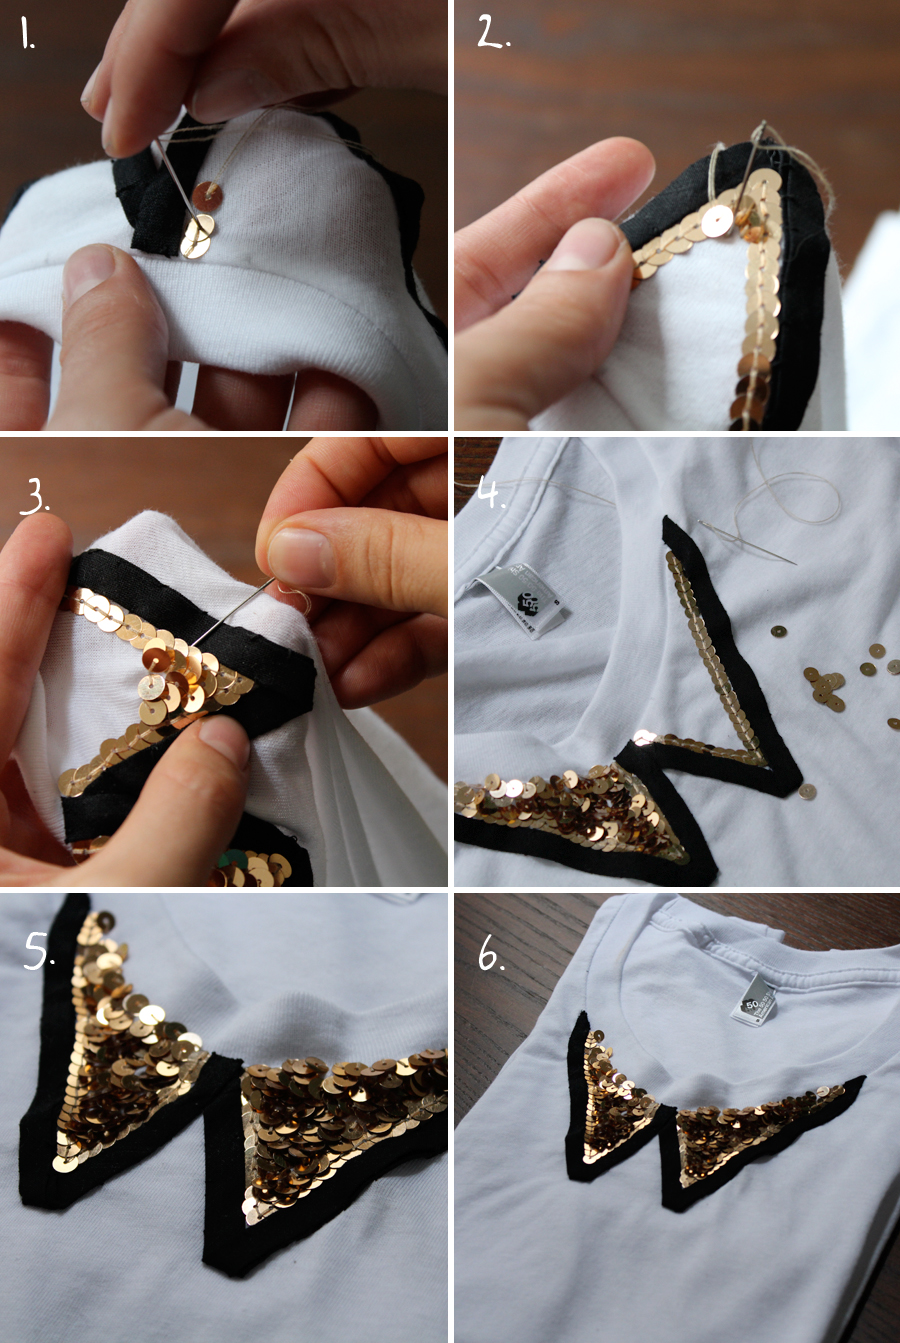
Don't panic, it's easy! To start with and to make the work a little more qualitative and neat, I preferred to follow the bias with the sequins before sewing the others randomly and anarchically.

Start embroidering on one edge, following the bias. It's very simple: to keep your sequins in place, you need to pass through the tee shirt, then pass your needle and thread through the first sequin and re-stitch your needle at the same point where you passed through the tee shirt: easy. Then take your needle out at the edge of the first sequin, thread the second sequin and stitch in the center of the first sequin fig.1 and so on. I know it sounds scary, but I promise it's not complicated! Once you've gone all the way around in this regular way, cut your thread and you're ready for the "random" embroidery starting from the tip fig.2. It's very simple, even more so than for the edge: you just need to stitch the sequin and re-thread the thread at the same point where you brought it out. Then repeat the operation quite tightly to create a charming sequined mess fig.3. Once you've finished the first part of the collar, do the same crusade on the other side fig.4. And TA-DA (fig. 5&6)!

[:]


