POLKA ADDICT

Hello the company!
Yesterday it was gray, and not very warm for the first time in months in Paris, I put on a sweater that made me feel funny, and I heard phrases like "I love this end-of-summer light". My kittens, I have bad news: summer vacations are the beginning of the end... I'll be fine, I promise. I love the atmosphere, preparing my outfit on my bed the night before school starts again, the smell of notebook protectors, seeing my caramelized friends again, the return of good resolutions! So here we are, I'm presenting a super-simple DIY that I loved preparing: a military jacket. You've all got one in your closet... And like the Levi's denim jacket, it too makes you look 15 years younger, and you have the feeling that the photo of Che stuck on the cover of your diary is going to resurface from your handbag at any moment... Don't worry, I've got the trick to give your Camo jacket a twist: felted polka dots!

More polka dots, you ask? Yes, I know, but when you love it, you don't count! And I think it gives a fresh look to that jacket you don't wear any more, but can't bring yourself to throw away... The discovery of this paper, generally used to write numbers on soccer shirts, is a little revolution! A revolution because this paper is supposed to be used with a special press, a bit like silk-screen printing... Well, I've worked it out, and with your iron on a heat setting of 160°C /190°C between Viscose and Cotton, it works!

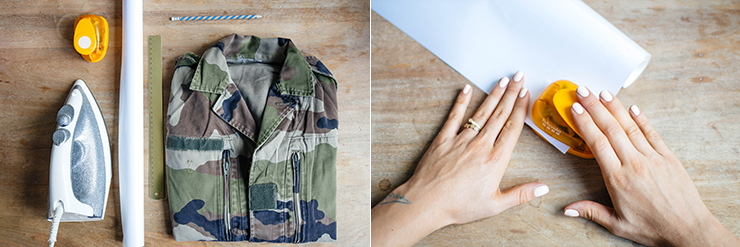
For this DIY, you'll need :
- -A camouflage military jacket is best,
- - velvet paper "Velvet-look flock found here 50cm in white,
- - An iron,
- - A sturdy, good-quality punch,
- - A ruler and pencil, but these are optional.

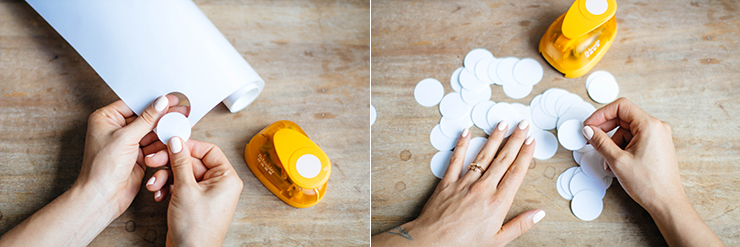
Start by cutting circles out of this brilliant material as if it were paper. You can also make squares, triangles and lettering - have fun!

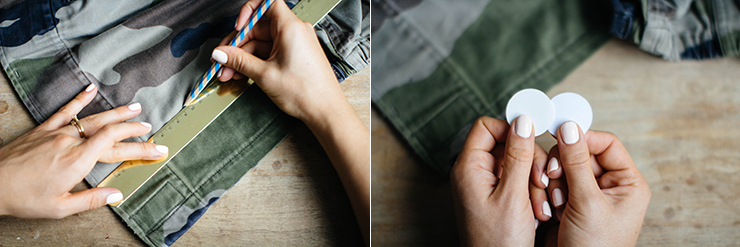
Then, if you're a bit of a stickler for order, you can take a ruler and a pencil to mark out the location of your future polka dots. But personally, I find it much more fun when the polka dots go off in all directions, and overlap... Careful, there are two sides!

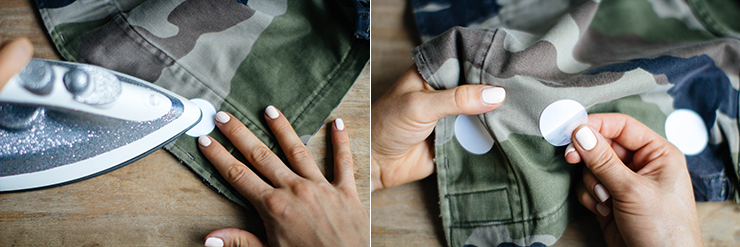
Yes, there are 2 sides, one a little more beige, which will be against the fabric, and a shiny one which will be towards the iron. Iron your pea for about 15 seconds, using small rotary movements to avoid damaging the fabric. Once the pea has adhered well to the fabric, remove the shiny cover and you're ready to go!

Before getting started, I advise you to do a few tests inside your garment to adjust the heat of your iron and familiarize yourself with the matt and shiny sides of your polka dots and TA-DA! Many hugs and kisses!

To read this post in English, click here!


