THE DIY SWIMSUIT
Hola!
I started to build up the suspense yesterday with this DIY, and I hope we won't be disappointed. I told you I couldn't believe it myself, not so much the realization itself, but the fact that I'm showing off my swimsuit on the Internets! Yes, I know you can't see much in the photo, but you should know that I don't show my bikini to just anyone... no, no. For the record, in the course of my blog review, I got lost on Alix de the cherry blossom girl who needs no introduction... and I saw there this little swimsuit from H&MI'm going to try to make another one for my "yeah beach" week. The h&m one had high-waisted panties, so I thought it'd be easier for you if we kept it simple with elasticated bikini power panties.... and as usual have fun, I did it in water green because I'm mono-maniacal about certain things, but I could have done it in polka dots, so go wild (and send photos!)! Oh yes, and don't worry, the post is a bit long, but that's because I wanted to go into detail, just to be clear, it's really easy, fingers in the nose, the promised bikini!
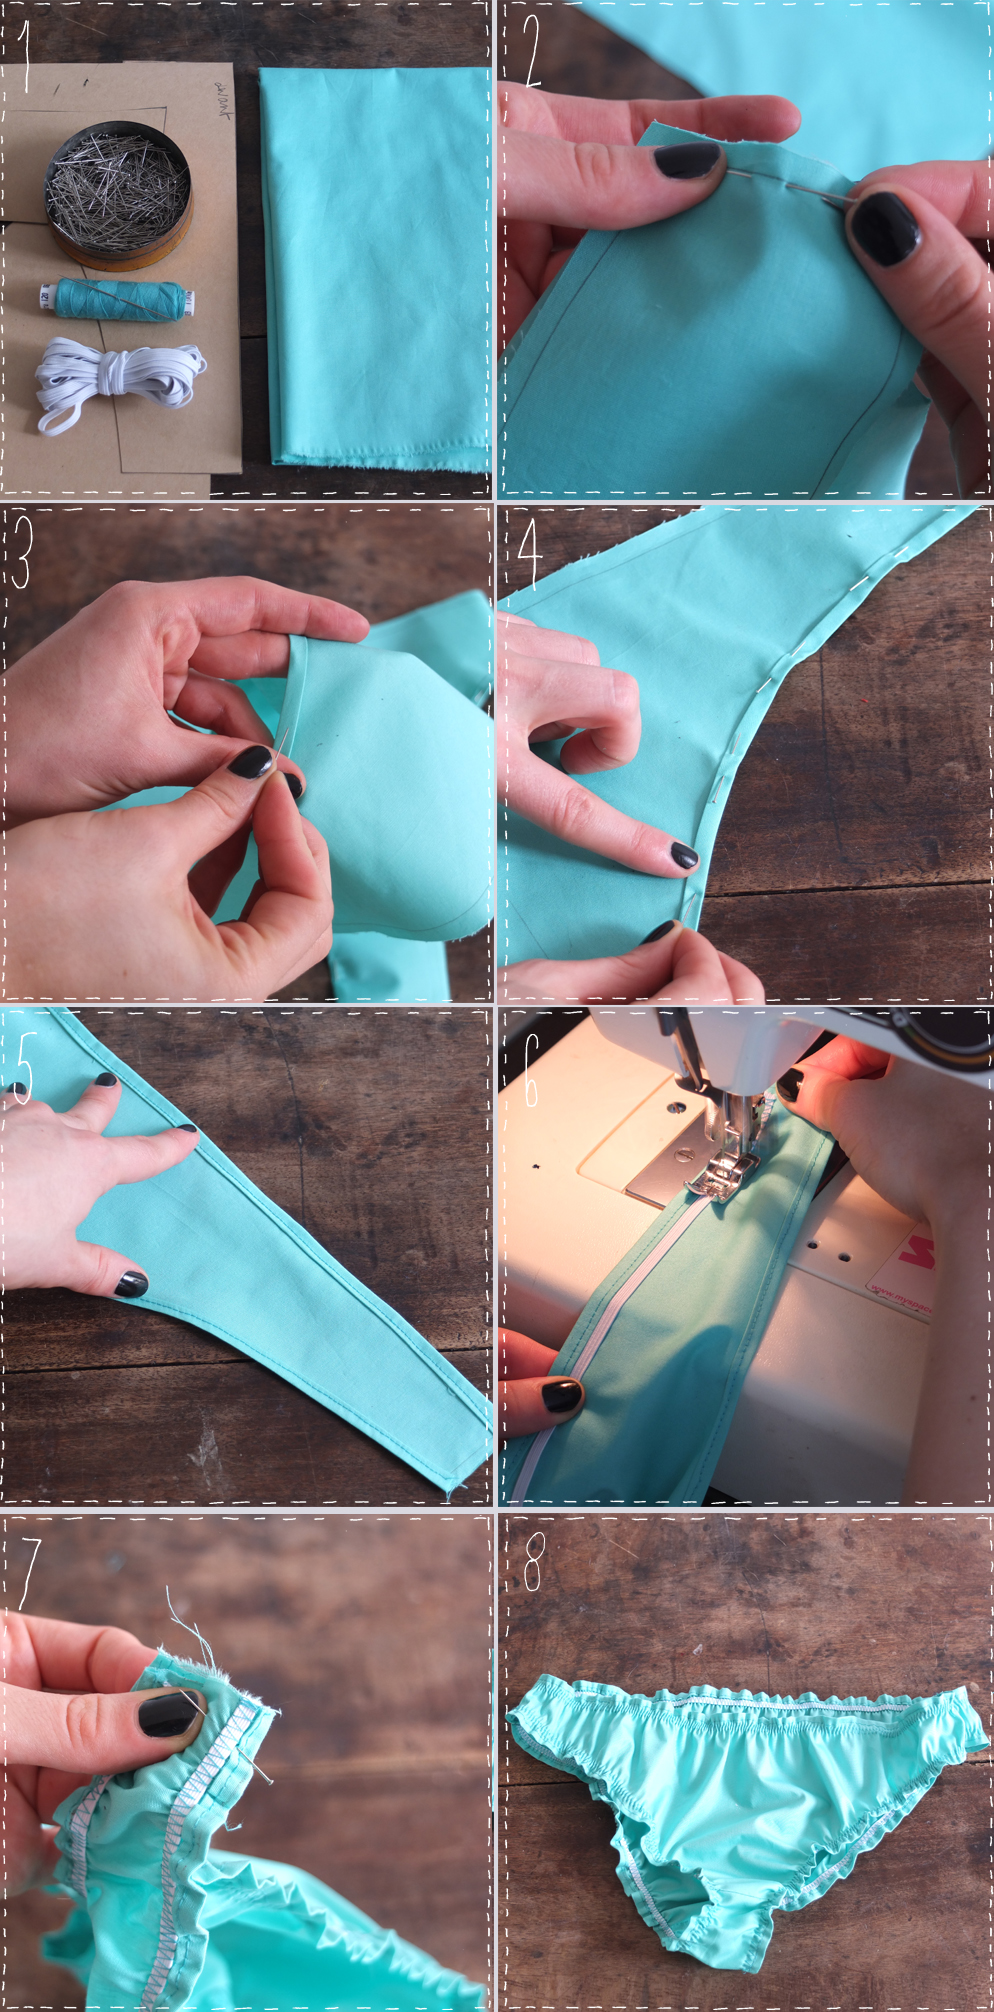
You'll find the pattern HERE here, it is a Size M , but I give you a tip on how to adapt it to your size!
 to make this Killer Death Bikini, you'll need:
- fabric about 1m, 1m20 to be on the safe side!
- thread to match your fabric, and a needle,
- elastic (approx. 3m)
- pins
- and a sewing machine!

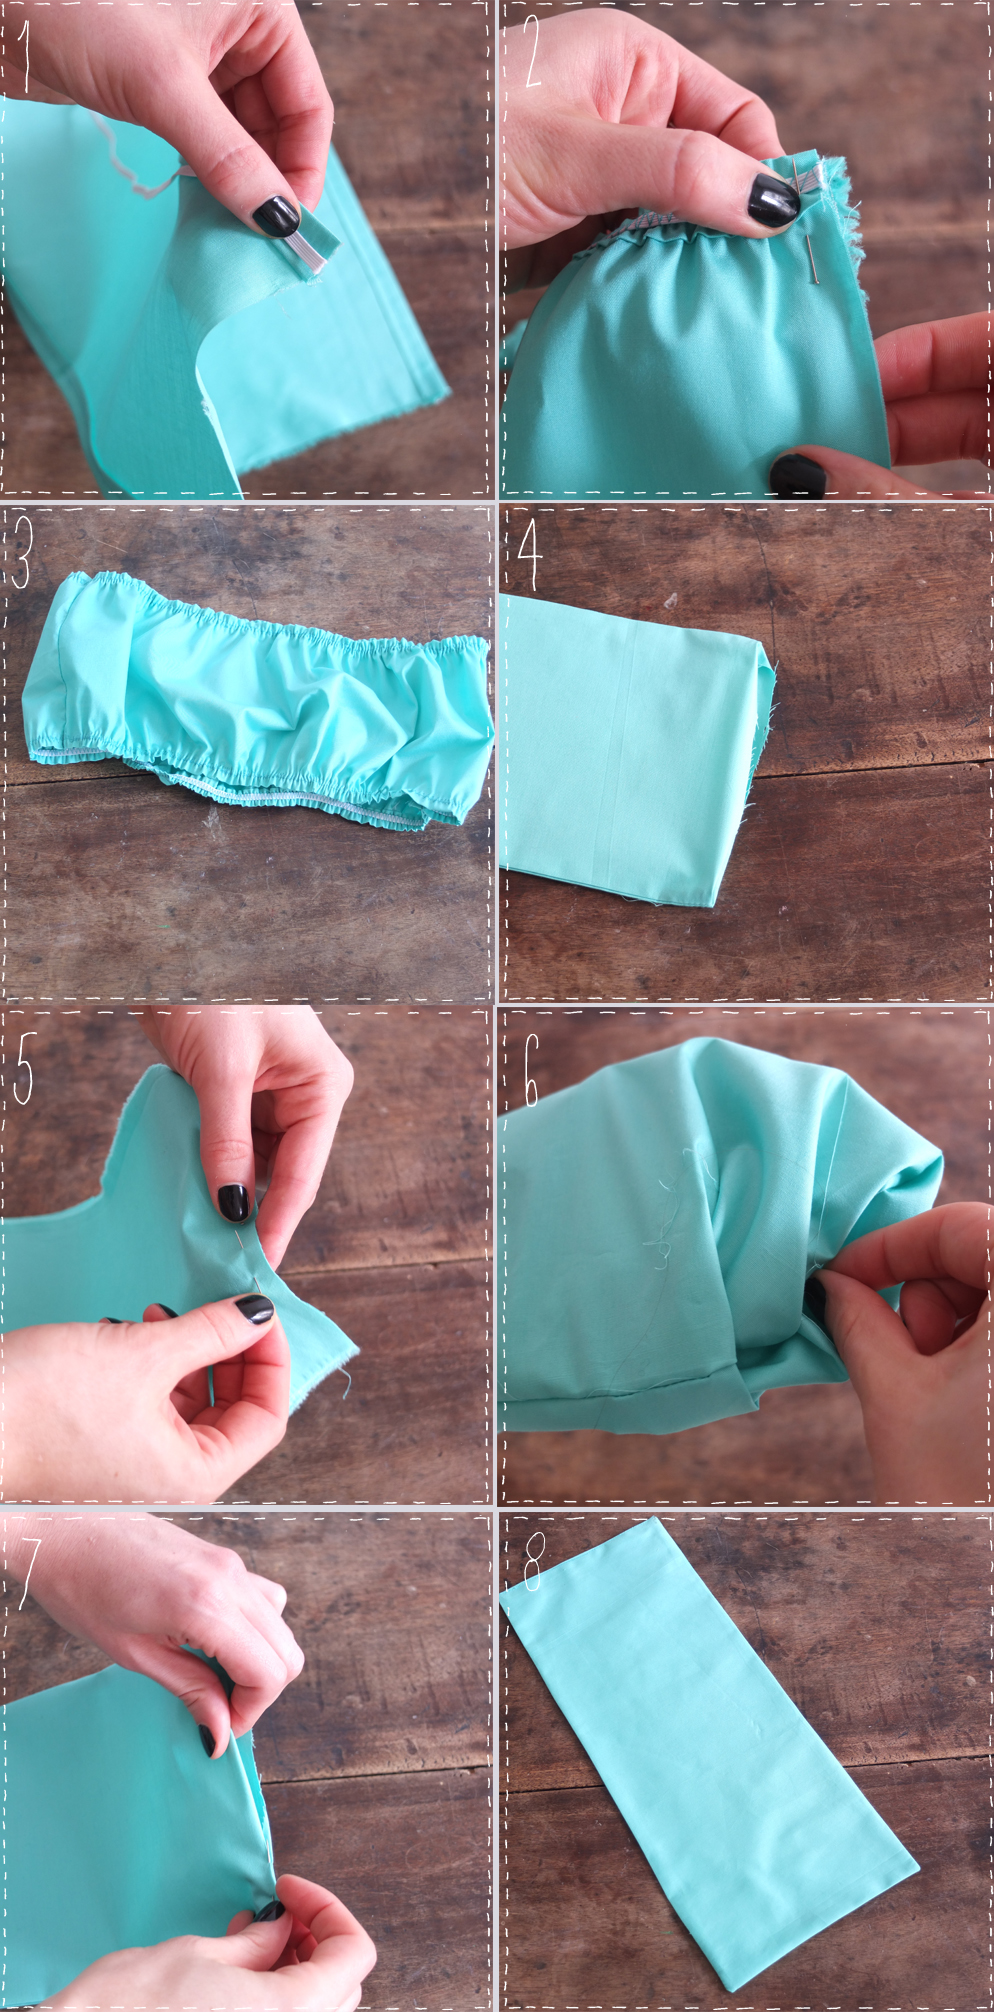
For the bandeau, do as for the panties and stitch the back and front together (just on one side) and hem all the top and bottom lengths, pin and stitch. Then take 68 cm of elastic and, as for the bikini bottom, stitch it to the widest Zig Zag stitch on your machine, pulling (gently) fig.1, then do the same for the other side. Close your headband, pin it (fig. 2) and stitch: TA-DA your headband is ready fig. 3!
Now for the knots. Take your large rectangle of fabric, fold it in half fig.4, and pin 2 sides (length and width) fig.5, then stitch. Next, slide this rectangle of fabric fig.6, to close your band, tuck the edges inside fig.7, pin and stitch to close. Iron well to ensure a flat rectangle fig.8. First part of the bow finished.

Next, take the small rectangle, fold it in 2, pin and stitch it, fig.1. Slip it along its entire length, fig.2, and iron it, so that it's neat and smooth fig 3. Take your large rectangle, place it on the front of your headband and with your small rectangle, form a ring to create the knot, fig. 4. With needle and thread, close this ring with a tight hand stitch fig. 5. Then attach the upper sides of the knot to the headband fig.6. And repeat all these operations for the little knot on the back of the panties, and I recommend you attach the four corners of the knot to the bikini! and TA-DA a brand-new, home-made cotton swimsuit!

It was windy as hell! lots of kisses!
[:]


