Wordpress blog EN
DIY DIAMONDS
Hello!
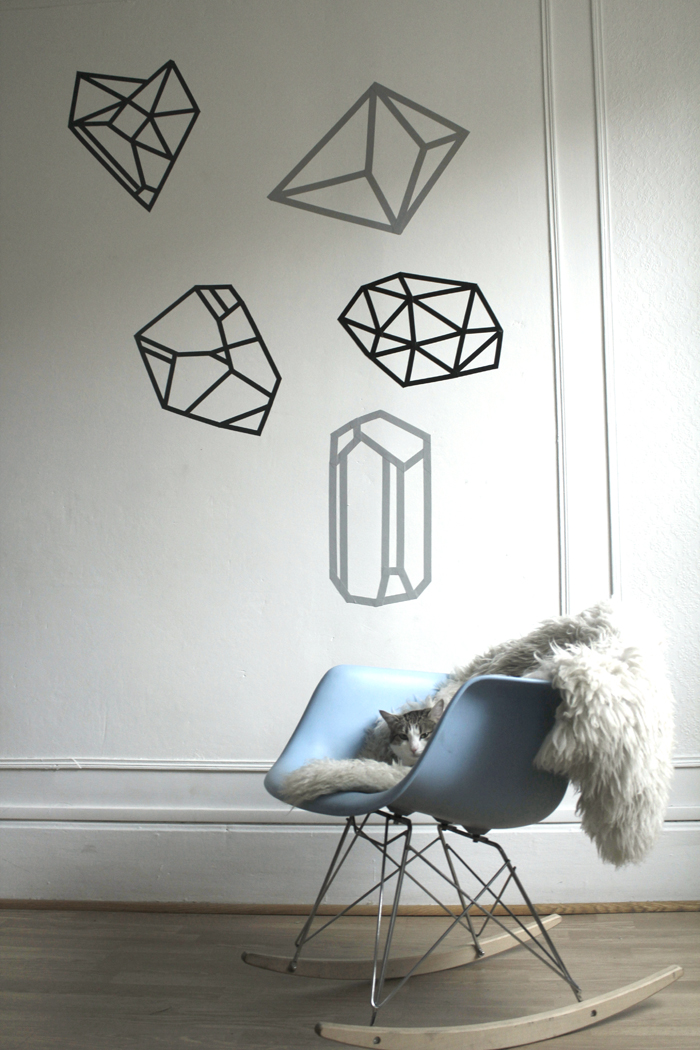
Wednesday's DIY is here! Today I'm veering more towards a geometry class than true diamond bling. As you'll begin to notice, I'm a huge fan of Scandinavian design - the retro feel and pure lines that we've all noticed invading our internet browsers...and this DIY is no exception, coming about when I stumbled across this image on the internet. I said to myself, "wow, that's too cooool, I have to do that!" and then the decorating tyrant with whom I live crushed all my big ideas and said "you're really going to repaint one of the walls in our apartment just for a blog post?". And so, I realized that maaay have been a step too far, so to please everyone (in particular my darling loved one...because yes, I would quite have liked to repaint one of the walls in the living room...) I'm going to show you how to create the opposite of this image. What's more, this version is definitely less permanent and restrictive - yup, don't say I don't think about you my darling students who aren't reeeally allowed to repaint your apartment. Just grab a bit of gaffer tape or masking tape and you're ready to go! It's not exactly high voltage DIY, but hey, I know that not everyone has Mike Gyver with his ten fingers...so ENJOY!
To carry out this DIY, which couldn't be simpler, you need:
- - Scissors
- - A sharp blade (e.g. a Stanley knife)
- - Colored gaffer tape (you can buy it from Rubans de Normandie, Paris 75003)
- - Or sticky masking tape (but make sure it sticks well!)
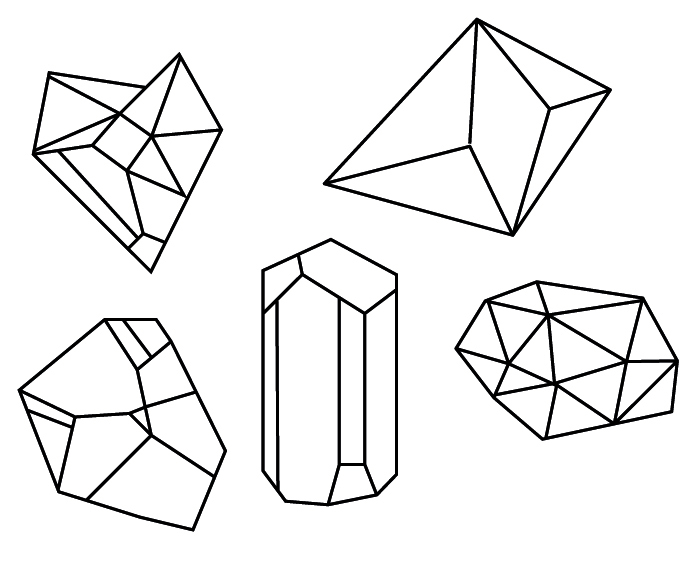
- - And templates of the crystals, which you can download HERE.
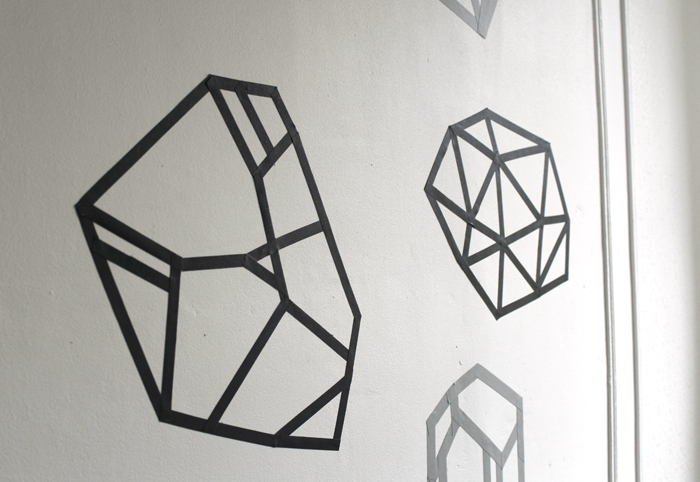
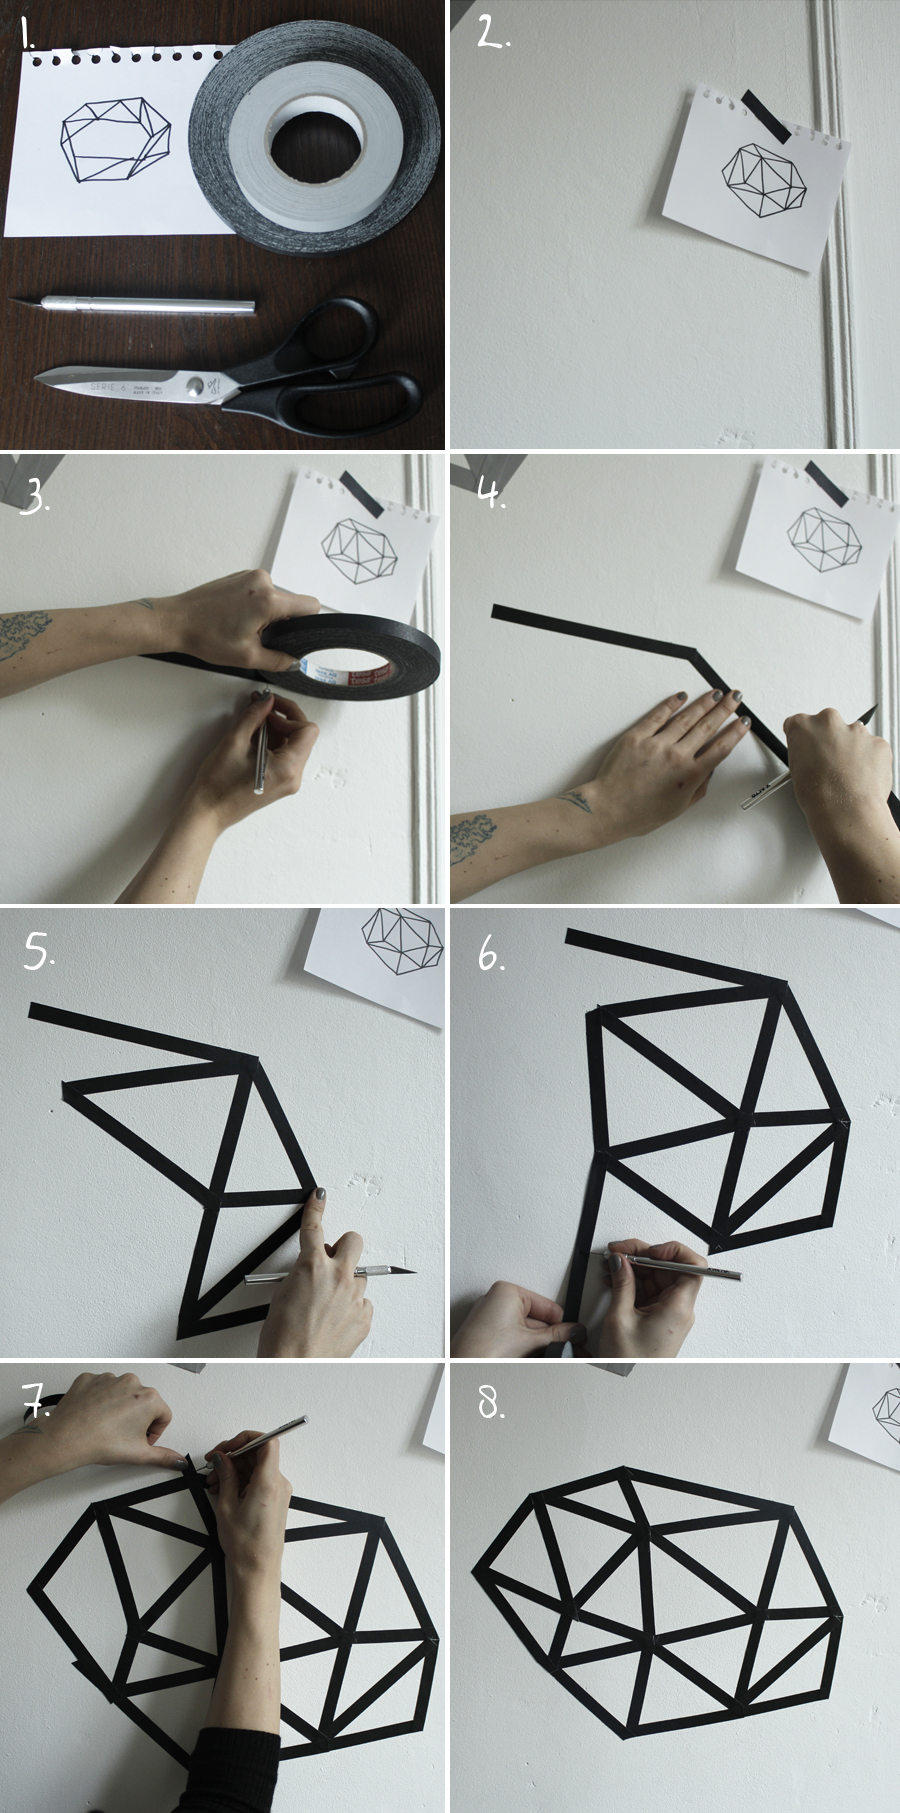
To start, choose the place on the wall where you want your crystals to be, and stick your template near you so you always have the pattern in your mind, fig.2 . Unroll your first lot of tape and place it on the wall. Choose where you're going to start from on the sketch of the crystals and create a larger version using the tape, fig. 3,4,5 & 6. The great thing about this DIY is you don't need to be precise at all with your traces of the crystals. You can let your imagination run wild and reinvent shapes! The key is to stay with shapes with broken up lines, and that the ends of each line form an angle with another. In order to get a clean finish, with your knife cut away any irregularities so that your shapes have a clean and sharp finish (just cut gently on the surface, there's no need to slash up your wall!)fig.7 and TA-DA fig. 8! Of course you could always create these diamonds with a bit of masking tape and by painting over it you'll achieve an effect not far from the original source inspiration, or you could even make them with crazy colored tapes...whatever you do, have fun with it!!!
And here is a little bonus:
[:]
DIY of the silent strass[:]
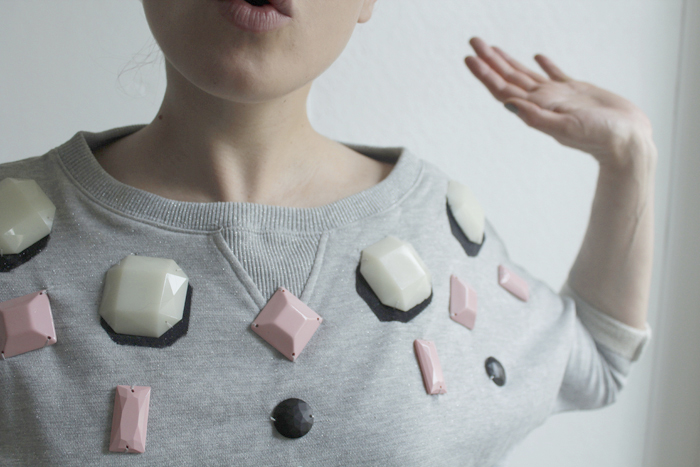
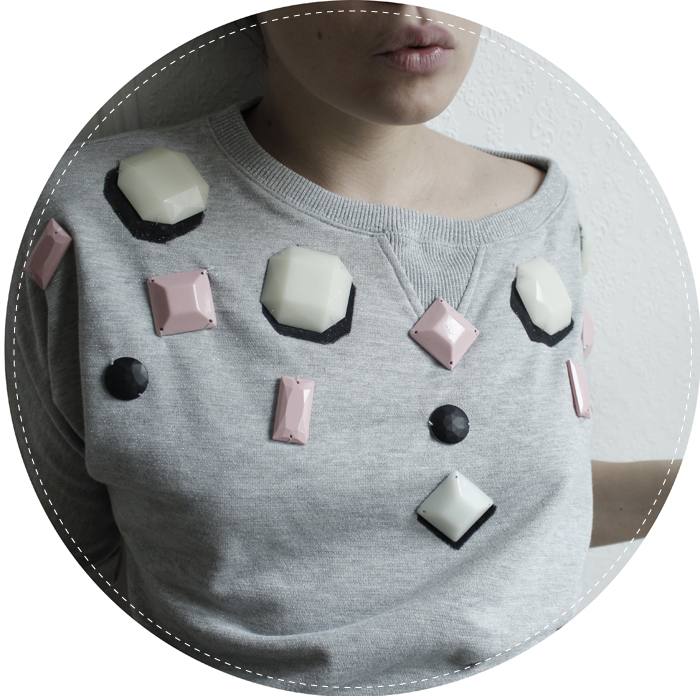
But what DIY could be hiding behind this mysterious title..? Well, an easy and super effective, graphic DIY, with plastic diamonds that I spray-painted to give them a more chic less cheap finish that so often goes hand in hand with the classical sew-on sparkling diamonds. Anyway, I love the idea of making diamonds which are usually supposed to be super shiny, super opaque, cool huh? In fact I love the idea so much that I've become obsessed with pink ones, black ones and white ones...but I need to calm down...And so, I hear you asking, "but where oh where did you get such enormous diamonds from?" I took apart a necklace that I picked up at a car boot sale but if any of you ever find somewhere that sells such huge sew-on diamonds like these, tell me tell me tell me! Though I'm not so sure that everyone's such a fan of oversized things like I am, so for you lot the dimaonds will be a lot easier to find! Whatever you use whether it's small or huge stones, sew-on or clamp-on, spray painted or varnished, the DIY will still look super cool... And so over to you with your paintbrushes, spray cans or use nailpolish?
.
To make this silently shining DIY you'll need:
- -A grey sweatshirt (this one is from monshowroom), with a bit of lurex in it...
- -A pencil and a paintbrush
- -Sew-on diamonds (preferably different shapes and sizes)
- -Colored spray paints (at least 3 different colors)
- -Fabric paint
- -Some thread and a needle
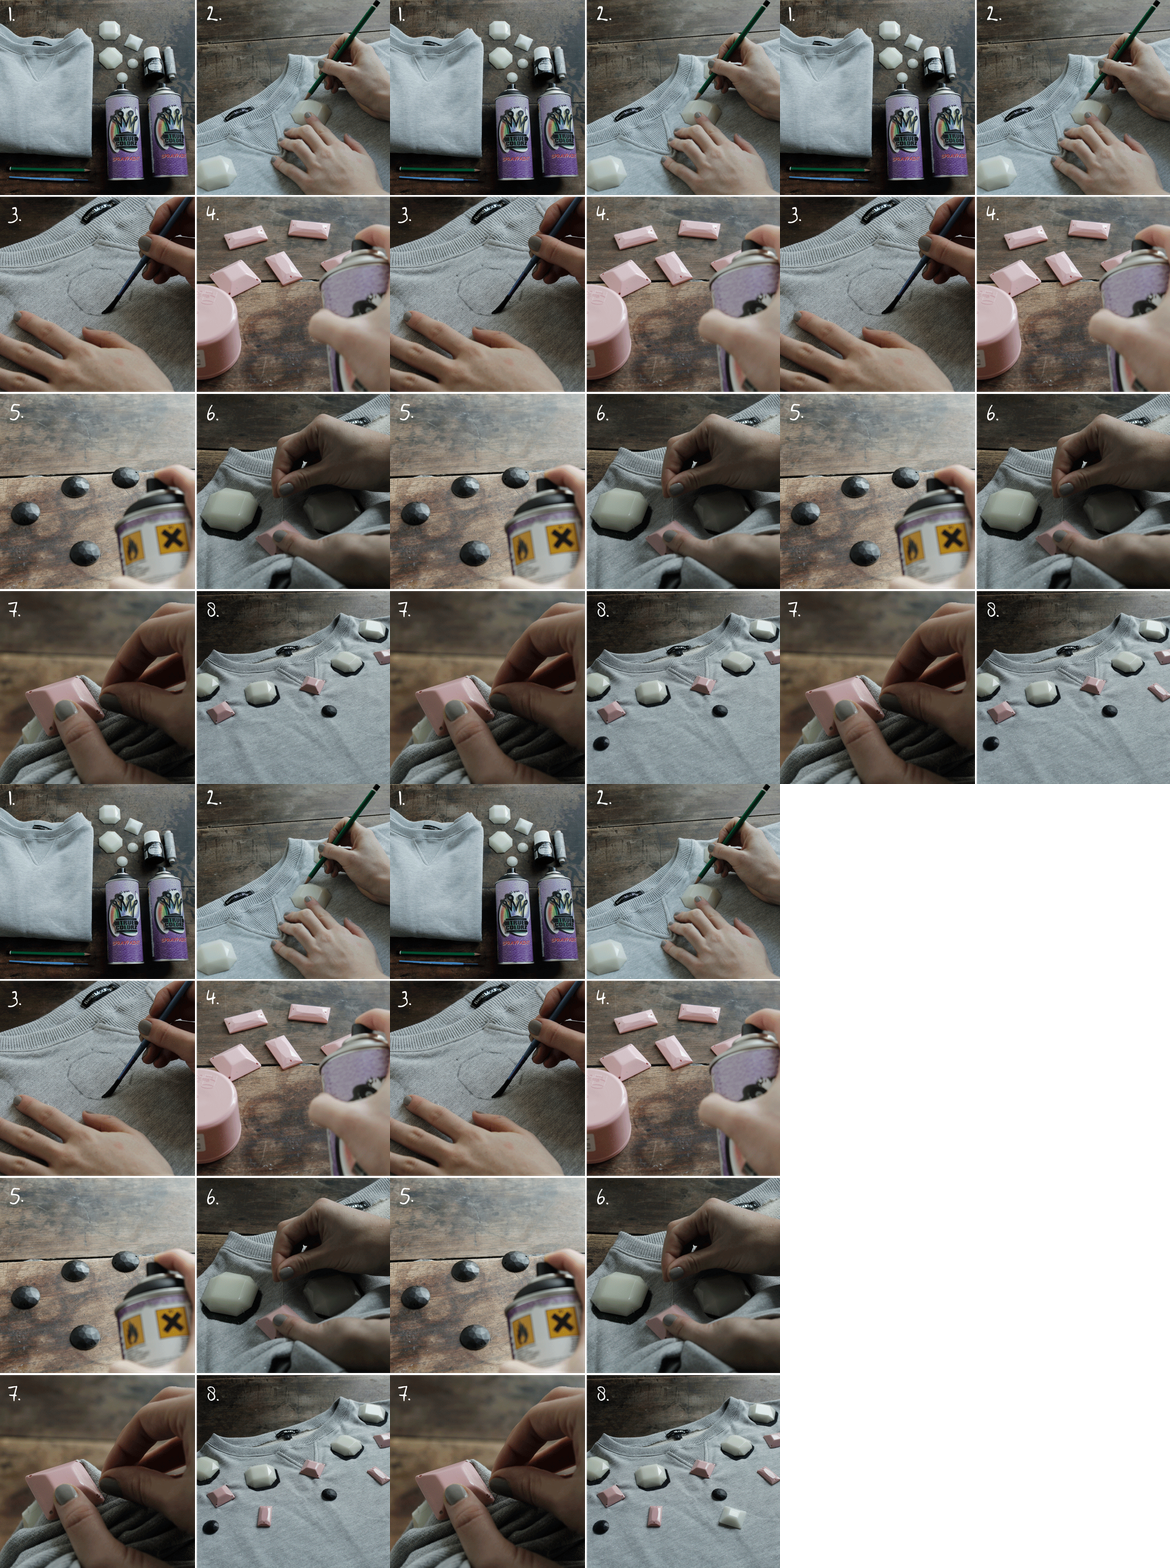
To start, arrange the diamonds on the sweatshirt to create your own pattern. So you remember where you put them all it's best to take a little photo! Then, using a lead pencil, trace around the diamonds lightly (the clearest ones), slightly shifted from the place you want to sew them (to really create a graphic contrast) fig.2. Then with the help of a thin brush and some fabric paint, carefully paint the area you just drew on the sweatshirt to create a silhouette effect, fig.3 Let the fabric paint dry. While you're waiting, spray paint the diamonds in the colors you've chosen, fig. 4&5. Once the paint on the sweatshirt and on the diamonds has dried, take a needle and thread (the same color as the sweatshirt would work best), and start to sew on the diamonds, checking the photo you took at the beginning to make sure you're putting them where you want, fig.6&7. Pop on the jumper and TA-DA, you're ready to go!
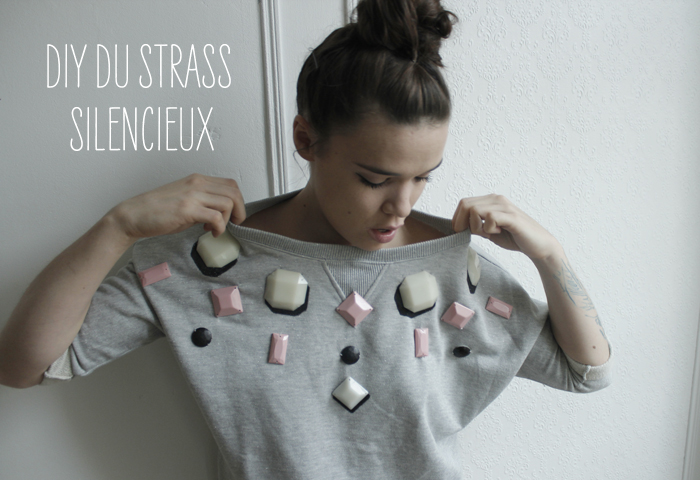
My big obsession at the moment is diamonds and sequins...you'll be seeing a lot of them soon! Next week will be themed around them, just wait... I'm not going to say anything else for now but one thing is sure, I've had loads of fun preparing it all for you! Mucho love! Until tomorrow...
[:]
EATING RIGHT #5: KIWI FRUIT
Happy Monday, yuppies!
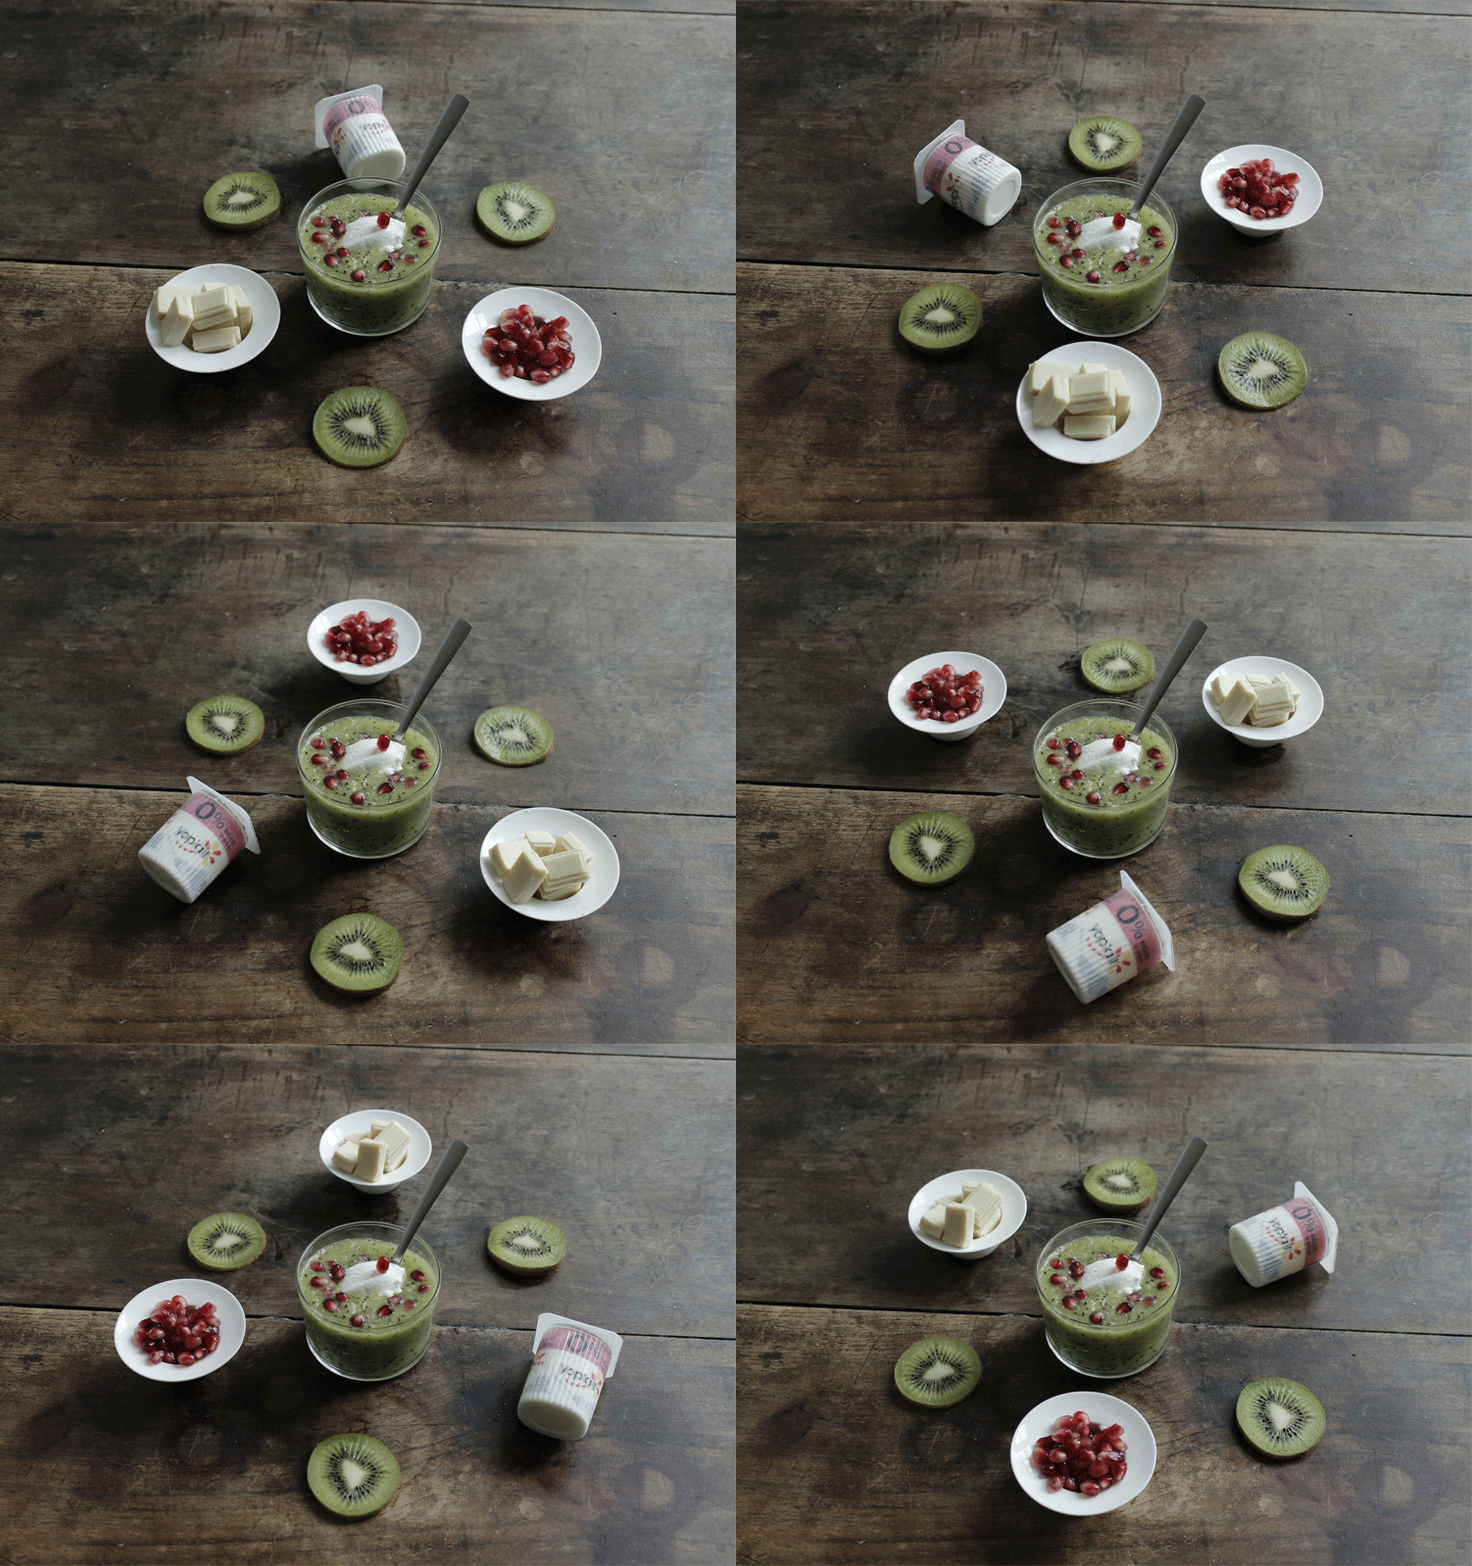
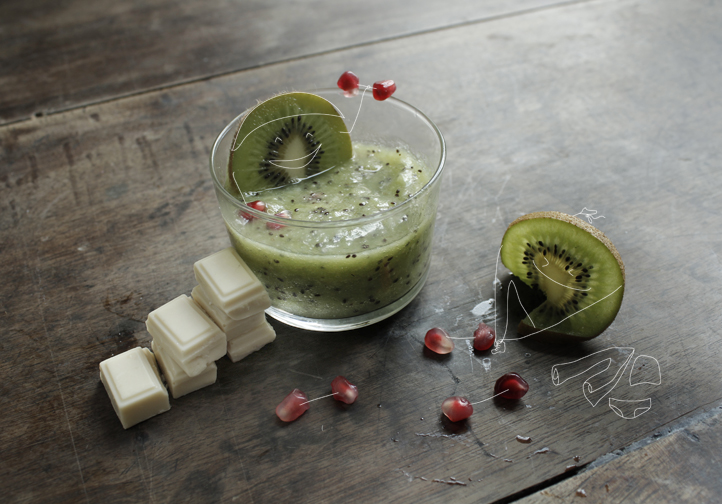
We're back to good habits, "Manger-Bouger" number 5, and here we are, halfway through this collaboration with club med gym... With the first "gourmet" sweet recipe, I discovered it in a restaurant I love, "les p'tites indécises" on rue Jean Pierre Timbaud... I've reworked it into a bikini- friendly recipe (yes, you'll see that it's basically more "capiton friendly"), but I've given you the 2 versions, I'm nice ... I wish you a wonderful week in the company of my aqua gym kiwis, I'm preparing a little surprise for tomorrow and when I think about it I'm preparing lots of surprises for this week! I can't wait to show you everything! I give you a big kiss and I'll see you very, very soon!
For this little supa easy dessert, you'll need (for 2):
- 5 kiwis,
- 1 half pomegranate,
- 1 petit suisse 0% (or 2 tbsp mascarpone),
- 50g crushed white chocolate (optional, for the gourmet version).
BARUCKELLO X MAKE MY LEMO #2
Oooooh my little cats!
I'm sorry... but not really, I've been playing hooky, or rather blogging hooky, for a week. I've got boxes of things to do, dozens of ideas and hundreds of desires, so don't worry, I'll be back with more enthusiasm than ever! I'm making progress, I'd love to be able to tell you all about it, but that would spoil the surprise effect. In my private life, I'm a specialist at selling my secrets, so with you, here, I want to work on that... And it's worth it... (suspense...ha ha ) I'll say no more! Today I'm back to tell you about the Baruckello lookbookI'm really proud of it, because I really enjoyed myself, and in the future, that's what I'd like to do, as a job, when I grow up! Let me explain, what is art direction? Well, to explain, using this lookbook as an example, the Baruckello team put their trust in me and entrusted me with the styling, the choice of location, the choice of model (you'll recognize the sweet Justine B.), the layout and the general atmosphere. I made little trend boards, explained to the photographer where I wanted to go, wrote a little story board... and that's artistic direction, and for another example, that's what I do with Little Fashion Gallery. I hope you'll like it, and if you click on the MML logo, you'll see a mini interview to find out where I was heading...
I'd like to say a special word to Baruckello: "THANK YOU". This little team is incredible, and the collection and choice of pieces are to die for. die of love in chains and thank you for trusting me... to see the entire lookbook click here... see you soon.
Photo credit Ludovic Ismaël TOO STRONG
UN BEAU JOUR x MAKE MY LEMO
Happy Halloween!
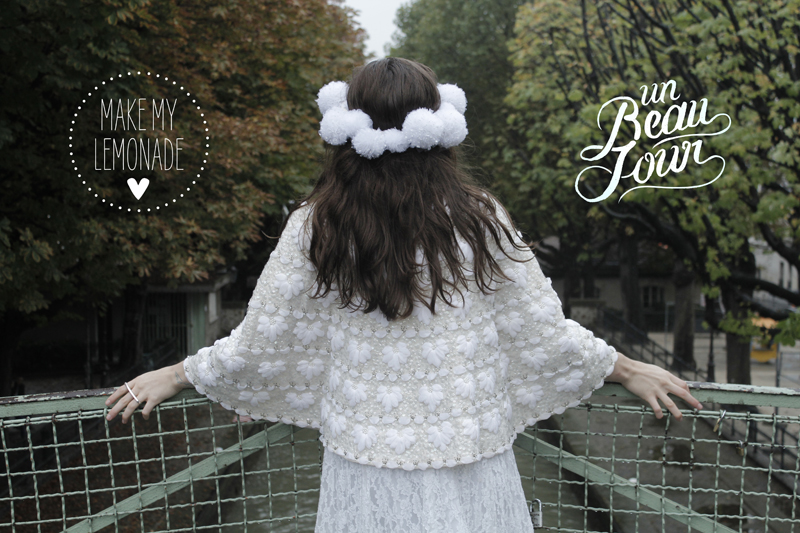
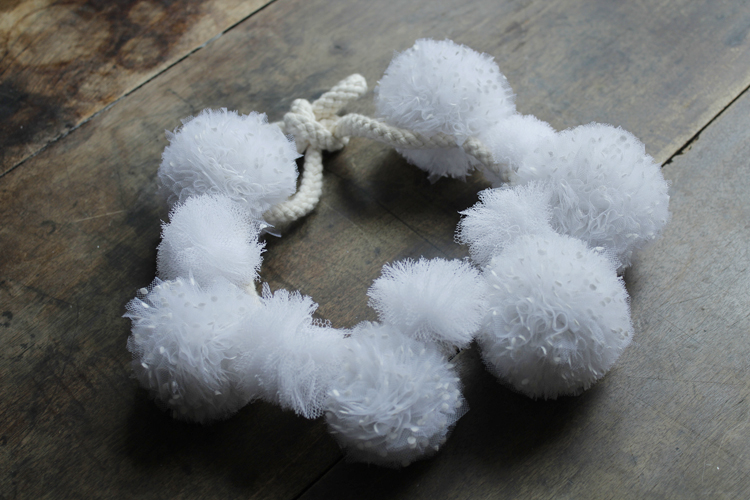
Funny coincidence that I'm doing this post on Halloween - you'll understand why in a few lines time... Anyway a few months ago I met the adorable founders of un beau jourElodie and Anne Solange, two true creative geniuses! I could have spent hours and hours talking to them, a real tennis match of ideas! If you don't already know their site (but why oh why don't you?!) I strongly recommend you visit it - it's a goldmine of inspiration for all those who are prepared to say the big I Do (or for anyone else with a pretty event on the horizon). The photos are sublime, the shopping ideas are inspired and the DIYs related to the D-day are pure gold dust, so go go go, get to it! And so just like that, with one thing leading to another, we decided we needed to do an easy but totally cool do it yourself, so why not a tulle pompom headband (in white of course)?... In fact it's so easy you might find it a bit disconcerting...Grab this pair of scissors guys!
To make this headband, you need:
- - Some white tulle and/or organza (about 1m20)
- - 80 cm of fine chord
- - cardboard
- - a pair of scissors and a compass
It's easy to make pompoms, but it's even easier to make pompoms from tulle because it's so much quicker! To start, trace two circles, one within the other, both with the same center point. The first with a radius of 3.5cm and the second with a radius of 1.5cm. Cut the circles out, making a little notch so you can cut out the smaller circle. Do the same thing again to make a second circle, fig.1 Here I've used 2 different sized pompoms but it's completely up to you whether you want them to all be the same size or you want smaller ones as well. Fold the tulle very neatly, then cut 2 strips lengthways. This is called a wad, fig.2 So there you go, you have all the strips you need to make the pompoms, fig.3. Now take the two cardboard circles, and wind the tulle around them, fig. 4&5. Once the cardboard circles are covered in several layers of tulle, using the scissors, cut the tulle through the gap between the two circles, moving all the way round the circle, fig.6. Once the whole pompom has been cut, fig.7 take a strip of tulle and slide it between the two cardboard discs in order to make a tie to finish off the pompom, fig. 8 - but make sure you don't cut off the dangling ends of this strip!
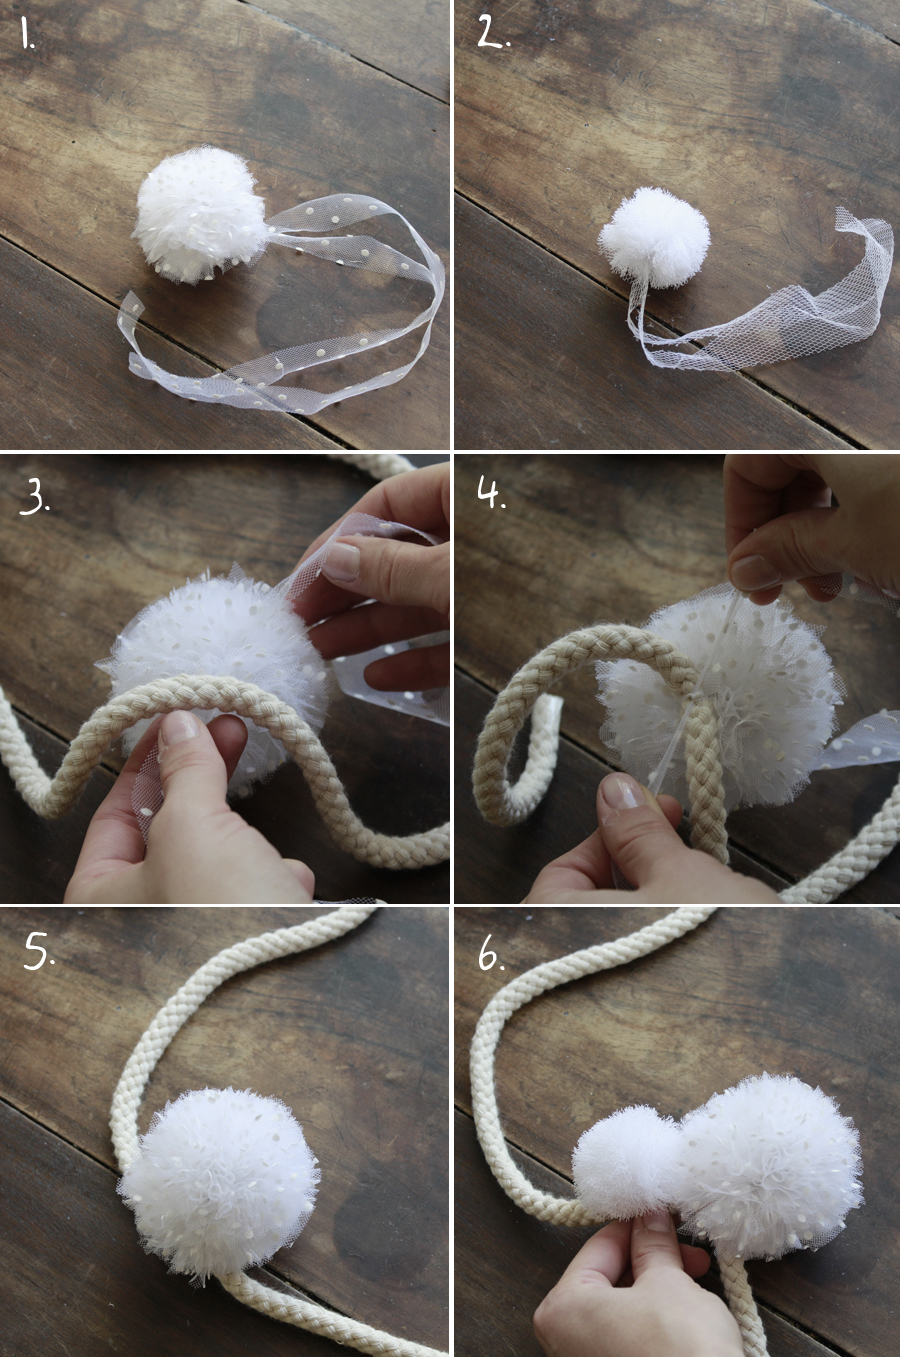
To finish off the pompom crown, take all the pompoms, fig.1&2 and attach them to the piece of chord by knotting them on using the dangling strips you attached to the pompom earlier, fig. 3&4, and TADA! You can alternate with one small pompom and then a big pompom and so on! It's completely your choice, so play around and have fun with it! fig. 5&6!
It was actually really hard for me to take these photos because I am totally not a big marriage fan! I think those that jump into it, hand in hand, are super courageous and I admire them for it, but for me, today marriage has become a great excuse for a big party where we can dance 'til dawn, wear a great dress and make incredible invitations. I don't think any of these things are the true foundations for a marriage - until death do us part and all that. I have great respect for all of those promises, but I don't really believe in them - or rather, they don't really touch me or mean much to me. I prefer to imagine that if one day I get married, it will be a party to show that we are in love with each other, something I will want to share with my nearest and dearest, rather than "signing our names at the bottom of a piece of parchment". Anyway, I digress - me getting married, wearing completely white, in the center of a very rainy Paris...hard to believe huh....
But I'm coming back to the fact of sharing this joy with your closest and I have an idea for your big day. Slide everything they'll need to make you a pompom into your witnesses', your made of honors' and your parents' invitations...a sort of early present for the big day - a little part of them you can wear around your head! Just like a good luck halo or a little something to comfort and calm you!
[:]
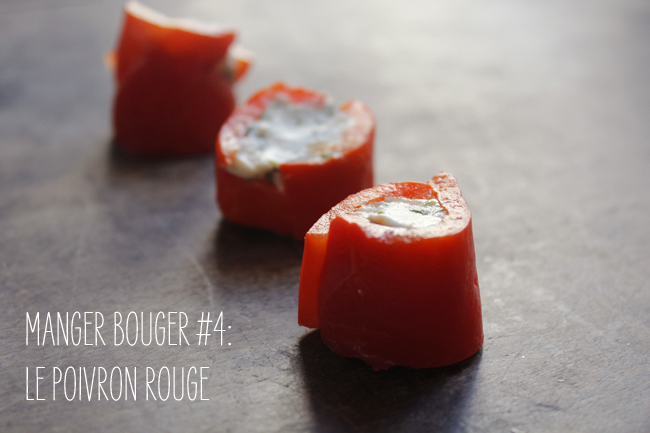
EAT AND MOVE #4: RED BELL PEPPER
Whoa, people!
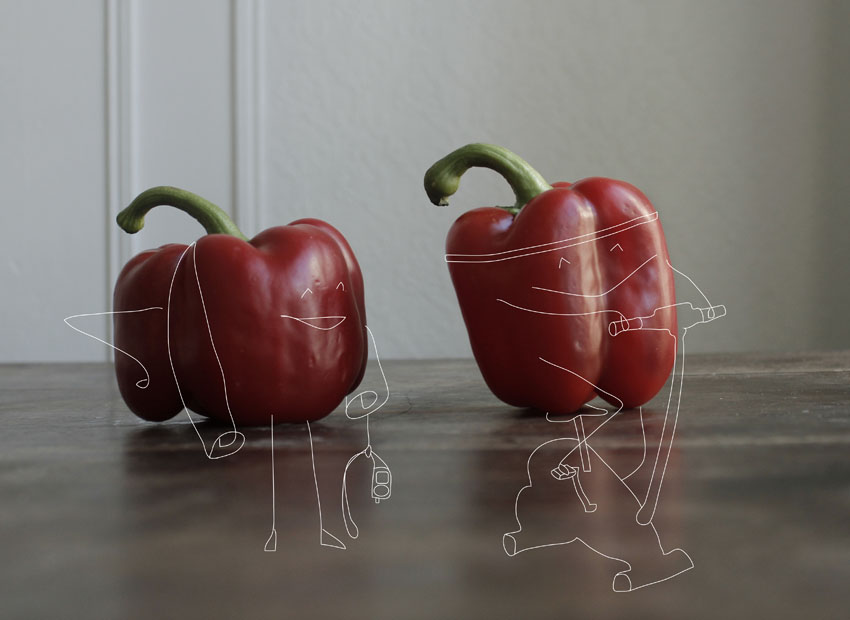
A recipe, it's been a long time! I'm continuing my collaboration with Club med Gym, with another "bikini- friendly" recipe, this time it's red bell pepper. What I like about this collaboration is that I'm learning something new every day, and I like to create new constraints for myself... well, constraints are relative, let's just say I have a list of 10 fruits and vegetables that I have to work with... So I could have made you a stuffed bell pepper... but NO! I'd rather experiment with a Maki of peppers with 0% cheese and a little spinach, walnut and basil pesto (the pesto's not so light, but that's for the gourmets...) For my part, I really need to find the time (finding the time is such a strange idea when you think about it...) to go to the gym more often to let off steam, just to take care of myself (I love the idea... my muscles a lot less) and to be able to sleep like a baby afterwards... I can always dream, but in the meantime, I propose to "limit the damage" with a recipe that's super yummi and perfect for impressing your friends, without having to rush out and grab the first packet of chips that comes along... but I admit that opening a packet of peanuts takes a lot less time than peeling peppers... No pain, no gain...
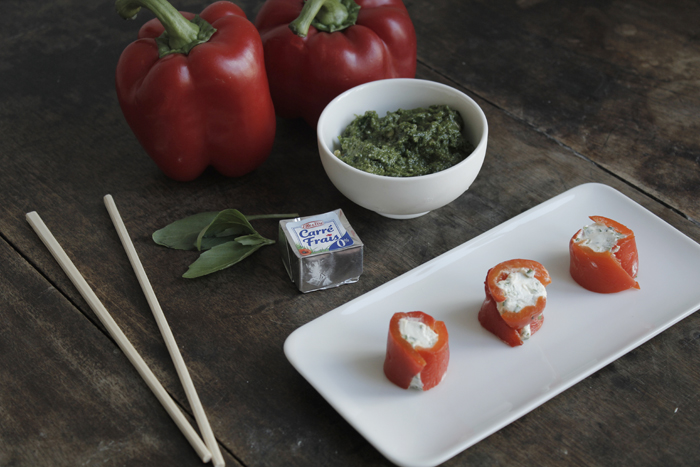 For this little maki with red bell pepper and fresh squares, you'll need..:
- 4 small peppers,
- 7 fresh squares 0% (or not),
- a bunch of chives,
- 2 tbsp lemon juice,
- salt and pepper,
- A sushi mat.
To begin, preheat the oven to 240°C, cut the peppers in half and remove the white parts and seeds. Place the peppers in the oven, flesh side down, for 25 minutes. When the time is up, remove the peppers from the oven and place them in the plastic bag and seal for 15 minutes. Meanwhile, in a small bowl, combine the fresh squares, lemon juice, finely chopped chives, salt and pepper, and mix well. Remove the peppers from the plastic bag and peel them. The advantage of placing them warm in a plastic bag is that it makes peeling much easier... in case you were wondering... Now you've got naked peppers, and you need to cut them lengthwise into strips. Grab your sushi mat, cut out a sheet of stretch paper and place it on the mat. Spread the bell pepper strips over the entire surface of the mat, with as few holes as possible. On one side, spread a 3cm-wide strip of the fromage frais mixture over the entire height of the mat. Then, as if you were rolling a maki, roll the peppers and cheese tightly together. Keep your "boudin" in the fridge for an hour, wrapped in cling film, before cutting into small makis. You'll find plenty of maki rolling videos to help you along. here.
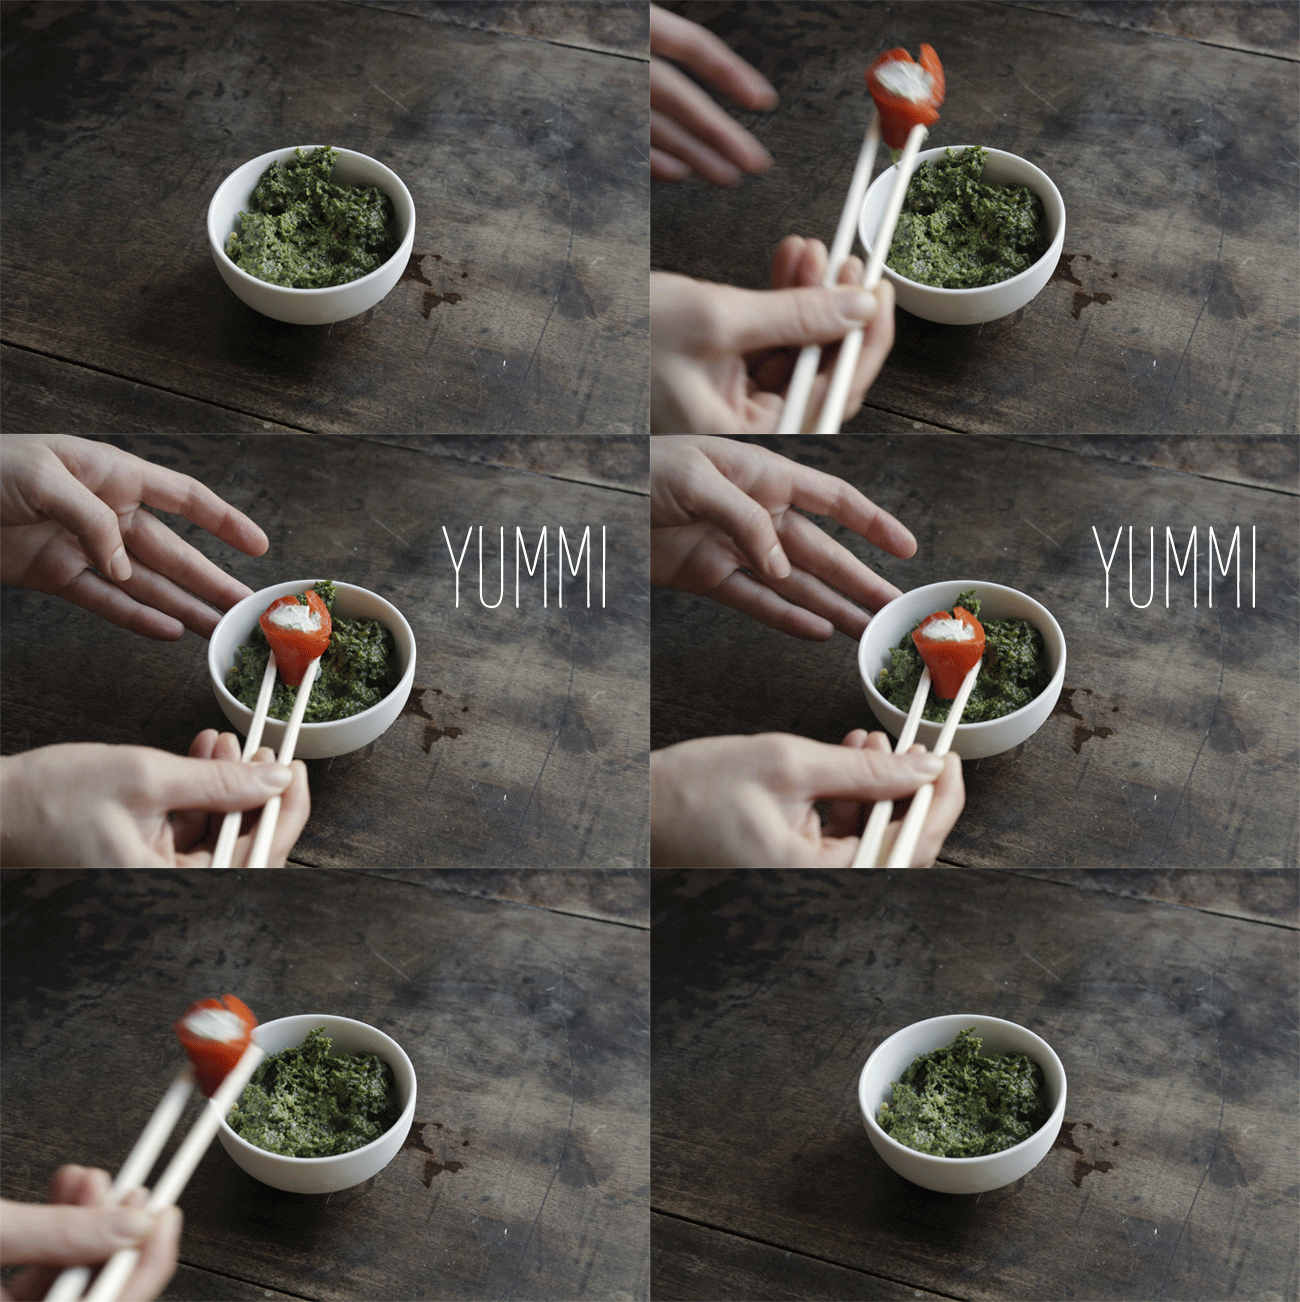
And for the pesto, you'll need..:
- 40g baby spinach,
- 60g basil,
- 20g Parmesan cheese,
- 70ml olive oil,
- and a handful of walnuts.
Place all these ingredients in a blender, and blend very finely - don't hesitate to blend several times. Serve the pesto with your bell pepper makis and enjoy!
LITTLE FASHION GALLERY X MAKE MY LEMO #3
Happy Sunday almost under the snow, kittens!
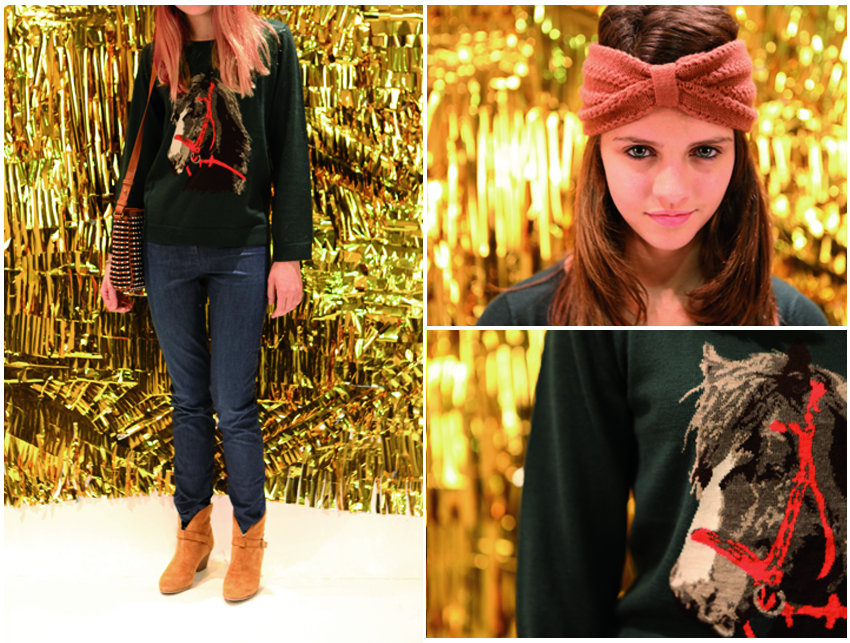
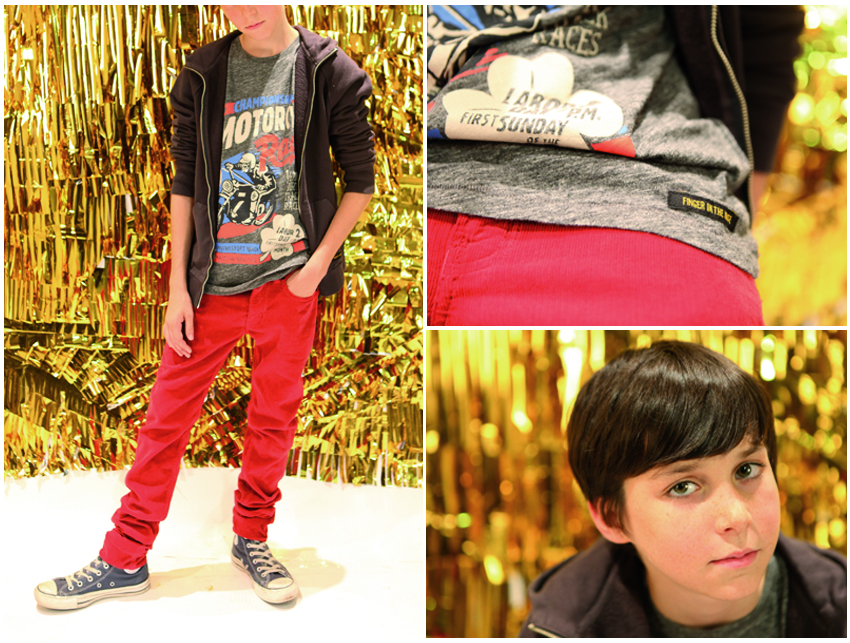
I don't know if it's the same where you live, but here it's polar... I realize that I haven't been out for more than 24 hours, but it's probably for the best, as the draught creeping under my door confirms my status as a nun. By the way, I'm posting the third opus Little Fashion Gallery x Make My Lemonade... You don't know how much fun I'm having with this collaboration: decor, looks and this time I tried my hand at video, nothing technically transcendental but I hope to learn quickly and then go see the looks and selection It was hard to choose because I wanted to wear everything, yes because this time it wasn't children but teenagers...
Ps: you made me laugh so hard with your hair!
Little Fashion Gallery x Make my lemonade #3 from Make My Lemonade on Vimeo.
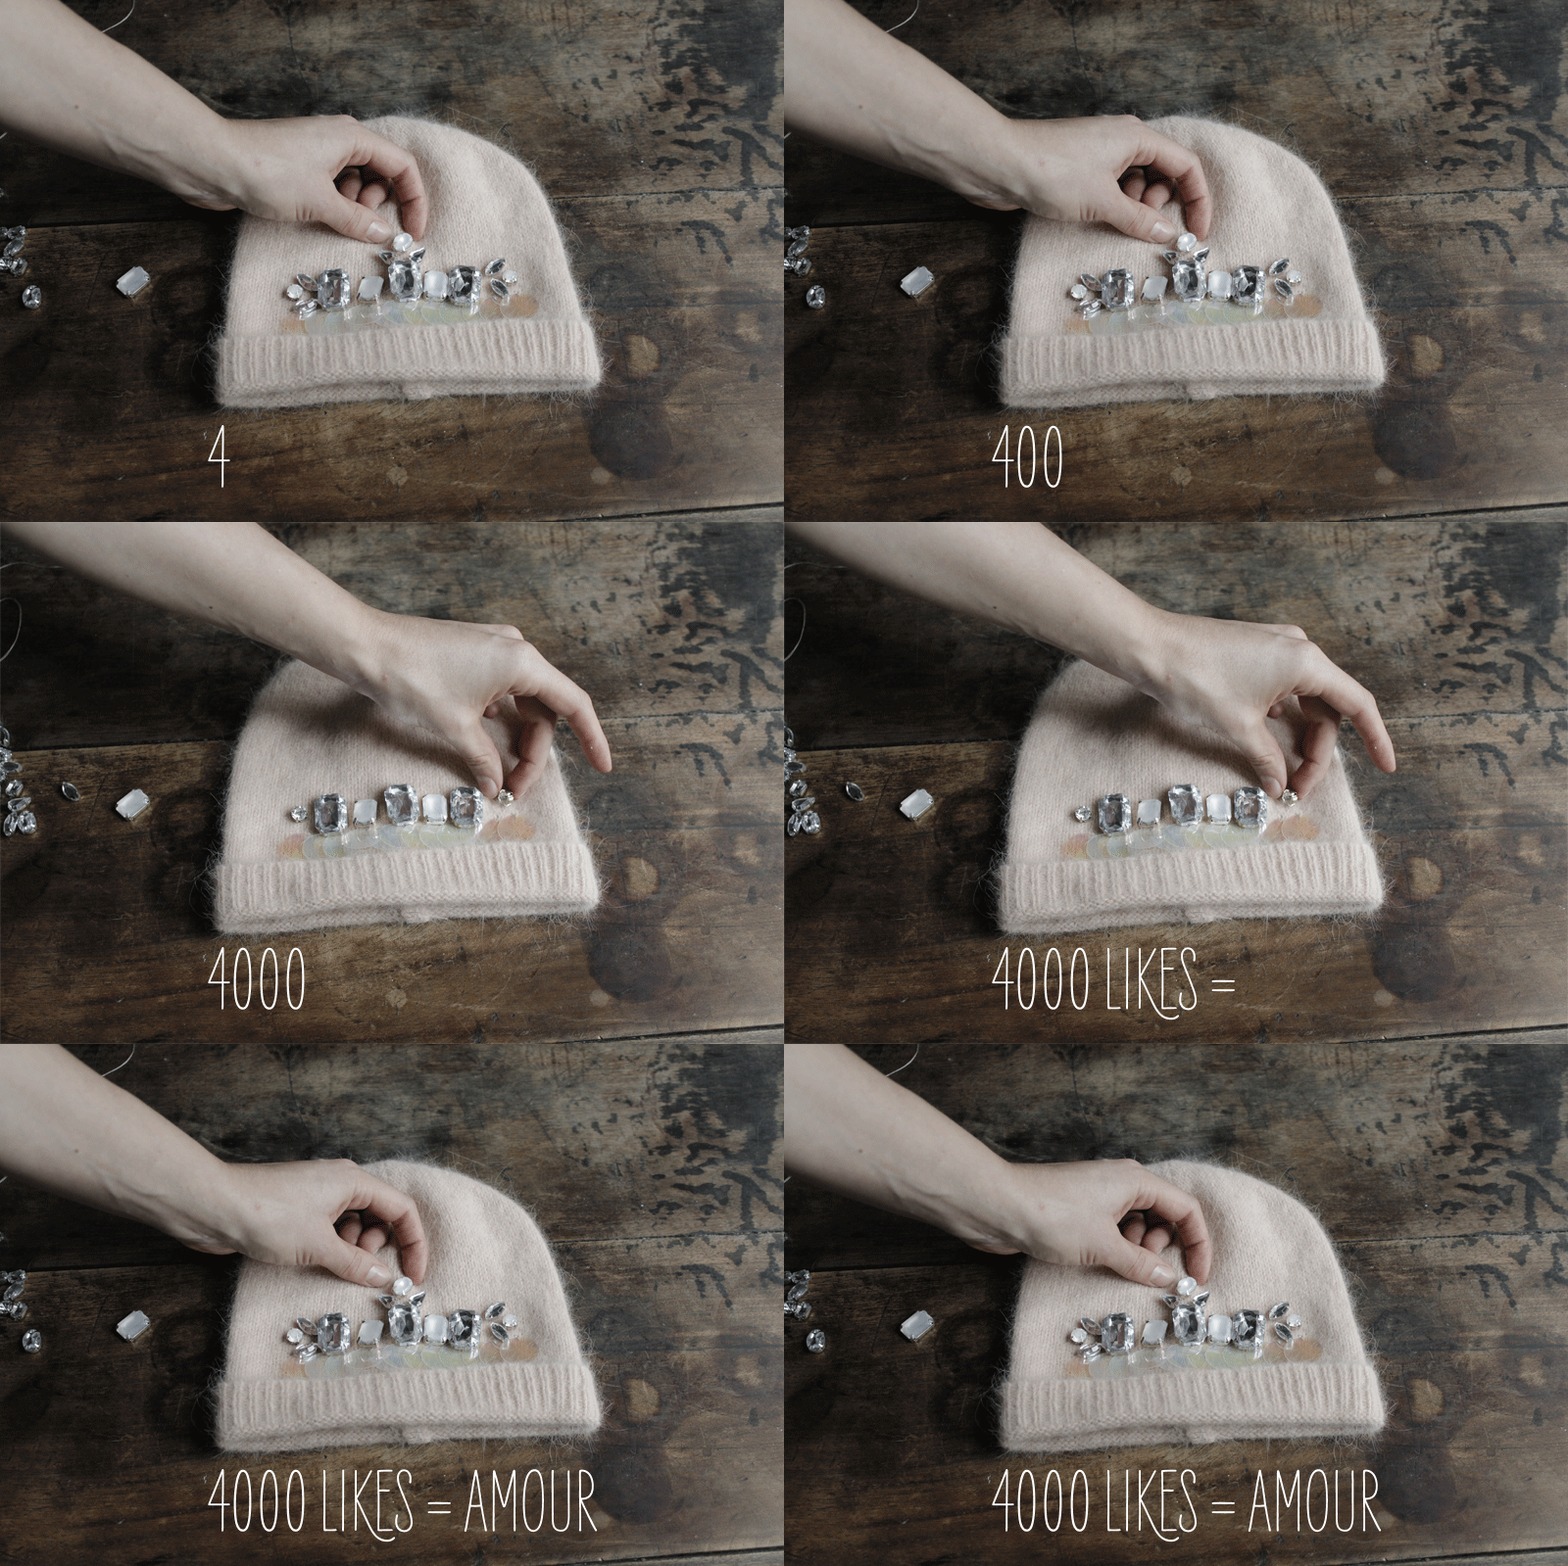
THE THANK YOU DIY #4
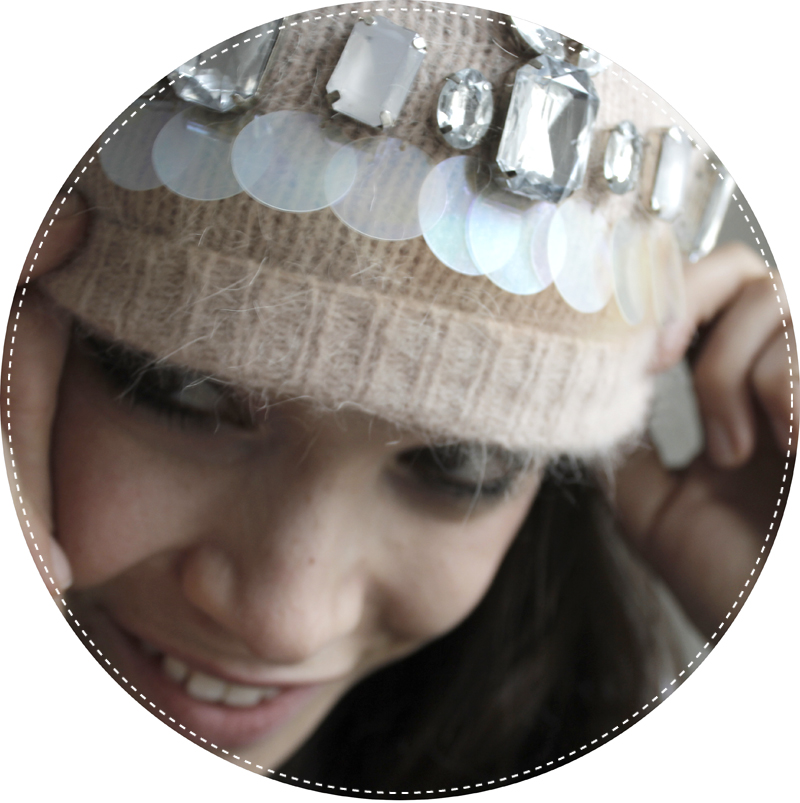
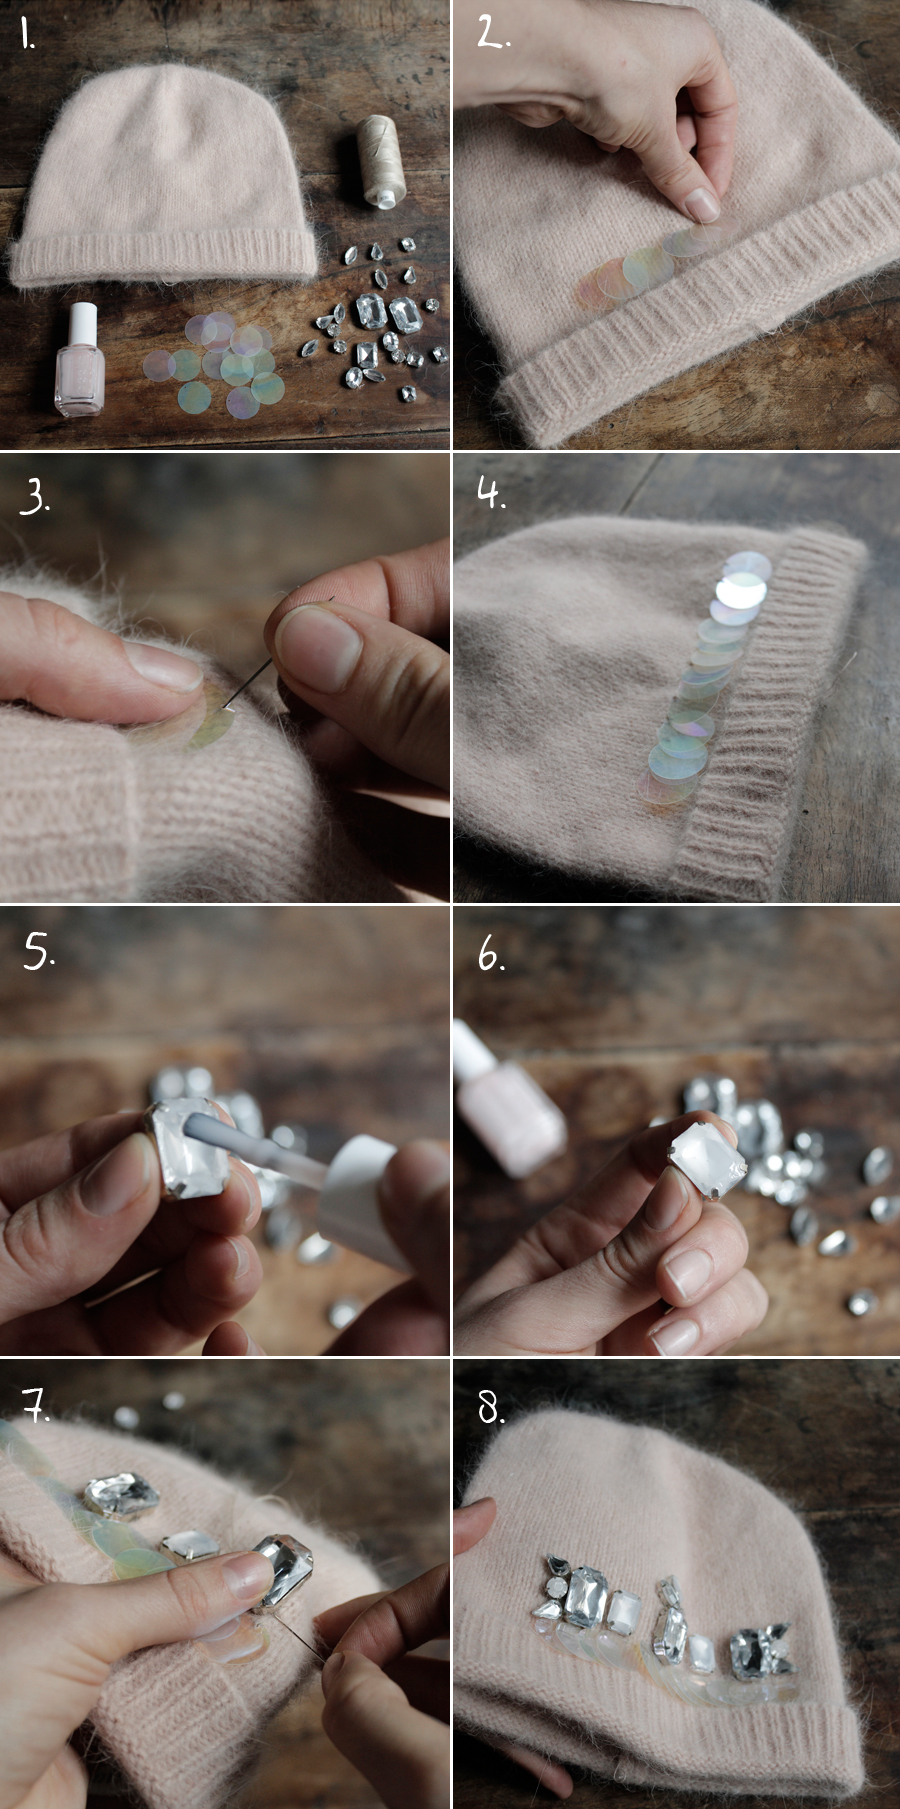
As promised, little darlings, the Merci Do it Yourself, (plus I'm making rhymes, that's a gift). As I write to you on the Facebook pagethere are 4192 likes: Thank you! And as it's our little ritual, I'm letting you win this DIY: The rhinestone and sequin bonnet... yes yes. I have to tell you the whys and wherefores... Like any girl with the internet and an interest (however small) in fashion, I confess, I go to Madame Garance Doré every day, that's how it got into my genetic coding. And the other day I came across this video where her friends Elisa Nalin and Viviana Vilpicella talk about their careers as stylists... Nothing to say except that these chicks have crazy looks and probably closets that make me dizzy just thinking about them. Anyway, Elisa Nalin, the boss of colorful outfits (a bit my reference in terms of improbable combinations!) is wearing such a cool beanie that I thought: "Easy!" it'll make a great Do it yourself to give away... I've remixed it a bit with aurora borealis sequins, yeah! Thanks again, guys!
Too easy for this DIY, you need it:
- a hat ( h&m )
- rhinestones of all sizes ( dismantle your 4-cent necklaces... an old claire's necklace for me )
- sequins ( la droguerie )
- nail polish ( essie )
- thread and needle
Thanks again! To win this love bonnet, it's very simple: leave me a comment with your favorite style icon... your muse, your fashion guru... And I'll draw the winner (or the winner, you never know) at midnight on Friday!
COMFORT AND/OR SEDUCTION
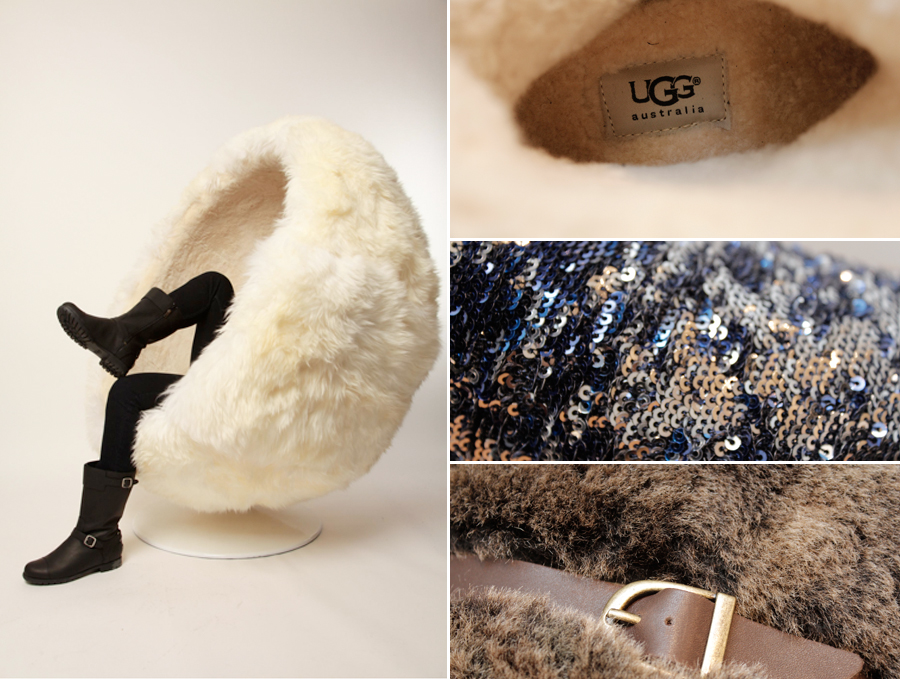
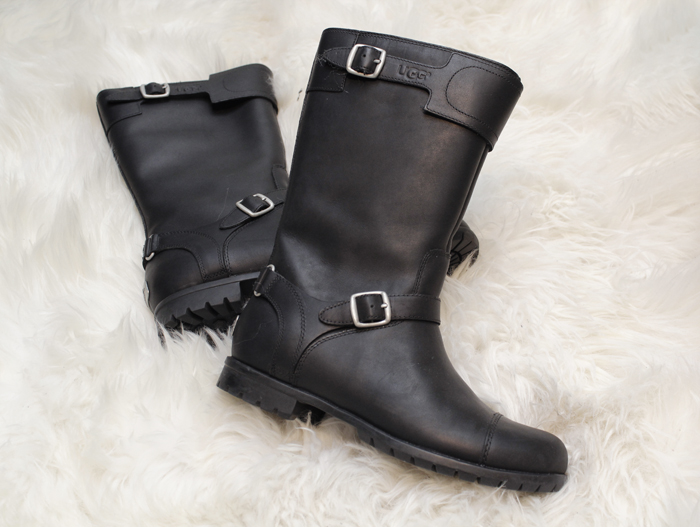
Some time ago, I was invited to discover the event boutique Ugg in the heart of Paris... And that made me smile, because I'm not normally a fan of this kind of shoe, but why not? And then I told myself that in 2012, this year, this winter, I'd stop being cold by: having sweaters, real coats (at least one) and comfortable shoes to stop my toes feeling like croustibats at the end of the day, etc.... But this invitation gave me the irresistible urge to ask my boyfriend, if I happened to be wearing uggs at home (because let's face it, they're slippers), would he still love me? he said "No". Very well, he added, it's like jogging suits: the less you wear them, the more I love you... So I'm faced with a dilemma: either I leave him right now and can wear Uggs in peace, wearing jogging pants, watching stupid TV shows all day long, and eating nothing but chocapic*. Or I'm doomed to be perched on 12cm heels, eat healthily, move more and never have runny mascara** BUT have an attentive lover: BIG question... Is comfort the enemy of my relationship? Am I having a romance with the tyrant of the shoe? Who am I wearing shoes for? him? me? For us, for sure. But since I'm curious, I went anyway, thinking that there must be other models, between THE "no fuck" ugg and the "bitch" pump, I could find a happy medium... a kind of stuffed stilettos? And so it was, miracle joy and elation. The lined biker boot... If my underwear had taste buds, the moment I slipped my feet inside they would have been close to gustatory ecstasy... Cute, comfortable, light, with a tutu and a denim perfecto: so cool, I leave my experience delighted... You can still go to LA CREMERIE, 15 rue des Halles - Paris until the end of October to discover the entire collection, and as a bonus - yes, I salute brands that are creative like this - there's a little barefoot/blackout trail to follow, but I won't tell you more about it. For a souvenir, because you still need to attest to your presence on the spot, like "I did it!" there's a photo call, in the filled egg, and the icing on the cake is that your photo will be submitted. to the votes of Internet users in the hope of winning a huge gift voucher...
* I don't do things by halves, this kind of model triggers excessive and regressive behavior in me, true.
** I'm exaggerating... don't worry, I'm not doing the housework in my maid's uniform, everything's fine!
DIY WHITE SHIRT
hello kittens!
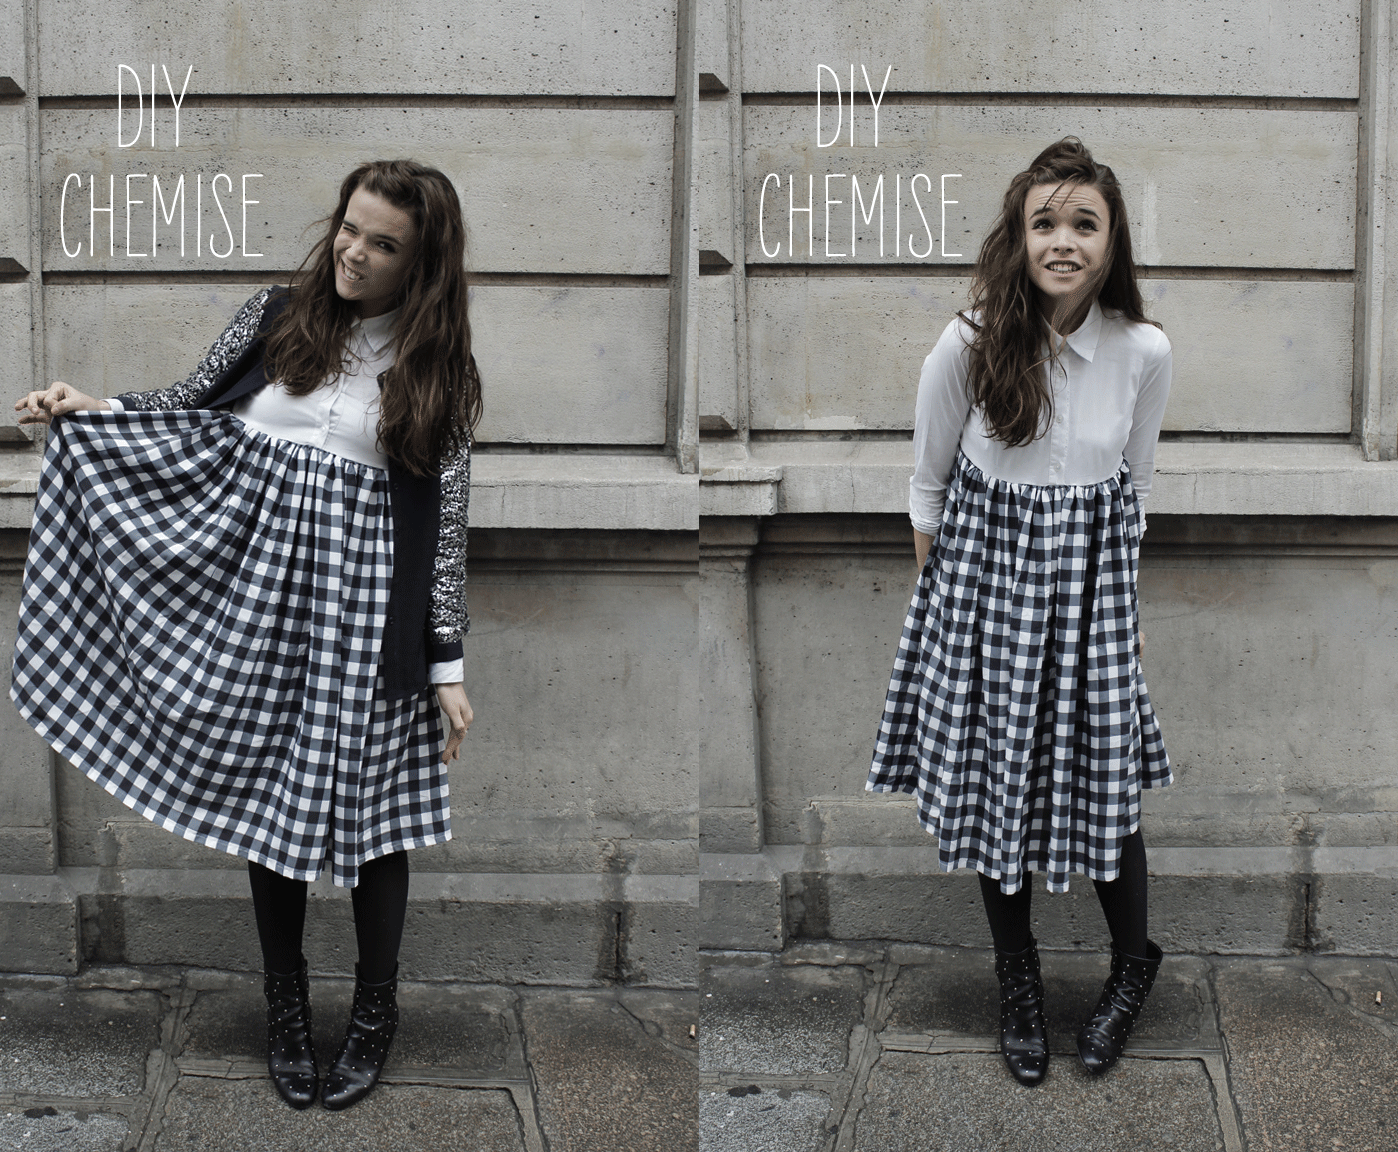
As agreed, the DIY of the shirt that turns into a dress... I didn't want to do a simple customization of the shirt collar, I wanted to offer you a second life for your shirts, whatever they are, because this DIY can be done with a floral shirt, a polka-dot shirt and another plain fabric or even with another print... it's party time and I don't want to hear you whisper "it looks too hard... gna gna gna" When I see the number of photos I've received of your swimsuits (remember?), I know you can do it. So today it's a joke, with your fingers in your nose, desperate housewives playing in the background and your mother on the phone at the same time... Basically scale 1 (and a half) on the Do it Yourself galère scale, I promise... Just let yourself be guided, and everything will turn out just fine! Let's get started!
For this shirt DIY, you'll need..:
- - a shirt
- - fabric ( 2 strips of 60 cm by 150 cm )
- - pins
- - scissors, ruler and pencil
- - sewing machine and iron...
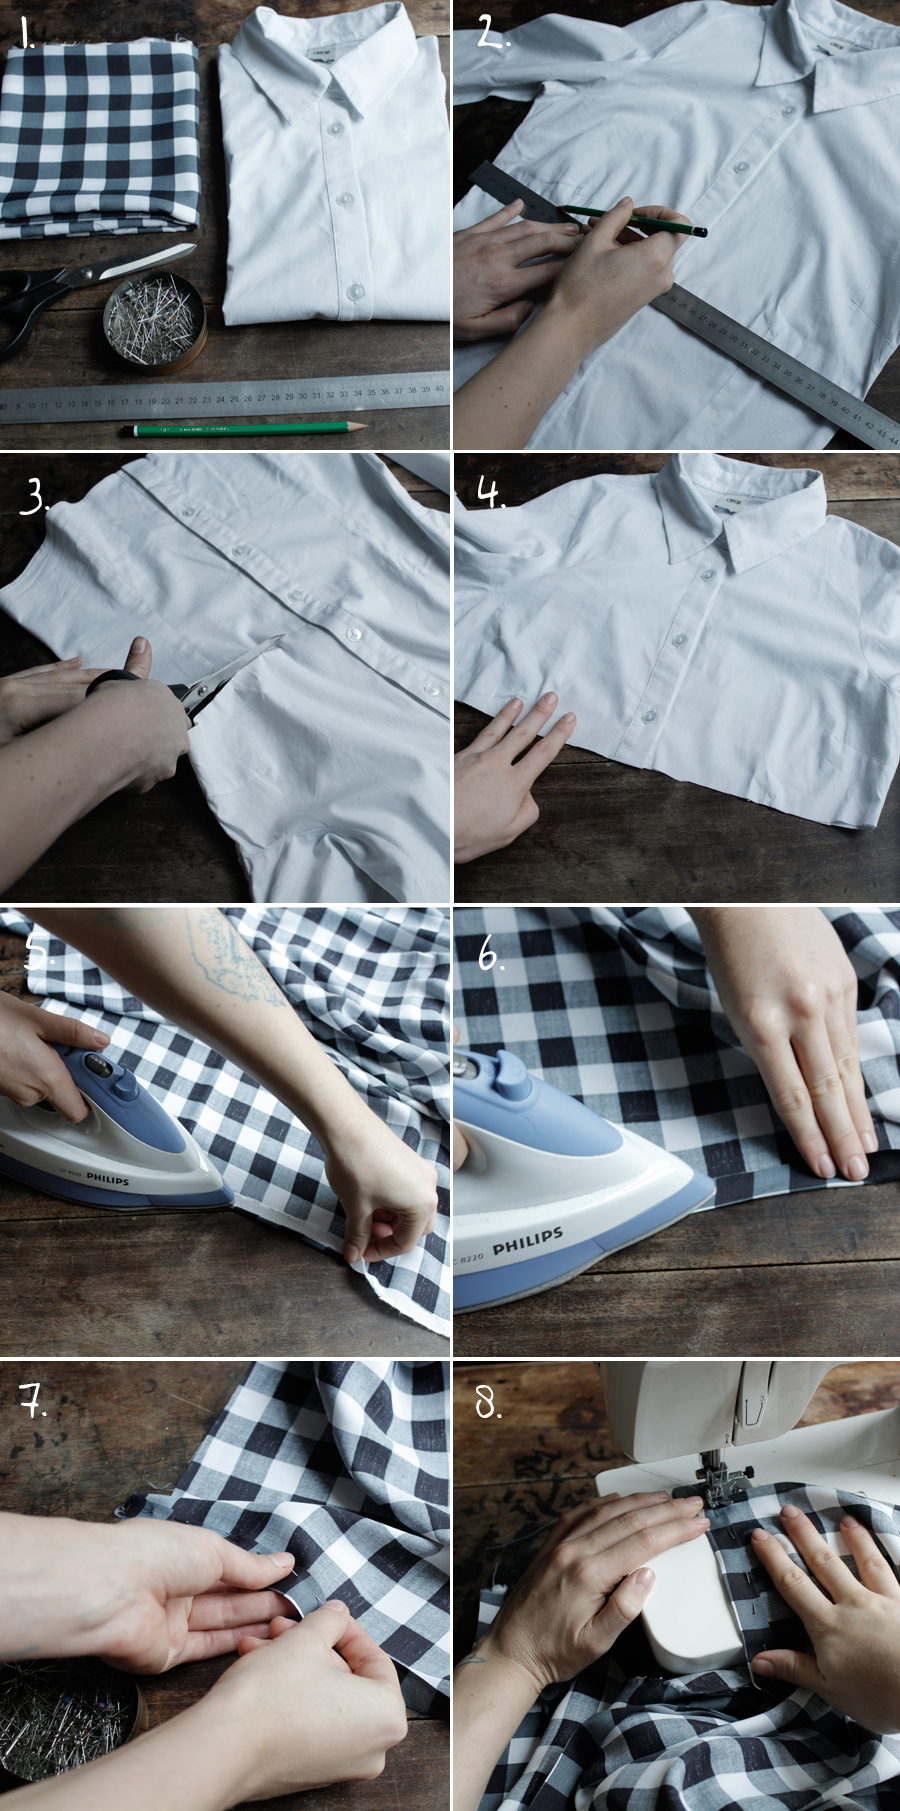
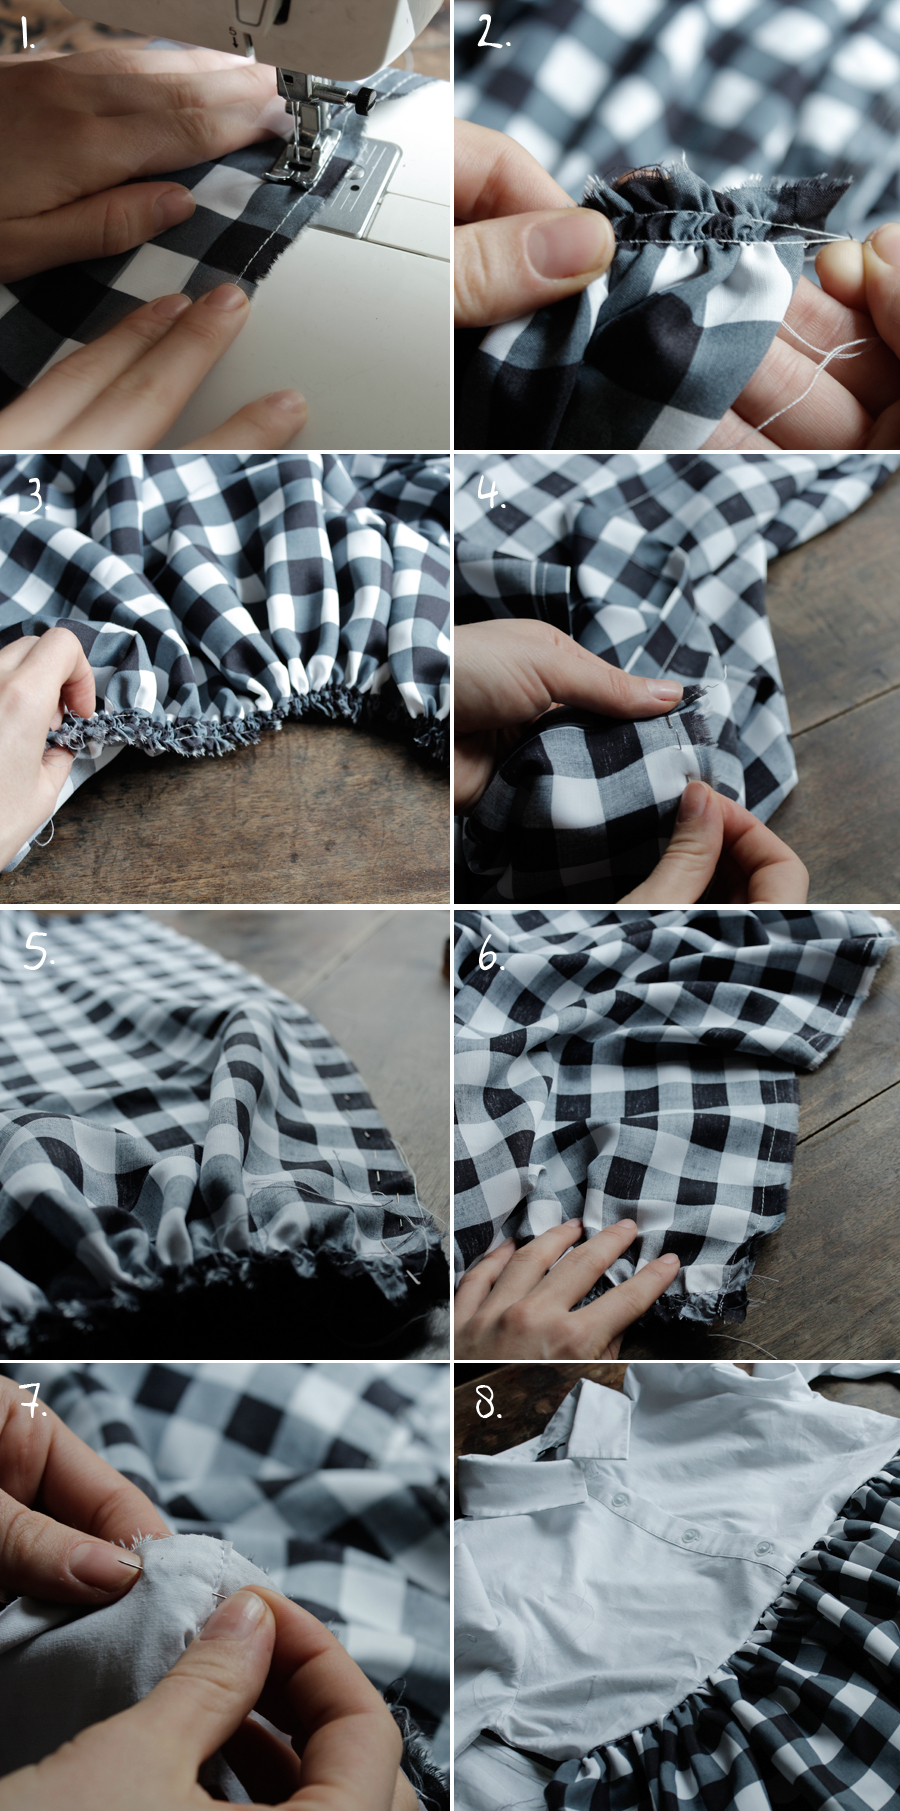
On the opposite side of your hem, make two parallel stitches all along your 2 strips fig.1. Once you've sewn your seams, lay flat and pull on the two threads on the front of your fabric (or the two on the back) to create the gathers - it's a magical moment fig.2. Gather the entire length of your strip, and you're going to ask me: at what point should I stop? Well, it's simple: the first strip should be as wide as your front, and the same for the back (allow a few cm for the seam allowance). Evenly distribute the gathers along the entire length fig.3 and stitch the front and back of your "skirt" right sides together fig. 4 & 5. Then machine-stitch these parts fig.6. Then assemble the shirt part to your skirt, still right sides together fig.7, stitch and press to flatten the seams and TA-DA fig. 8!
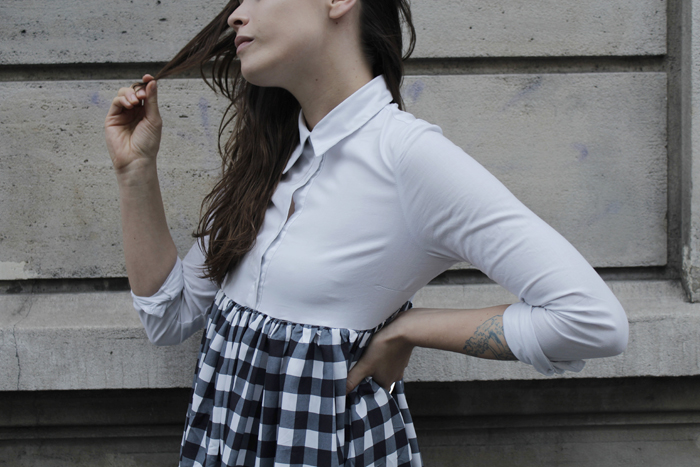
Because I know you.... and I know you're going to ask... I'm wearing a great sequined shirt. Baruckello that I wear as an available teddy here! So did you like this week? LOVE
[:]
EATING RIGHT #3: SPINACH
Happy Monday, yuppies!
We're on the 3rd instalment of the "eat and move" list that Renaud, the marketing director of clubmed gymm, sent me. I knew that of the 10 sports ingredients to highlight, there would be a few that would make me cringe... And even though I'm taking care of myself, I'm happy to eat spinach shoots, but cooked spinach wasn't exactly an Eldorado for my taste buds. But what I wouldn't do for the love of cooking, for my buttocks and for you. So here's a little recipe for a fine spinach/beetroot tart! (Sweethearts, I'll reply very, very quickly to your comments as soon as I have 1 hour today, I promise, I've had an atomic weekend and I'll be making BIG things for you soon...)
You'll need..:
- 700g spinach
- 1 roll shortcrust pastry
- 150g crumbled feta cheese
- 200g cooked beet (vacuum-packed)
- 90g pine nuts
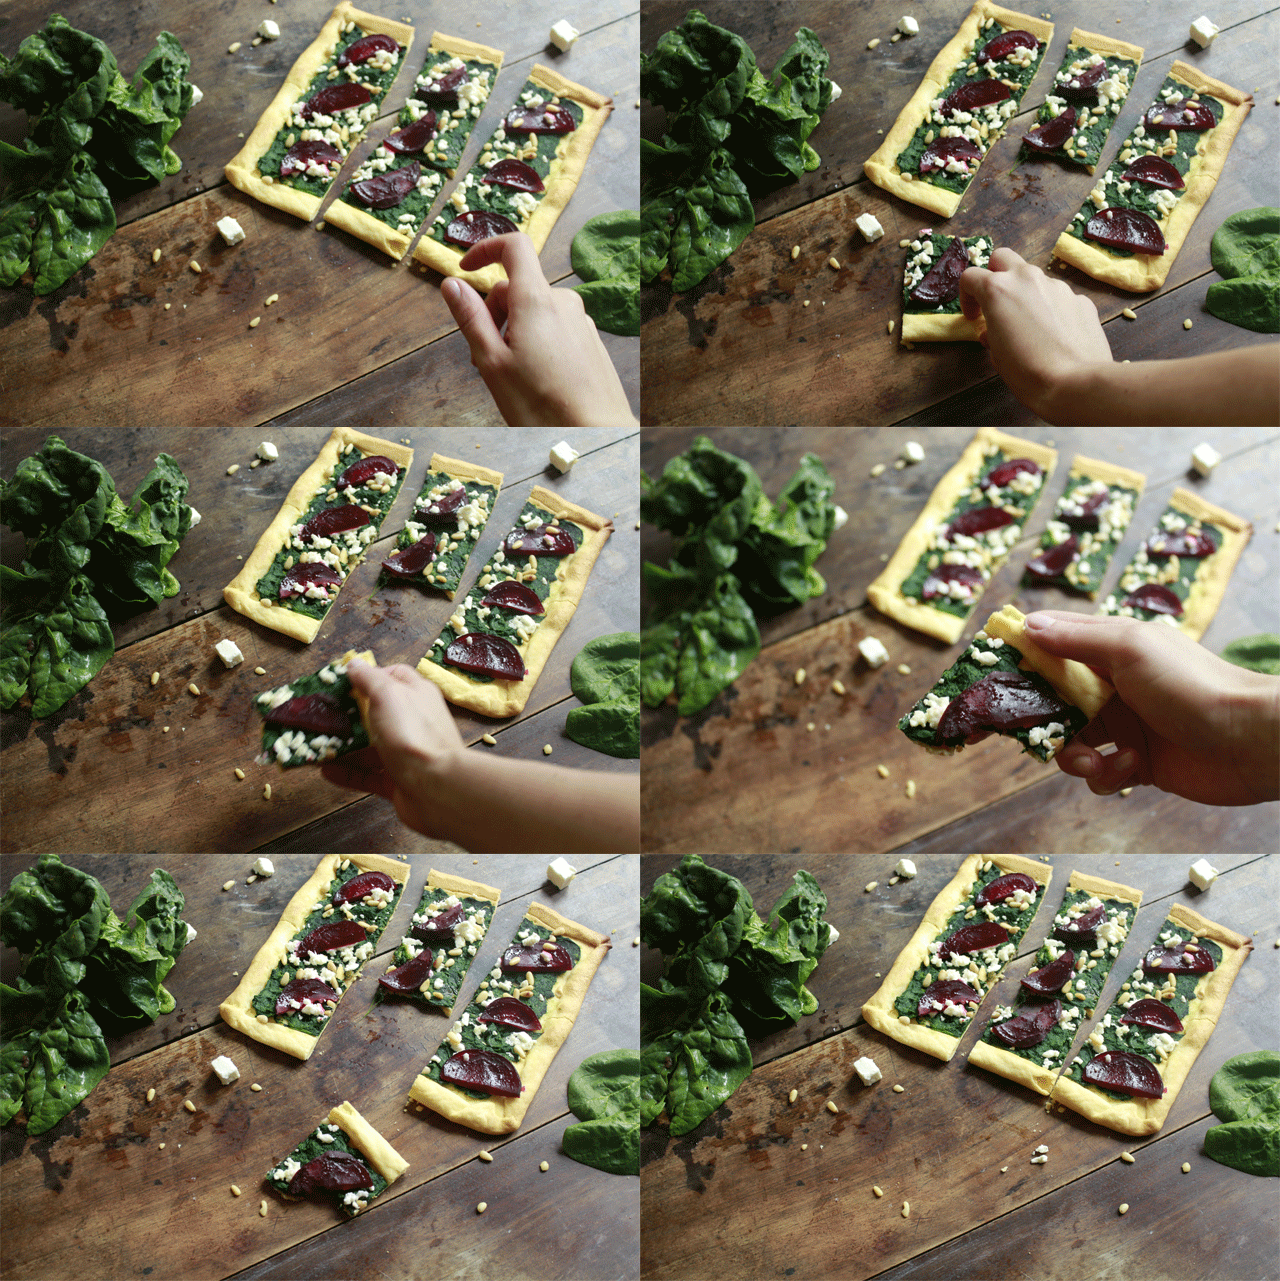
Preheat the oven to 200°C and place the shortcrust pastry on a baking sheet. Fold the rounded corners of the pastry inwards to form a square shape. Prick the bottom of the tart with a fork, and place some baking balls or dried beans on top (to prevent them from swelling) and bake for 10 minutes. Meanwhile, clean the spinach and cook in plenty of water for a few minutes. When cool enough to hold in your delicate hands, wring it out to avoid soaking the dough. In a salad bowl, finely chop the spinach and mix with the feta cheese. Spread the spinach-feta mixture over the pastry and garnish with beet slices and pine nuts. Bake for 10 minutes at 180°C! Enjoy!
MEOW PAD
My little cats, I'm working overtime to show you my feline DIY of the week... I know that not all of you are lucky enough to have a wonderful lover who gives you IPADs for your love birthdays... So that's why this is a bit of a DIY, 2 in 1... with a little tip for customizing any textile surface and the measurements for making an ipad cover for those that are varnished... I hope you're all sitting up and wiggling your fingers, because I've seen the craziness that leah goren's little Chat print dress has unleashed in you, so today I'd like to revisit this print a little by adding... Polka dots! I hope you like it and have fun putting cats and polka dots everywhere, on your tee shirts, your curtains etc. etc. etc.... WITH ALL MY LOVE!
To customize any textile (preferably cotton) you'll need..:
- pebeo "setacolor" opaque textile paint
- stencil brushes (and smaller ones for outlines)
- thick paper (or cardboard)
- and scissors
and for an iPad cover, you'll also need the pattern you can download here HERE:
- cotton fabric (approx. 50 cm)
- wadding sheets
- pins
- sewing machine
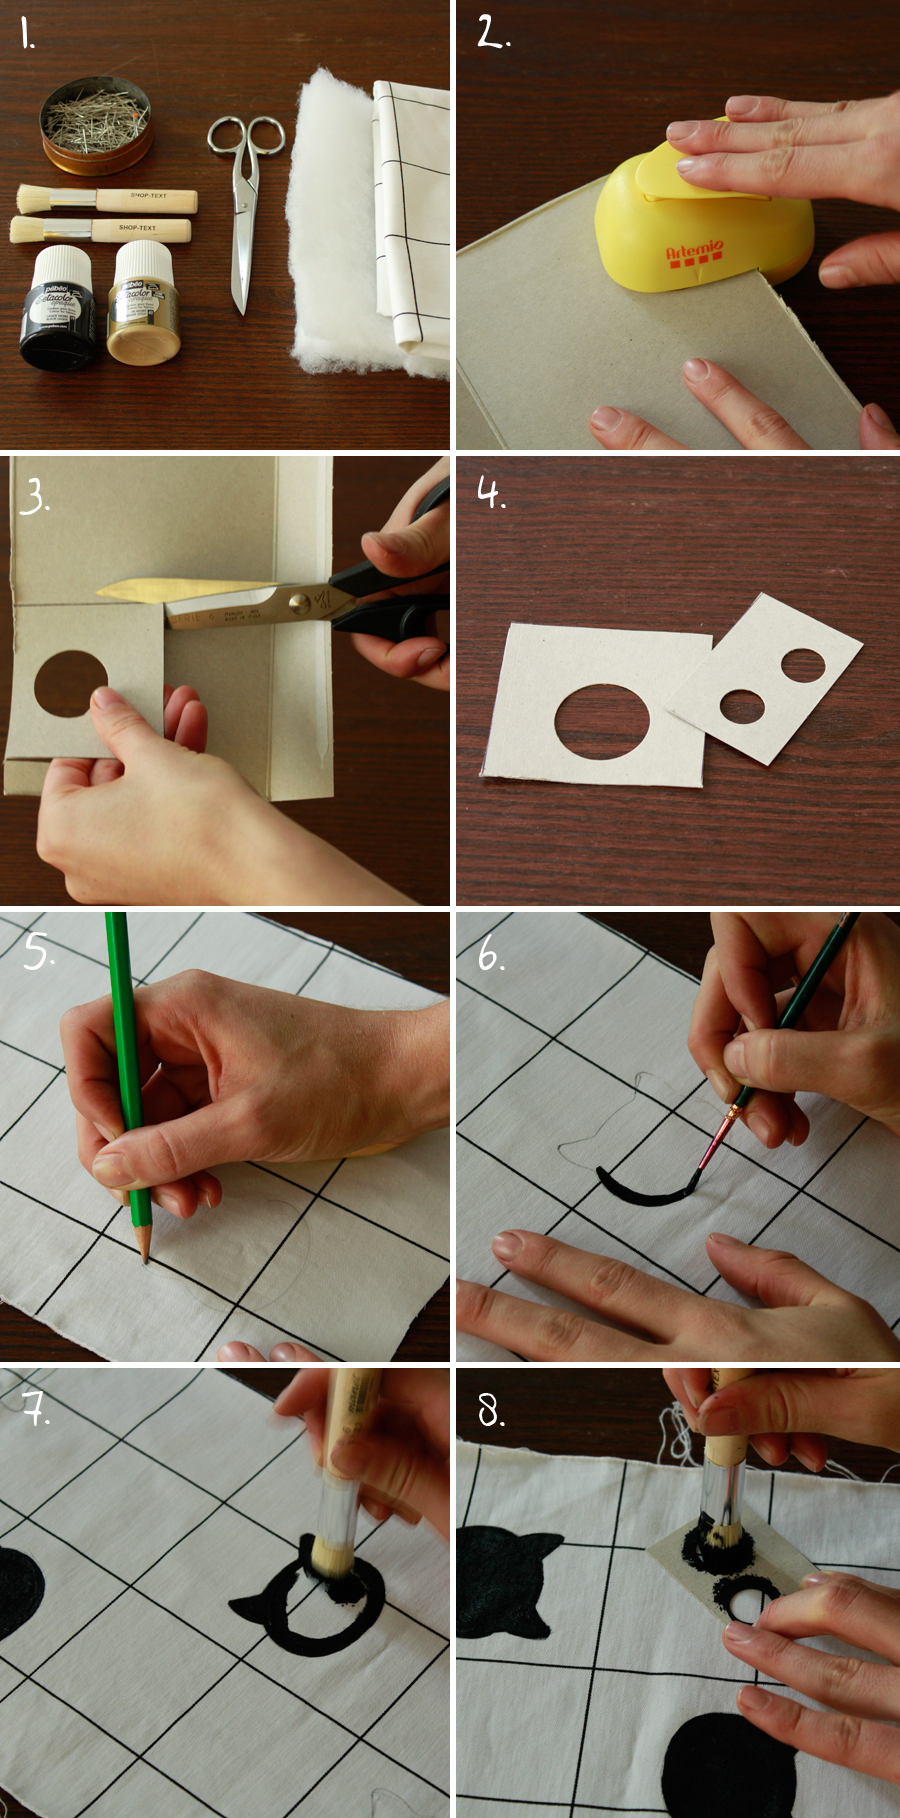
Start by customizing your fabric. Here I've used the famous cake punches to make the polka dots. "bathing cap remember... Punch a circle or two as you see fit (it's easier to do one at a time), in the cardboard box of your favorite cereal fig.2, and cut around it as much as possible (and a stencil, one!) fig.3 & 4. Together directly on the fabric, trace the outline of the cat heads (which you'll find on Pattern HERE ) fig.5. Using a small brush, dip it in Pebeo paint and follow the outline of the cat's head fig.6, then with the stamp brush, fill in the pattern fig.7. Finally, use your round stencils to add random dots to the rest of the fabric fig.8.
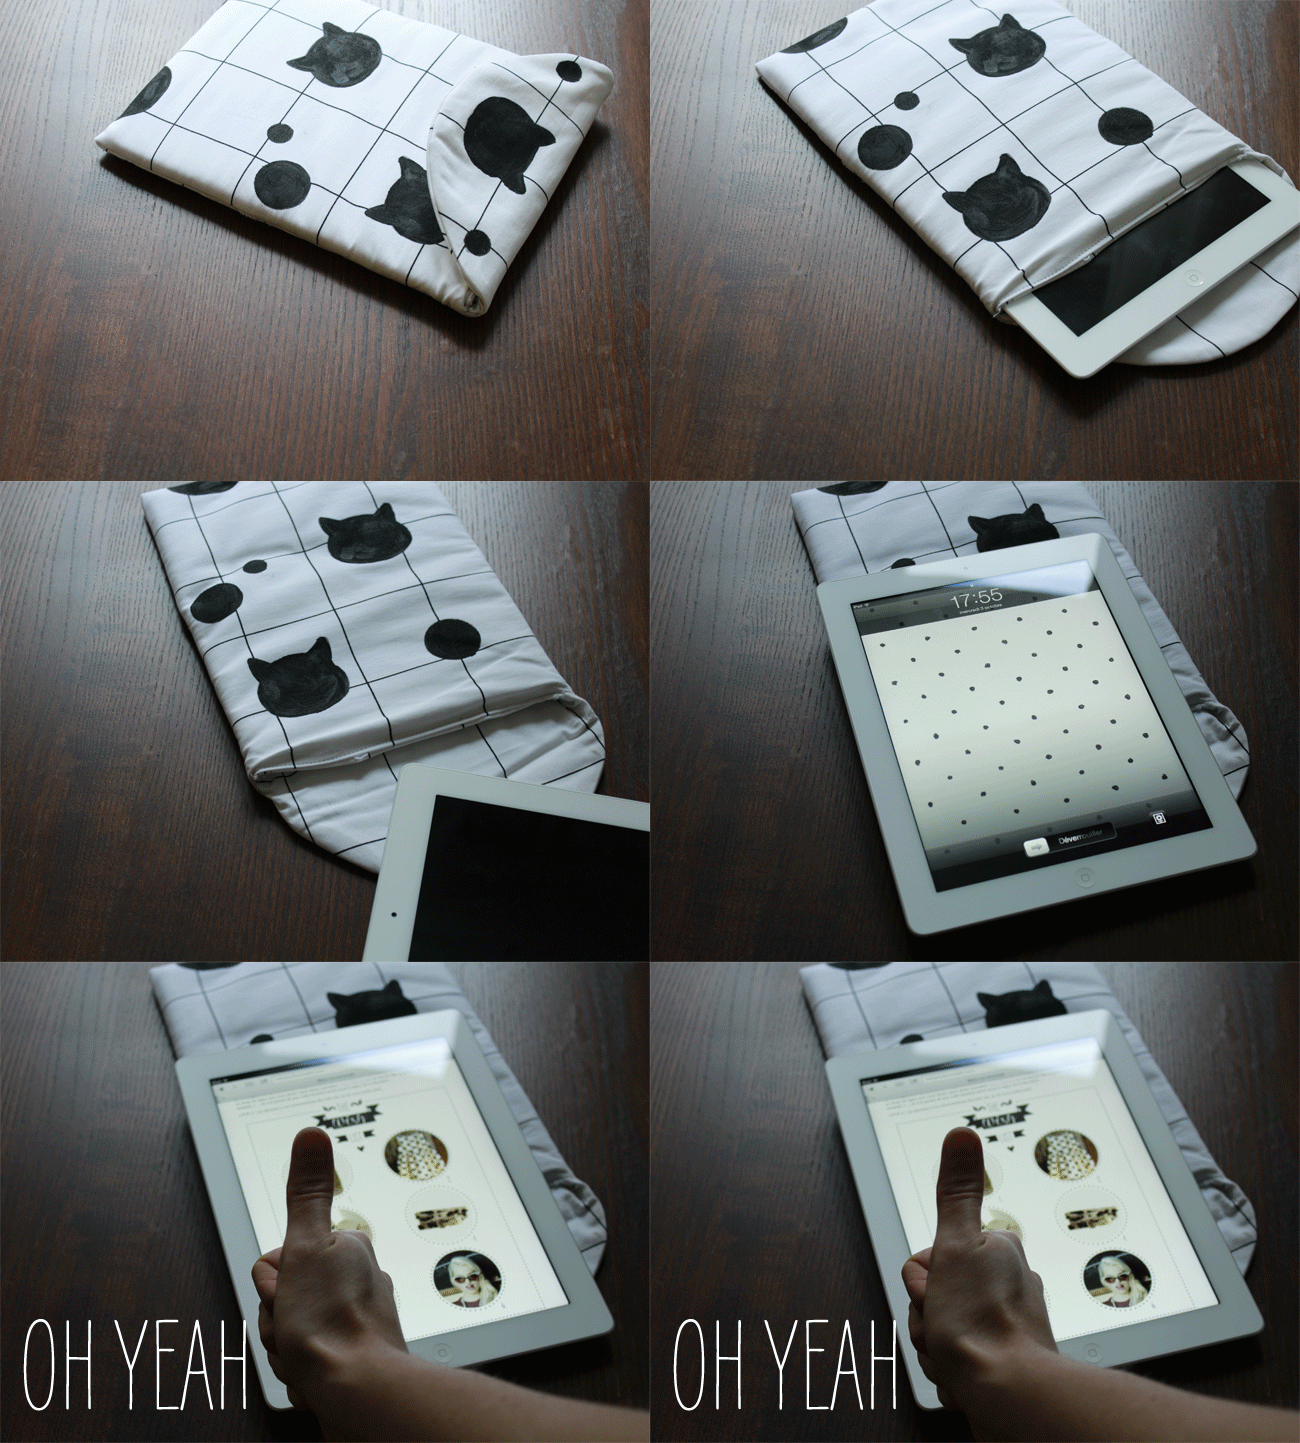
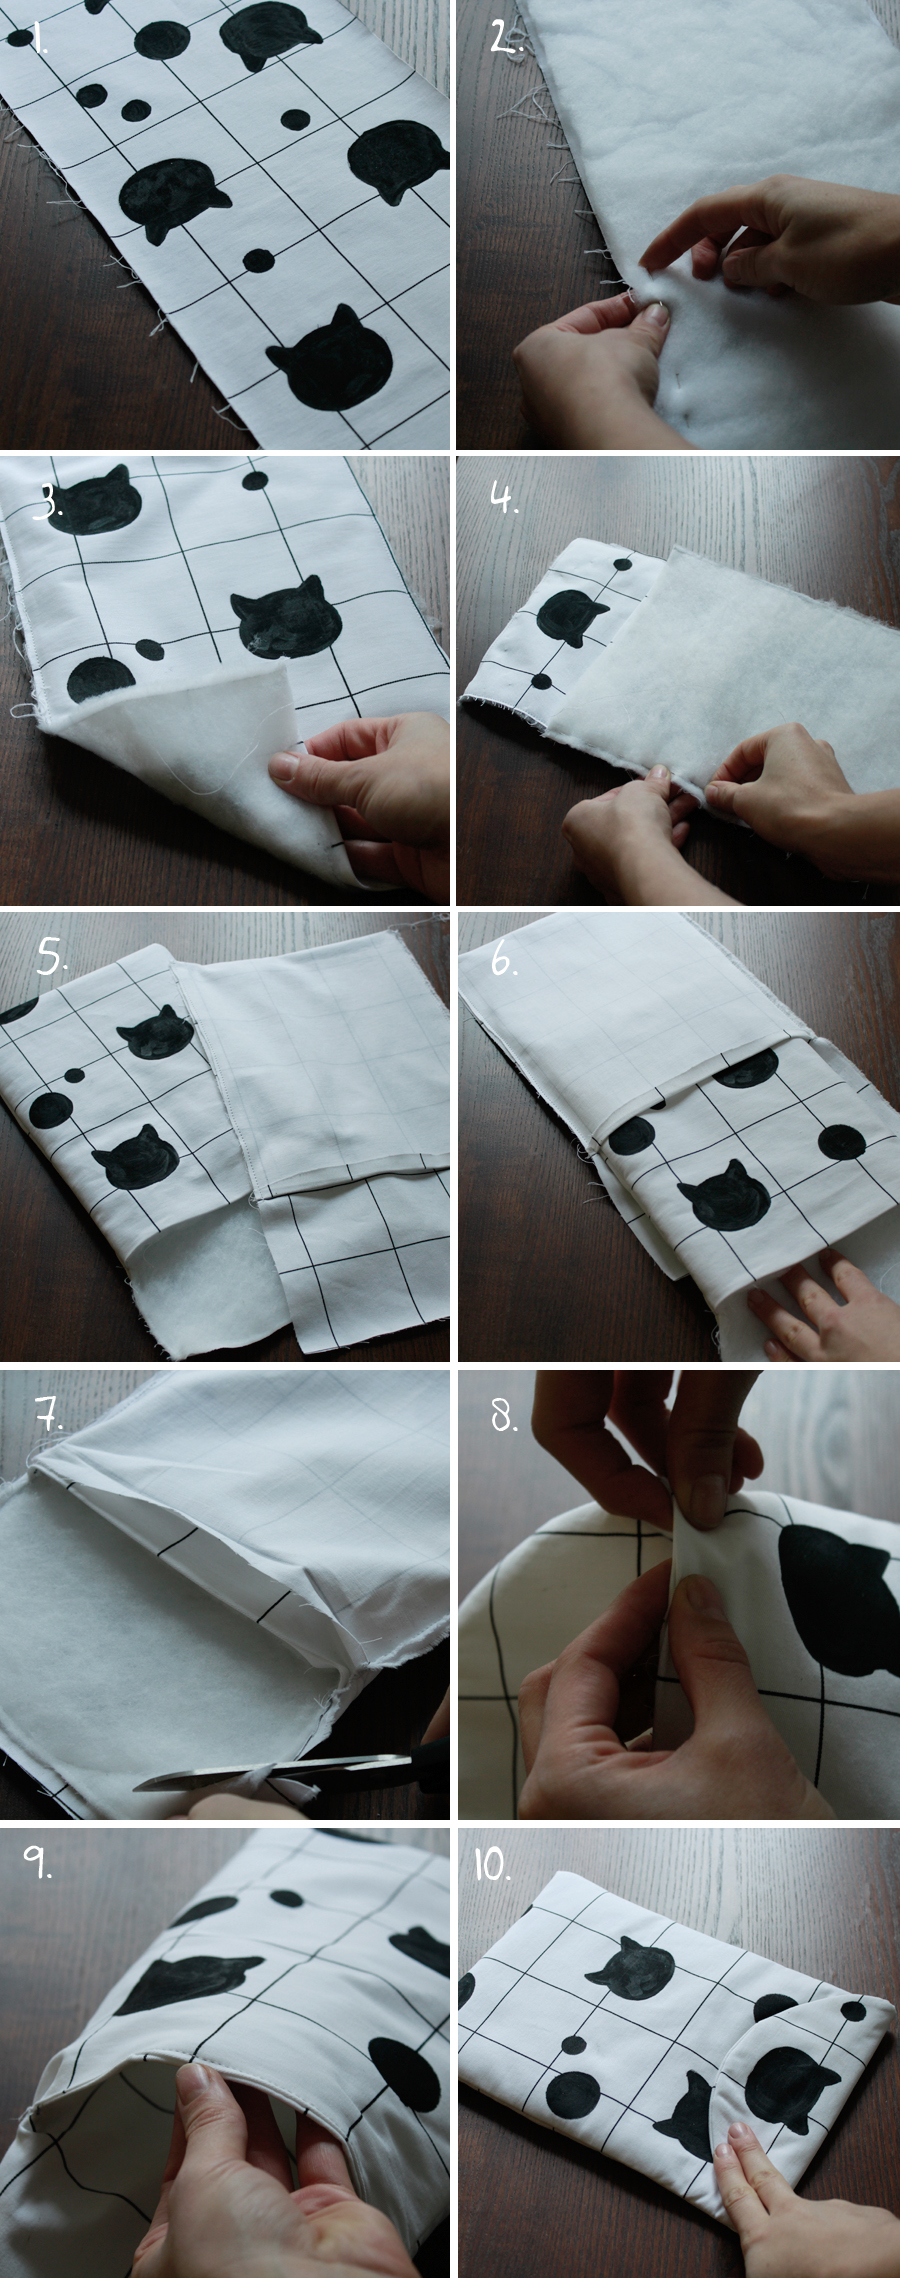
Making a cozy cover for your ipad is actually quite simple, and I couldn't really find what I was looking for on the internets, so while I waited to find the holy grail of a cover, I concocted a little pattern for myself... To begin, pin the wadding to your printed fabric fig.2, then machine stitch fig.3. Then fold your fabric strip right sides together, leaving enough space for your flap fig.4. Machine-stitch, and do the same with a second fabric strip (your lining) fig.5. Insert the right side into the lining as shown in fig.6, then pin and stitch along the rounded shape of the flap, then trim the excess around fig.7, before notching the rounded edge. Slide the whole assembly together and pin the part that will end up under the flap fig.8, making a small return. Finally, pin this straight line fig.9 with an iron and TA-DA! fig.10!
[:]


