DRIES DO YOU HEAR ME?
AAAAhhhh, resumption!
This three-days-long weekend was good and I'm sure it was for you as well... Thank you for all of your precious advices, I now have a list as long as my arm to go to the pharmacy and take care of myself! Thanks a lot!
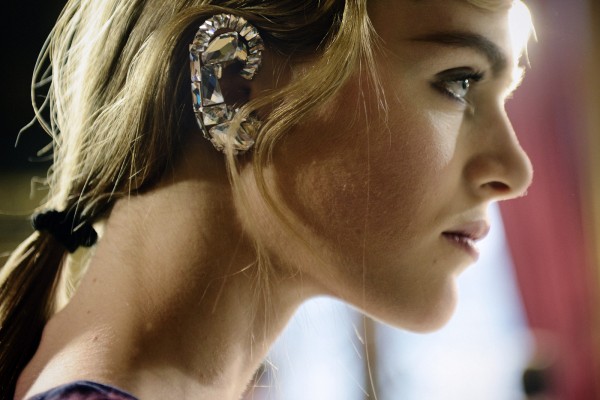
The other day Mai calls me in a near trance to ask "Have you seen Dries' ears?" Err Wtf!? Noo "So go have a look at them!", which I do. I google "Dries Van Noten earrings" and I simply fall in love, in shock actually - how did I miss them?! I immediately understand the goal of Mai's call: we HAVE TO make them and fast, before anybody else does the DIY. The race against the clock is launched: supplies, feasibility and timing to see each other...
For the record during the last fashion show of Dries Van Noten, Peter Phillips the genius make-up artist (who loves gluing strass on models generally) had this amazing idea... With surgical glue he glued strass directly on the ears of nine models which is SO cool, so Dries. The beauty and genius of this jewelry reside in its ephemeral nature.
The challenge for us was from this cosmetic happening to make a long-term object that could last for a life or at least a season... We're talking about creating the earring of the future, that you can put on and off as you like and that would resist to your daily life. I loved our surprise once it was done, we couldn't get over the COOL of the thing itself.
So here we are with only one question burning my tongue (or my ears) "Dries, can you hear us?"
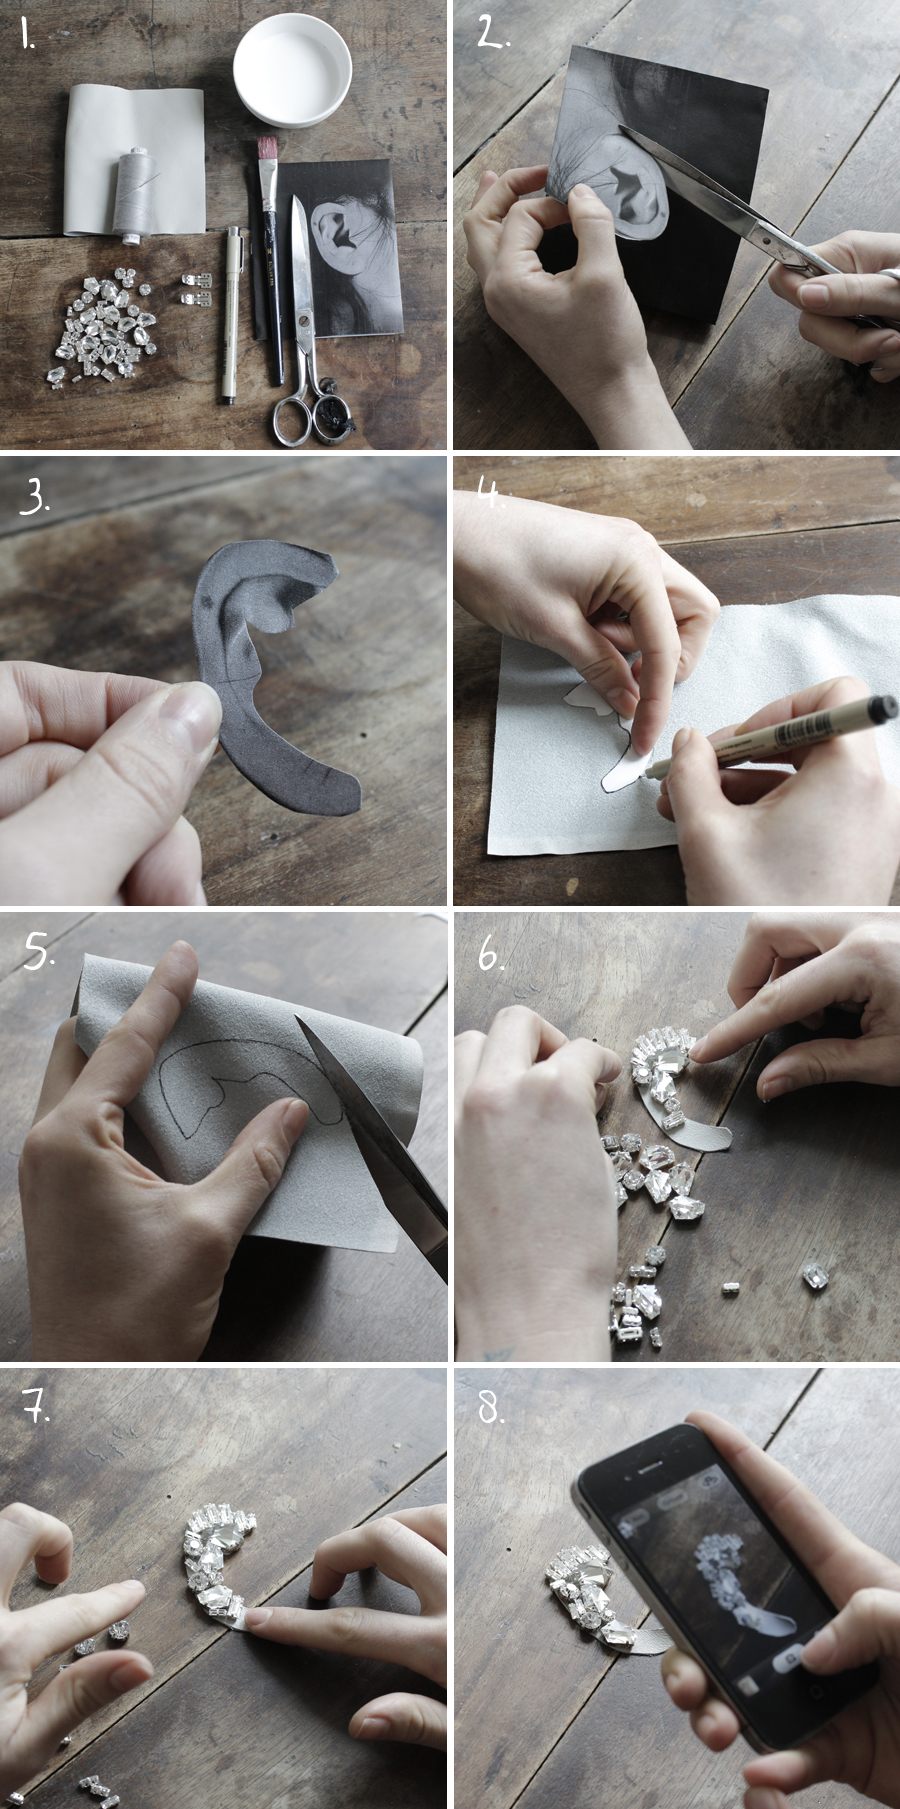
To do this DIY, you will need:
- - The copy or scan of your ear (yes, your own ear... As if you never did it),
- - Strass, any form, any size as long as it comes with settings,
- - A small piece of leather,
- - Two clips for clip-on earrings,
- - Some thread that matches the leather and a leather needle,
- - Some hardener paste for fabrics,
- - A pair of scissors and a pen.
To start with, cut the copy of your ear by following the cartilage. You will cut it as you like depending on the shape you want to give to your earring fig. 2 & 3 and even though you're not convinced about the final shape, you can still change it later. Turn over the piece of leather and, on the verso side, draw with your pen the reverse of your ear pattern fig. 4. Then, cut the leather with the scissors along the black line fig.5. Put the rhinestones on the recto side of the leather to figure out their final space fig. 6 & 7 and take a picture to immortalize it fig.8.
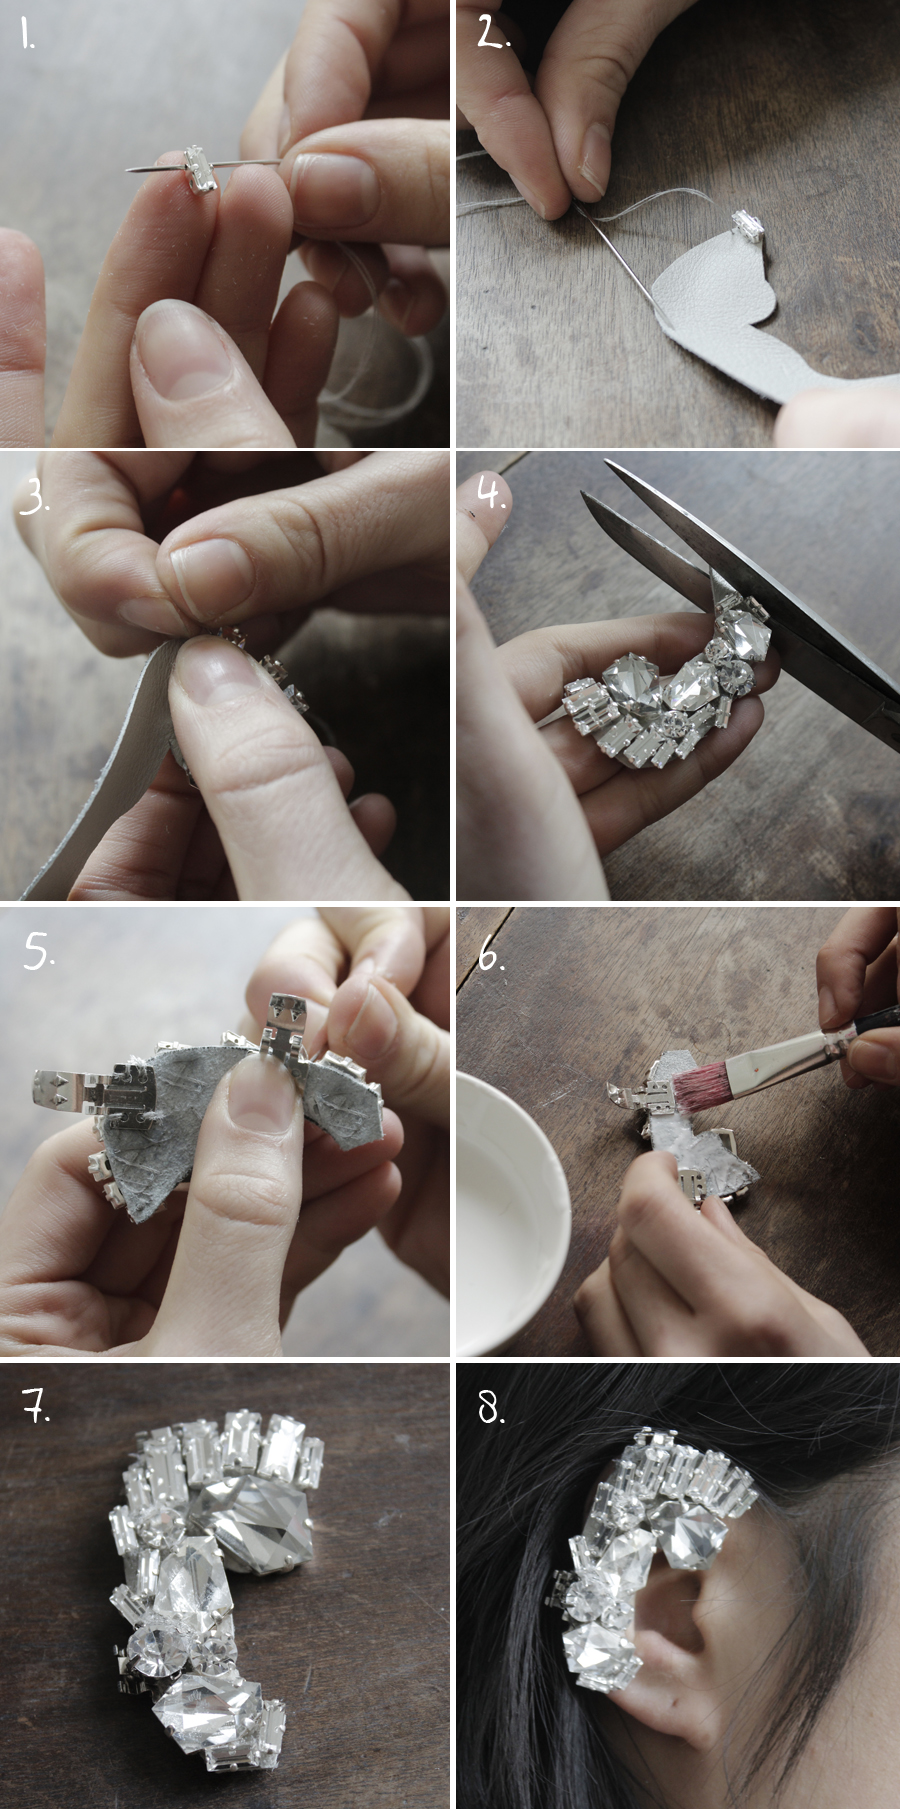
Then with your photographic copy before your eyes, start to embroider the strass: with the thread and the needle, go through the leather first (fasten off with a small knot), then go through the holes of the settings and into the leather again fig. 1 & 2. Keep going with all the strass and don't tell me it will take you too much time because you'd have 20 strass to sew tops... fig.3 As I was saying earlier, there is a possibility of your earring being less long or of the strass not going completely to the bottom of your leather pattern... If so, simply cut the extra leather showing of your jewel fig.4. Then on the verso side of your earring, fix the clip-on earrings fig. 5 - for the D day we only had shoe clips, which work just fine, but for better comfort I recommend classic clip-on earrings. And then to make 'the beast' rigid and strong enough, take a brush and apply the hardener paste on the verso of the leather. Do not hesitate to apply several thin layers to make a very rigid jewel fig. 6 & 7. And TA-DA!

Go to Mai's blog to watch what follows in video! Oh by the way, what do you think of the DIY in video? It is more work but I think it is helpful and explanatory, isn't it? Although you'd need to be as talented as Mai... (HAPPY BIRTHDAY MAI DES BOIS)
DriesMentendsTu? from Supertimai on Vimeo.


