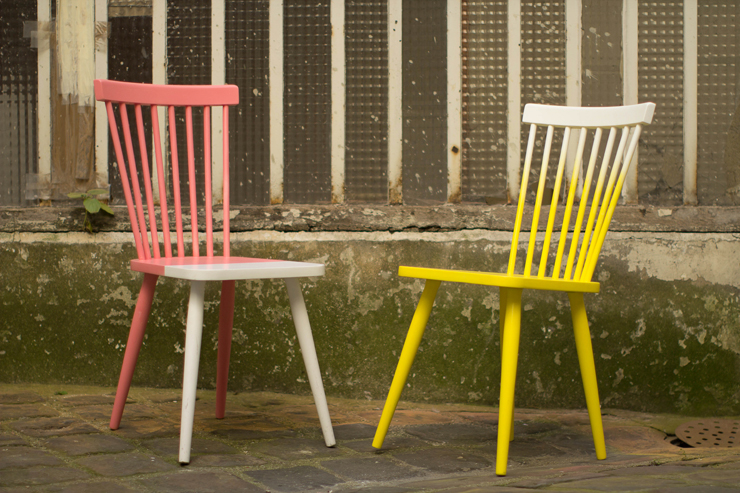
DIY pimp your chair!

Happy Thursday my little cats!
Today it's Do It Yourself decorating, again! Yes, because it's totally topical in my life, but don't worry, I'm preparing a do it yourself jewel from behind the scenes. I can already see you pining away behind your screens, so bear with me! So today, it's a do it yourself that you've probably already seen on the Internet, but I really wanted to make it and find out if it was as easy as that.... Well yes, I think the result is stunning, there's not a person who enters or leaves the office without asking us where we bought our chairs, and when that happens it's really my daily treat, to say: "oh that? It's nothing... You know, we're the ones who customized them...". Well yeah, I even want to add, "And it only took us 15 minutes, and I'm so happy you want the same ones!" But I won't say it, I'll keep it to myself. All this to say that it's THE easy do it yourself, that's got a lot going for it. Everything we love, right?
Today, two ways to customize a chair: an ultra-easy two-taste version and a Tie and Dye version to tell you all about it.

- Difficulty: super super easy
- Time: One hour for both chairs, including touch-dry time.
- Cost: 15€ (without chairs)

For this DIY you'll need :
- - One or more chairs (in this case La Redoute)
- - One or more paint cans (here Liquidex Cadmium Yellow light and Cadmium Red medium 6)
- - Painter's tape
- - Clear wood varnish
- - Paintbrush
- - Newspaper or other material to protect the floor

We'll start here with the bigoût version. Place your scotch tape in the middle of the seat and cover the whole front of the chair to create the "two-tone" effect.

Take your spray can and start painting. Don't get too close to the surface to be painted, as you'll run the risk of drips.

Once you've painted the back of your chair, let it dry for a few minutes, then remove your tape and TA-DA! Ultra-easy, I told you, this pink is really hot.

Moving on to the Tie and Dye effect: it's very important to place painter's tape halfway up the back of your chair.

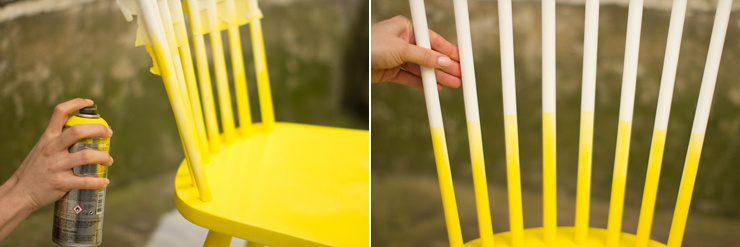
Start painting the chair legs and seat evenly. Once you've reached the seat, move the spray can away from you and lightly build up the paint to create the gradient.

Continue gently until you reach the tape, then remove it, and finish your gradient by moving your spray can as far away from the chair as possible, but so that it can reach the rungs.

For the Tie and Dye effect to be successful (you'll quickly get the hang of it), the gradient must be as soft as possible to finish off the transition between yellow and white. Leave to dry (in this case, a 15-minute wait and it's ready) and pick up your varnish.

Cover with a coat of varnish, making sure it's even. Leave to dry overnight before sitting on it, and TA-DA!


