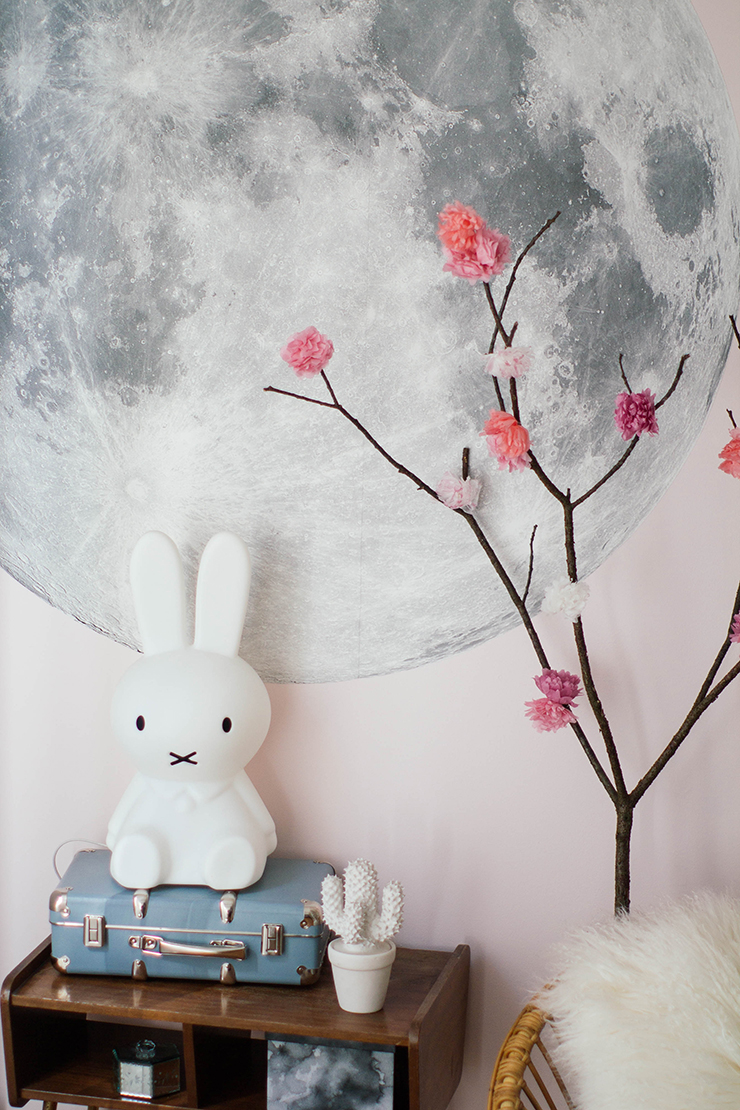
DIY ETERNAL CHERRY BLOSSOM[:]
Happy Sunday to you, my little kittens!
I hope you're recharging your batteries, as it should be on this Sunday, I just took a look at the weather on-line, and it appears that everyone will see the sun today! So I'm picturing you with your computer or iPad on your lap in bed, checking out what's in the press, on the blogs, and on other websites, a toasty and a steaming-hot tea close by, and your sweetheart who is pumped up to clean the apartment ... Oh, the good life. I'm back today to give you a very simple decorating DIY, to bring a touch of Japanese style into your home sweet home, "the eternal cherry branch." Yes, when you say it like that, it seems to be a whole concept, but I think it brings a touch of poetry to any room, and you can do these small, paper flowers in any color you want, imagine your branch decorated with ten small, white balls ... Have fun, and oh I think it's Mother's Day very soon, if you're stumped for ideas, and pretty broke, grab your scissors! Speaking of Mom, the opportunity is too good not to tell you a bit about mine! She just finished her second novel, a sort of psychological thriller that I had trouble putting down! "Left-handed contrariness"(Making a left-handed person write right-handed) by Martine THORRE, add it to your list of books to gobble up!
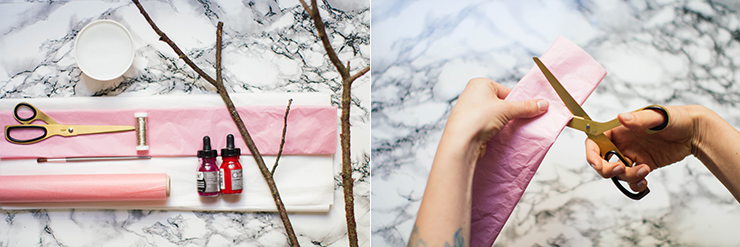
For this DIY, you will need:
- -a pair of scissors,
- - some thin, brass wire,
- - tissue paper,
- - a branch with nice off-shoot branches,
- - a paintbrush and ink(s) and a little bit of water.
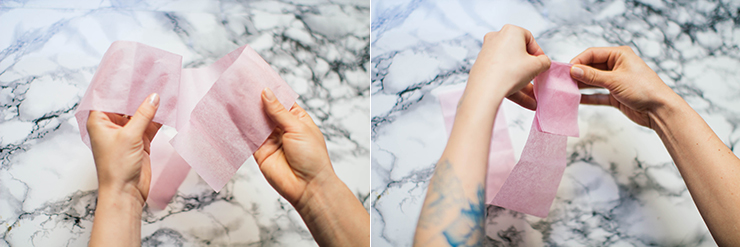
Start by cutting a strip of tissue paper of 10-12cm in width along the entire length of your roll, then fold you strip like a fan along the entire length. Your folding value must be equal to or less than 10-12cm in width to obtain a square, once the entire strip has been folded.
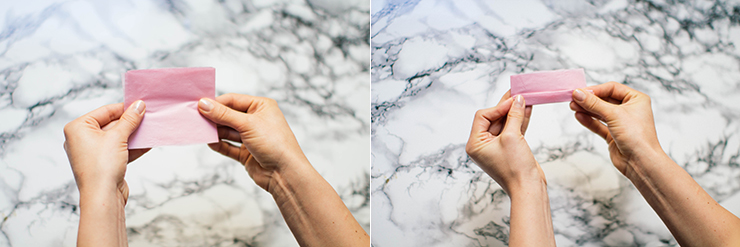
Then, keep folding your multi-layer square of tissue paper into a fan. But be careful, you must fold about 1 cm, and be sure it's parallel to the edge where you haven't already folded.
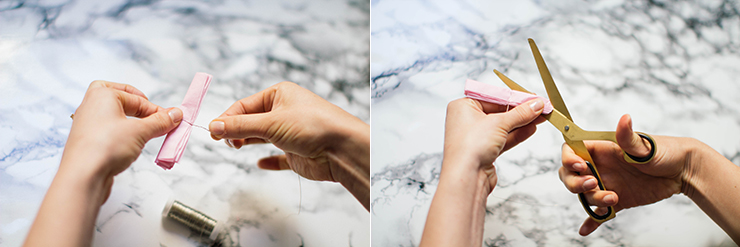
Once you have your fan, take about 20cm of brass wire and loop it around your fan at its midpoint. Using your scissors, cut each end, being sure to round out the corners.
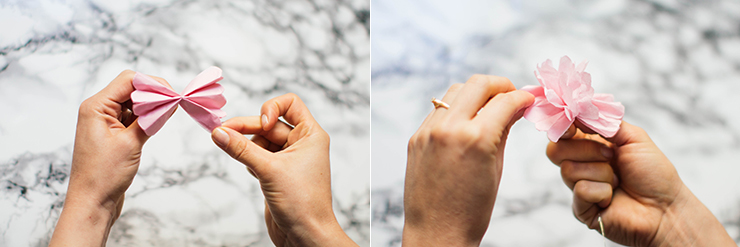
And I can just hear you saying, "oh great, we've made bow tie pasta", but have a little patience! Now, turn out each layer of paper towards the middle of your butterfly bow tie. And then you shall see your flower take shape...
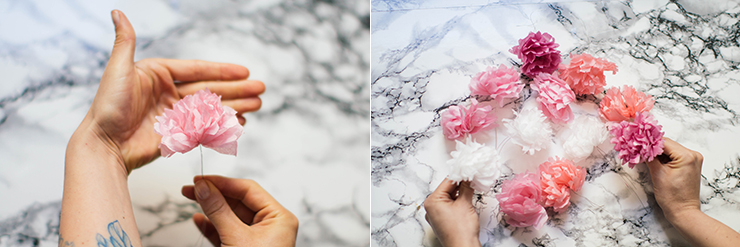
Twist your brass wire and maintain the length. For those DIY enthusiasts out there, this is actually the same way you make a pompom out of paper, with just one slight difference, for this flower, all the layers of paper are turned upward in the opposite direction of the brass wire, but if you want to make a pompom, you have to space out the layers of paper evenly, in an upwards and downwards fashion, in order to hide the brass wire.
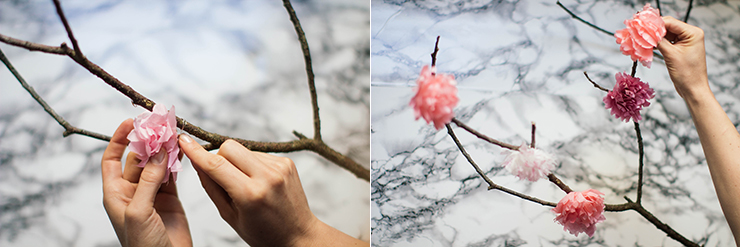
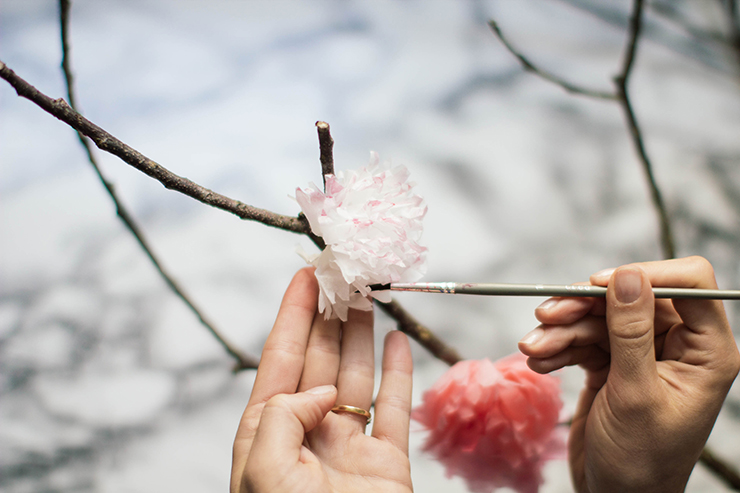
With the rest of the length of your brass wire, you can attach your flowers to your branches and TA-DA! And here's a little something extra ... If you have ink of different colors, dilute them thoroughly in some water and paint the ends of the petals of your lighter flowers.... Send us pictures of your finished products!
Translated by Ida Driscoll.
[:]


