DIY Polka dot!!
Screams of hysteria! I'm as excited as a flea! More and more of you come here every day, Thank you for reading! Thank you is the word I use most in early 2012 happiness! And I think there are more and more of you too, thanks to my fairy godmother! Valentinewho is a little jewel, a joy, a laugh, in short, Thank you!
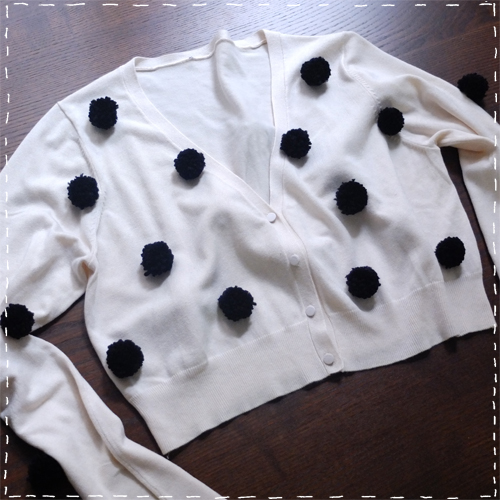
This cardigan is so cute, I want to wear it every day (I must admit I wore it all weekend... and today too). It's perhaps the simplest DIY I've suggested so far, but it's applicable to all your knits. And even for children's clothes (I'd love to see it on a little girl...).
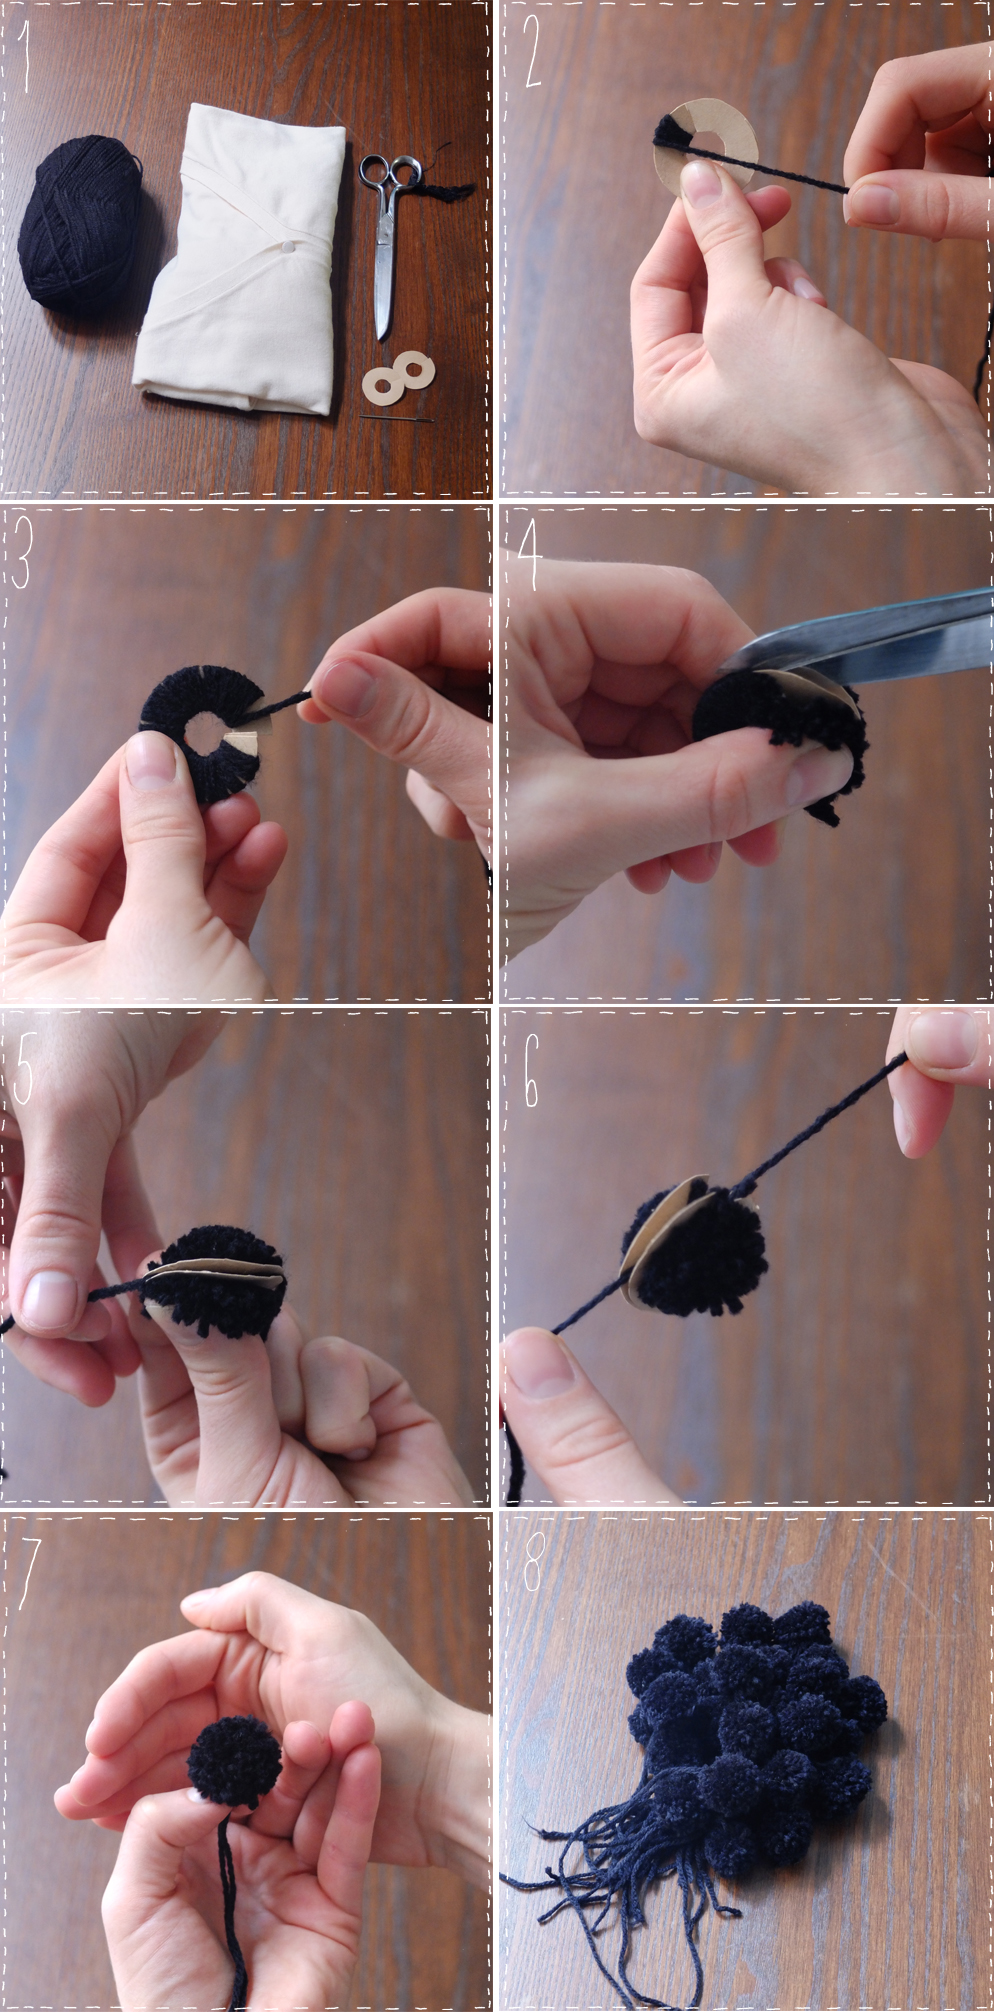
First of all, you'll need..:
- 1 ball of black wool and a large needle
- 2 pom-pom circles approx. 3 cm in diameter
- 1 good pair of scissors, a wooden pencil
- 1 small cardigan or sweater, anything in need of a makeover...
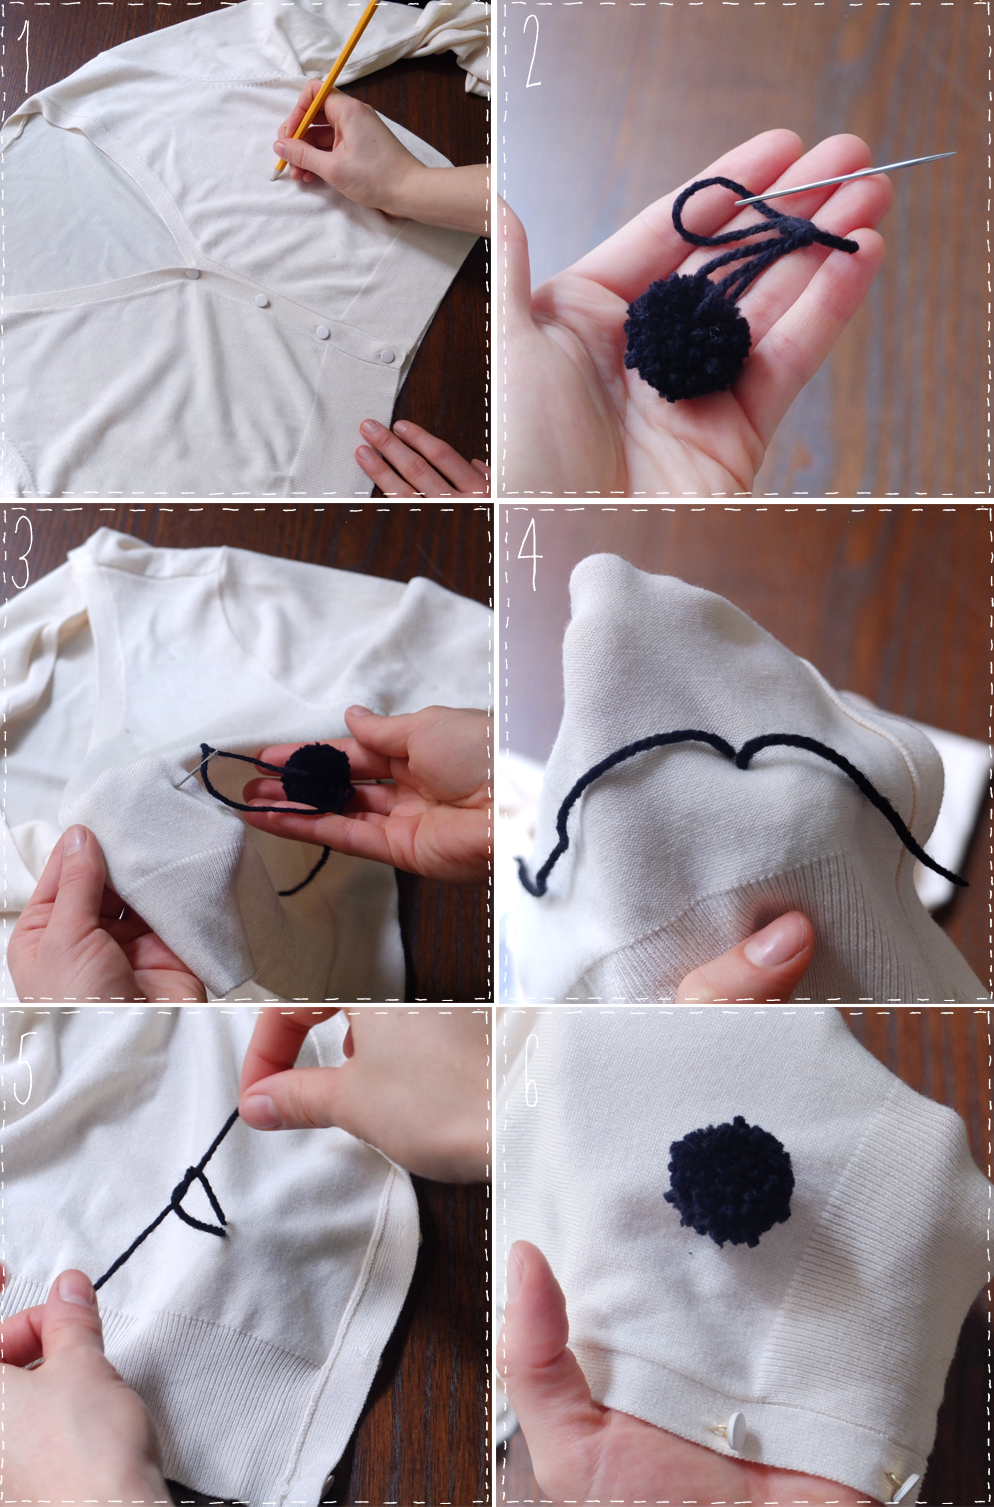
Using a wooden pencil, mark the location of your pompons (1) with small dots. I've obviously decided to place them in such a way as to create a polka-dot pattern... (It's my polka dot week! Don't roll your eyes!). Then, using a thick "mummy" sewing needle, so as not to struggle to get the wool into the eye...(2). Stitch at the stitch location, remove the needle and re-thread the second piece of wool through it, stitching again a few millimeters from the first pass (3&4). Turn the cardigan over and tie 3 tight knots one on top of the other (5). And that's the start of the fun (6), repeat the operation for the whole vest. Have fun! And enjoy wearing it!
See you soon!
 [:]
[:]


