EMBROIDERY LETTERS LEMON SPONGES

Hello my little cats!
We continue this special week with the famous DIY, which we imagined for Levi's during our last workshop! I don't know about you, but whenever I wear a denim jacketI feel like I'm 17 again... As if this garment were a real time machine, I could wear vans and put my hair in a ponytail and put back on my backpack customized with bic and blanco, with my Che patches... I just had a vision of myself at 17 with a single dreadlock into which I'd sewn a seashell, what an idea! I can't stop talking about the passage of time these days! Still, I'm delighted to find the Jean jacket and I'm really proud of the "COLLEGE" DIY embroidery result! As I was saying, I think that do it yourself on denim is a bit sacred, and what's your favorite customization on denim, I'm curious!
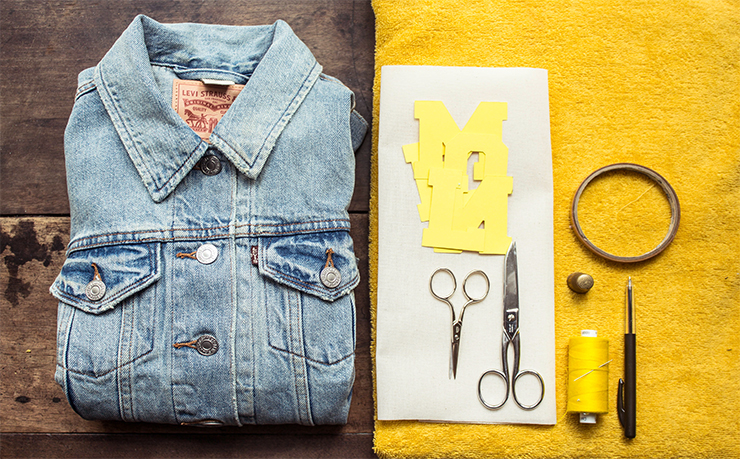
For this DIY you'll need :
- - terry cloth (you'll find it at Marché Saint Pierre in a multitude of colors),
- - thick iron-on adhesive,
- - download a free middle-school alphabet from dafont.com, such as this one,
- - scissors,
- - double-sided tape,
- - pen,
- - thread and needle.
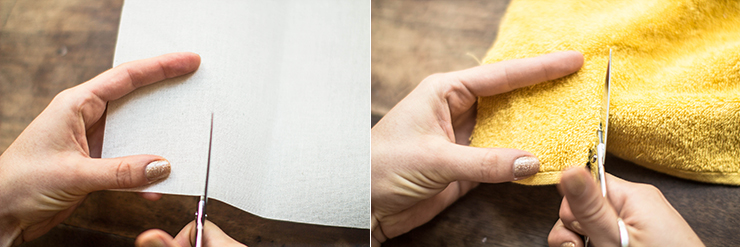
To begin, cut a strip of fusible web corresponding to the width and height of your word. I recommend choosing a short word of no more than 5 letters... Do the same for the terry cloth. There are different types of terry, but for this diy, it's best to choose a flatter, less "fluffy" terry so that your final lettering is as clean as possible.

Now take your hot iron and iron to fix the iron-on. Now take the letters you've cut out from a thick piece of bristol-type paper and transfer them to the iron-on.

Please note! Remember to transfer your letters upside down so that they face the right way up on the sponge (I've been there, done that...) The iron-on will help stiffen the sponge and make tracing and cutting out the letters easier and more precise.
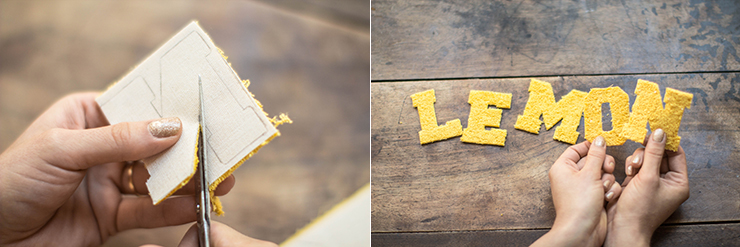
If you need to cut them out, use small embroidery scissors or thread cutters for the inside of the letters - they'll make life easier! Personally, I want to write dozens of multicolored things on a denim jacket, an all-over alphabet with words intertwined...
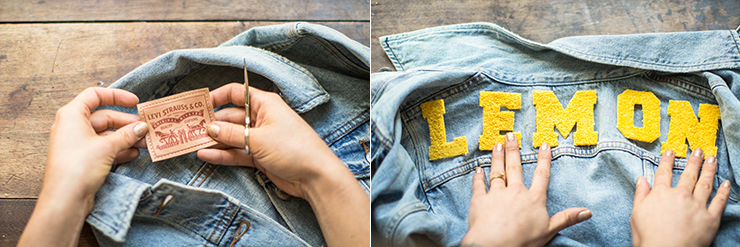
Once you've cut out your letters, you can place them on the back of your jacket (or on the pockets or sleeves, as you wish). Before you do that, unstitch the Levi's label on the inside. It'll be much easier to embroider the back if you don't have to go through the leather.
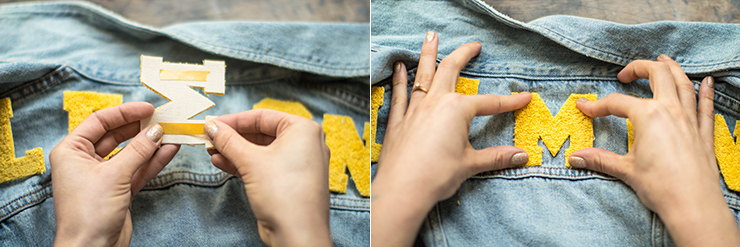
Place your word starting with the center letter to even out the spaces between the letters. Using double-sided tape, secure your letters so that they don't move during sewing. You don't need to put tape everywhere, just in the center, otherwise your needles will stick if you glue your letters very close to the edge... ( I've been there, done that a third time! )
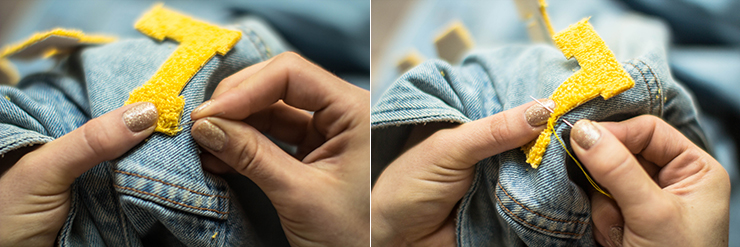
Arm yourself with your needle and thread, and let's get started! Stitch on the underside of the sponge and pull out the top to start. Then take a few millimeters of denim from the jacket and stitch through the sponge (stay close enough to the edge of the sponge so your stitches don't show).
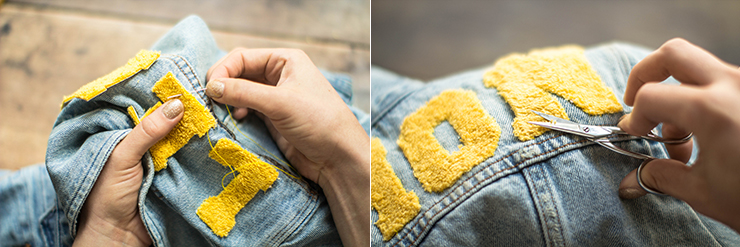
Continue like this, and when your thread becomes too short, finish with a knot: make a classic loop as if to create a stitch, and pass the needle back through this loop and pull, and you've got a knot! Keep up the good work and you'll see the embroidery. It's very soothing, so hold your jacket this way to make sewing easier. Don't forget to "clean" or "wax" your letters with small scissors to remove unsightly threads!
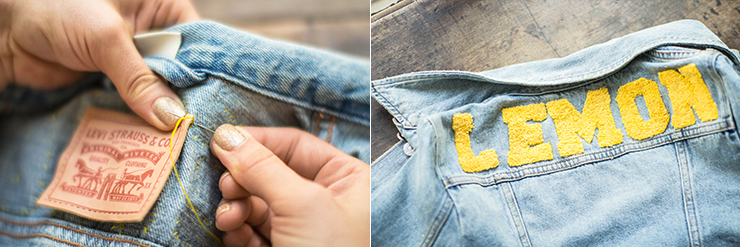
Turn your work over - you're almost there! Stitch the leather label on all four corners and TA-DA! You're ready to play the Grease remake! Big hugs and kisses!

To read this post in English, click here!


