DIY cupcake tower

Hello guys,
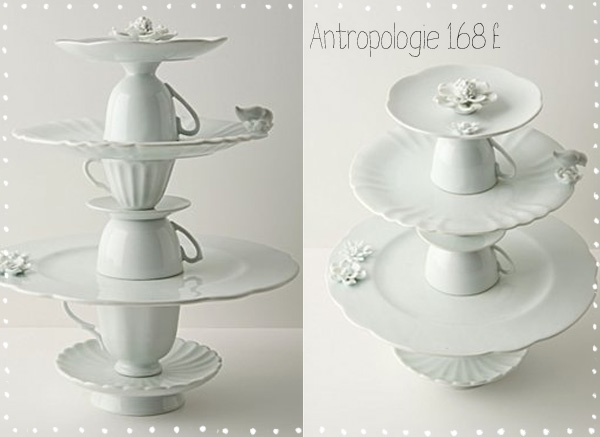
Tuesday is DIY, (it doesn't rhyme, too bad). Last month I was lucky enough to go to London with my boyfriend, to shop, see exhibitions and eat well! It was a bit like my London baptism, and I really took in the sights, coming back recharged with ideas and a thousand desires! I don't have an unlimited budget either, but many things appealed to me without breaking the bank (you can be proud of me), and as I wandered around this sumptuous "antropologie" boutique, which is a feast for the eyes and the mind, I came across this infernal tower of cupcakes, or little pastries... top of the range, except for the price, the weight and the space it would have taken up in my suitcase. Nevertheless, one picture with my iphone later, I keep it in a corner of my mind. I get back to Paris, call my crazy friend Camille and say "kitten, I'm sending you an mms, tell me if it's feasible?" Camille is a ceramics pro and tells me Araldite! I say to myself Araldite, Araldite? it must be a new expression meaning "eureka" I google it anyway and I understand that it's THE glue, the real thing for ceramics... I've got the solution to my challenge, I'm off to la vaisellerie specialist in cheap white crockery in Paris.
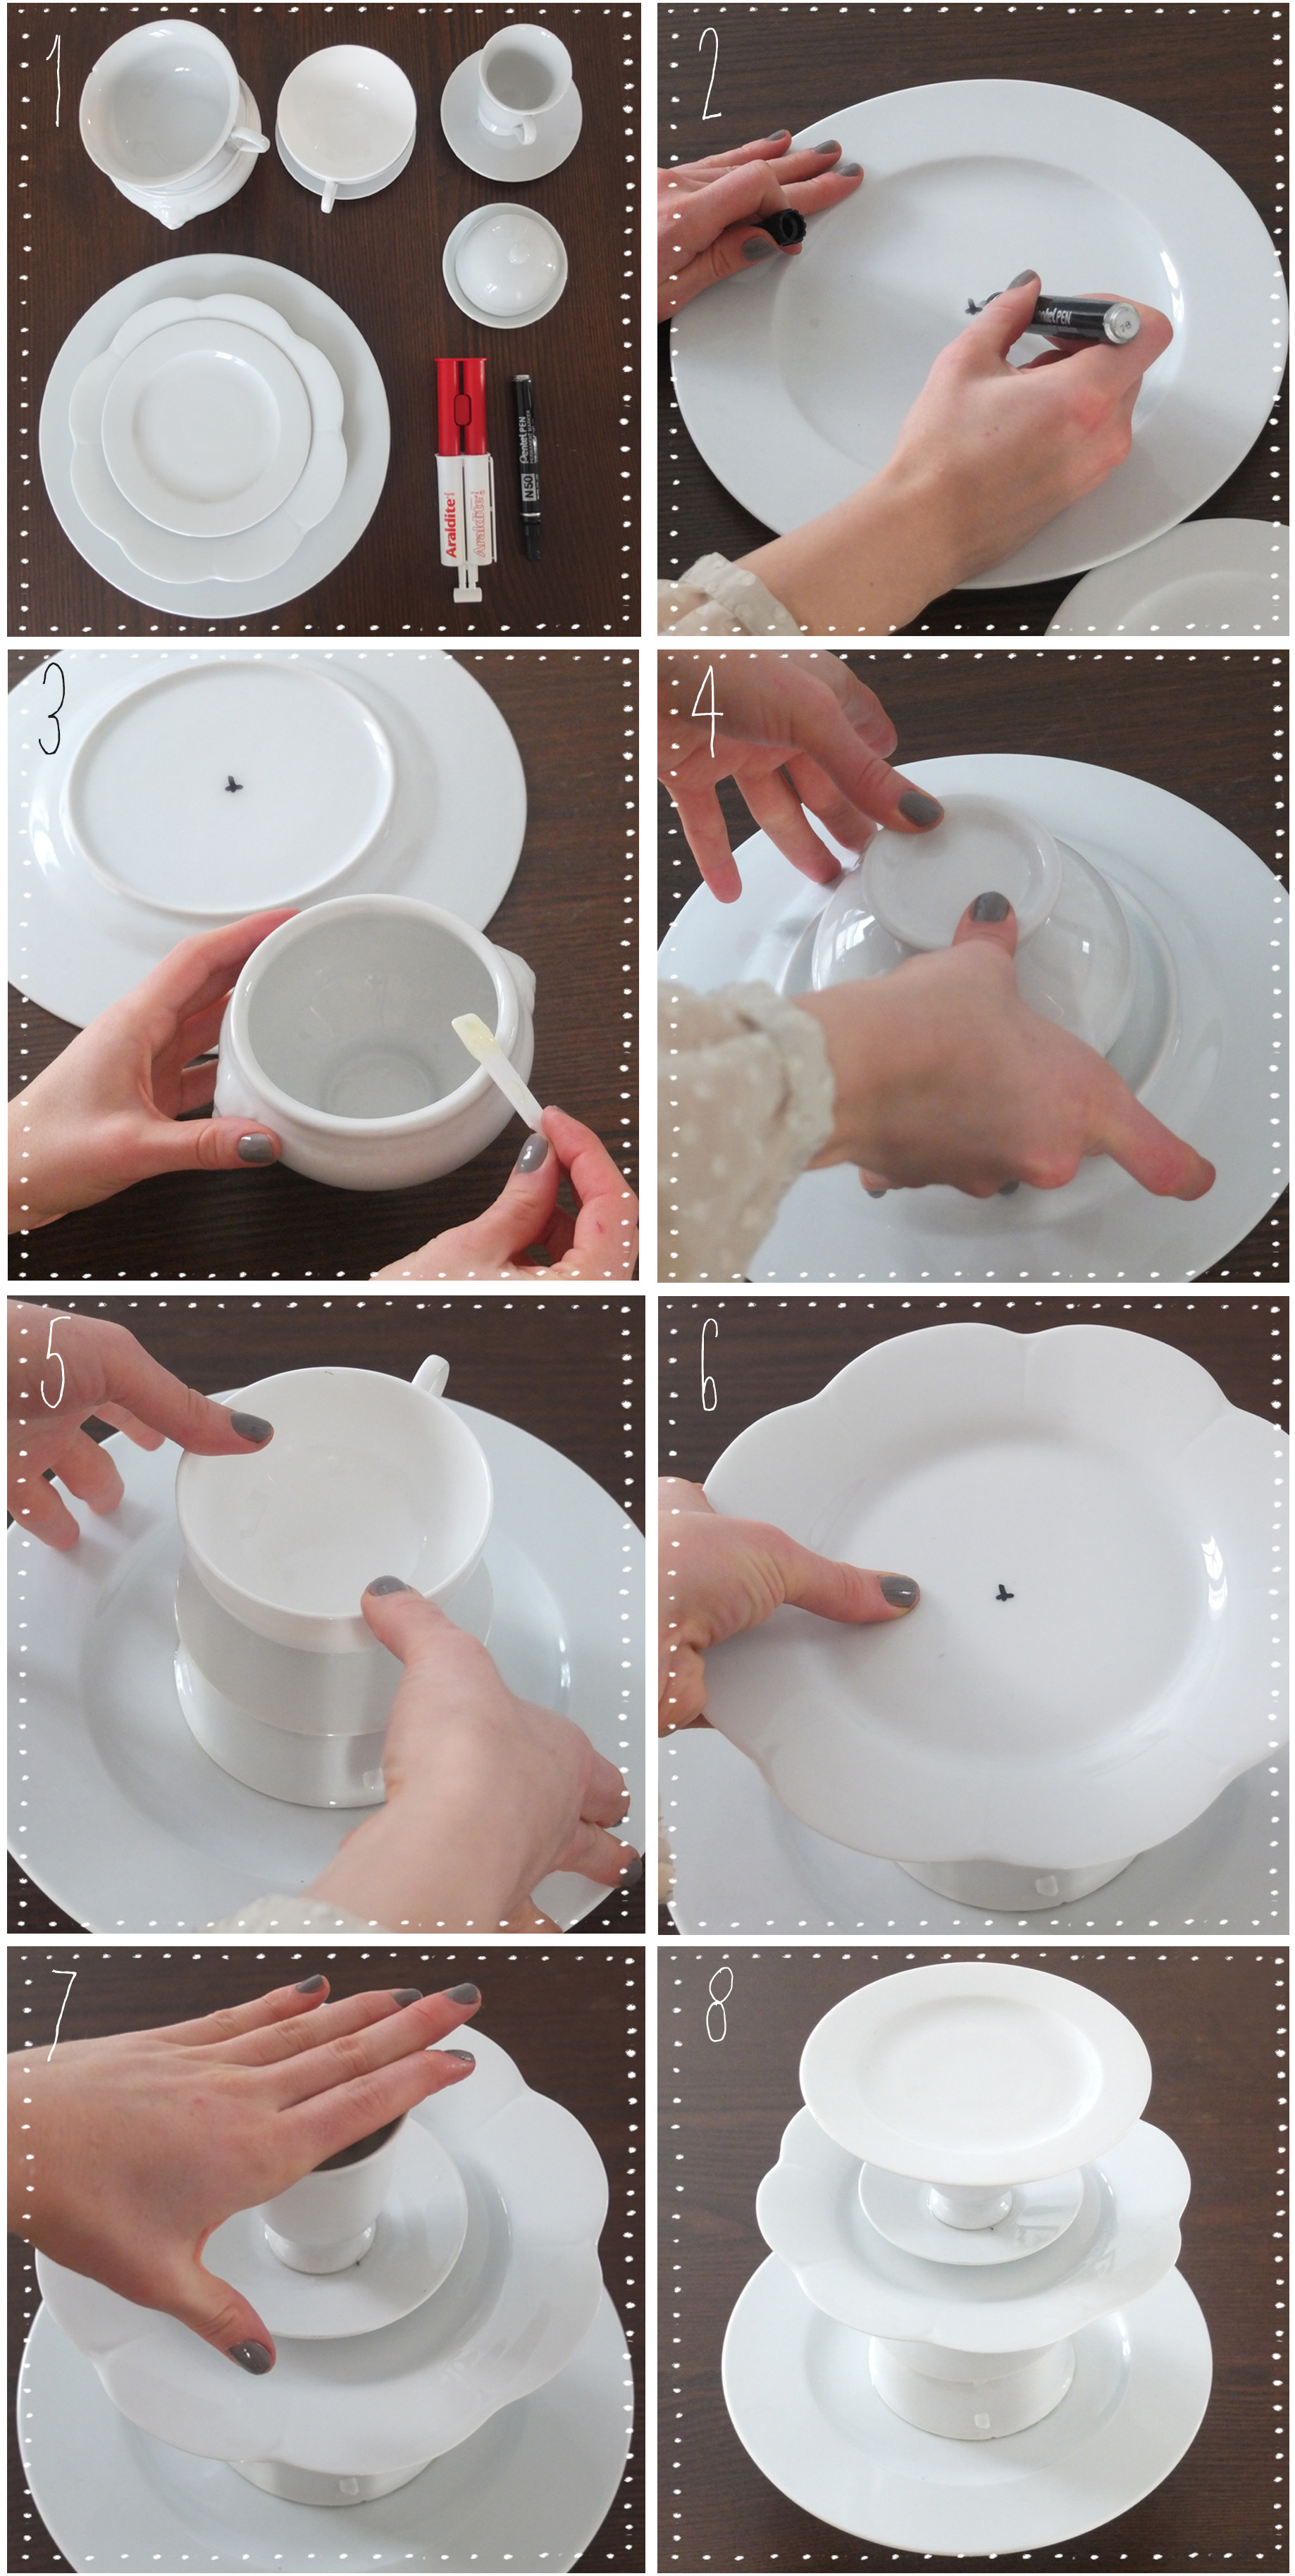
You'll need..:
- 3 plates of different diameters and designs, - 3 cups of different sizes and designs +2 coffee saucers -a small soup tureen, - a tube of araldite + a marker.
First, mark the center of each of your elements to help you find your way around when applying the glue. Next, open your 2-component glue and follow the instructions carefully. Coat the surfaces that will be in contact, and place the elements one on top of the other, applying light pressure. The glue will set in 4 minutes, dry in 20 minutes and your tower will be ready to use in 2 hours! All this for the sum of 29 euros. For an even more retro look, and especially if you're not in Paris, I'd advise you to hunt for your elements in attics.
Lisa


