


MY BOW SHOES
Happy DIY day my kitties,
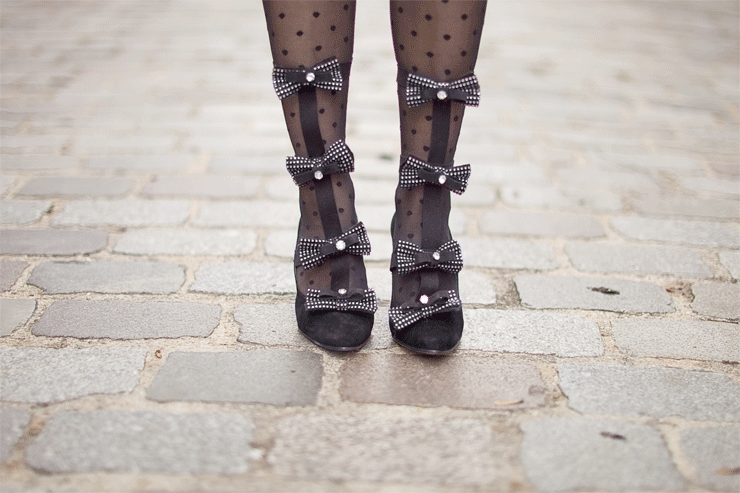
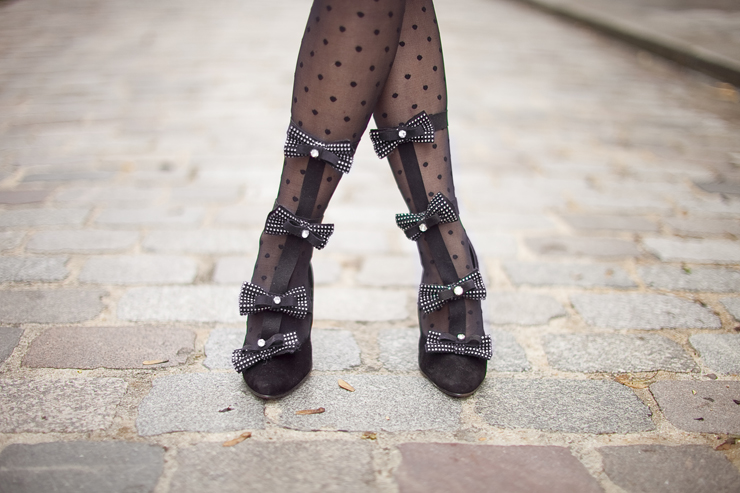
You know how there are some things that you dream about knowing you'd never be able to afford them, or even if you could you'd never dare wearing them. Because you'd be too afraid to damage them or you wouldn't be comfortable wearing the GDP of a developing country on your feet... Oh yeah! I'm sure you know what I'm talking about , I already told you about it here... Well it is quite the same thing than with the Isabel Marant's fringes boots... I had a crush on these strass knots Chloé shoes. But not only are they unaffordable for ordinary people, they are sold out everywhere because those ladies are starting to be a hold hand. I find them amazing, they were coming as heels or flat ballerinas and it was a tough choice to decide which one to make for this DIY but I thought heels would be more flattering, I was afraid of the "party sausage kind of look" with the flat version. Saying no more, here are the steps to make your own Chloé like pair of heels. Happy DIY day kittens,
To make this DIY:
- it will cost you about 30 euros (shoes not included)
- it will take about 2 hours, count 3h if you're not very focused...
- difficulty wise: no need to be an expert...
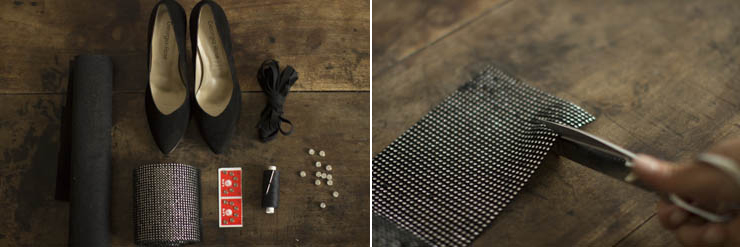
To make this DIY, you will need:
- heels of course, these are Georgia Rose's!
- rhinestone ribbon like this one, with small rhinestones on a black background,
- 2 sheets of thin felt,
- 4 little press studs,
- 8 large round strass,
- 4 meters of 2 cm wide and 80 cm of 1 cm wide black imitation suede ribbon found at Shindo's (you'll have 20% off if you say you come from me)
- black string and a leacher needle,
- 40 cm of wire or sheath.
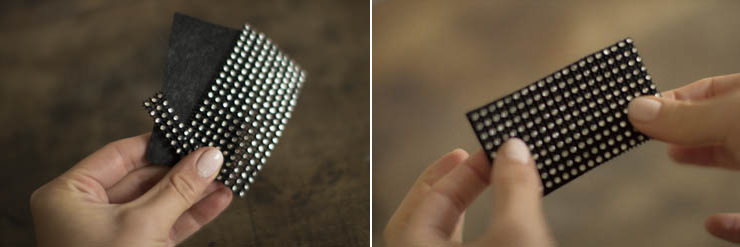
First of all, cut 8 rectangles of strass ribbon of 8 cm x 4 cm, and do the same with the black imitation suede. Then, only using the strass ribbon, cut 8 small rectangles of 5 cm x 1 cm. Place the strass ribbon on top of the imitation suede.
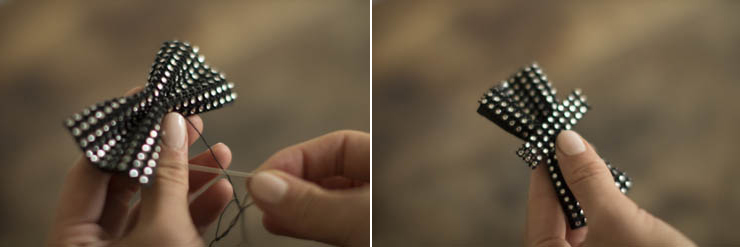
Take the leather needle and the black string and purse the middle of the rectangle in order to make a bow, fix it by making several hand-made stitches. Then put the smaller rectangle on your stitches in order to hide them.
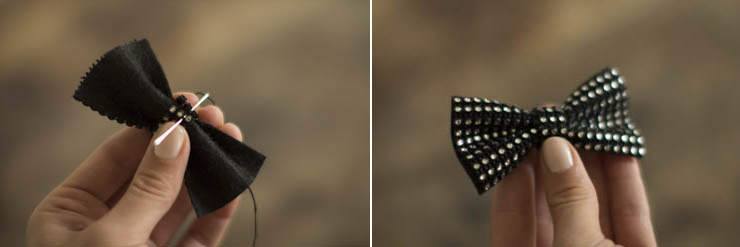
Fix the small rectangle with the leather needle and the black string in order to make a small ring. And here you are with a lovely little bow.

Then take the 1 cm wide imitation suede and cut it into 8 pieces of 10 cm. Make a ring and fix the center to close it. Then with a little extra suede make a ring around the center of this leap.
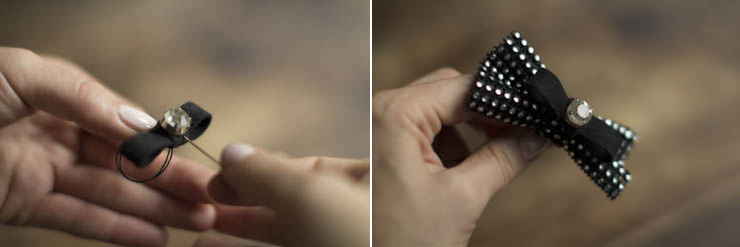
Still using the string and the needle, fix this new imitation suede bow and sew a large strass on top of it. Then fie the little black bow on top of the strass bow. It starts to look like something, isn't it?
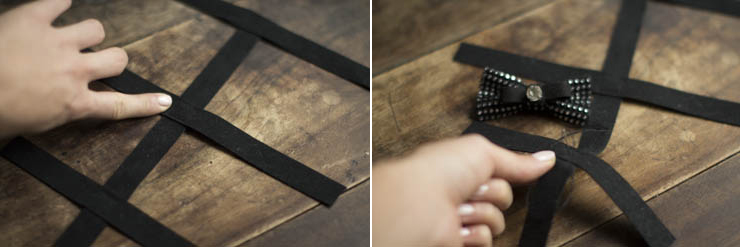
Then cut 4 stripes of imitation suede: one of 26 cm for the upright position, one of 27 cm (my calf size, adjust the length according to yours), one of 24 cm (my ankle size) and one of 16 cm (the instep). Lay the upright ribbon on a table, then place the " calf ribbon " at the very top of it, perpendicularly. Place the " ankle ribbon " about 8 cm lower, and then the " instep ribbon " 8 cm lower, still perpendicularly. Pin these spots, being careful to place them very perpendicularly, I insist on that because if it's not straight it can easily look very cheap. Then sew the ribbons with your machine making little squares or crosses.
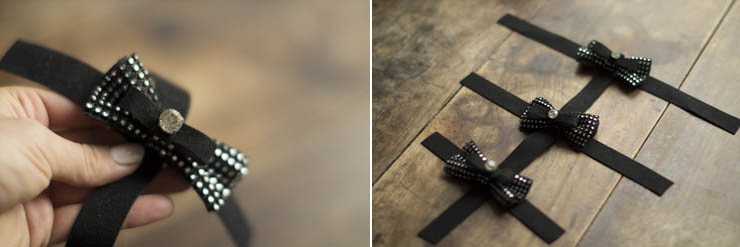
Then, on each intersection hand sew the bows. Congratulations, you've made the biggest part!

Then hand sew the ribbon to the middle of the shoe opening, very firmly. The leather needle and the string will considerably help you but don't hesitate to use a thimble for this step.
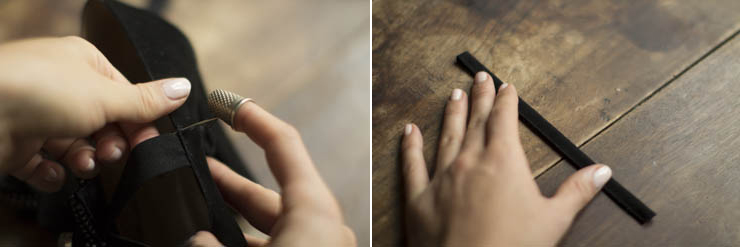
Then sew the "instep part" on to the shoe, provide for 1 extra cm. This part needs to be really tights on the foot because imitation suede loosen itself a little, do not worry if you have to force (a little bit!) when you put on your shoes. Then take 17 cm of the 2 cm ribbon, fold it into two height wise and sew a tight stitch on the edge with your machine.
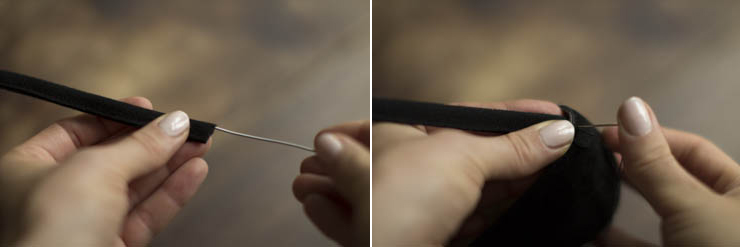
Cut 16,5 cm of wire and slide it through your imitation suede tube. Close your tube either with your machine or by hand, in order to avoid the wire to go away. Firmly fix the rod on the middle of your shoe's heel.
At the top of your rod, fix the end of your "calf ribbon", still very firmly. When I say " firmly " I still mean gracefully, no big thread blotch... I know you.

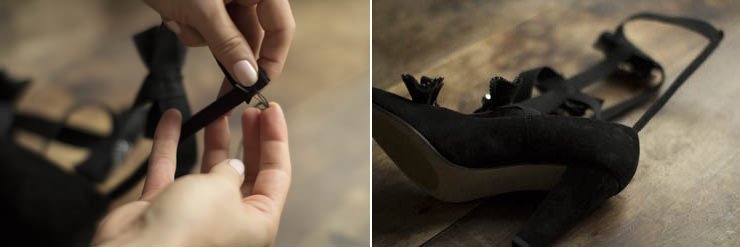
Now take the stud buttons and fix the female part onto the back of the rod, sandwiching the wire rod and the " calf ribbon ".
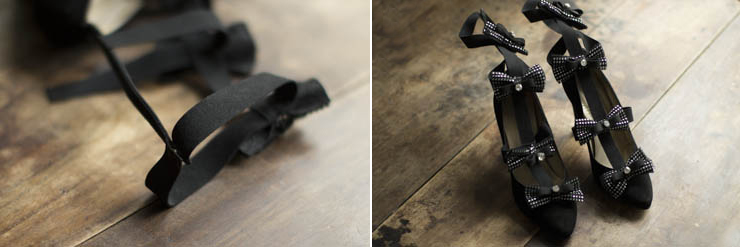
Do the same thing with the " ankle ribbon " and sew one end onto the rob, about 1,5 cm above the heel. Then add the stud buttons and TA-DA! Start over with the other shoe and let's show off a little...
I'm wearing a light pink Marionnaud nail polish, very opaque, and tights from Etam!
[:]