


THE THANK YOU DIY!

Hello darlings!
Like every 1000 likes on facebook, I'm doing a little DIY contest for you to win the famous Do It Yourself in question... But this time I let myself get a little overwhelmed, and we're at 3500 and counting and I'm only posting this famous contest now! BUT YOU'RE CRAZY! Thank you Thank you Thank you, I won't hide the fact that it makes me a little dizzy, but it's so good to read you, you're little shoots of love, if I don't always reply to your comments or e-mails, don't hesitate to get back to me... I wouldn't say I have a head like a sieve, but sometimes at the end of the day when I sit down to read you, I might forget one of you... To make up for my tardiness, I'm offering you the chance to win not one but two "Louis Vuitton" collars! But if you know this summer lace collection invaded the magazines.... And then the other day I was strolling along rue Saint denis during my lunch break (I work nearby, of course, so I don't do my shopping in the area...) and there I came face to face with this collar in the window of the haberdashery "SR fournitures". I rushed in, found the collar, and there it was: joy and happiness, 5 euros mademoiselle... Thank you a thousand times over for reading me, I know the next few months are going to be busy, but I can't wait to tell you all about it! It's easy to enter this contest: all you have to do is post a little comment with what you'd like to see more of on this site, a beauty section or "life briefs"... get to your keyboards, I'm listening! You can play until Sunday noon!

For this DIY Louis Vuitton collar, you'll need:
- A collar from Sr fournitures (226 Rue St Denis, 75002 Paris)
- A white cotton canvas (50 cm,)
- A sewing machine,
- an iron,
- white thread and a needle,
- a staple or snaps.

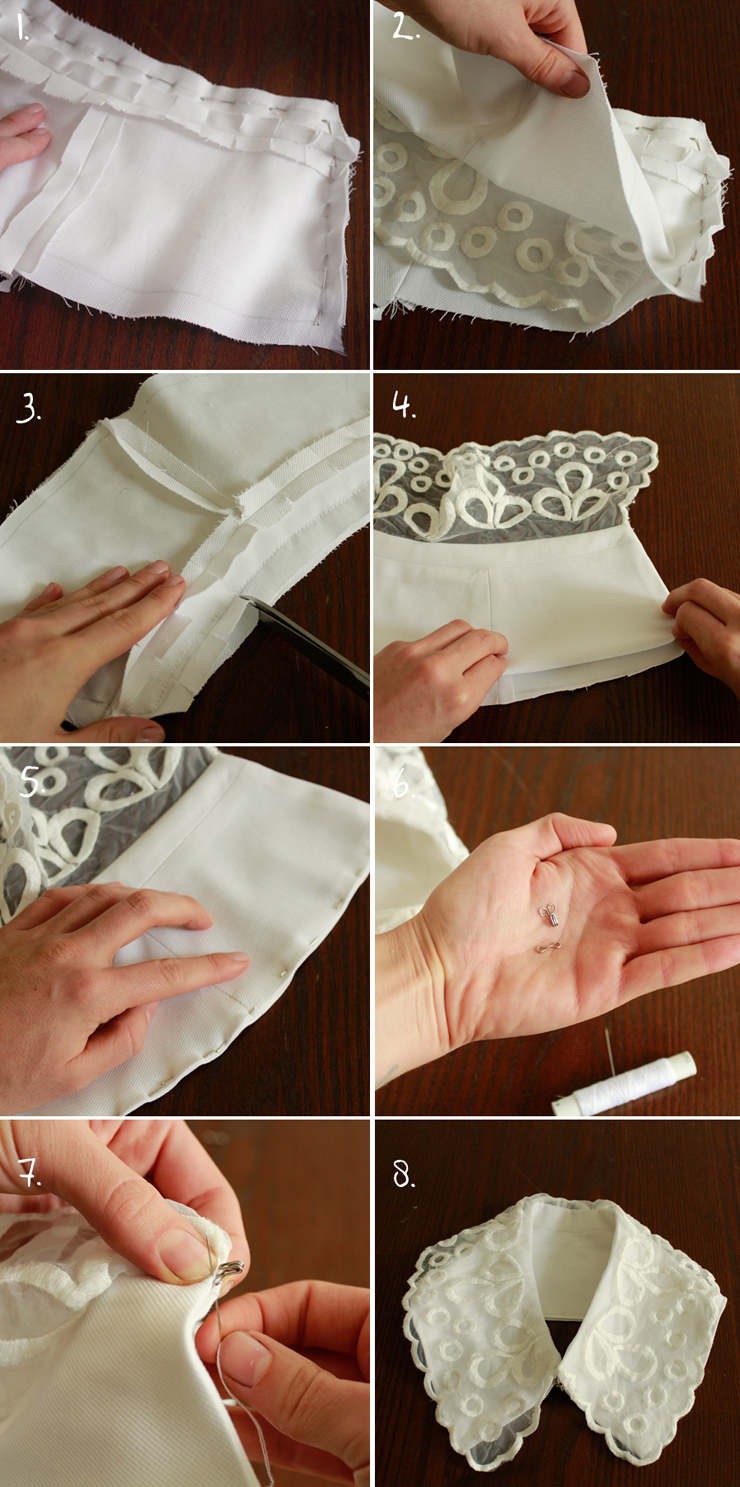
Once your front and lining are assembled, sandwich the pretty collar by pinning (fig.1&2) following the lines. Once pinned, stitch the machine, notch the top of the collar foot again (fig.3) and turn the whole thing inside out, then iron so that it's neat and tidy. Now all that's left is to create a kind of hem, using your iron to tuck the clean edges inside the collar and pin (fig.4&5). Machine-stitch and iron one last time, before attaching the staple or snap to close the collar (fig.6&7) and TA-DA (fig.8)!
