


TAKEN FROM LIEGE
Happy Wednesday, chestnuts!
Yeah, yeah, yeah, I'm doing high level jokes for this new year!
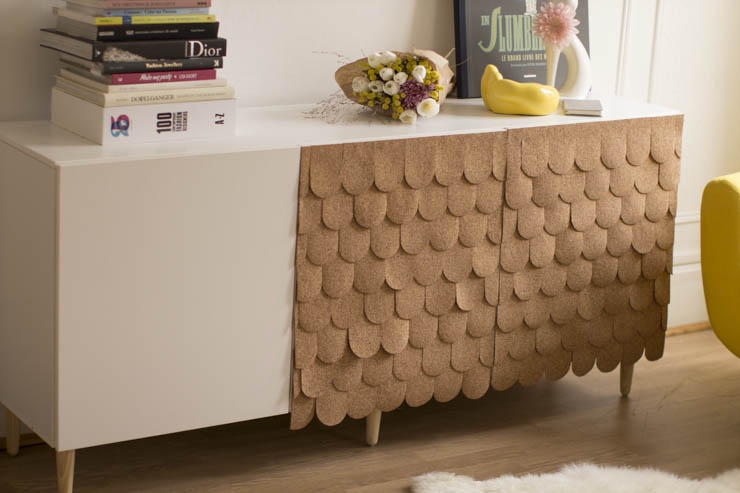
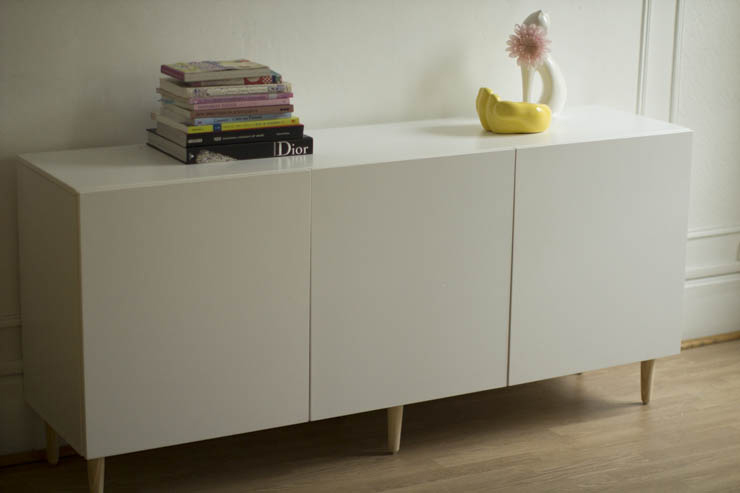
While I'm waiting for my resolutions to be finalized, I'd like to share my Wednesday mission with you: to convince you that cork isn't old-fashioned, but downright cool. For me, cork is associated with the agonizing "blocnote" board in my grandparents' kitchen, pinned up with business cards and other discount coupons. Don't be those who don't know what I'm talking about... Today, I'm teaching you how to customize a piece of furniture, to give it a second lease of life, to make it unique and yours, but this method can be applied to any surface. Keep this in mind for the day when you need to refresh some furniture. With your scissors, I promise it's easy, for a guaranteed crazy effect.
To make this DIY:
-Cost approx. 35 euros (materials excl. furniture)
-Time about 4 hours...
-Difficulty "easy, but requires great attention to detail"...

Equipment:
- - Cork on a roll,
- – Pattern ecailles
- - Small tapestry nails with flat heads,
- - Hammer,
- - No nails, no screws" glue
- - Wooden pencil, eraser, ruler and masking tape.
Start by downloading the scale pattern, printing it out and tracing the scales on the cork. For this piece of furniture, you'll need around 120 scales, the number depending on the surface to be covered.
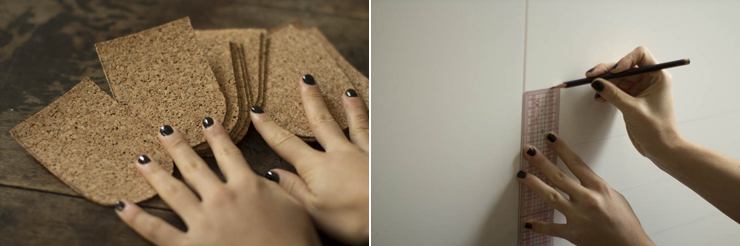
Once you've traced the scales perfectly, cut them to size. The cleanliness of these cuts will determine the final quality of the furniture. Use a ruler and a pencil to trace the markings on your furniture. For this piece of furniture, I drew parallel lines every 7.5 cm. To cover another surface, measure the height and divide this distance into rectangles of the same size. To be able to use the pattern for these scales, the height of your rectangles must be between 7 and 8 cm.
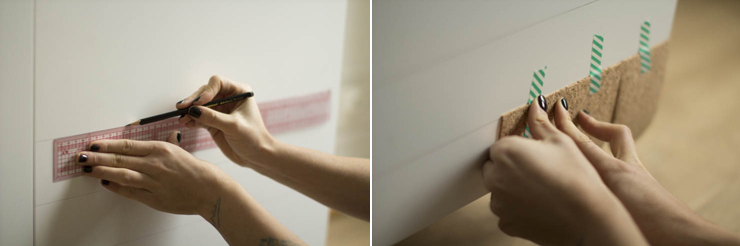
Draw the lines parallel across the entire surface to be covered, and especially if your scales are to be placed on two doors side by side, pay close attention to the lines! No loose ends in this step! Now pre-position your cork scales with the tape along the line, starting with the lowest line.
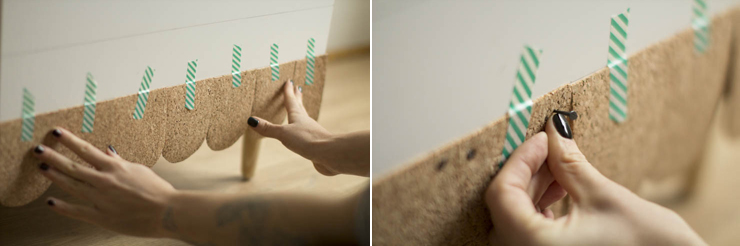
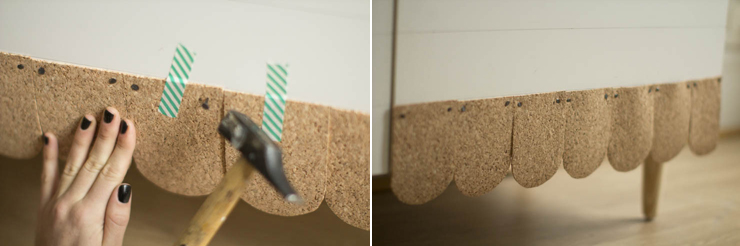
Once your line is complete, grab the small upholsterer's nails and fix the scales to the furniture at the top two ends of the nails.
Please be careful with your fingers, as cork is a fragile material until it's properly fixed.
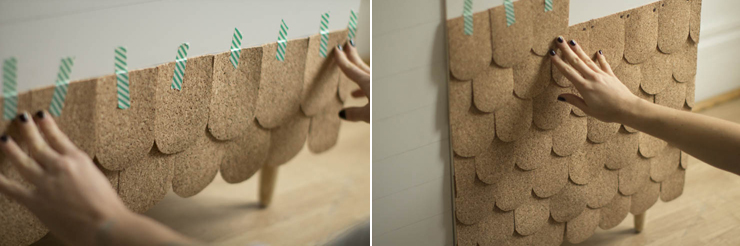
Continue your covering, repeating these steps on the second line, and so on up to the last line, the one at the top of the cabinet door.
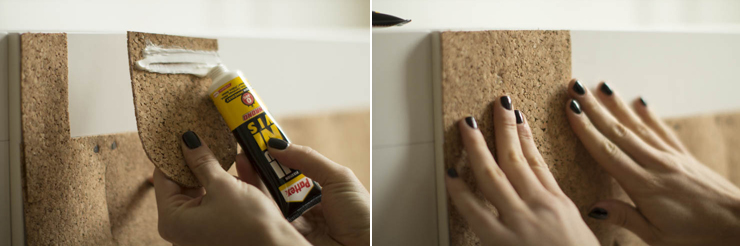
Now, to finish off your last line without any unsightly nail marks, I recommend you use the magic tool of "no nails, no screws" glue, which is extremely effective in our case. Glue your last scales in line with the top of the cabinet.
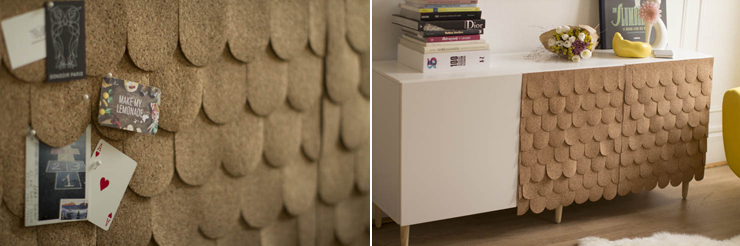
Repeat all these steps on the second door and TA-DA!
Inspiration Sara Larsson via Pinterest.