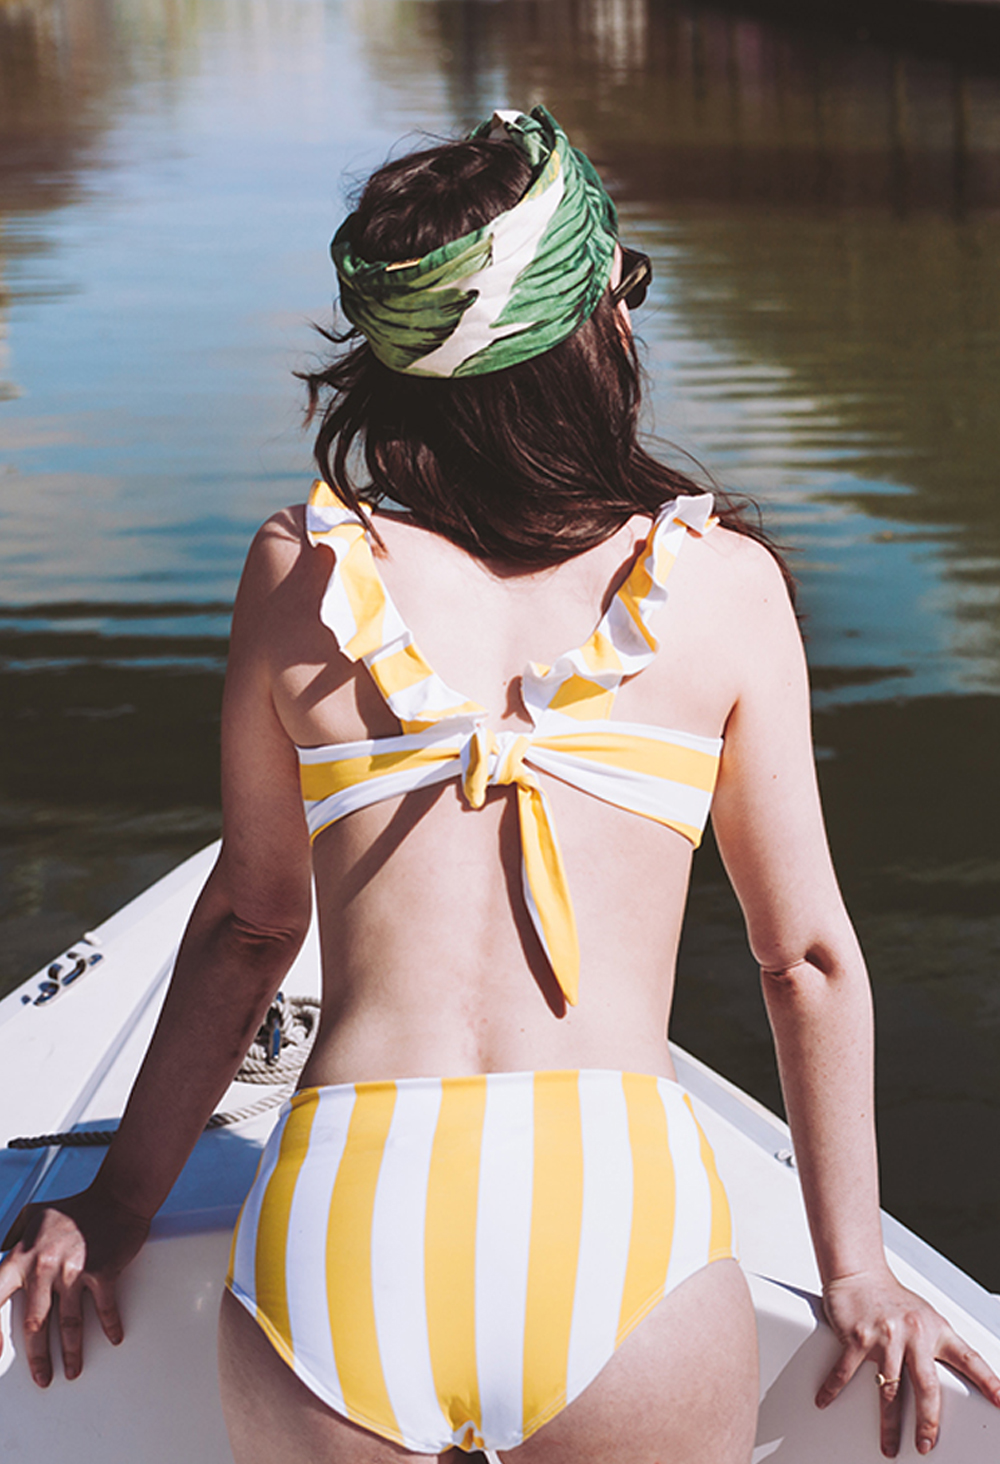
SAVE THE DATE AND DIY URSULA

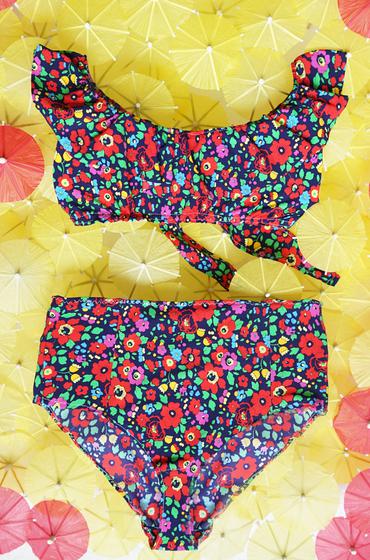

To make the Ursula swimsuit you'll need :
- 1m of not too thick lycra fabric in 1.40m width, we found these Liberty fabrics at Personal patternmulticolored flowers here and the white and red flowers here,
- 0.45m anti-slip bustier tape (easily found in haberdashery or even on the internet),
- 1m laminette (not compulsory), also available from haberdashers or online,
- tissue paper,
- masking tape,
- and our downloadable pattern here !
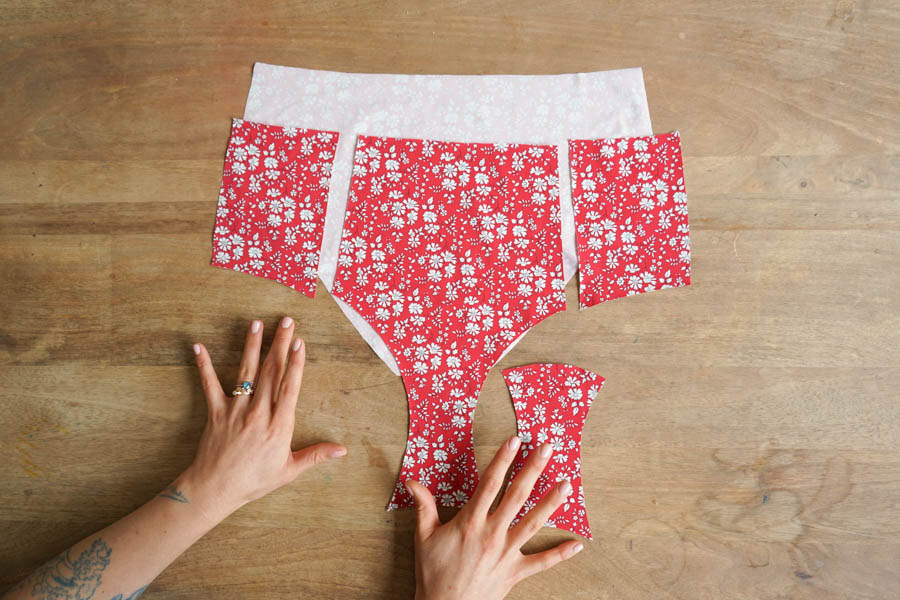
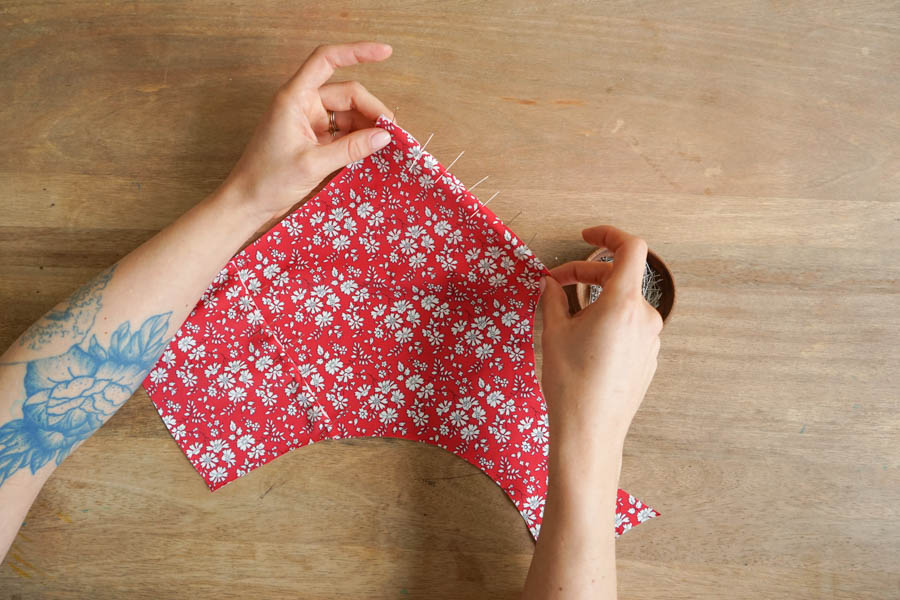
We'll start with the pants, which come in 5 parts: 3 for the front, 1 for the back and a bottom. Be sure to add an extra 1cm on the pattern line that will form the thigh. Starting with the front of the panty, as we're doing an English seam, pin the short sides to the front, wrong sides together, and stitch at 0.5cm.


Turn the seam over and this time pin right sides together and stitch at 1cm. Take your back and pin it to the front. Pin wrong sides together, stitch at 0.5cm, then turn and stitch at 1cm.


We'll now sew the panty bottom. Pin the bottom front with the bottom back of the panty, right sides together. Pin over the edge of the panty bottom so that the right side of the panty bottom is over the wrong side of the panty back (photo right). Stitch at 1cm.


On the other side of the panty bottom, iron a 1cm fold (be careful not to get it too hot, or the Lycra will melt!) and stitch this fold to the front of the panty, 0.5cm from the edge (left photo). Iron the waistband 2x1cm.


Pin and stitch at 0.75cm. Be careful with thread tension and use a slightly wide stitch. You can also do a zig-zag for extra elasticity, or if you're lucky enough to have a twin needle, sew a seam with it! Fold over 2x1cm and stitch around the thigh. You've finished your panties!


For the swimsuit top, you'll have a lot of pieces: 1 front, 2 back bands, 1 front ruffle and 2 back ruffles, and don't forget the laminate and anti-slip band. Take the front and back bands. Pin them wrong sides together, overlapping the back band by 1cm on each side (photo right).


Fold over the seam and pin right sides together, then stitch at 1cm. For those who want extra support, you can slip a small, soft plastic whalebone cut to length inside the English seam. Iron.


Fold over the edge of the back band, 2x1cm. Don't hesitate to do this twice, ironing and using lots of pins, as the material moves a lot.


Then pin the reverse side to a tissue paper folded 2 or 3 times. Stitch 0.5cm from the edge, in straight stitch, zigzag or double-needle. For zigzag stitching, remove pins as you go.

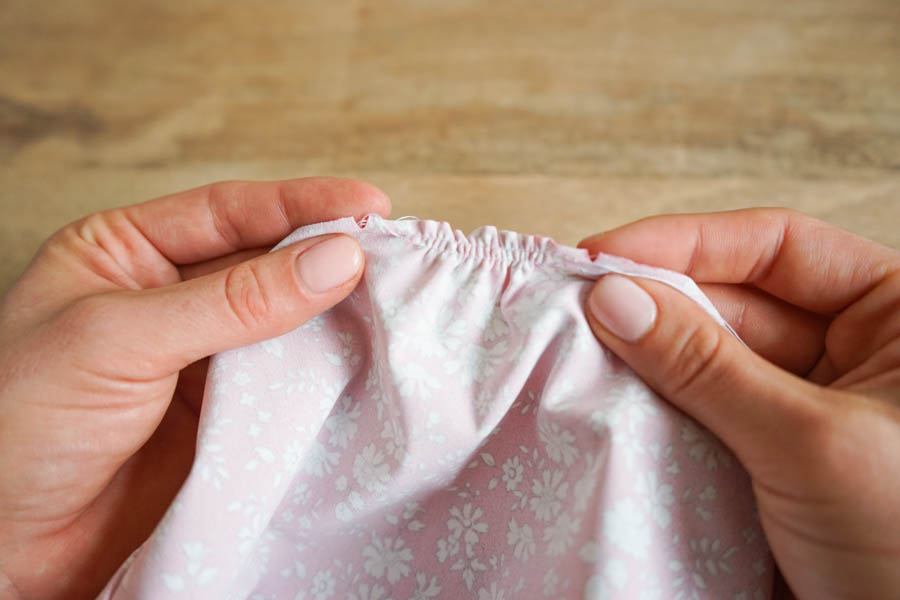
Gently tear off the tissue paper. Move on to the front gathers. Thread two gathering threads between the notches indicated on the pattern. There are 4 notches in all, 2 for each breast.


The gathered value should be 4cm. Measure carefully between the two notches. Fold up the bottom of the bra (where the gathers are) by 1cm. Pin in place.
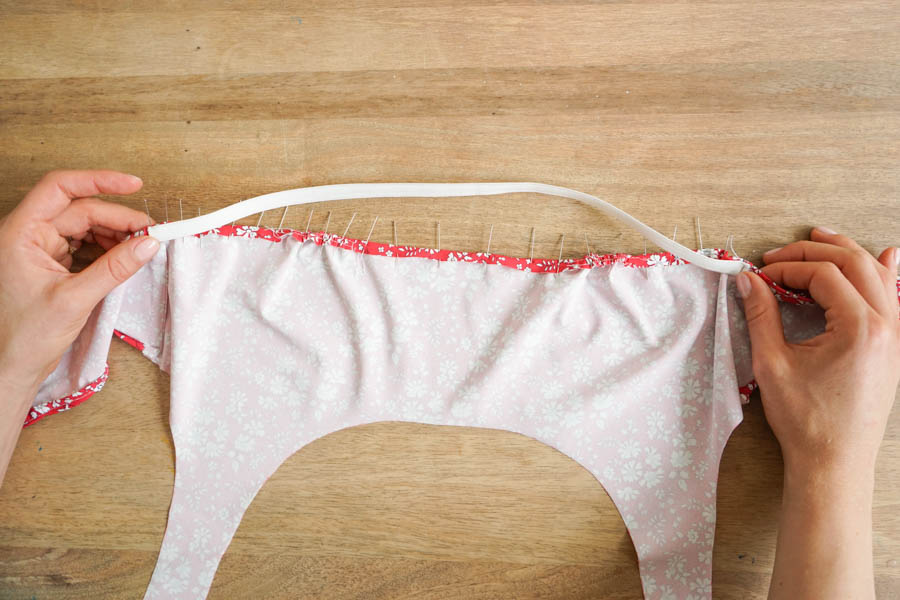
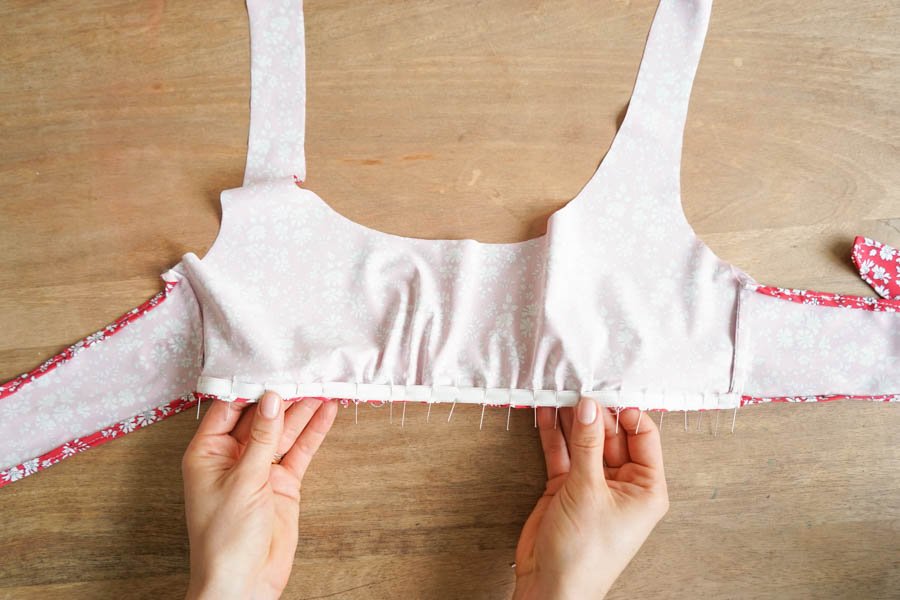
Take the anti-slip band and cut it without pulling, making sure that it is the same length as the bottom of the bra, from the left-side seam to the right-side seam. Hold it in place with a lock-stitch on the sewing machine, at each side seam! Then pin it all the way through (make sure the pin doesn't get stuck in the thin silicone strip that runs through the middle of the anti-slip band).


Pull up the bottom of the bra and tape masking tape to the anti-slip strip. This step will be easier if you have two extra hands! The masking tape will prevent the underside of your presser foot from "skating" on the silicone of the anti-slip tape, adding an extra layer of stiffness to your lycra and making your seams cleaner. Straight-stitch a first stitch at 1cm from the edge, then a second at 0.5cm.


You can slit the middle of your masking tape with small scissors or a quick cutter. Remove it by pulling gently, as with tissue paper. Remove any small pieces that may have stuck.


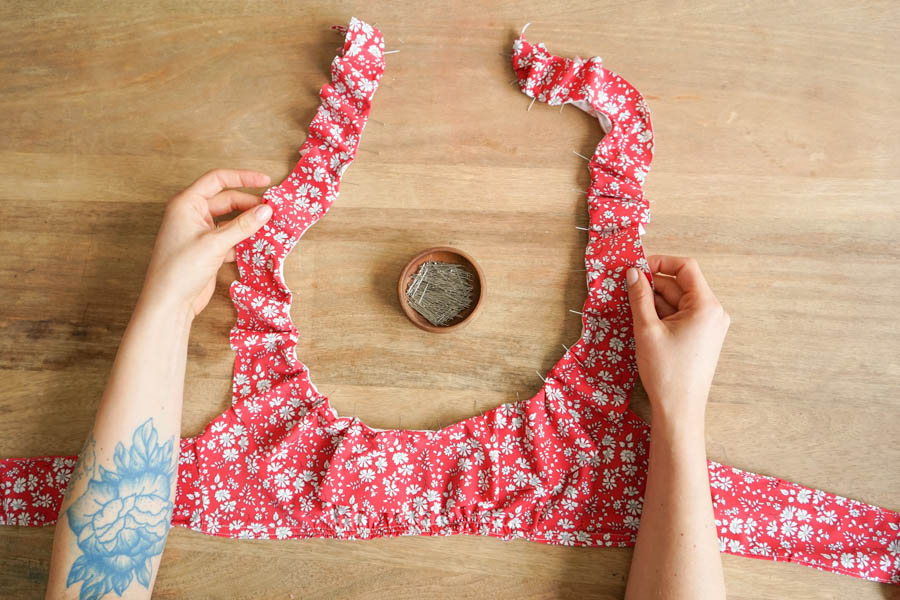
Move on to the ruffle. Pin the edges of the front ruffle to the edges of the back ruffles, right sides together, making a very large circle. Stitch at 1cm. Press the seam open.


Pin the right side of the ruffle to the wrong side of the bra, leaving 1cm free at the shoulder strap. Make sure the front middles coincide. If your ruffle is larger than the bra, make more pleats at the front (photo right). Stitch at 1cm.

Turn over so that the flounce sits well, then stitch in a ribbed pattern to keep the flounce pointing down (left photo). Move to "armhole". Pin the laminette all along the armhole, i.e. from the bottom of the strap to the side seam. Make sure the pins don't "go through" the laminette, but are right on top of it.


Stitch at 0.5cm so that the stitch holds the laminette in place.


Follow the pattern to mark the location of the straps on the back bands. Pin the straps in place, making a 1cm fold. Stitch securely to hold.