Happy Monday company!
I hope you had a great weekend in the sun, because it was winter again in Paris... I'm lying, we had 2 rays of sunshine long enough to take a few photos of this crazy week! After the Sushi invasion in the 2000s, Thai cuisine, bentos by the thousands, now it's Korean Street Food madness! It's not that I don't like it, I'm literally jumping on the bandwagon, scouring the restaurant Hero whose ribs buns make me roll my eyes, and recently I discovered SAam not far from where I live. A few years ago in New York, I had eaten Kimchi balls without knowing the name, and I was freaked out by the texture, the spicy taste, but also by the slightly regressive side of the cheese melting in the middle, and then that little ball of breadcrumbs surprise, really everything I like. So the other day, I saw SAam these little balls of rice on a neighbor's plate and my memories come flooding back, I want to taste it! And then the flashback: I spent 2 hours eating my Kimchi balls, trying to analyze the texture and ingredients, with just one idea in mind: to eat Kimchi balls for the rest of my life. So I've been experimenting with different recipes, and so far this one is the most stable! You can also mix stringy blended meat into your rice, or even add small bacon cubes. In short, have fun and enjoy!
For around 10 Kimchi balls, you'll need :
- 500g round sushi rice, not risotto rice,
- A small onion,
- A large handful of Shiitake mushrooms, widely available in Asian grocery stores.
- Two small carrots,
- Two stalks of celery,
- 100 g frozen peas,
- 2 glass jars of Kimchi, easily found in Asian grocery stores.
To assemble, you'll need :
- Emmental-type cheese
- a small bowl of flour
- small bowl of egg yolk
- And a final bowl of breadcrumbs or "Panko", Japanese breadcrumbs that retain much less fat when fried and are superbly crunchy. They are also widely available in Asian grocery stores.
- a good liter of oil to fry your Kimchi ball.
First of all, as you'll see, it's not complicated - even if the shopping list looks long, I assure you it's going to go well. You'll need to proceed methodically and, above all, be patient between steps, otherwise it's going to get a bit "mimi cracra style".
Start by cooking our round rice. For those of you who don't know, to make good rice, you first have to wash it. So, before boiling the water, rinse your round rice so that the water in which your little grains of rice bathe is as clear as possible. Put the rice in a saucepan and add the water, which should cover the rice by just over a centimetre, no more. Cover with the lid of the pan and cook for 10-15 minutes, checking from time to time that the rice underneath is not burning. Once the water has completely evaporated, allow the rice to cool completely - this is important for the rest of the cooking process. While the rice is cooking and cooling, finely chop all the vegetables: onions, mushrooms, carrots and celery, and defrost the peas. Take your two jars of Kimchi, and puree one, and cut the other into small pieces. I know it's a bit disgusting, but it's important for what comes next.
Once the rice is cold, in a large frying pan or wok, heat 2 tablespoons of fat (olive oil, grape seed oil, coconut oil or butter) and add all the vegetables and the chopped kimchi. Cook over medium heat for 3 or 4 minutes, stirring well to color all the ingredients, then add the rice and the puréed kimchi and stir vigorously until the rice is completely colored and the vegetables are evenly distributed. Leave to cook for a further 5 minutes on a low heat. Then remove from the heat and wait about 30 minutes for the mixture to cool.
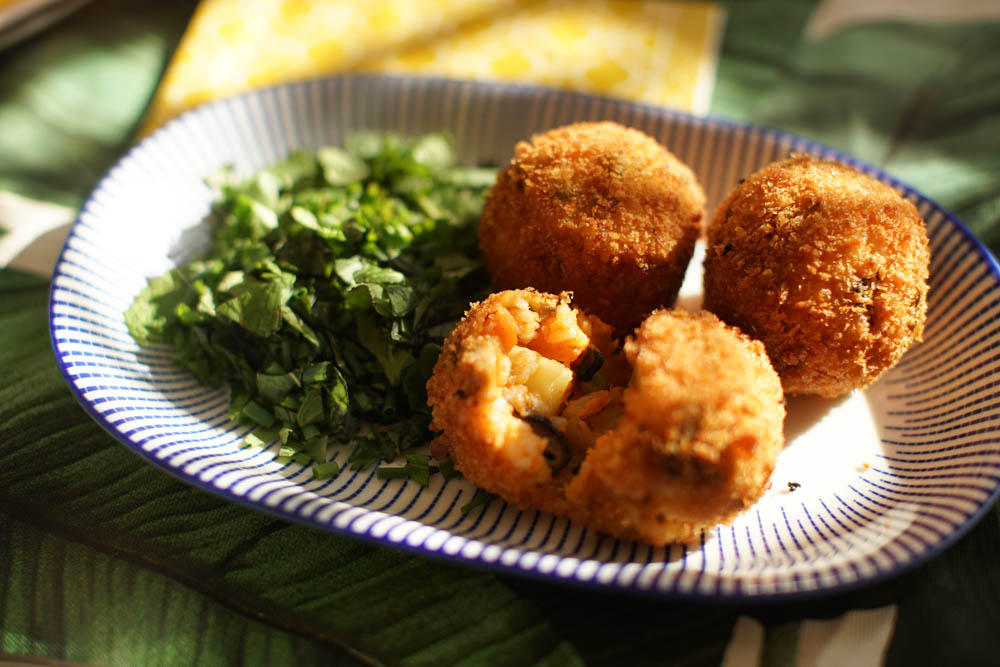
This is the part I like best: before you start, prepare 3 bowls of flour, egg yolk and Panko, as well as your Emmental cheese, which you'll have cut into 1cm cubes. Wash your hands well and keep them moist, to avoid sticking. Scoop out a small amount of the rice/kimchi/vegetable mixture and form a ball between your palms, about 7 to 8 cm long. Make a small hole, slide in the cheese and close with a little rice, then rework your ball a little to make it round. Dip in flour, egg yolk and plenty of Panko, even if it means adding a little more Panko at the end to make your Kimchi Balls extra crispy!
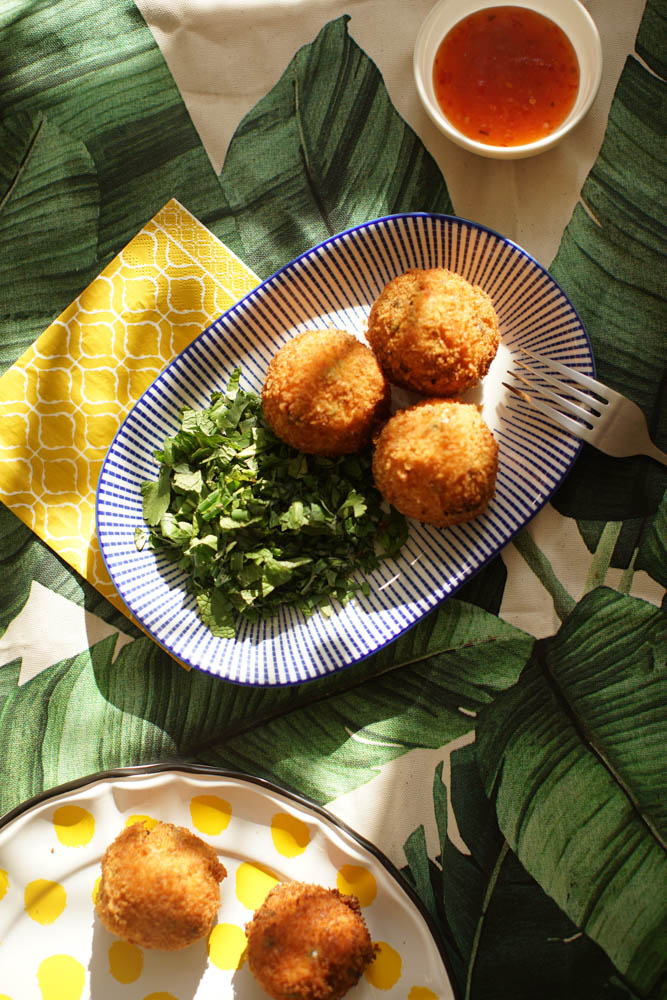
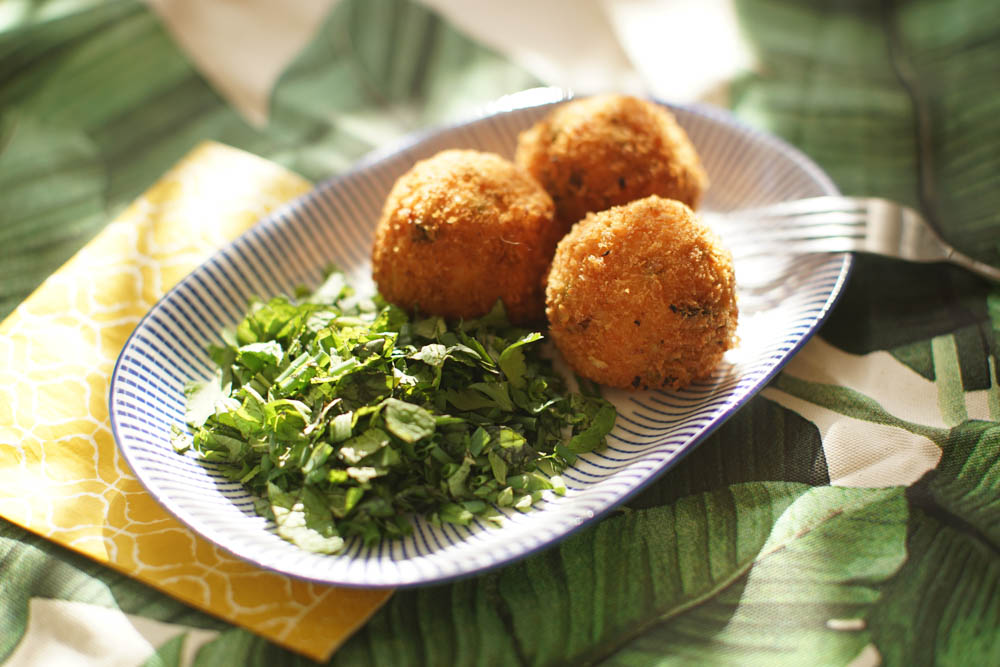
Now heat the oil in a saucepan that's not too large, and once it's hot, place the Kimchi balls in pairs and cook for about 3 minutes, but keep an eye on their color - they mustn't turn brown! Remove with a skimmer, drain on Sopalin© and serve hot. I served them with a small herb salad I've already told you about.
here and sweet Thai pepper sauce!