Do It Yourself PAPER TRAIN BY LORENZO P
Hello my little cats!
A few weeks ago I presented Lorenzo Papace in a portrait of good people. Meeting this man was a real coup de coeur. And I asked him, if he felt like it from time to time, to come and help us dream up a paper DIY! I jumped for joy when he said yes. For this first time, I gave him carte blanche and he came up with a little pink paper train, "the LJUBLJANA Train"... I like the idea that there are a few more male contributors around here. By the way, I'm preparing a new theme week for you, Lemonade Week... A bit like fashion week, but with lemons! I hope it'll be a chance to see Lorenzo around here again... To your scissors, my birds!
Lisa
Level : difficult
Time: one or two days
Cost: €7 paper and glue
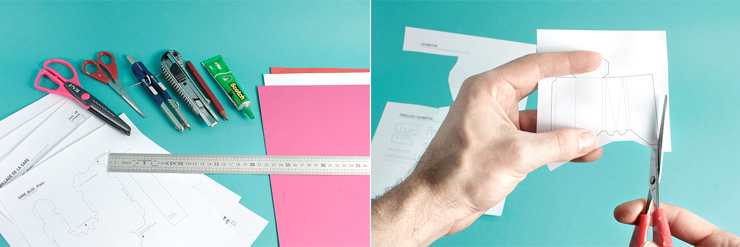
For this DIY you'll need:
- Downloadable patterns here,
- If you have a "silhouette" style cutting machine, you can download here PDF cutting files. The black represents the cut, the blue the fold, and the pink is a marker,
- Pink, red and white paper (one sheet each in grape format). I recommend a heavy weight for the color (240g) and a medium weight for the white (160g),
- Scissors,
- Tile scissors,
- Compass (for point only),
- Cutting equipment (ruler, cutter or scalpel, cutting board),
- Pencil (if you need to outline patterns),
- Green Scotch glue (I'm not advertising, but it's a must. Look out for special offers on tubes in stores, it might be worth stocking up).
Download the patterns, print them out and trace the outlines on your paper, or print them directly on your paper.
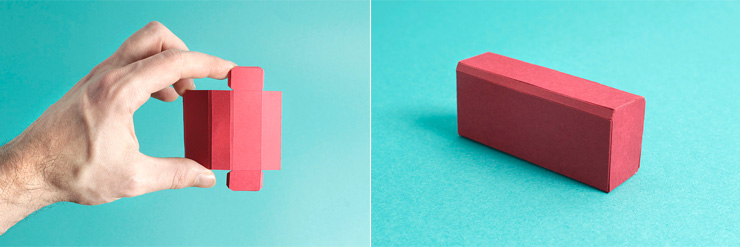
Start with a wagon. Cut and glue a first wagon structure in red or pink paper. Fold along the dotted lines (use your scalpel to trace the fold lines).
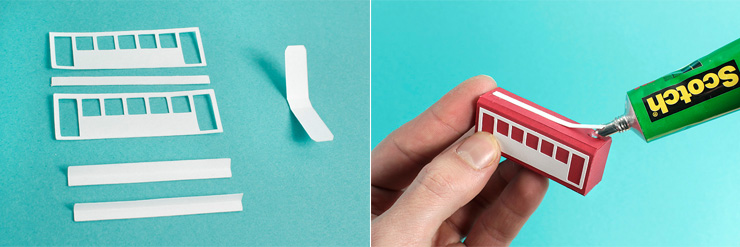
Prepare the dressing for the first wagon in white paper. If you're having trouble with the small windows, you can use the printed design without cutting it out. Glue the windows to the sides of the wagon and the strip to the roof.
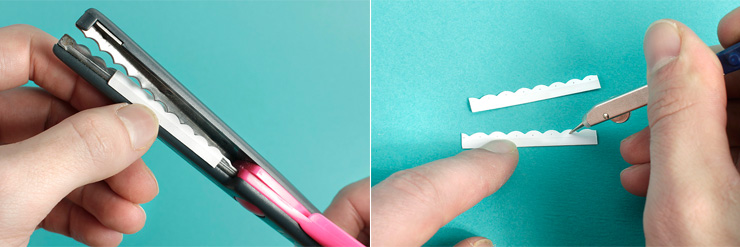
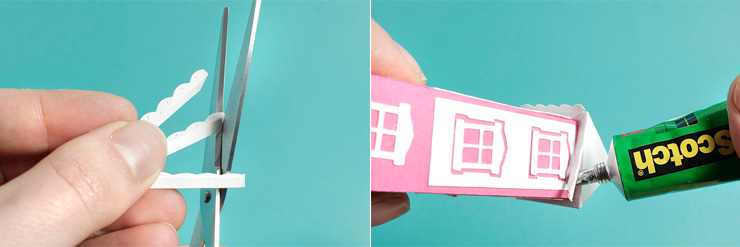
For the wheels, cut one of the two sides of the folded strip with notched scissors. Next, use the tip of a compass to drill a hole in the center of the tiles. This small, meticulous detail will add finesse to the wagon.
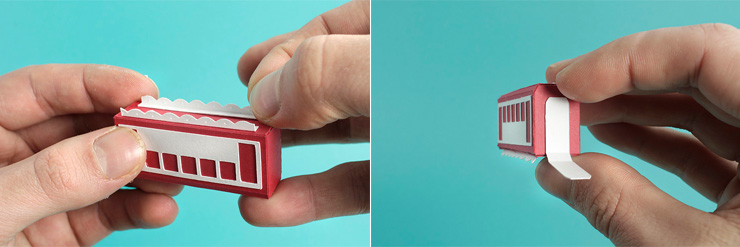
Glue the wheel strips under the wagon, slightly recessed from the edge. On one side, glue the small strip that will connect it to the other wagons or to the locomotive.
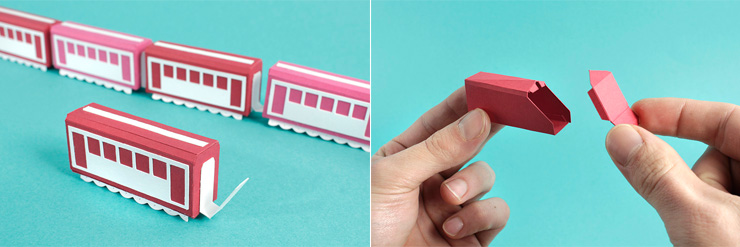
This is what your little wagon should look like. It's a modular element that forms the basis of the train. Make as many as you like, in other colors if you like. As for me, I thought it would be nice to build 3 red ones and 3 pink ones. Assemble your cars using the little tabs. The last one will be used to attach the locomotive.
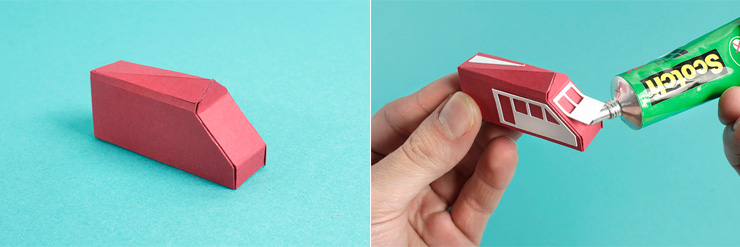
Cut, fold and glue the two parts of the locomotive structure in red or pink paper. If you're alternating pink and red wagons, make the locomotive in a different color from the lead wagon, with the tab free. Glue the two parts of the locomotive together. In exactly the same way as for the wagons, prepare the white paper trim elements. Decorate your locomotive.
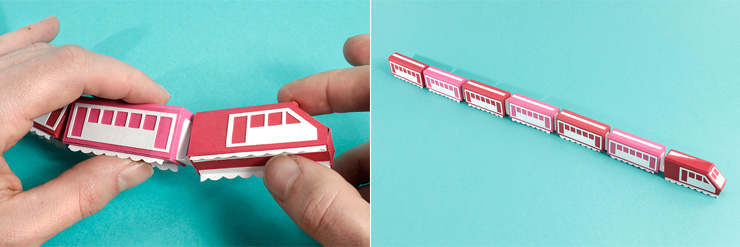
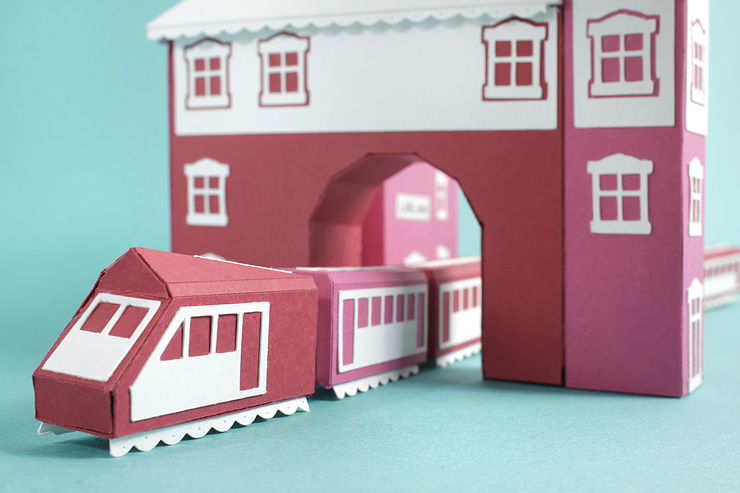
All that's left to do is attach it to the other wagons with a little glue, and you've got a lovely little train. Tchou Tchou!
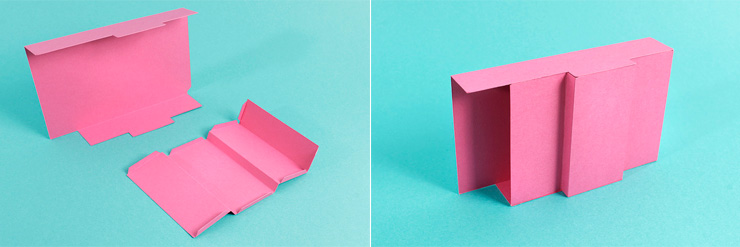
Cut, fold and glue the "Façade" block in pink paper.
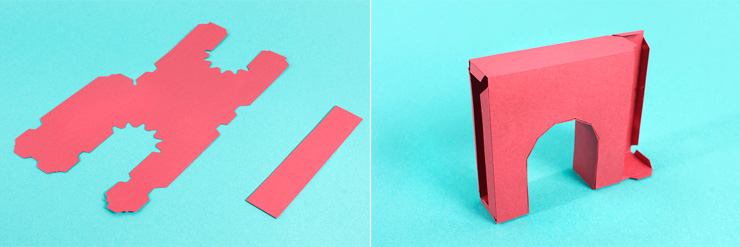
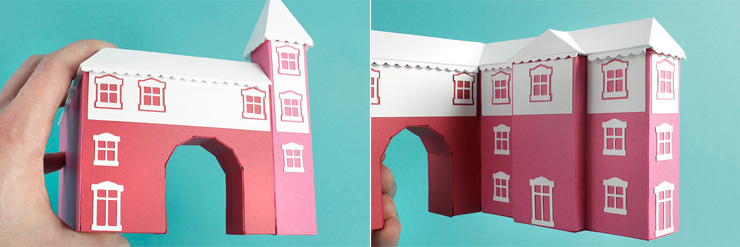
Cut, fold and glue the "Bridge" block in red paper. Glue the inside strip of the arch.
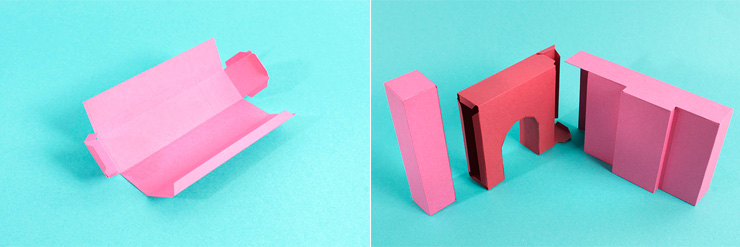
The tower is the simplest volume of the three blocks: a parallelepiped. Cut, fold and glue this block in pink paper. Assemble the 3 blocks.
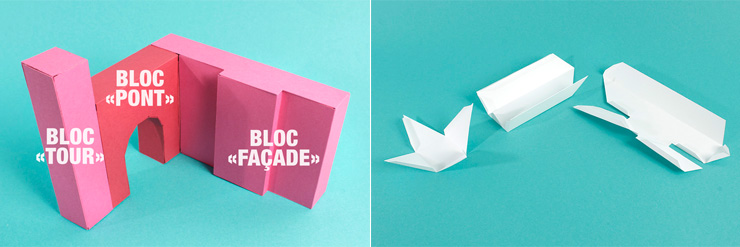
Your blocks are ready! Prepare the roofs in white paper.
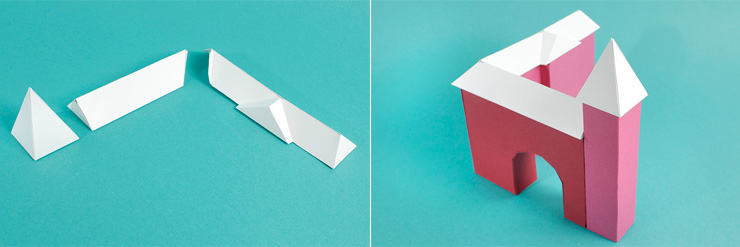
Glue the roofs onto the 3 station blocks. And that's all there is to it! Now you can move on to the finishing touches.

Now comes the hard part: the little windows. If you can't cut them out and you're getting a bit nervous, just cut out a print on machine paper, as you did for the carriage windows. The rendering won't play as well with light, but it works too. The tile strips work on the same principle as the wagon wheels, providing a visual reminder. Once again, arm yourself with patience and prick them with the tip of a compass.
Let's dress up the tower. The face touching the bridge block has no windows. The other three sides of the tower are identical, apart from one door. If necessary, bevel the tile strips to prevent them from overlapping. Glue the tile strips to the underside of the roof, flush with the edge. This is how your tower should look.
Dress the "deck" and "facade" blocks in the same order. This is how they should look. At the back, no window, just a strip of tiles.
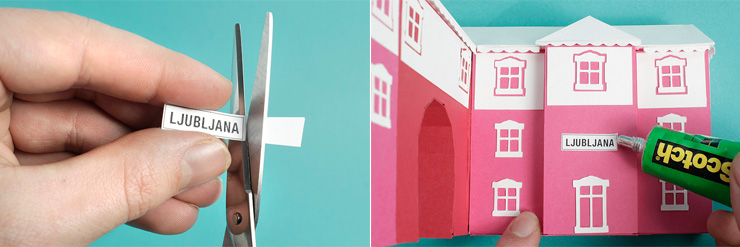
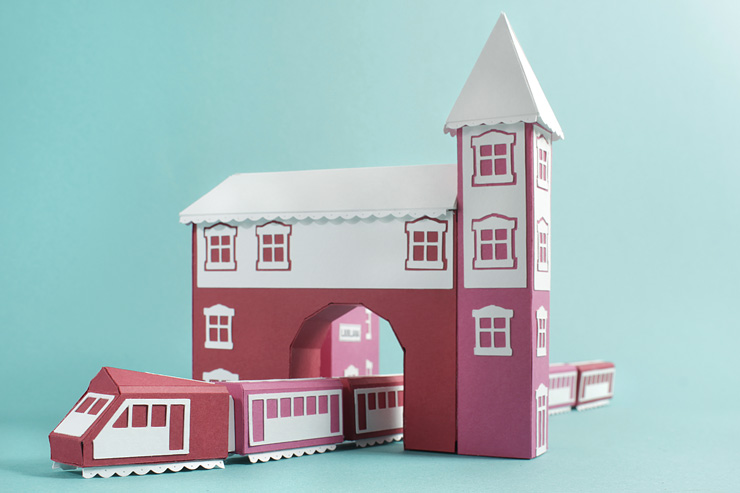
Congratulations, you can finally name your station. I chose Ljubljana (pronounced "Lioubliana") because I love this Slovenian city, its architecture and its colors.
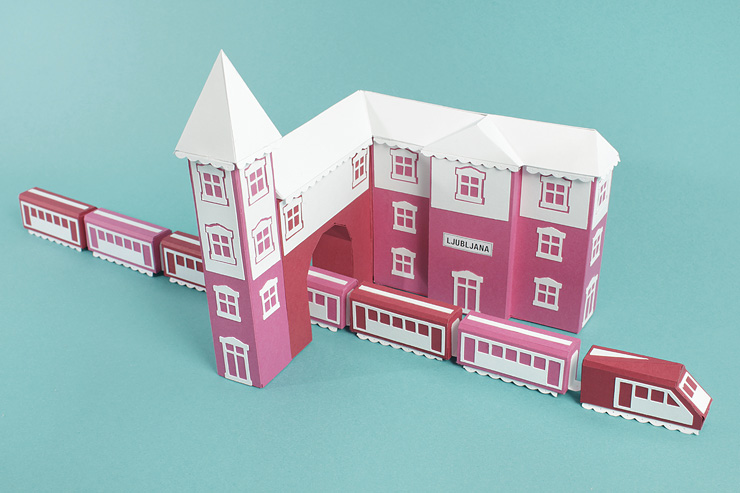
and Ta-Da!