


DIY WHITE SHIRT

hello kittens!
As agreed, the DIY of the shirt that turns into a dress... I didn't want to do a simple customization of the shirt collar, I wanted to offer you a second life for your shirts, whatever they are, because this DIY can be done with a floral shirt, a polka dot shirt and another plain fabric or even with another print... When I see the number of photos I've received of your shirts (remember?), I know you can do it. So today, it's a joke, with your fingers in your nose, desperate housewives playing in the background and your mother on the phone simultaneously... Basically scale 1 (and a half) on the Do it Yourself galère scale, I promise... Just let yourself be guided, everything's going to work out just fine! Let's get started!

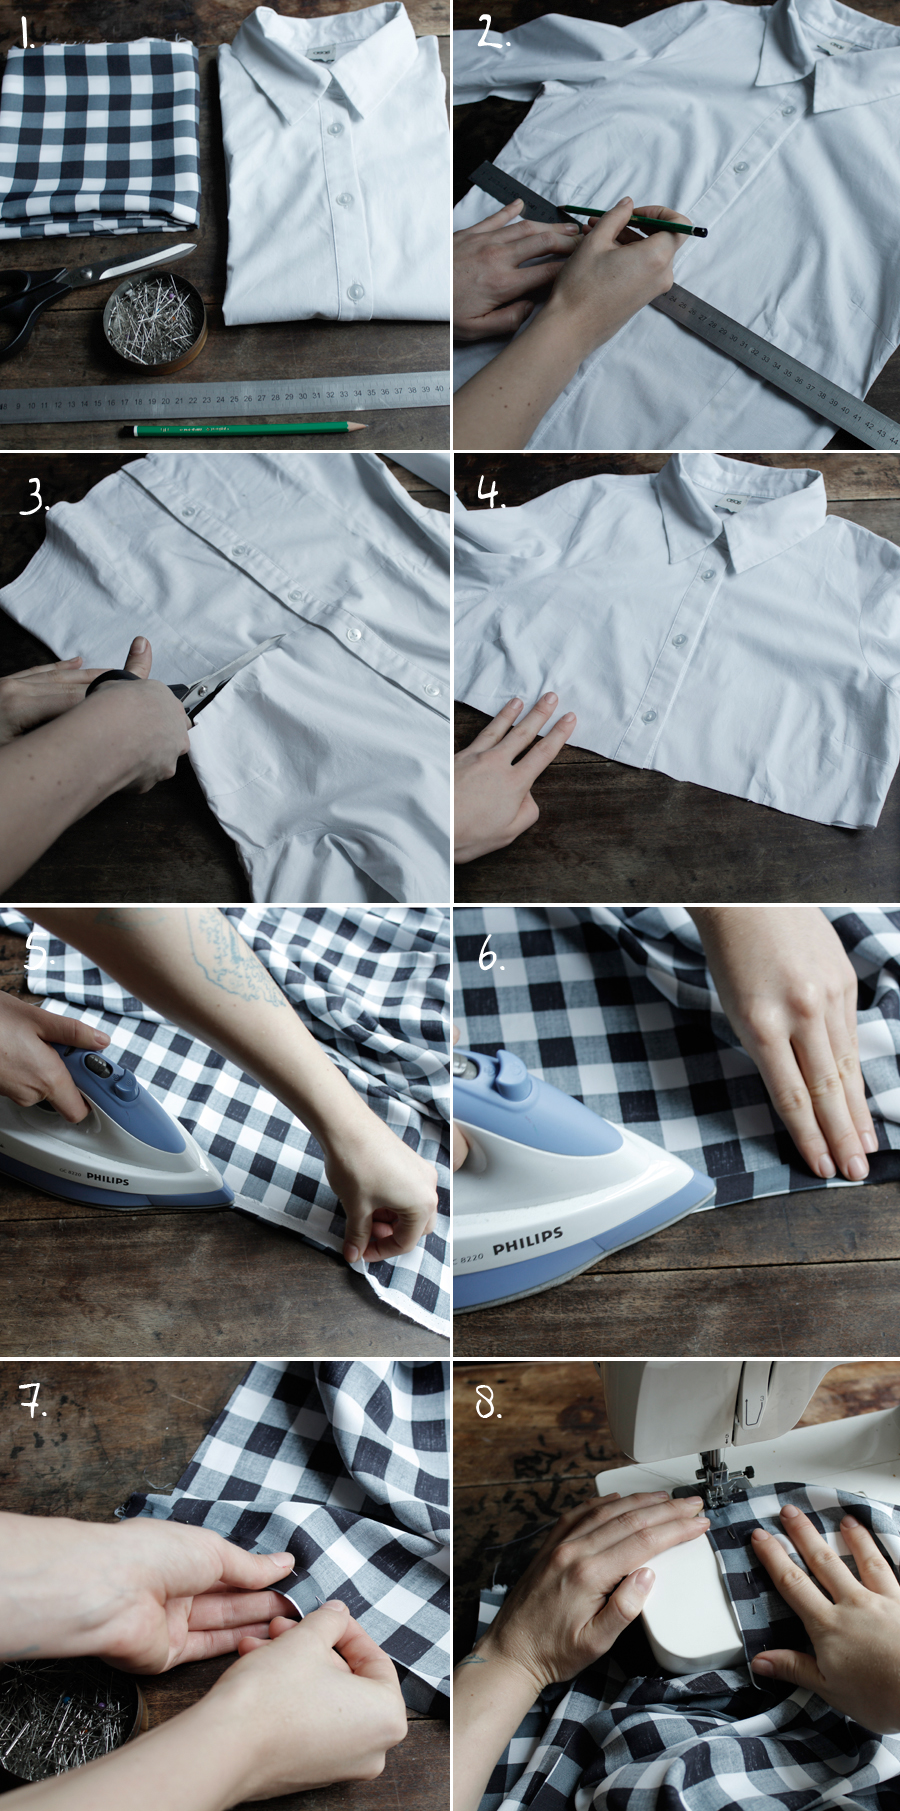
For this shirt DIY, you'll need..:
- - a shirt
- - fabric ( 2 strips of 60 cm by 150 cm )
- - pins
- - scissors, ruler and pencil
- - sewing machine and iron...

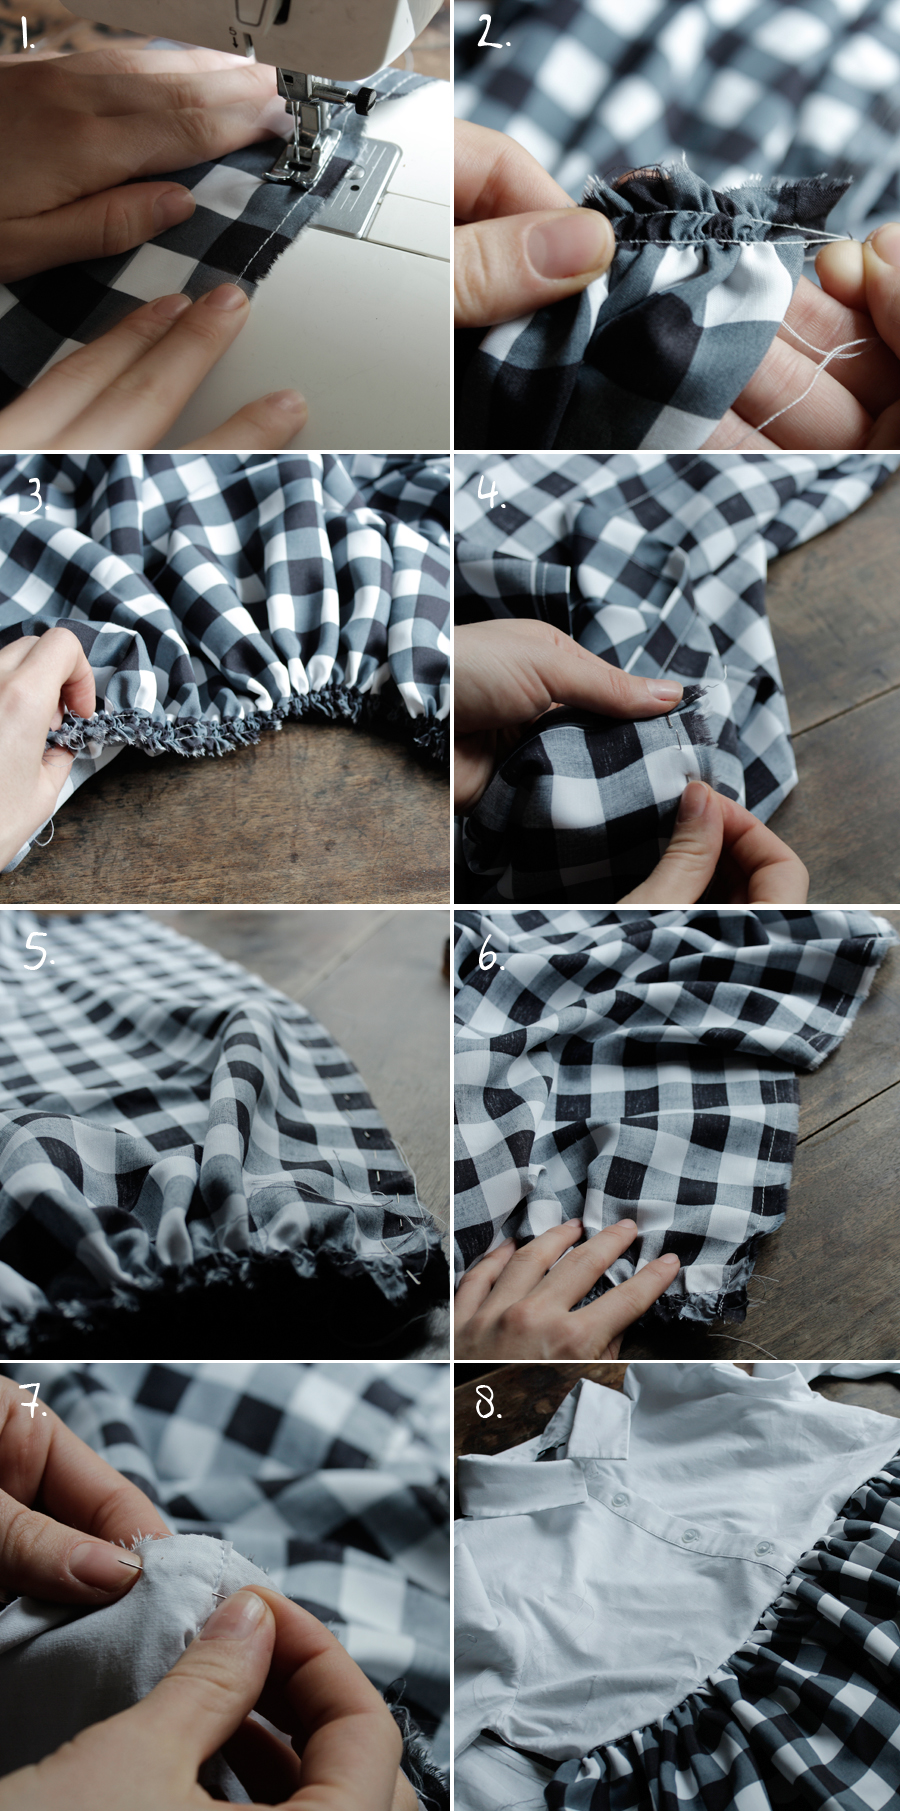
On the opposite side of your hem, make two parallel stitches all along your 2 strips fig.1. Once you've sewn your seams, lay flat and pull on the two threads on the front of your fabric (or the two on the back) to create the gathers - it's a magical moment fig.2. Gather the entire length of your strip, and you're going to ask me: at what point should I stop? Well, it's simple: the first strip should be as wide as your front, and the same for the back (allow a few cm for the seam allowance). Distribute the gathers evenly along the length fig.3 and stitch the front and back of your "skirt" right sides together fig. 4 & 5. Then machine-stitch these parts fig.6. Then assemble the shirt part to your skirt, still right sides together fig.7, stitch and press to flatten the seams and TA-DA fig. 8!

Because I know you.... and I know you're going to ask... I'm wearing a great Baruckello sequined shirt that I'm wearing like a teddy! So did you enjoy this week? LOVE
