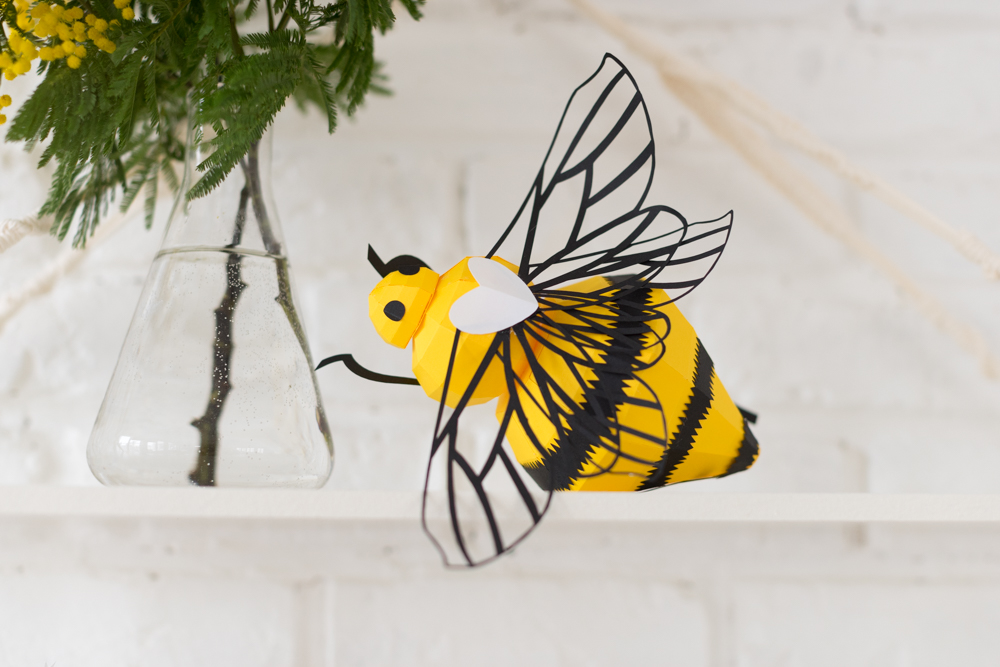
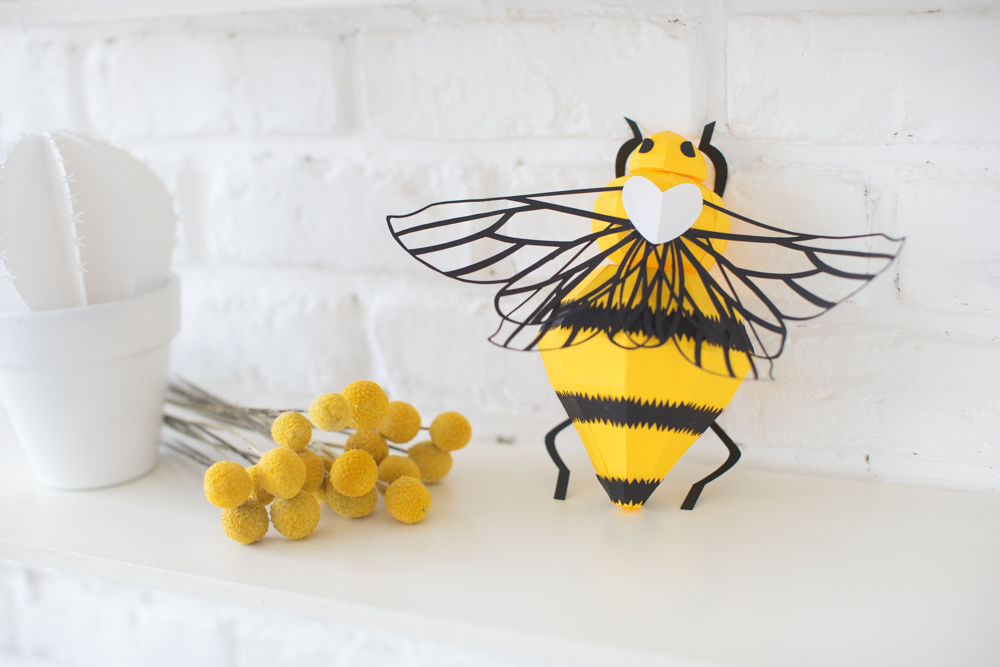
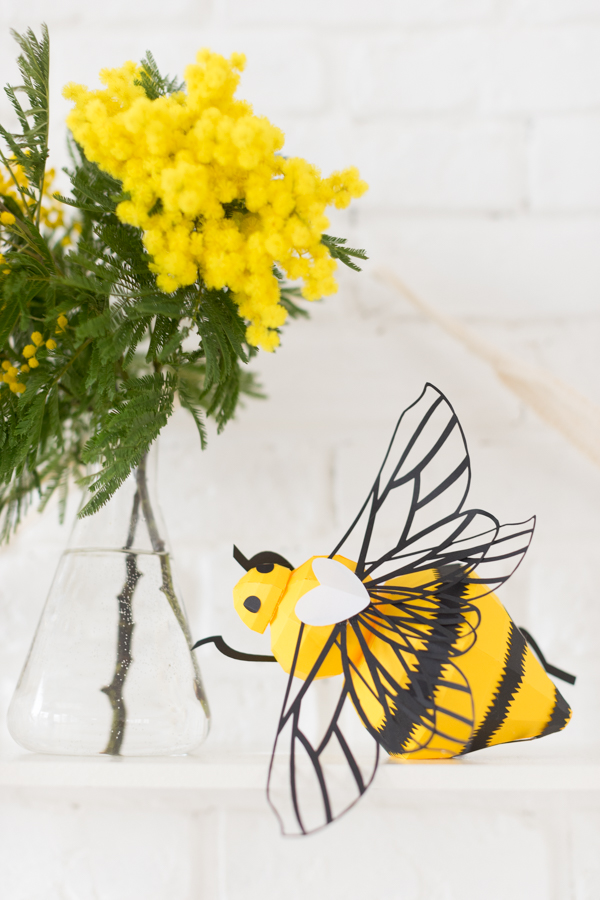
DIY Paper Bee
Happy Tuesday, my dear otters,
As you already know, today sees the release of the new collection Wear Lemonadecollection, which is all about sunshine, mimosa and, of course, bees! I couldn't pass up the opportunity to imagine a paper bee that would sit on your wall, your desk... And the sweet Julie also suggested that it would look great on a child's mobile. And on this Valentine's Day, you can also give it as a gift by saying "bee my valentine"... In short, this bee is all terrain! I've been wanting to make paper insects for some time now, after seeing those from Zim and Zouor the wonderful kits from AssembliSo this collection was the perfect excuse! So don't worry, it's still relatively simple to make, and I guarantee that after this, paper volumes will hold no secrets for you. On that note, I'll let you warm up your ten fingers and give you a big kiss!
Charlotte
For the parts that are entirely black on the pattern, I'd advise you to print them directly onto thick white paper and cut them out without transferring them to other paper.
For this DIY you'll need :
- Patterns to download here,
- thick colored paper (Clairefontaine here),
- Scotch green glue,
- a small ruler,
- scalpel,
- a pair of scissors.
To begin, print and cut out all the patterns from your colored paper, paying careful attention to the number indicated for each part.
Then take your scalpel and ruler, and trace all the folding lines with the back of the blade (folding indications are indicated on the patterns).
Now fold all your lines! Now grab your tube of glue, and we'll start by assembling cut-outs D and E. Part E has a hole so you can fix your bee to the wall by slipping the head of your nail through, but if you're not going to fix it to the wall, you can cut part D nine times instead.
Apply glue to the first two tabs and glue them to the next section. Wait a few seconds for the glue to dry, then glue the next tabs to secure the two sections together!
Keep going and you'll see the bee's body take shape. Don't forget to join section E to the rest of the body. Use the hole in section E to fix the bee to the wall on a nail. To finish off the bee body, glue the A and G cut-outs to the ends.
Now for the F sections! Follow the same pattern as for the bee body. I suggest you assemble 4 sections on one side and 4 on the other, then fix them together by nesting them. Don't forget to close your volume by gluing piece C!

Let's finish off with the bee's head (H). Once you've finished that, you'll have the bulk of the work done! Glue the tabs together and your head will take shape without too much difficulty. Finish with cut-out B to close the volume.
Now you can congratulate yourself and take a snack break!
Take the cut-outs for the bee's stripes, and trace the folding lines if you haven't already done so. Fold and check that your folds match the shape of the bee! Now all you have to do is glue them to the bee's body! I advise you to glue the ends of the stripes to the side with the hole. This will be the side you see the least, so don't worry if your joint isn't perfect!
Now fold the two circles that make your bee's eyes and glue them to the top of its head.
Glue together the bee's body, abdomen and head!
Fold the heart in half, which will be attached to your bee's abdomen and will also be used to attach the wings.
Glue the large wings to the small ones at the red line indicated on the pattern.
Now attach your wings to the heart, positioning them at the desired angle.
Finish by gluing the heart to the abdomen, and Ta-Da! Now all you have to do is find a place for your new friend!