DIY KILTIES[:]
Hola my little kittens,
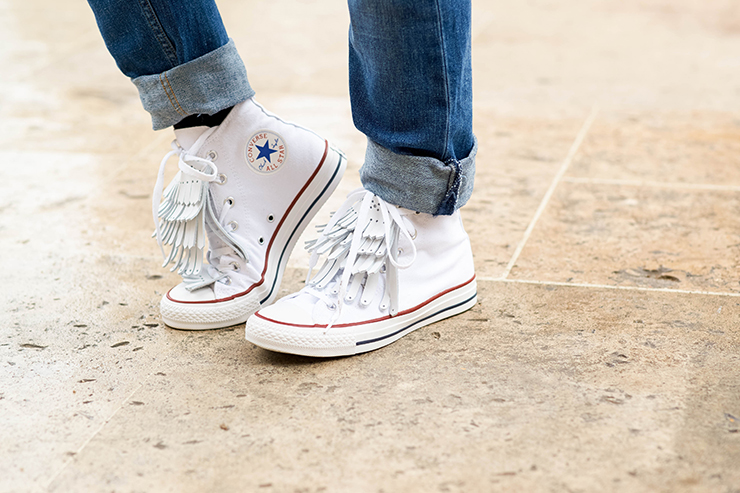
Today is Wednesday, so let's get back into the good habits of "DIY Wednesday"! Do you remember how much I love kilties? What you talking about Willis? Come on, you know, the fringed tongues that golfers wear on their shoes! Remember when I told you about how my trip to Maurice Manufacture finally led me to discovering the name of these marvelous little things that make any shoe look eccentric... And today we're going to teach you how to make your own kilties, to be worn on their own, or to create a waterfall effect, sort of like a ruffle on your shoes... A few weeks ago, Sarenza asked me to propose a concept for a DIY for Converse. For the occasion, he wanted me to work with the legendary Chuck Taylor sneakers, who will soon be turning 100, and not even a wrinkle... I could tell you countless anecdotes about these shoes that carried me throughout my teenage years...It was therefore with such unconcealable pleasure that I accepted to play the customization game.
The problem now is that I want to put them on all of my shoes! At the Studio, I see the fringes travelling from shoe to shoe, I think I've spread my addiction to everybody... But I love wearing them like a waterfall on Converses, it makes them look less juvenile, more sharp, almost chic!
- Time required : No more than an hour
- Difficulty level : Super easy as long as you have the right materials.
- Cost : About 20 €
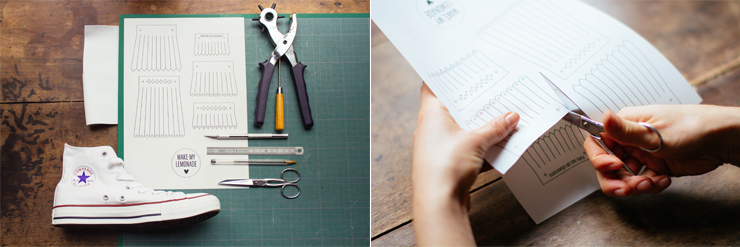
- For this DIY you will need:
- - The template of the fringes tabs, download here,
- - An awl (punch pliers)
- - Some thick leather (you can find scraps at Sacré Coupon Cuir, rue
- d'Orsel),
- - A scalpel that cuts really well, or it's time to change the blade,
- - A pencil,
- - A ruler, preferably metal,
- - Scissors.
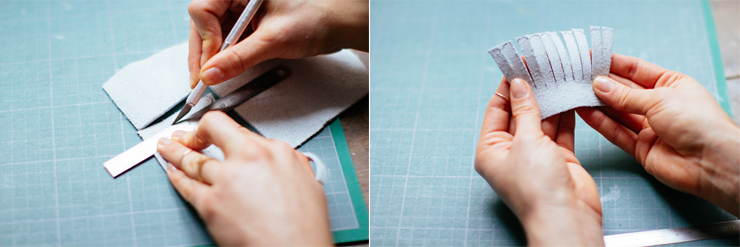
To get started, download, print and cut out the templates of the kilties. Trace the templates onto the back of the leather with your pencil, remember to cut out the various slits in the paper beforehand. For the slits, you don't have to trace them entirely, you can simply trace the upper extremities, you will join them together directly when cutting, with the help of a ruler.
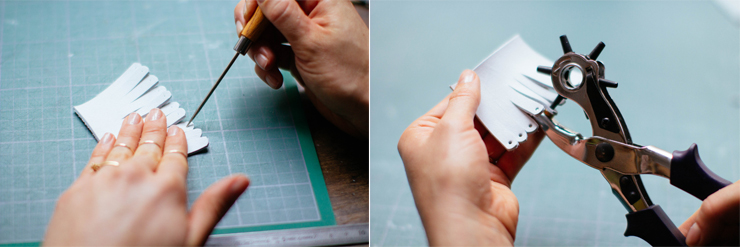
Use the awl, or a thick needle, to mark off the holes on the back of the leather and go over the markings with a pen.
Take your scalpel and begin cutting around the tabs (keeping in mind not to damage the surface underneath). Continue with the fringes!
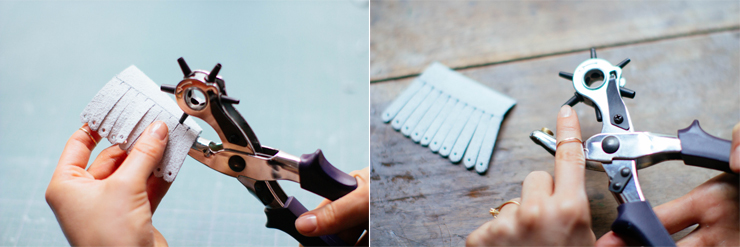
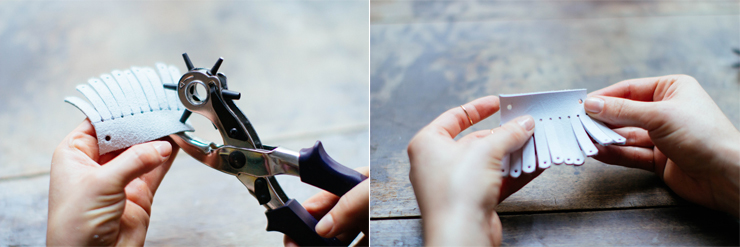
For fringes that are rounded, use small scissors to cut along the curves, it's easier this way than with the scalpel. Once again, use an awl or a thick needle to mark off the positions of the holes on the lower part of the fringe. Using your awl, choose a rather small diameter and punch some holes!
Do the same on the upper part of the fringes. And you can change diameter to make wider ones so you can perforate the top of the fringe, or thread shoelaces.
Punch out the two holes at the top, and you've got your first Ta-Da!
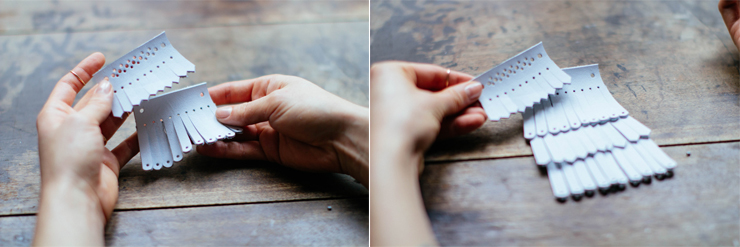
Continue to do this with the fringes of other sizes and layer them, making sure to match up the holes on the top.
Thread the fringes into the laces, at the level of the next to last eyelet. Make a bow (I'm not teaching you anything new here I hope) and TA-DA!
For the little bitty fringe, thread it at the very base of the laces to dress up the front of the shoe.
[:]


