


THE DIY OF THE THANK YOU A PIERROT DRESS, AND A SMALL GIFT![:]
Happy friday my kittens,
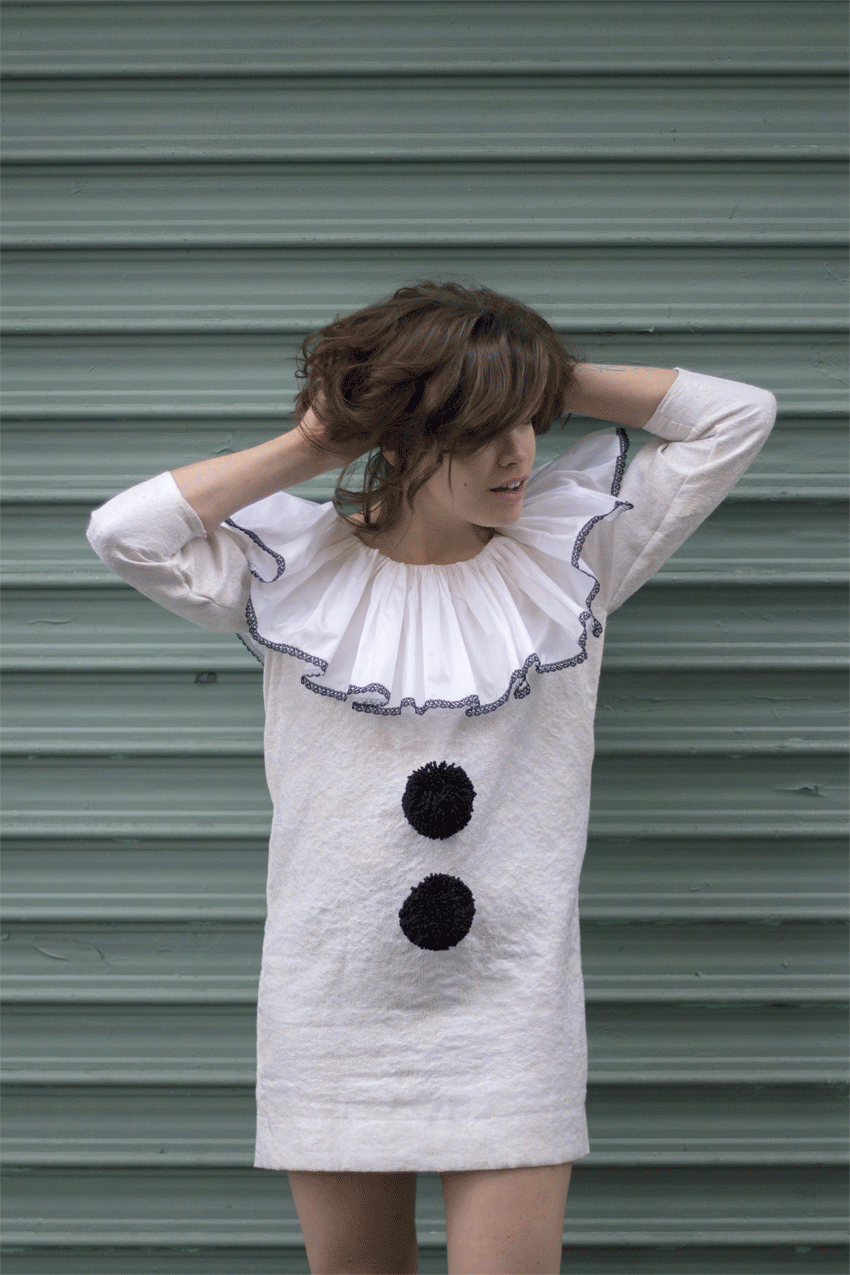
I hope you're doing fine! No you're not dreaming I am wearing a Pierrot dress... I like this character and his friend Colombine so much that it's possible that some day I do a Commedia Dell'arte Theme week... You know how I love these collars... How do we call them by the way? Besides Pierrot collars I mean ? I saw that you have a crush on my Top Shop dress remember... So it's almost with my eyes closed that I told myself there were chances that this dress would talk to you. And to tell you the truth I've been a fan of Alison GoldFrapp and her universe for year and I have a picture that follows me from inspiration to mood boards: this one... Do you understand me better now ?
I guess that not everybody is as...well...crazy as I am? To go out in a Pierrot Dress you know... But try to see beyond the tip of your nose and imagine this dress in black (or in fuchsia) and without the pompoms... A tiny bit shorter with a pair of jean shorts... Try to transpose it... And for the most unadventurous of you, I'm giving you a gift/bonus of love: the DIY of the silk Pierrot collar... Remember, I owed you a last DIY video with Bershka... Well it's done, you can find it at the end of this post with all the explanations to make your collar, either fixed or detachable...
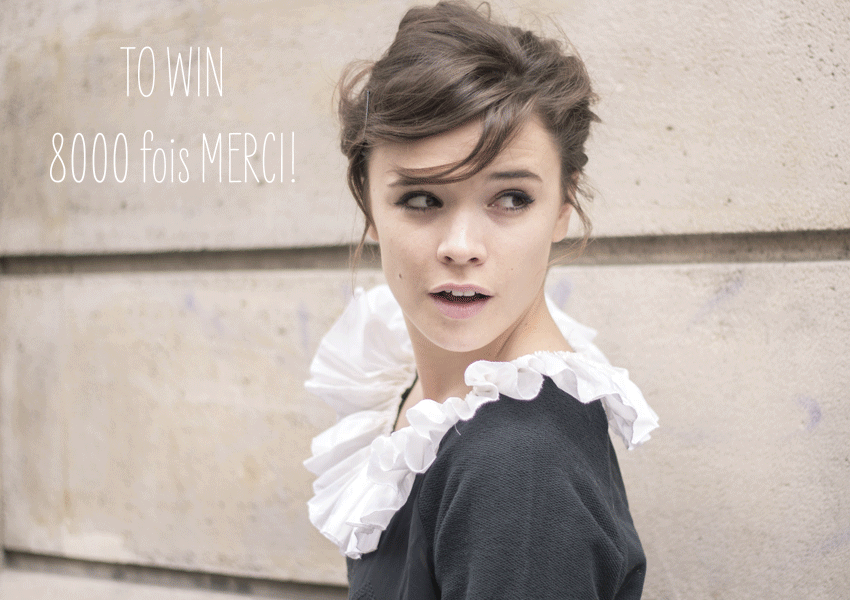
And to catch up and thank you for your fidelity and you constant love! You can win the customized sweatshirt... To participate tell me your life, I love reading you... What is your obsession, you fashion fantasy... I confessed mine, the Pierrot collar of Alison GoldFrapp, but what is yours? The strapless jumpsuit of Olivia Newton-John in Grease ? The sunny pleated of Penny Johnson in Dirty Dancing ? Tell me everything and I'll pick the winner on monday at noon... (and I'll publish the results straightaway I promise.)
To do this dress, let's say if you want it straight it's a 38/40 and if you want it loose it's a 36... But the pattern is really easy so you'll be able to adapt it to your own shape without a problem I promise...
So you'll need:
- - reproduce the pattern to the scale 1, you can download the indications HERE,
- - Fabric for the dress here it's flannelette (1,5m/1,4m) or cotton as you like,
- - Silk for the collar (16cm/3m),
- - 2 pompoms,
- - Small lace for the finishing touches of the collar,
- - Rubber band (3 cm wide) to elasticized the bottom of your dress (optional)
- - Scissors, pins, a sewing machine and an iron...
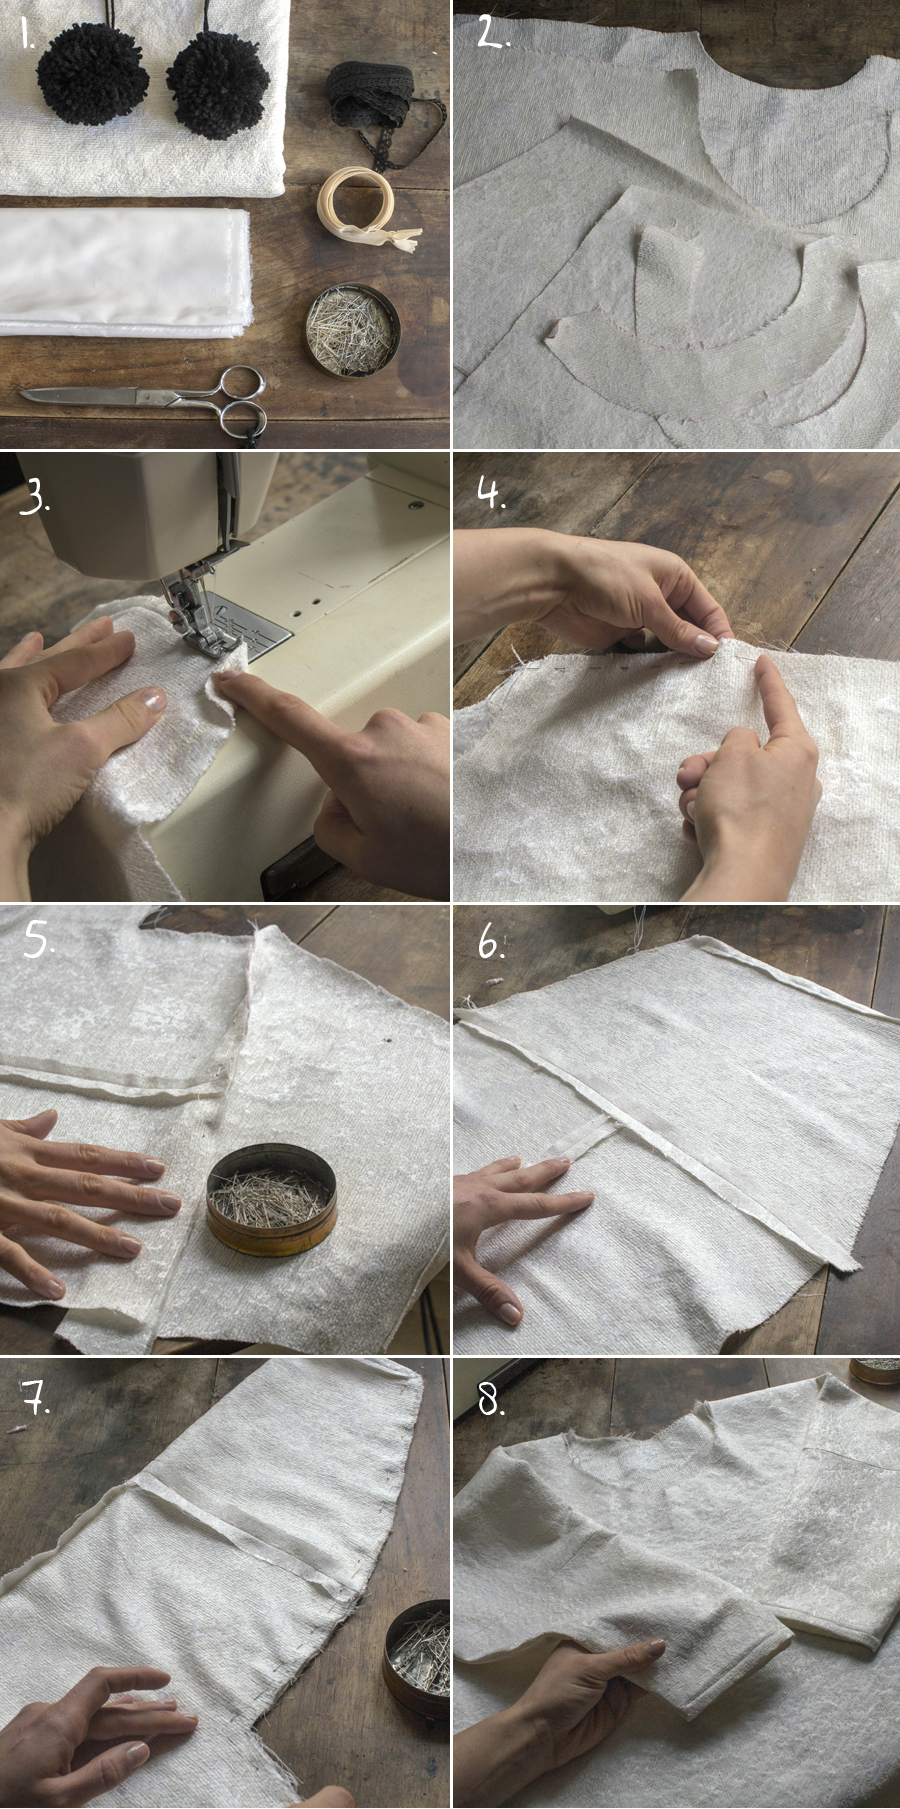
To start with, cut the 6 parts of your dress (SO easy...), one front and one back, the sleeves and the facing, I couldn't make it easier fig. 2. Start with making a small hem to finish the sleeves. How do to make a hem? Refer to the video "the essentials"...fig. 3. Then pin the back and the front (right side against right side), start with the shoulders fig. 4. Sew and open the seam with your iron. Now pin the sleeve to the back and front as shown on fig. 5. Then sew and iron to open the seams fig. 6. Until now it's fine right ? Fold the lot right side against right side, the dress is forming inside out, pin and sew the rest of the dress. Fig. 7. Well open the seams and turn the dress up, this is a good start... Fig. 8
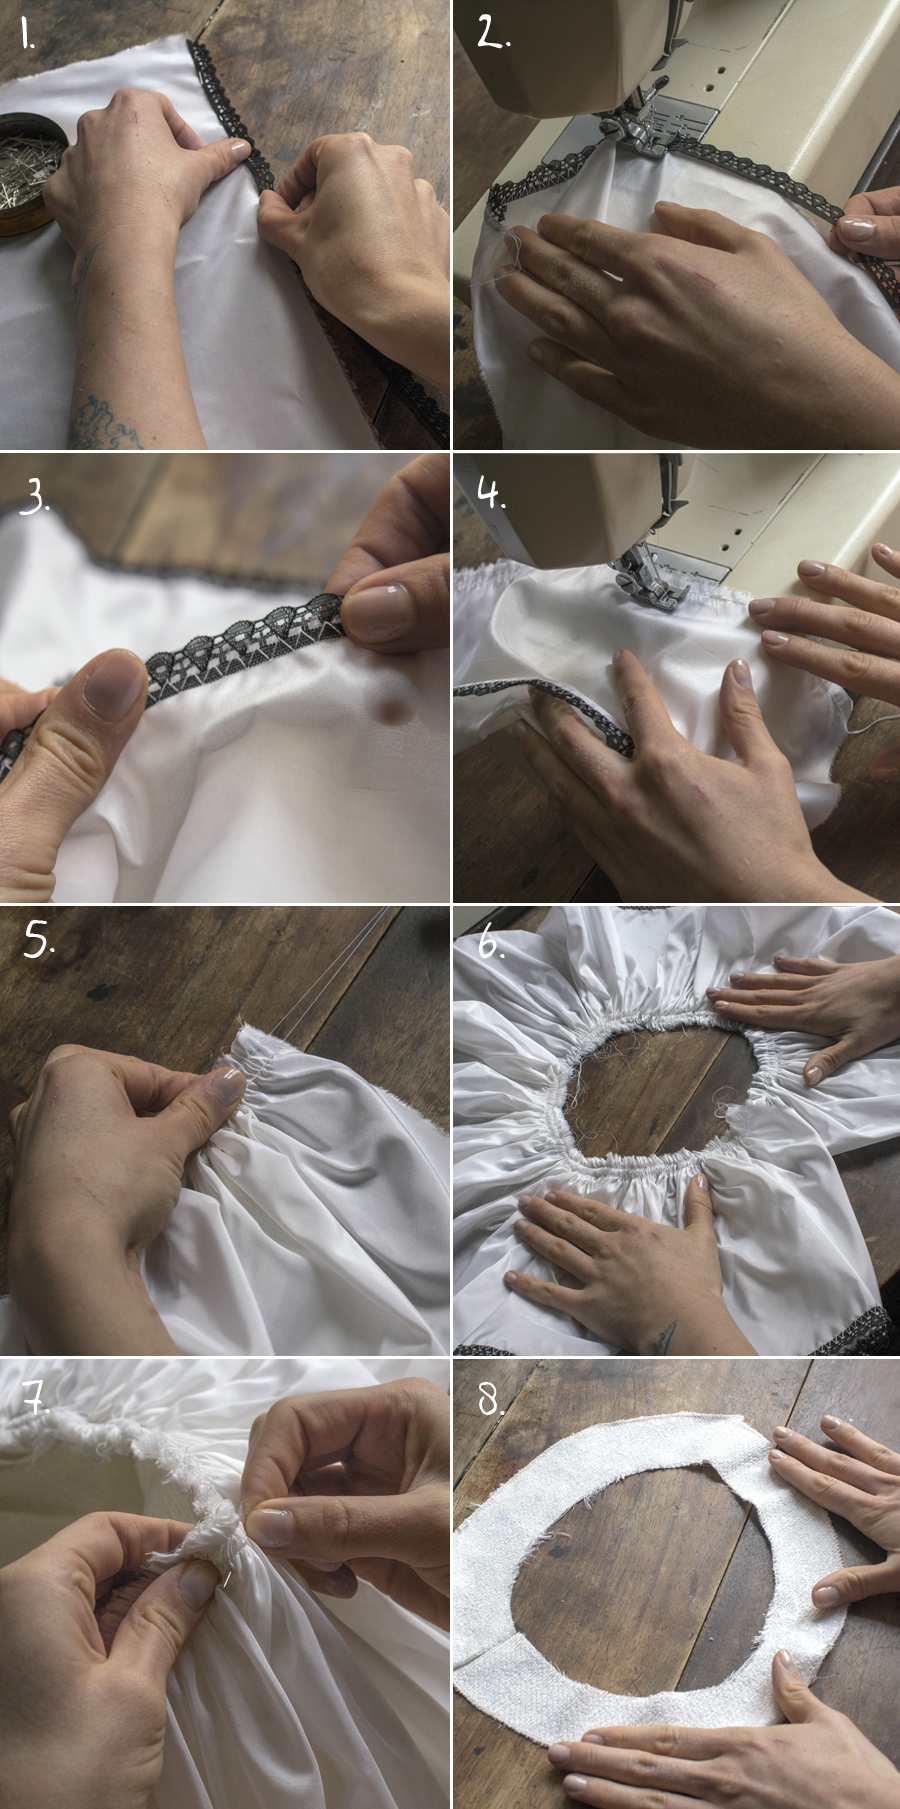
Put the dress aside and take your silk strip, if you're a beginner and patient, pin the lace on the edge of your strip fig. 1 otherwise go directly to the next step, which is: sew the strip and the lace altogether with a zigzag stitch lengthwise fig. 2 and here you have a discreet and solid stitch fig. 3. Then sew the stitching threads, if you watched the video about the essentials you should know how to do it otherwise all the steps are explained in the video at the end of this post fig. 4. 4. Take the two threads from above or from below, and you run them up delicately towards the inside fig. 5. Uniformly distribute the gather on the length of your collar (it depends on your head size, see the pattern...) fig. 6. Pin your collar on the right side of your dress fig. 7. And sew the lot with your machine (don't forget to assemble by hand the two ends of your collar with a little hem). Now let's get to the finishing touches of your dress, assemble the back and the front of your facing, right side against right side fig. 8. Sew and open the seams.
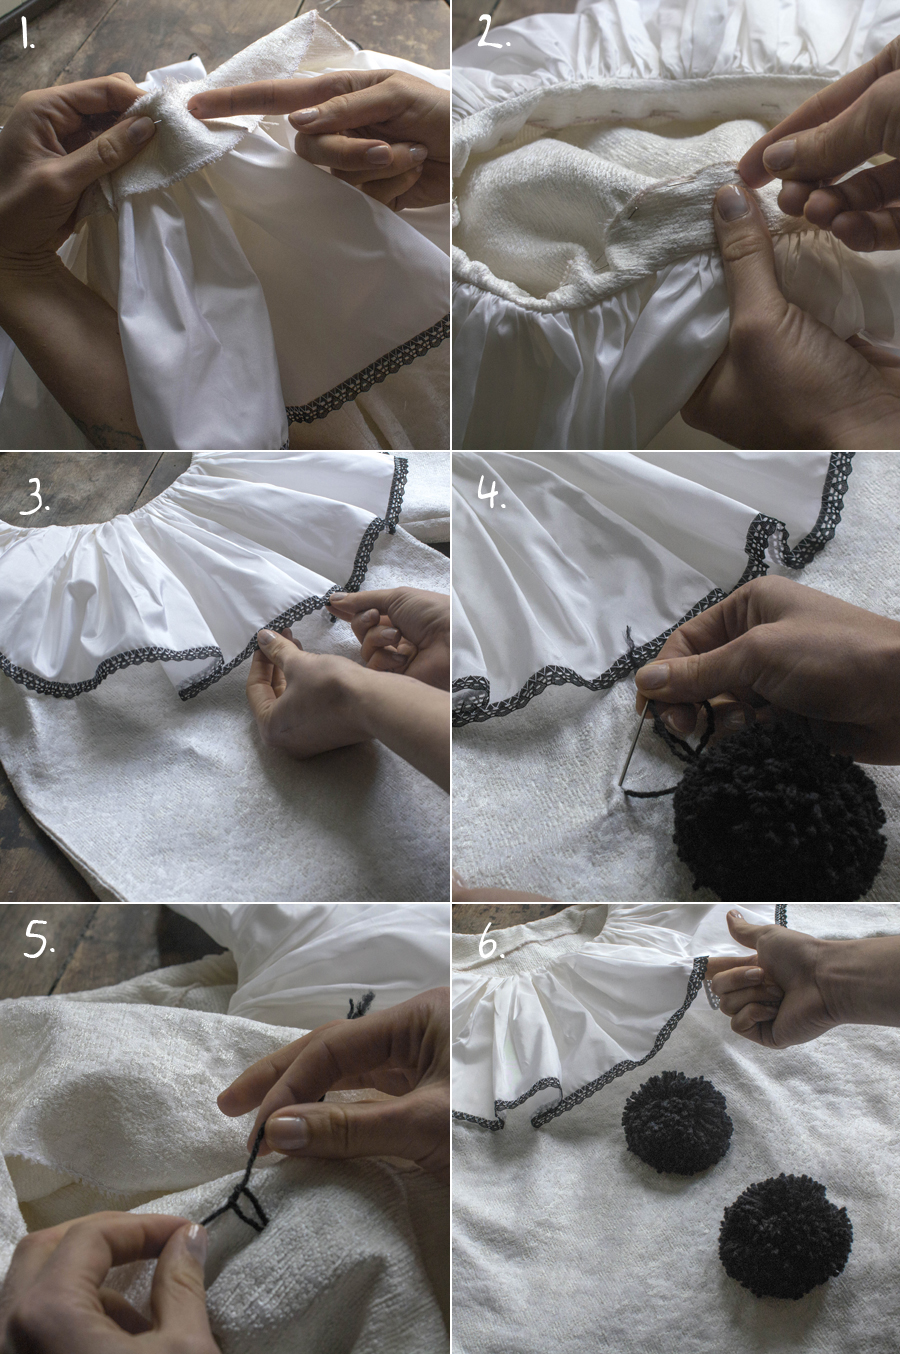
Pin the facing on the dress while sandwiching the collar as shown in fig. 1. Sew the facing on the dress, don't forget to notch the curves and iron the lot to have a neat collar, then fix the facing into the inside of your dress. Then you can either sew with your machine or by hand if you want your stitch to be invisible (but in both case the stitches will be covered by the Pierrot collar) fig. 2. And we could finish here fig. 3... But you certainly don't know me very well if you think I'm going to stop here, now with a big needle, put the pompoms on your dress, thread your piece of wool into the eye (pieces of wool previously kept long...). Once both you threads sewed on the wrong side, make knots on top of each other and turn over...
TA-DA!
LOVE U
The winner is Chloé! Congrats Miss!
