DIY cocooning diamond shape[:]
This Week of the diamond shape was quite chaotic but I have to admit I feel a little bit tired, not to say exhausted... I know it is a rough period to go through but it's harsh, and the only moments where I feel good are when under my blanket into my bed. I can feel I'm near my limits and if I don't want to explode anytime soon, I might as well try to listen to my body a little bit more. When I read this sentence it feels like I've hit rock bottom but I've not! It's just that sometimes, you have ups and downs, that's it. And it means that the next up will be awesome... I have heaps of ideas coming up ! But the thing that takes all my time today are all the crapy administrative stuffs like how to create a company... I can't wait for all this legal stuff to be behind me so I can dedicate myself to more creative things for you and for me!
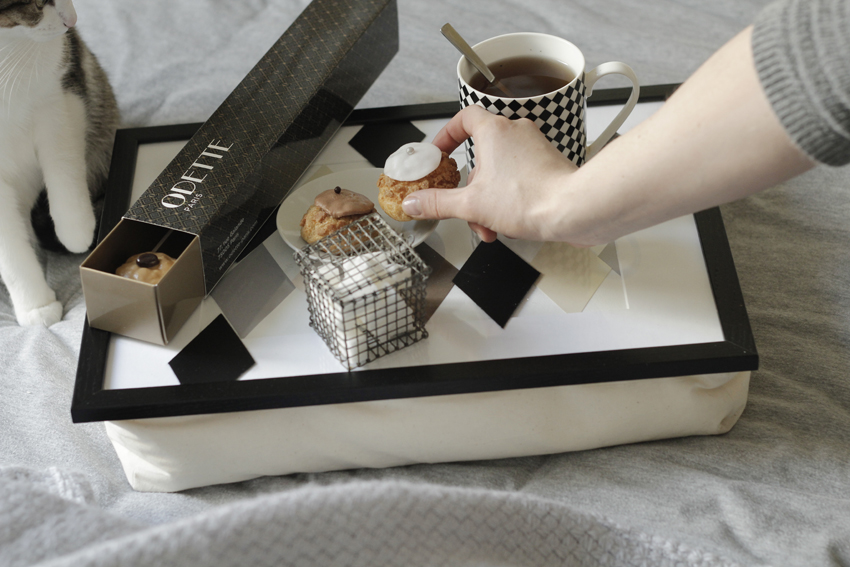
I have good news though ! Spring is coming and I know it because I've been waking up with a start for the past 7 days because it was too bright for 8 in the morning and I thought my alarm clock went off... It is a good news because the spring light will do us good, that and I will also be able to work and take pictures later in the evening... And who says Spring says long breakfast in the morning, because the fact I don't have a balcony doesn't mean I can't take my time to have a breakfast... So here is your deco DIY, easy and graphic (it is a good idea for a gift): a tray/cushion to avoid accidents like like like-hot-tea-spilt-on-the-bed or how a good intention can lead to the E.R. And apart from its chill side, this DIY can also be useful to work with your computer on your lap...
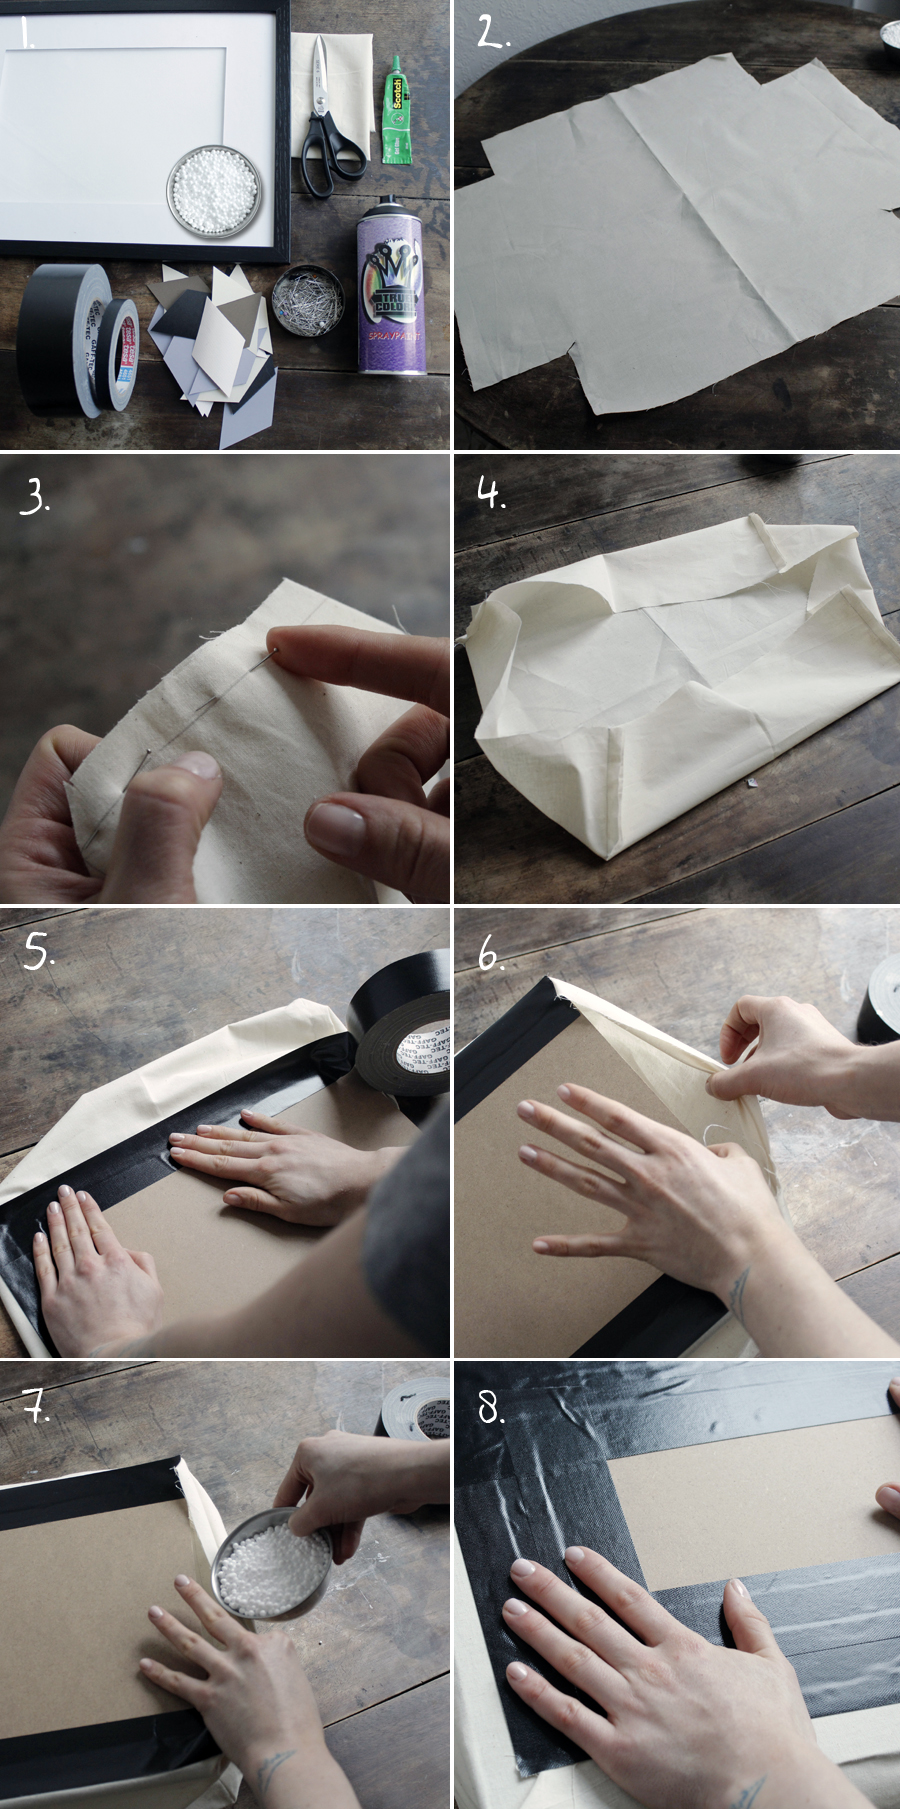
To do this DIY, you will need:
- - A frame with a photo mount (it's optional but more chic you know)
- - Polystyrene beads for the padding
- - Thick canvas
- - Papers of colors cut diamond-shape like (10 x 5 cm)
- - Strong gaffer tape with different width
- - Black spray paint
- - Pins, green glue and a pair of scissors
To start with, unfold your canvas - here I used a pattern canvas but any thick fabric will do and enjoy yourself picking one with a pattern matching what you want to put under the glass. Draw a rectangle the same size of your frame and then draw 4 other rectangles from each edges of the first rectangle. The depth of each of the 4 rectangles must be around 15 cm fig. 2. Then pin the 15-cm-sides together fig. 3 and sew it with your sewing machine with a tight stitch, don't hesitate to double the stitch fig. 4. Now take the back of the frame and the gaffer tape and tape the canvas to the back of the frame. Careful, the canvas must not outflank the gaffer tape by more than 1 cm. One centimeter is good because the tape will durably fix the canvas and allow you to identify the edges so you don't have any imbalance under the cushion fig. 5. Tape three sides like shown in fig. 6. Now with a small bowl, fill the cushion with polystyrene beads, up to the 3/4. The small bowl will help because the beads are very volatile and full of static electricity which make the use of hands difficult fig. 7. One your cushion is filled up to the 3/4, tape the last side as the three others and don't hesitate to double the strip of gaffer tape fig. 8.
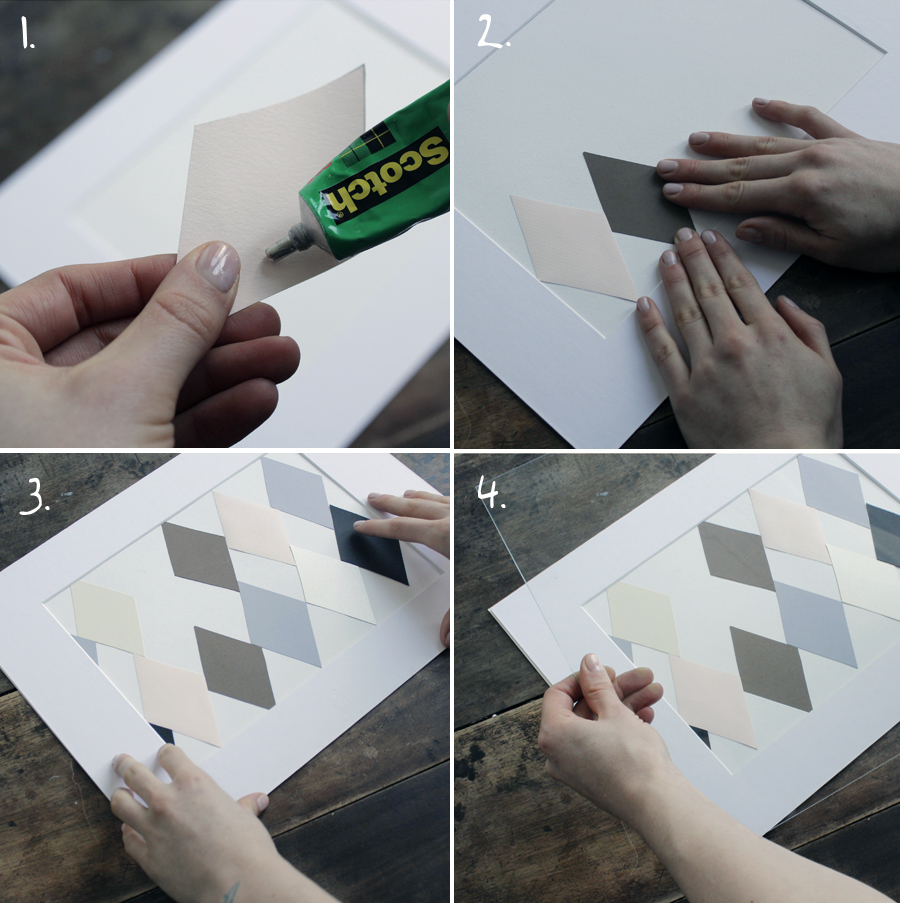
Now, let's take care of what will be into the frame. You're free to put anything you want, polka dots, triangles, your kids drawings... Here due to the diamond shape week, there are... diamond shapes but I decided to work on two different levels: a classical way for the first level with colored diamond shapes glued fig. 1 to 4, I randomly glued them on purpose, the next steps will be more relevant.
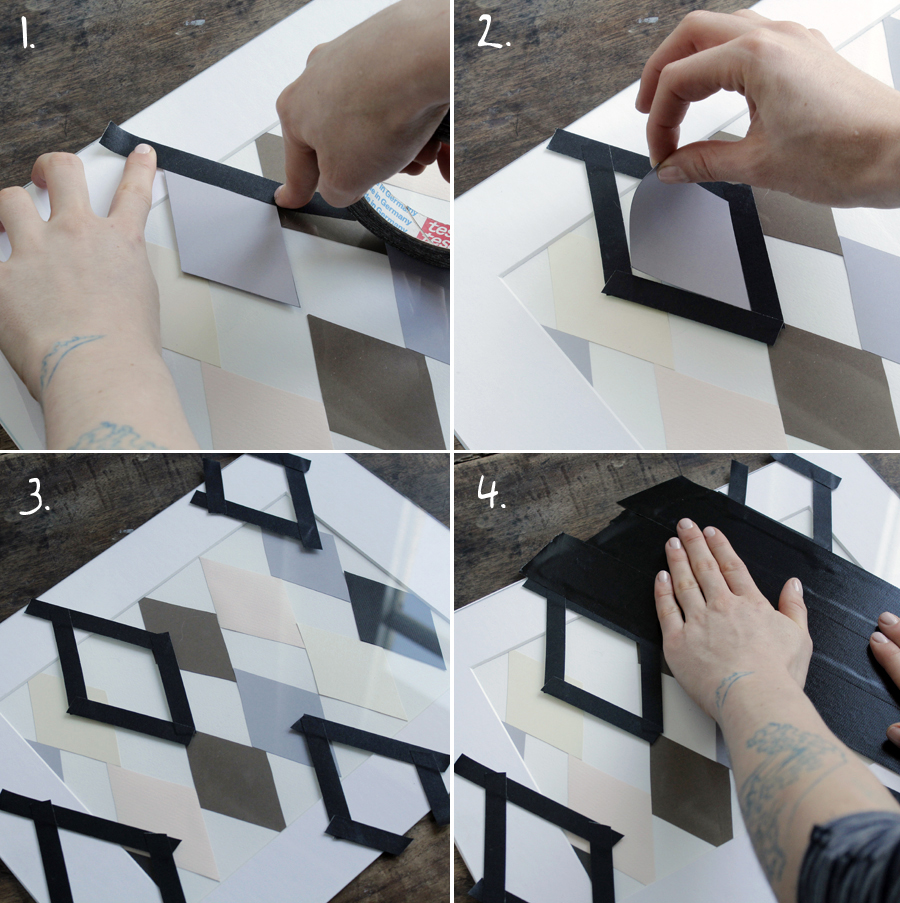
For the second level, I wanted to deal with the glass of the frame. With the help of a paper diamond shape draw the key line of the diamond shape with thin gaffer tape or masking tape fig. 1. Once you all your edges are drawn you can remove the paper diamond shape fig. 2. And you can start again as many time as necessary fig. 3. Then cover the rest of the window with gaffer tape or paper fig. 4. This way of working on a second level brings some depth to your depiction and a bit more relief to your tray, kind of what I showed you in my silent strass DIY.
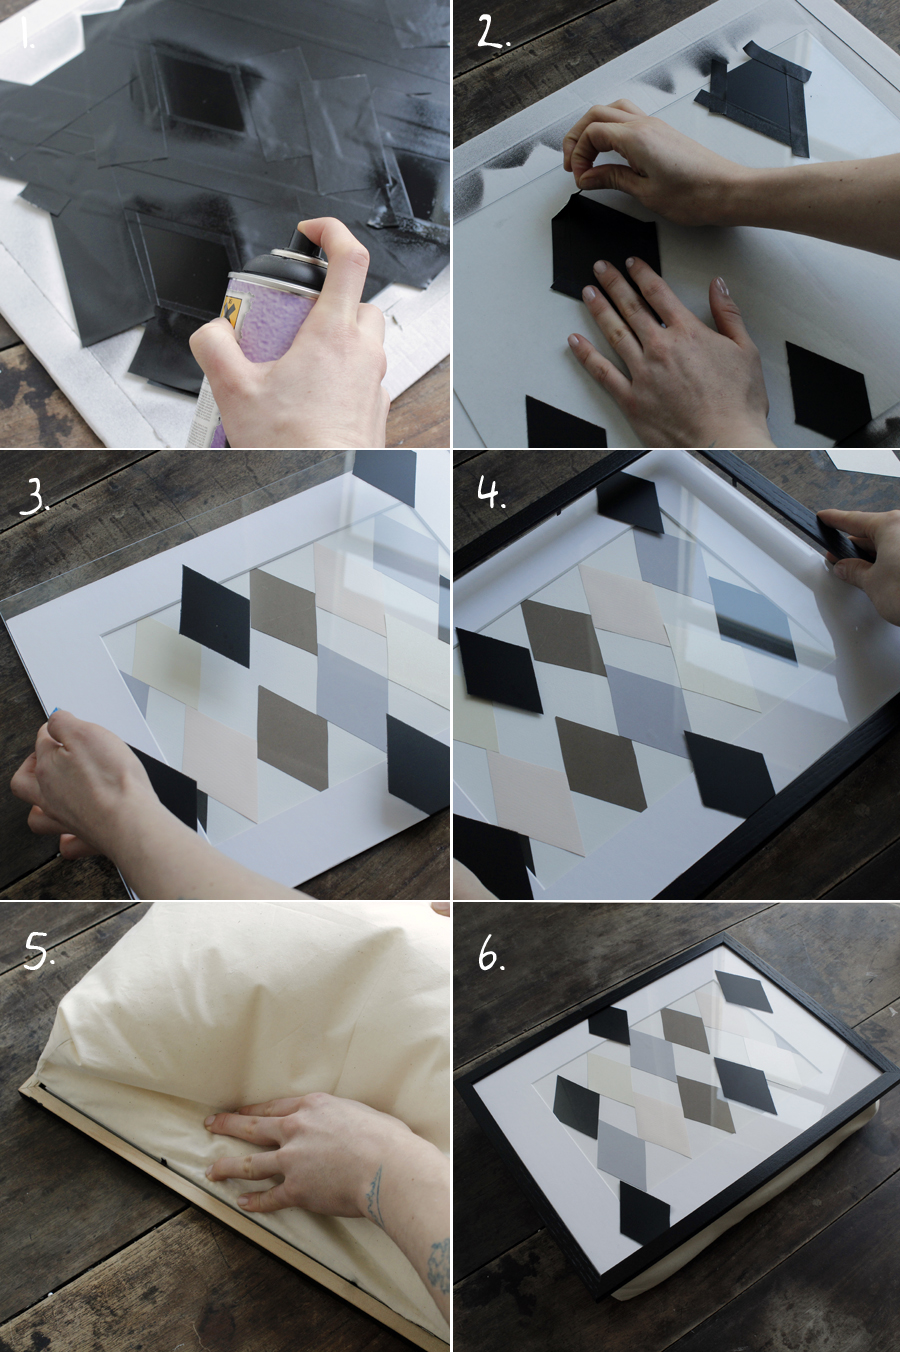
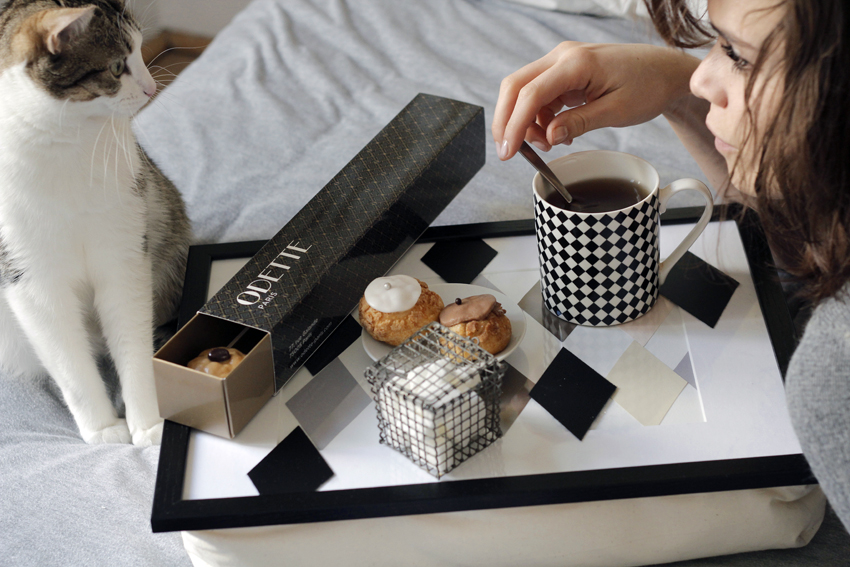
Of course, protect your table or floor on which you're working to spray your diamond shapes, and open your windows widely. Spray at 20 cm from the window frame and if you're not satisfied, wait for the first layer to be completely dry and spray again fig. 1. Let it dry for a good half hour, even an hour you can never be too careful, and remove carefully the protecting tape fig. 2. Put the window on the mount and the diamond shapes fig. 3 and sandwich it all with the frame and the cushion fig. 4. Turn it over and fold the metal straps, as to close the frame, to fix the cushion. Turn you tray over and TA-DA! Now it's your turn, go make some breakfast...
Little choux buns by Odette, a little too delicious available at 77 rue Galande, 75005 Paris.