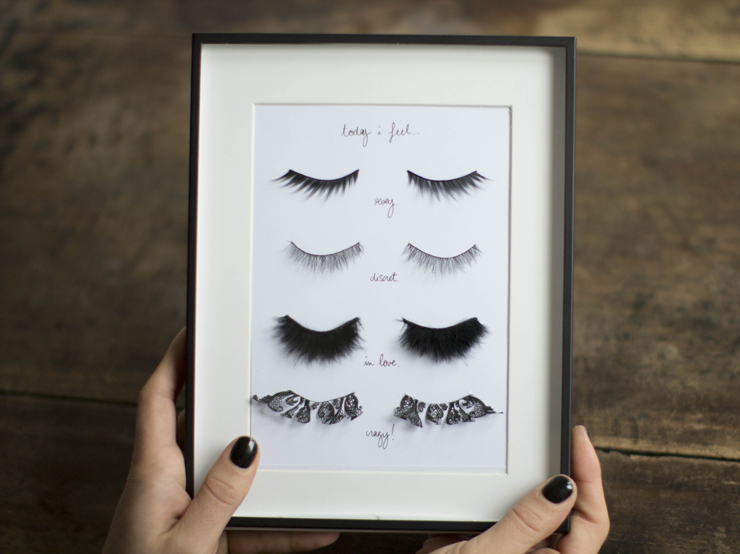
TODAY I FEEL...
My little cats!
Happy friday to you, I have more surprises for you tomorrow and the day after! In the meantime, here's the shu uemura DIY... Because for me, this brand means not only crazy colors and sublime textures, but also false eyelashes, each one more incredible than the last. For a very long time now, I've been wearing "easy-to-wear" ones that I cut and place on the outer corners of my eyes... I love it when people stare at me and say "Are you wearing false eyelashes or what?I love it when people stare at me and say, "But are you wearing false eyelashes or what?" Well, yes, I love it, I've got lots of them that I never dare wear because, seriously, like saying... As much as I sometimes go out in the street dressed so colorfully that every person I pass loses a tenth for each eye... As much as, speaking of eyes, I don't venture into pilositary eccentricities... capillary eccentricities... hair eccentricities?
In short, I love crazy false eyelashes, but they stay tucked away in their boxes at the back of my bathroom... So since I never wear them and I love them so much anyway, I decided to transpose them... To decorating, yes everything's fine. You'll see that it's disconcertingly simple, but there's something for everyone, and the next DIY will be a little more complex... I'd rather spare you this week!
love and see you tomorrow!
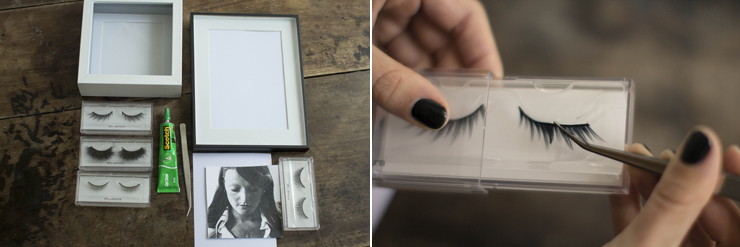
To make these two mini DIYs, you'll need..:
- - Frames with a bit of depth, at HEMA they do this really well,
- - False eyelashes, get out your collections THANK YOU Ludovic, here they're shu uemura!
- -Green glue, tweezers and a fine black pen,
- - A sheet of white paper and/or a portrait of someone with their eyes closed.
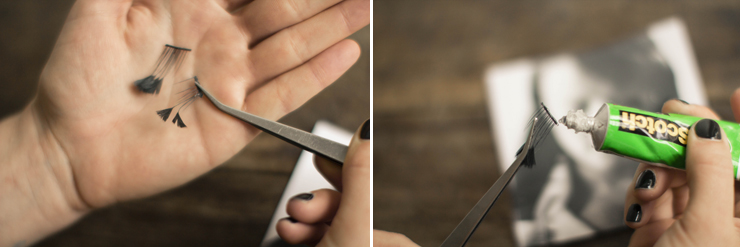
Using the tweezers, gently remove the false eyelashes from their box.
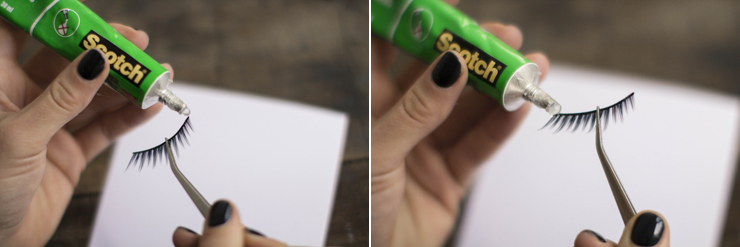
Hold your false eyelashes firmly in your tweezers and dab a tiny bit of glue on both ends.
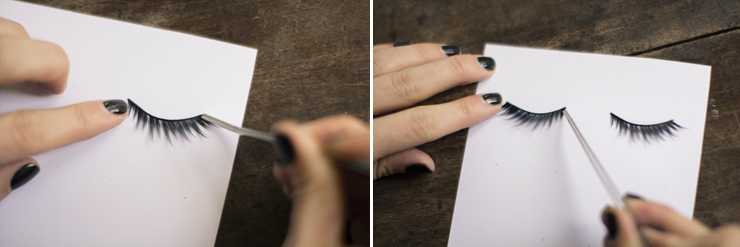
Glue your false lashes to a sheet of white paper. You can mark them on the white paper beforehand (here, the distance between the two eyes is 2.5cm). Adjust the false eyelashes so that they are nicely rounded. Do this quickly, before the glue dries completely.
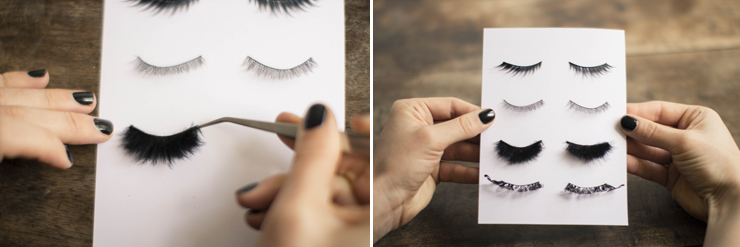
Continue gluing your false eyelashes along the entire height of your sheet; the space between two pairs here is 3.2cm. Once you've filled your sheet, leave to dry for a few minutes.
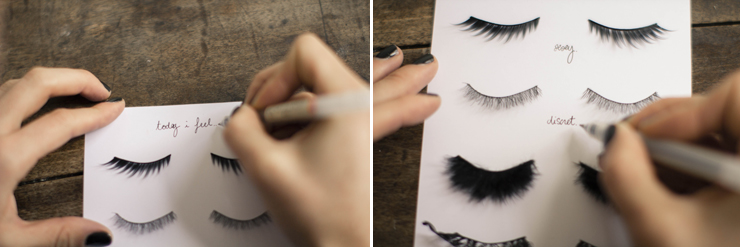
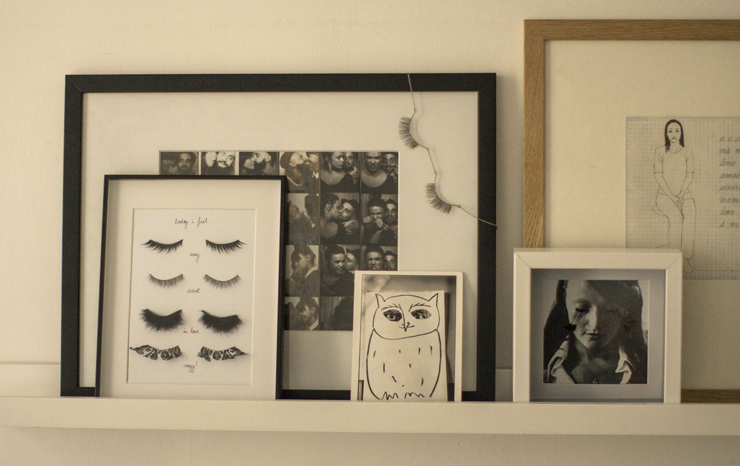
Using a fine felt-tip pen, write at the top center of your sheet, in French or English... I'm feeling totally bilingual at the moment "Today I feel..." or "Aujourd'hui je me sens...", then under each pair of false eyelashes, a mood corresponding to what they evoke in you...". Sexy, bitchy, in love, crazy, discreet..."
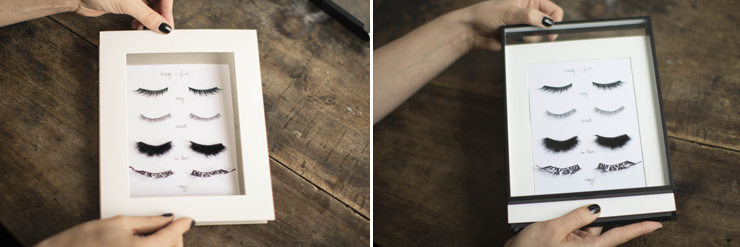
Place the passe partout on your paper, and slide it into your frame! And TA-DA! It's really important that your frame is a little deep to avoid crushing your false eyelashes...
In my case, it's in the living room... But I think it's a great gift idea for a beauty addict... Or maybe you never think about it, but for those lucky enough to have a nice bathroom, it can be a nice wink (yeah yeah, false eyelashes/ wink, I'm getting ahead of myself...).
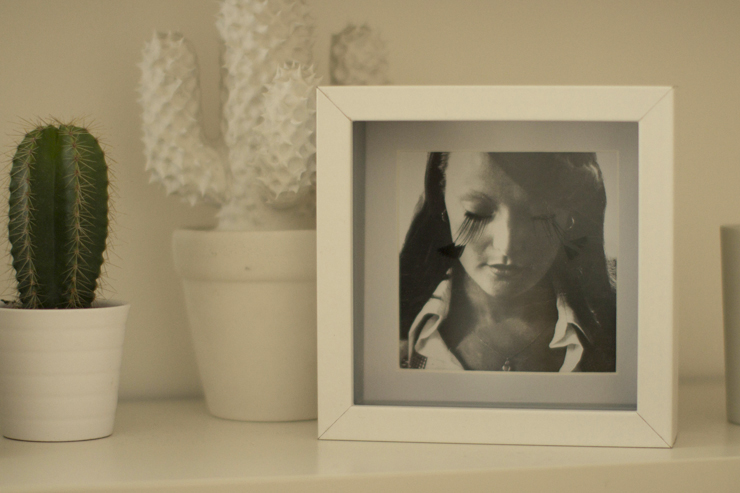
Let's continue with a little DIY bonus... Using short false eyelashes or those you've cut beforehand, apply a little glue to them.

Place them on the closed eyes of your photo... Here's my mom at 20, I love this photo... Leave to dry for a few moments. Place the passe partout.
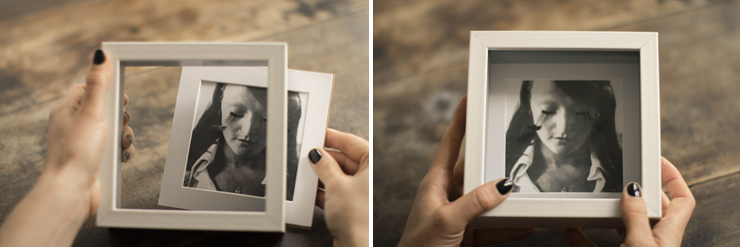
Place your photo and the passe partout in your frame, and TA-DA! Ready to hang! That wasn't so hard, was it?