


MILK BAG
Mes petits chats!!!!!!
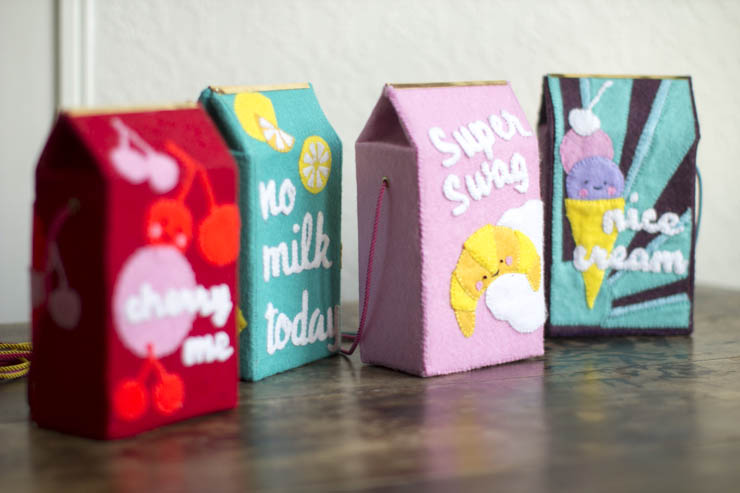
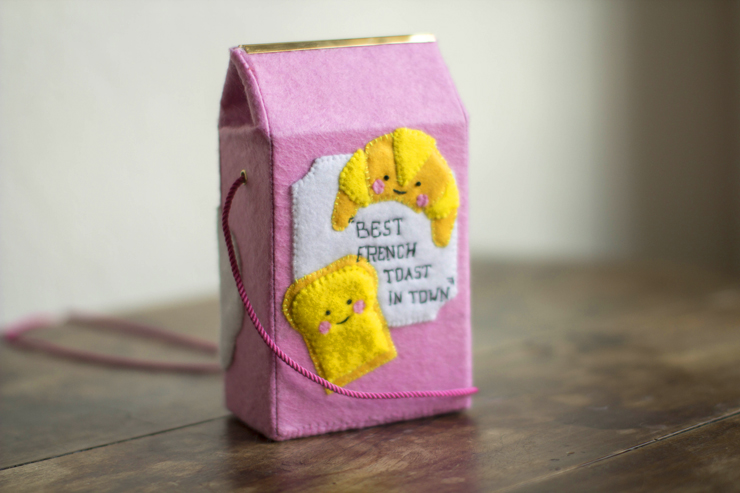
Today it's DIY! I've been preparing this one for a while now! And for good reason, it was very close to my heart. A few months ago, or even a few years ago now, I fell in love with clutches. Olympia Le TanBriques de Lait clutches. Absolutely adorable, absolutely unaffordable for a handbag, in which you can put absolutely nothing. And then, the day before yesterday, the Chanel fashion show turned the fashion world upside down with its super market. I even took a photo of a carton of COCO milk, which was a sign, so today I'm posting my little Milk Bag that I love so much... And to thank you for being readers of solid gold, I'm giving away 2 of these adorable little bags! For details of the competition, go to the bottom of the article!!! Hugs and kisses!
By the way... If you haven't signed up for the Make My Lemonade newsletter yet, now's the time... I'm just saying... I'm just saying...
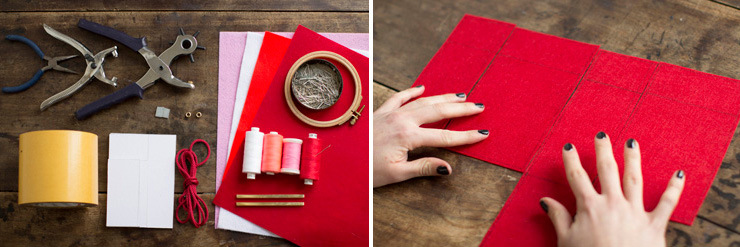
Materials :
- - Felt (4 different colors)
- - Thread (coordinated with the 4 colors)
- - Needle, pins
- - Good double-sided tape
- - Flat-nose pliers
- - Eyelet pliers / two eyelets
- - A hole punch
- - Cardboard
- - Two small magnets
- - Two bag finishes found at Gérard Diffusion 31 rue Yves Toudic 75010
- - An embroidery drum
- - Cord for the bag's handle, here it's from Shindo (by the way, if you come on my behalf to the boutique at 2 rue Aboukir, you get a 20% discount...)
First, cut out the base of the downloadable bag
no milk today: Version 1
cherry me: Version 2
nice cream: Version 3
super swag: Version 4
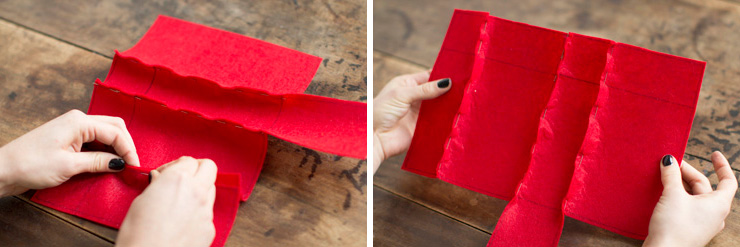
Then pin the 4 parts of your bag together on the reverse (traced side).
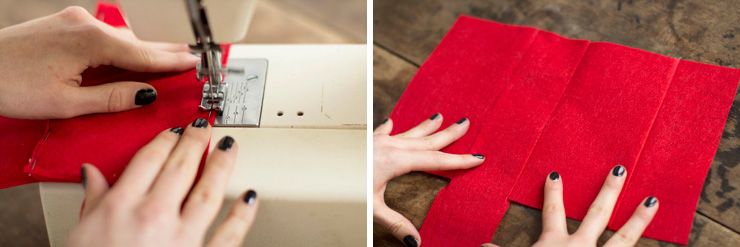
Machine-stitch along the lines and you've got the felt base of your milk bag.
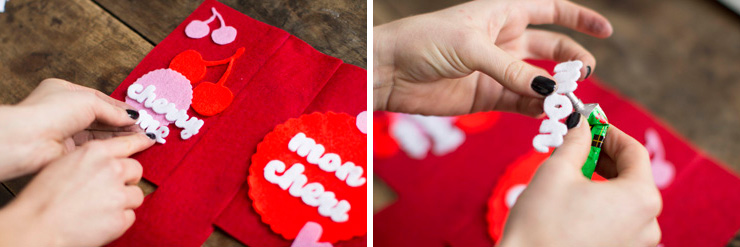
Now you can position the motifs you've cut out of the felt. Before you start cutting, I recommend starching the felt, as this will help you with cutting and embroidery... Lightly glue the elements to be embroidered to your base.
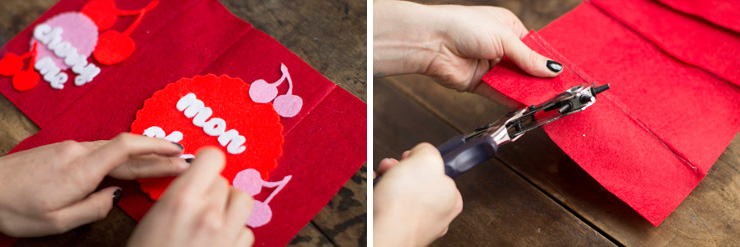
Next, get your hole punch and punch holes in the felt on the side of the bag. These holes will be used for the bag's handle (you'll find the location of the holes on the bag pattern).
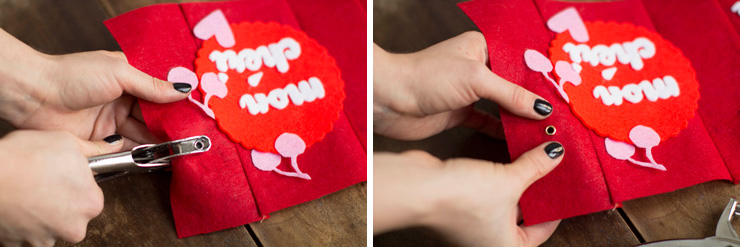
Then place the eyelets, using the appropriate tools, and please be gentle....
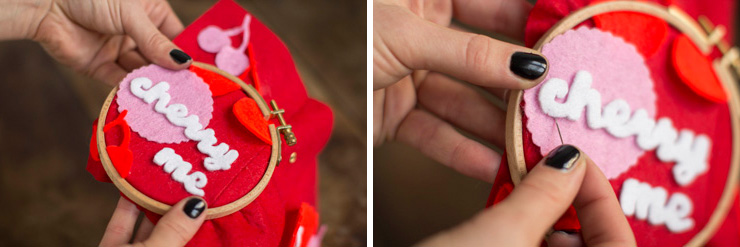
Now you can get on with embroidering your designs, while you watch a good film or two... It takes a long time, but I assure you, you'll quickly get the hang of it. To embroider, all you have to do is stitch by hand, although I find that this adds an authentic "handmade" touch that I really like.
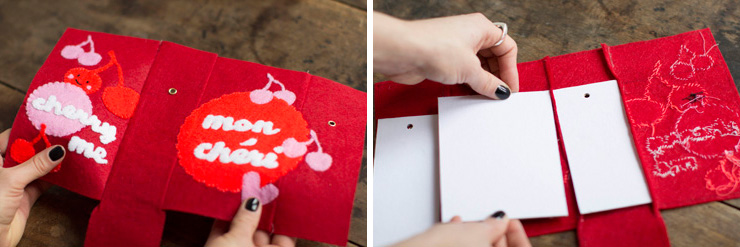
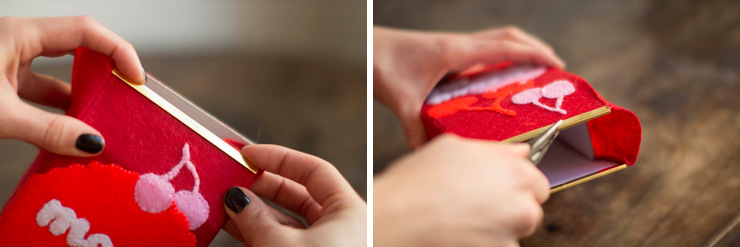
Well done, the hardest part is behind you! Now you can place the cardboard sheets you've cut to consolidate the base of your milk carton. Don't forget to perforate the sides of your sheets in the same place as the eyelets.
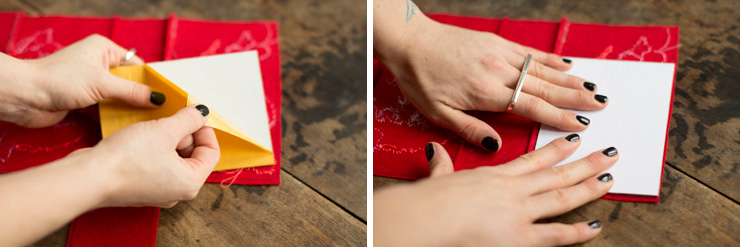
Thanks to your super double-sided tape (mine comes from ruban de normandieit's 10 cm wide), you'll now glue the plates, taking care to stick them against the seams and not over them (at the risk of creating an unsightly bulge later on).
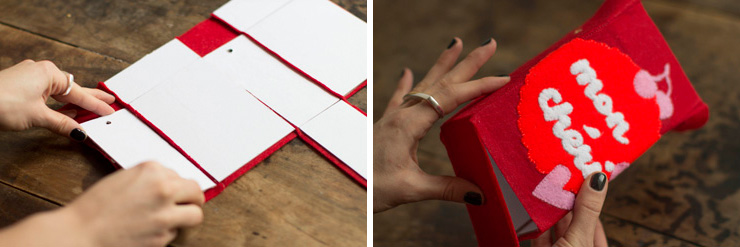
You can now fold your box and start admiring the result for a few seconds (it's almost done!).

Now it's time to concentrate: sew the sides of your box to close it, positioning the plates edge to edge, and fold the slight seam allowance inside the bag for a perfect finish.
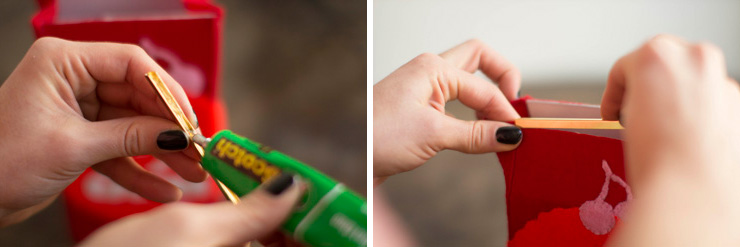
Take the bag's finishing strips and apply a light trickle of glue before sliding them over the top of the bag, making sure to take each layer (cardboard + felt).
Lightly crush the chopsticks with flat-nose pliers to ensure a firm hold.
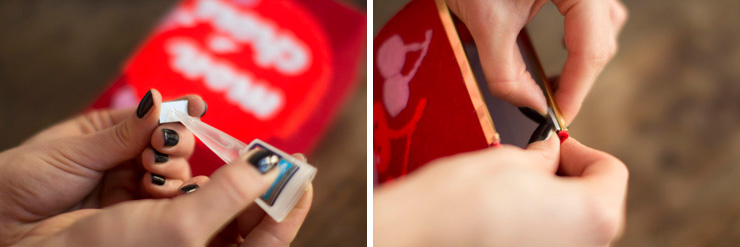
Superglue the magnets to the rods (on one side only, to the right for the front and to the left for the back, the magnet will then be attracted by the metal of the opposite rod).
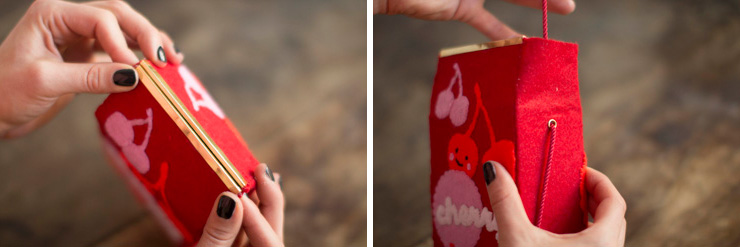
Finish by slipping your cord through the eyelets, adjusting the length and tying a knot.and TA-DA!
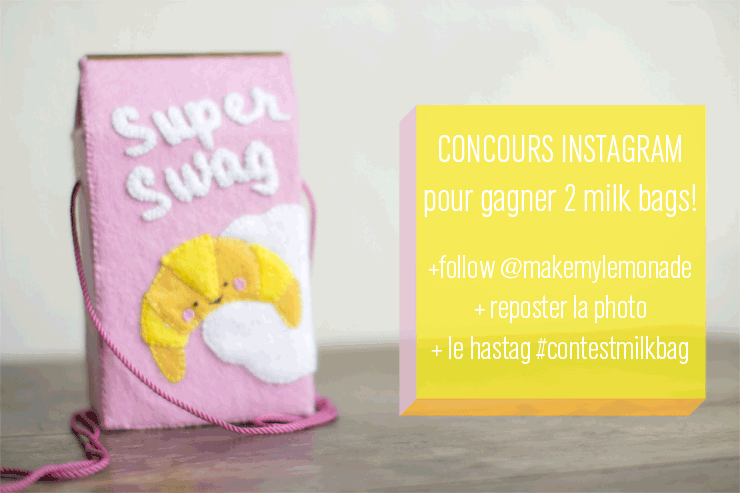
Visit the instagram account of Make My Lemonade accountAll you have to do is follow @makemylemonade, re-post the photo of your favorite bag (I'm going to post all 4...), to re-post a photo all you have to do is take a screenshot..., and add a caption with a little word and the hastag #contestmilkbag! I'll draw 2 winners next Monday! Big hugs and thanks for everything!