


LEMON BIKE
Hello my little cats!
The week comes to an end with one last DIY, and I hope you enjoyed it as much as we did! To tell you a little about today's guest, it's Antoine, the lover of our national Charlotte! Indeed, this winter, I discovered Antoine's passion for bike renovation, when he was in the process of refurbishing a rotting Roll Royce bike for his Charlotte. Glitter finish and matte paint: Sublime...

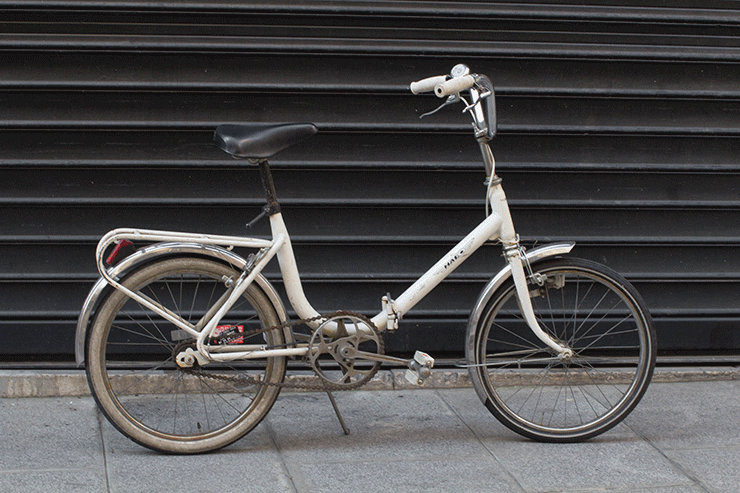
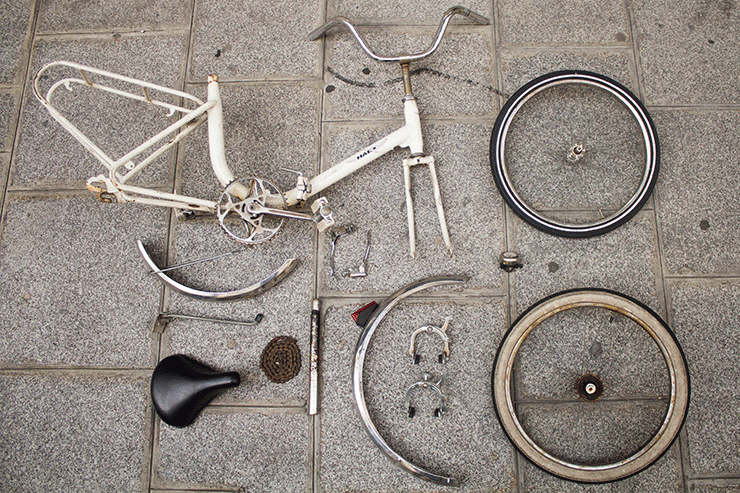
I asked him to take care of my little white bike, which had been outside for months and didn't look like much anymore. He transformed my little rusty frame into a mobile lemonade! I'll show you this extreme makeover! If you too would like to renovate your forgotten bikes in the depths of your cellar, Antoine works wonders and offers his services for 100 euros per bike (excluding the purchase of new equipment). If you're tempted, just drop him a line [email protected]!
I'd also like to thank the e-shop for its excellent service. Holland Bikes for providing us with the materials to renovate our lemon bike! Here's the list of things that were changed and added to our bike:
- basket BASIL
- saddle BROOKS B17 S
- bell BASIL
- yellow chain
- cable and sheath brake sheath;
- wooden board: Mr. Bricolage
- paint (zinc yellow + white primer + mat varnish) TRUE COLORZ: Generation 400 ML
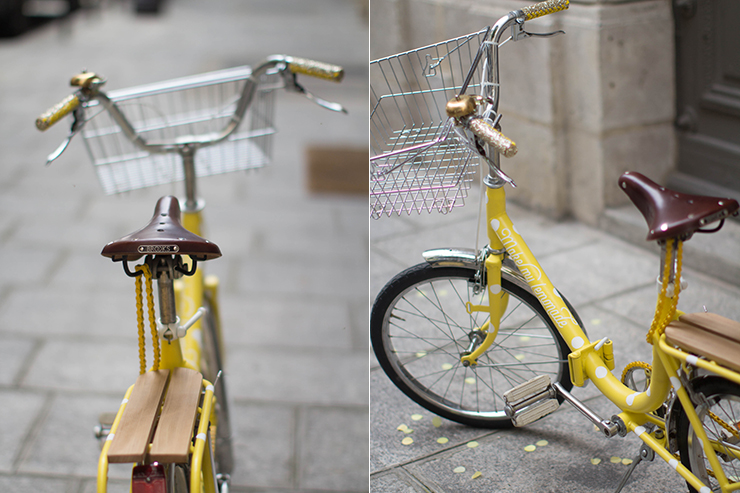
I've always wanted a nice saddle on my bike, but I have to admit that the main problem in Paris is theft. So Antoine suggested a kind of anti-theft deterrent: attach your saddle to your bike frame using a bicycle chain (yellow, of course!).
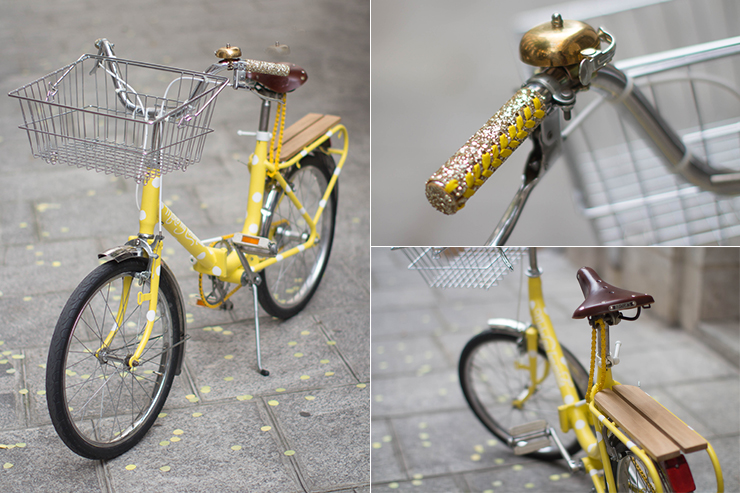
I've always balked at the idea of having a basket on my bike, but I'm forced to admit that it's quite practical, especially for lugging all our stuff around. All I wanted was a metal basket like in E.T., and then there was another problem: you often need a front luggage rack to put the basket on; and for old bikes with small wheels, that's a rare commodity! So Antoine fixed the basket to the handlebars using numerous plastic clamps and TA-DA! Without further ado, here's the DIY glitter handlebars, also in leather!
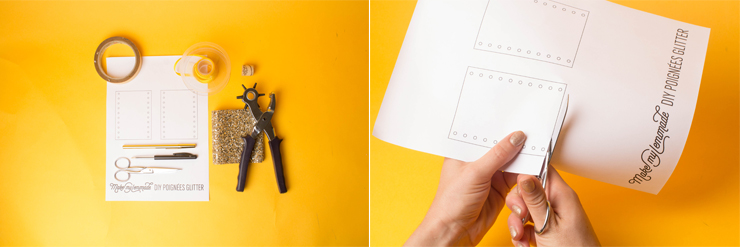
For this DIY you'll need :
- - the pattern to download here,
- - glitter fabric or leather,
- - a pen,
- - scissors,
- - ribbon (approx. 2m for both handles),
- - punching pliers,
- - cork stopper,
- - double-sided tape.
To begin, print and cut out the pattern.
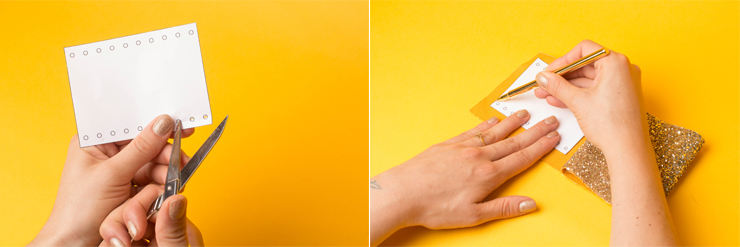
Use the tip of your scissors to punch the holes in the pattern, then transfer the pattern to the reverse side of your fabric or leather.

Cut out the contours of your handle and use your pliers to punch the holes, about 0.3cm in diameter.
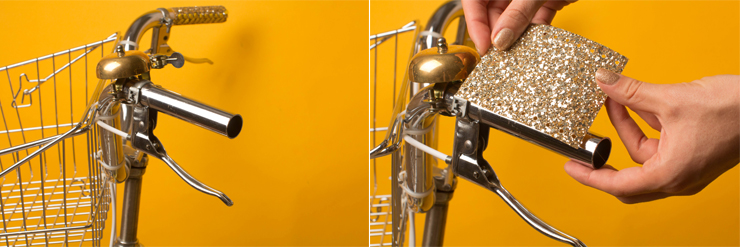
Now check that the handle is the right size (usually standard, but you never know). It should go all the way around the tube without protruding or overlapping.

Cut a piece of double-sided tape the same length as your handle, applying it lengthwise.
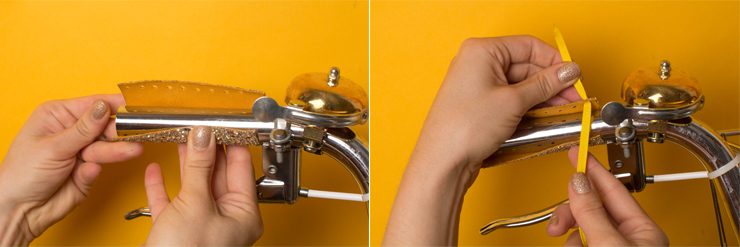
Now place your super glitter handle, which will be securely attached by the double-sided tape. Remember to anticipate the placement of the lace before gluing the double-sided tape perfectly. Take your ribbon and thread it through the first hole, starting on the inside of the fabric.

Slide your lace through the first two holes, facing each other. Continue in this way, criss-crossing the ribbon and taking care always to pass the lace from the inside to the outside of the handle.

Now you're as happy as you were the first time you tied your shoelaces! Twist the excess ribbon onto itself and slide it inside the handle.
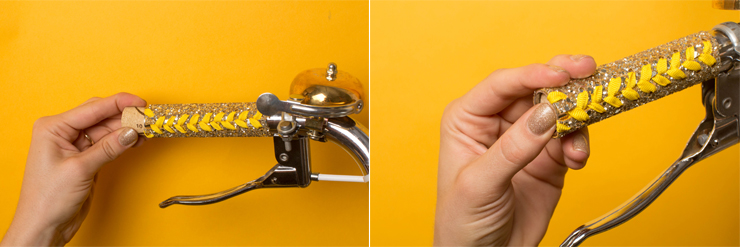
Now take your cork, which you've cut in half (one piece for each handle). Slide it in to fill the hole, being careful not to press too hard or you won't be able to get it out (unless you've got a corkscrew handy)! If you ever have trouble getting it in, don't hesitate to bevel it a little with a cutter.
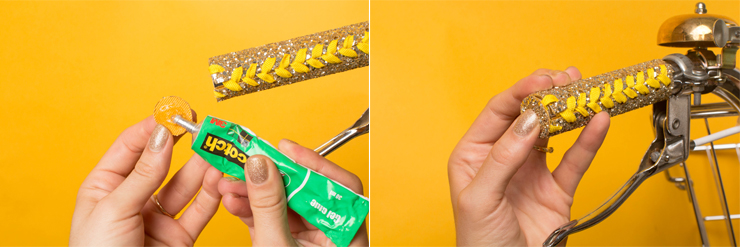
Once again, sizes are generally standard, but feel free to measure the diameter of your handle to be sure. Apply glue and attach to your stopper for a flawless finish!
and Ta-Da!
To read this post in English, click here!