


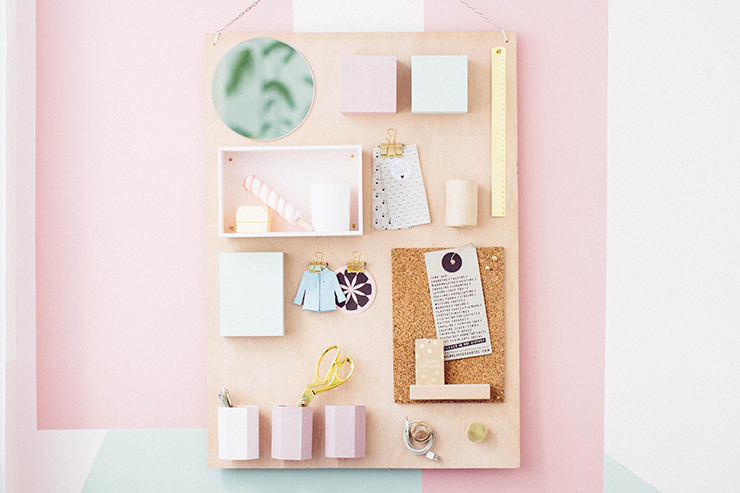
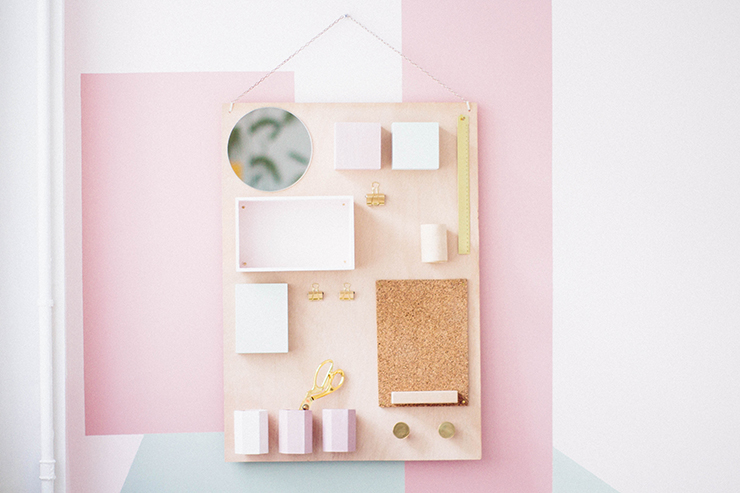
DIY ORGANIZER BOARD
Hello my little cats!
I'm back today with a good DIY as I like them! A long time ago, I fell in love with the this desk organizer on the Anthropologie website, which cost around $300. At the time, I had a doubtful little pout... "Well, I'll just have to make it myself!" I'd found lots of little wooden elements on the Internet and was thinking about starting to assemble them on this board so that they'd be invisible. Sometimes subjects like this get on my nerves, and I turn the thing upside down in every direction, to the point where it even keeps me awake at night! So I said to myself: "I'll glue them with wood glue". But that seemed too easy, like "I didn't bother with my DIY", I'll just take a picture and be done with it, thinking deep down that it would never be used...

Let's be honest: like me, you see DIYs like this on the Internets, but I know it's not possible and you shouldn't be taken for fools! So all of a sudden, doing something completely different, like our friend Doctor House, I found the solution! The clamp, the serflex, the plastic handcuff, call it what you will, but this little object is the solution to a whole host of problems, I assure you. YES, you should always have some in your toolbox! Without further ado (drum roll), I give you the DIY Desk Organizer to spice up your back-to-school!
Time: a short afternoon
Cost: approx. €30
Difficulty: easy, get help if you're not handy with a drill.
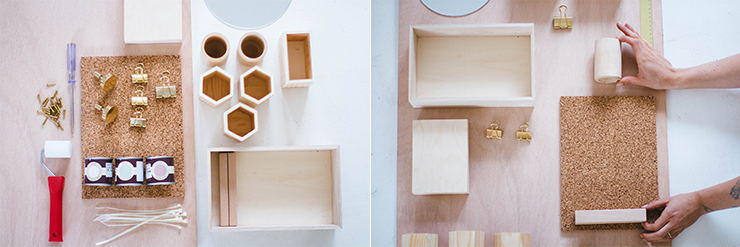
For this DIY, you'll need:
- - a wooden board,
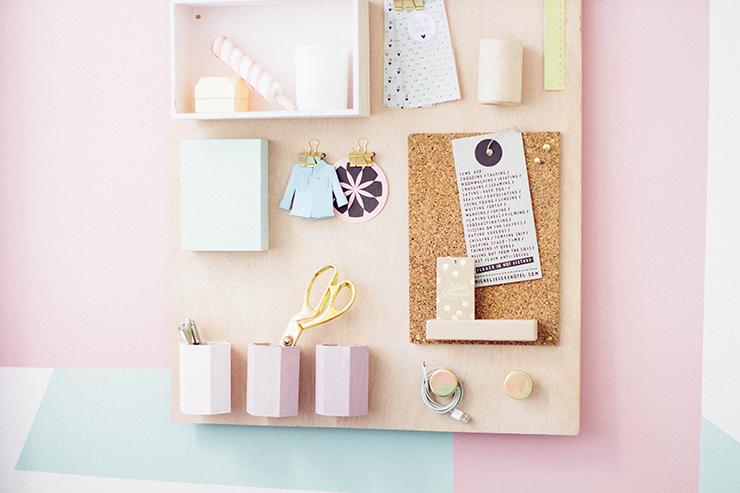
- - small wooden boxes and pots, (found here),
- - drawing clips in various sizes,
- - a drill,
- - screws,
- - hose clamps,
- - small roller,
- - paint, in this case Farrow & Ball, Middleton pink, Nancy's Blush and Teresa Green,
- - a pencil,
- - double-sided tape,
- - a small Ikea mirror,
- - a bit of cork,
- - sandpaper,
- - screwdriver,
- - two door knobs,
- - small-link chain.
To get started, lay out the elements you want to attach to the wooden board and choose their locations. You can take a photo with your phone if you're afraid you'll forget!
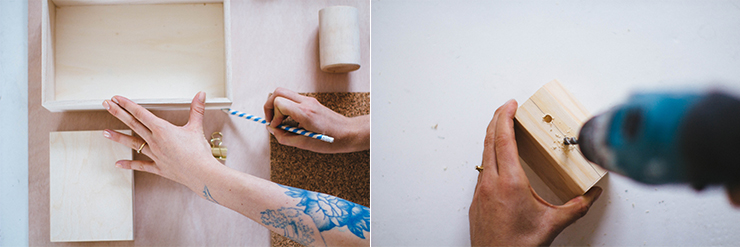
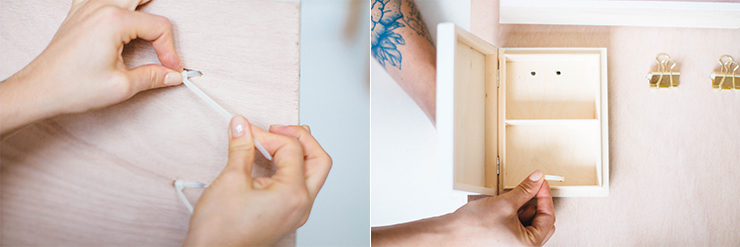
Mark the location of your elements with a pencil and a ruler to measure the space between similar elements. Now grab your drill and make two holes in your pencil pot (you need two holes to make a hanging point, make more if necessary, depending on the size of your elements, but always an even number).
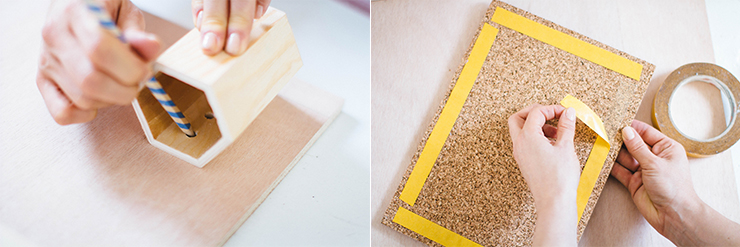
Once you've drilled your holes, put the pot back in its place and mark the location of the holes on the wooden board. For the small cork board on which you'll pin small items, apply double-sided tape to the back.

Glue the cork in place. Then take four pretty little screws and screw in each corner for a prettier finish! You can also fix the mirror with double-sided tape.
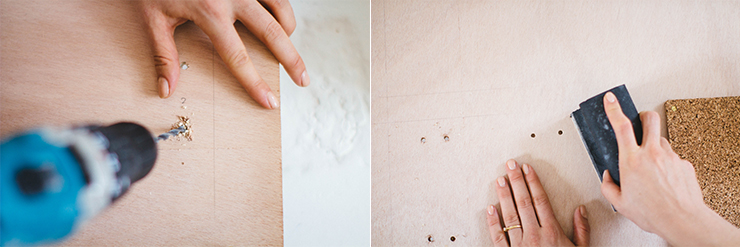
Once you've installed your mirror and cork, take up the drill and drill the holes you've transferred from your elements to the board. Don't forget to sand the holes a little with sandpaper. Rather than erasing your pencil lines, which will leave a demarcation on the wood, sand your lines!
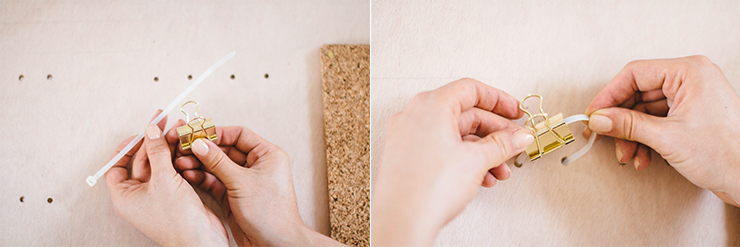
Now take your first clamp and slide it through the first hole in your element (from the back of the board to the front), slide it into your drawing clamp and out through the second hole on the back.
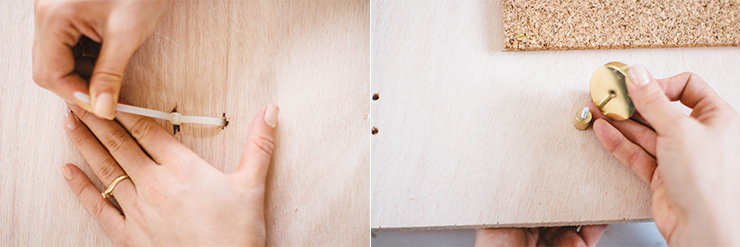
Now tighten your collar, and don't forget to recut it! For the door knobs you'll be using as coat hooks, slide the screw onto the back of the board and screw in your knob.
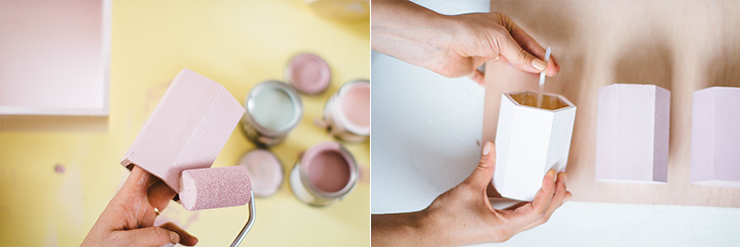
Now it's time to paint! Paint your wooden modules as you wish, using your small roller to minimize brush marks. Then secure them with a clamp, using the same principle as the drawing clamp!
As mentioned above, you'll need several attachment points for some modules, like this little box! Continue to attach your elements using the clamps (easy as pie, isn't it?).
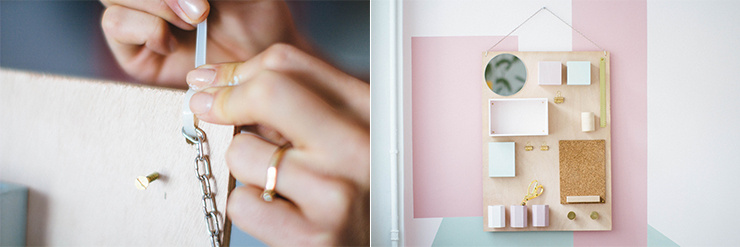
To attach your desk organizer, cut two holes in the corners of your board (not too close to the edge) and attach a chain with a clamp (they're good for everything, aren't they?). And Ta-Da!
To read this post in English, click here!