


DIY Mexican Cushions
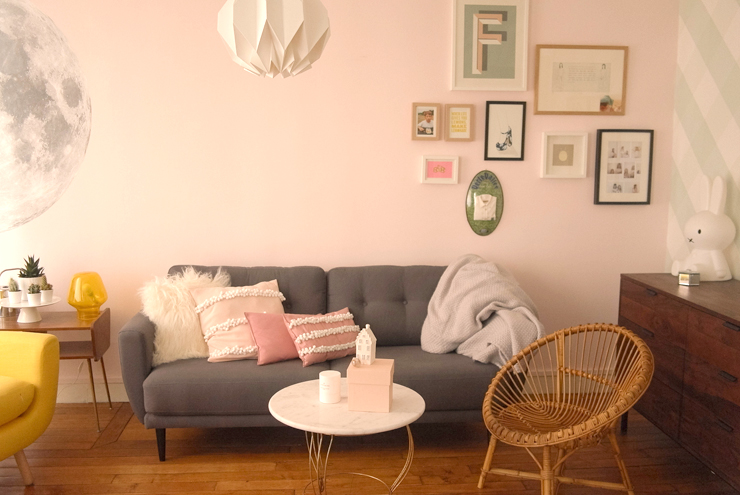
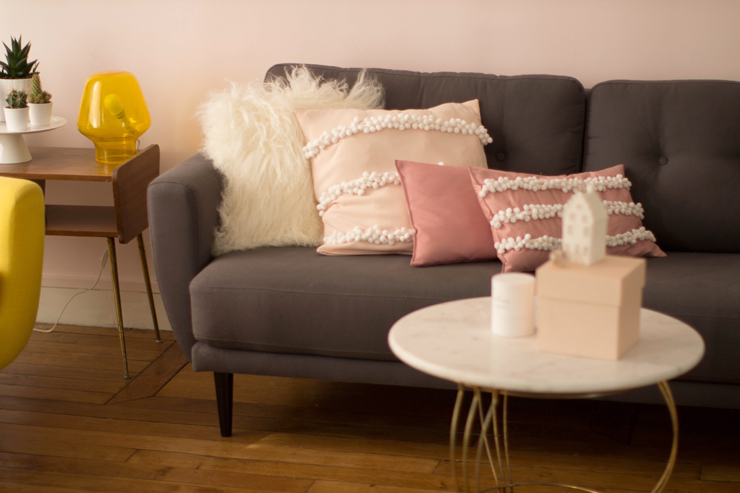
3-seater sofa La redoute Aghzu model, antique coffee table, rattan armchair Atelier du petit parcchest of drawers houses of the world and wallpaper Bartsch.
Happy Thursday, my little cats!
You know what?! My To-do list will be finished this weekend! A little dance of joy! I like to keep you up to date, you really are my silent supporters... Today I'm taking you into my living room with some little DIY sewing projects that will keep your ten fingers busy during these rainy days. Well, all this is just a glimpse of my living room, which is really "work in progress", okay the "progress" is well advanced, but not completely finished either... Anyway, another decorating article is in preparation... Here are my little "Mexican" cushions, I don't know why, but they remind me of Mexico...

For this tutti frutti DIY cushion with pompons rememberyou will need :
- - Fabric
- - A cushion
- - Crochet yarn
- - Scissors
- - Pins
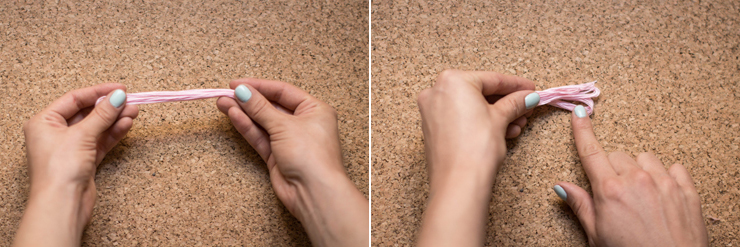
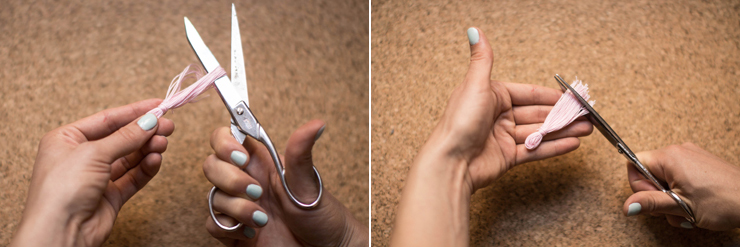
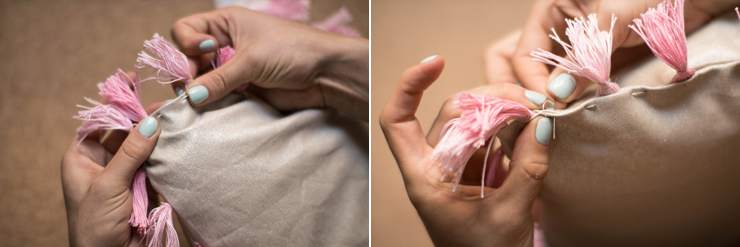
First step: The tassels! Take 4m of crochet yarn, join the ends of the 4m of yarn, fold them in half, then in four, then in 6 etc... Until the whole is only about 6 - 7 cm long.
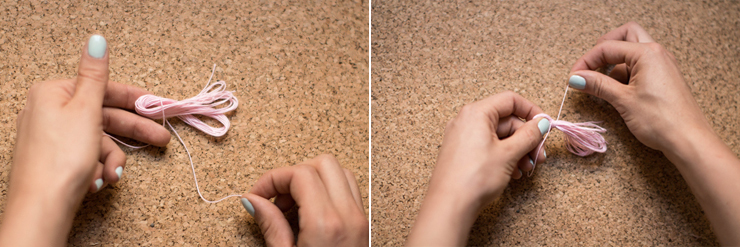
Take an extra 10 cm of thread. Make a few turns with the small piece of thread and tie several knots, 2 or 3, and pull tight.
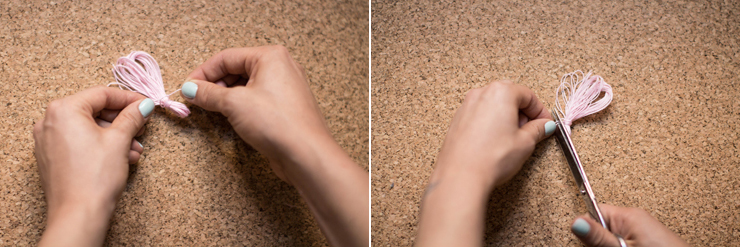
Cut off any small pieces of thread that stick out.
And there's one! Repeat the operation to get enough pom-poms to go all the way around your cushion, in this case 36 pom-poms in all.
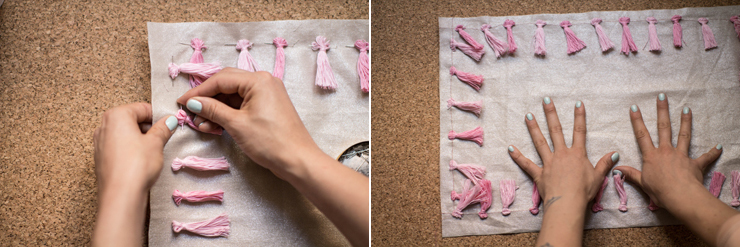
Cut two pieces of fabric to make your cover. Place your pom-poms 1cm from the edge of the cover, spacing them as you like. Of course, you can make more, in any color, it's up to you! Go all the way round and pin each pompom to the cover: patience patience... Make a straight seam 1cm from the edge all the way round, passing over the pompoms.
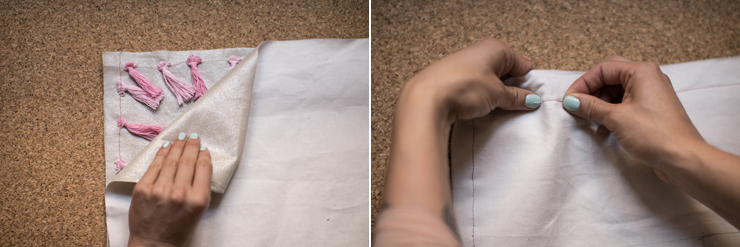
Take your second piece of fabric and pin it right sides together with the front of the cover. Stitch at 1cm from the edge, ironing over the tassels on three sides, leaving one open.
Turn your cover inside out, use a small iron to open the seams and slide the cushion inside.
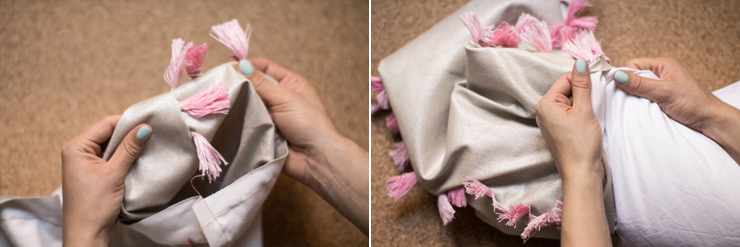
Pin it last, open side up, tucking the stitching values inside. Take a needle and thread and close the whole by hand, using small, close stitches.
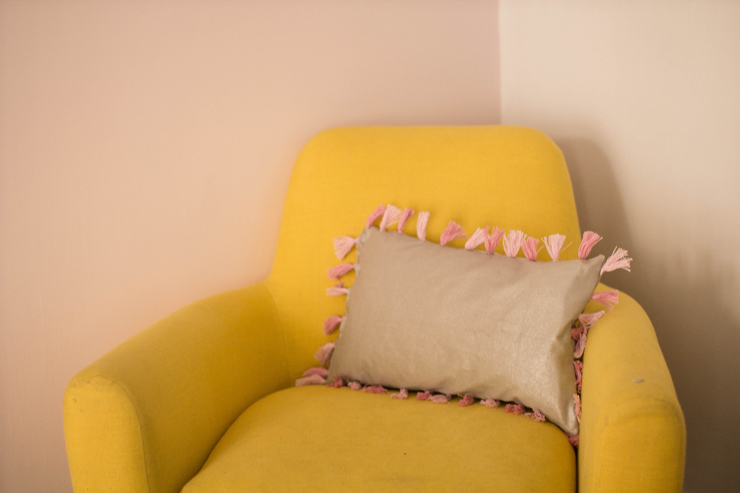
and TA-DA!

For DIY cushion pompons "mini afro cut" version, you'll need :
- - A cushion
- - fabric
- - Bands of small pompoms
- - Pins
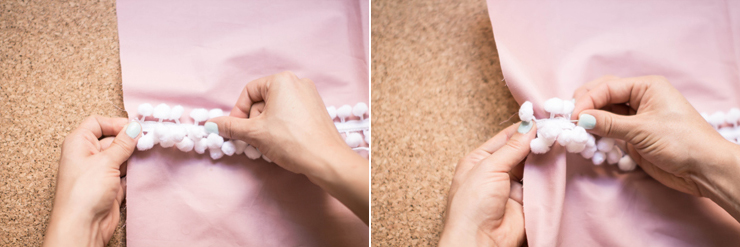
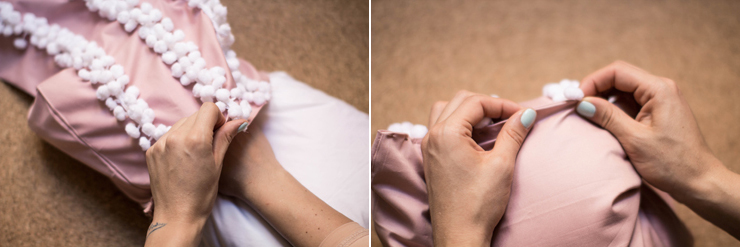
Cut two pieces of fabric for the base of your cushion. Place a first strip of pompons in the middle of your base.
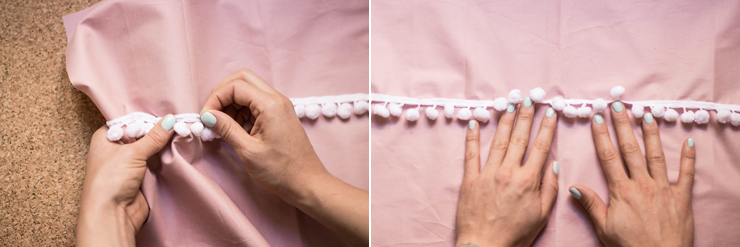
Pin in place. Make a straight seam along the strip.
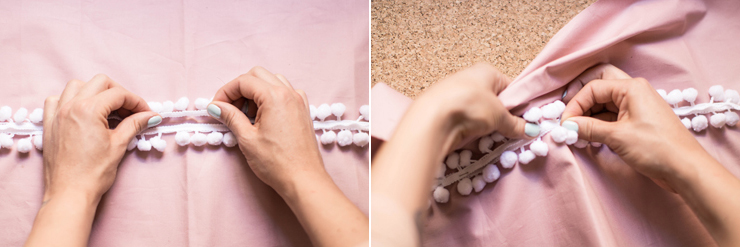
Place a second band of pompons on top of the first, but this time reverse the direction of the pompons (pompons up). Pin and machine-stitch.
Lay a third band of pompons on top of the previous two (pompons now facing the ceiling). Pin and stitch!
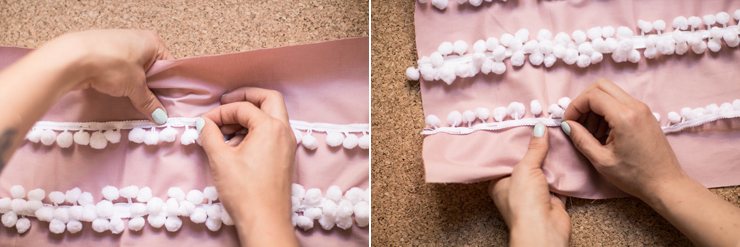
Repeat these operations a little higher, 6.5 cm above the first band of pompons. And one last time, 6.5 cm below the first band of pompons.
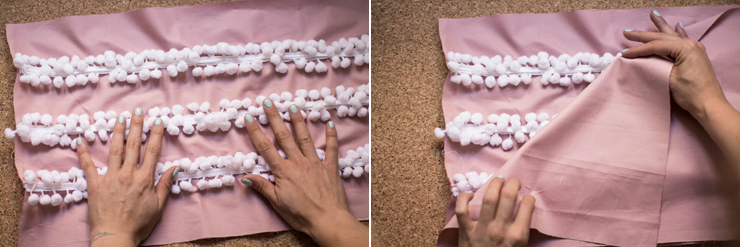
First TA-DA! Now pin the front and back of your cushion right sides together, leaving one side open.
Sew, then turn the cover right side out.
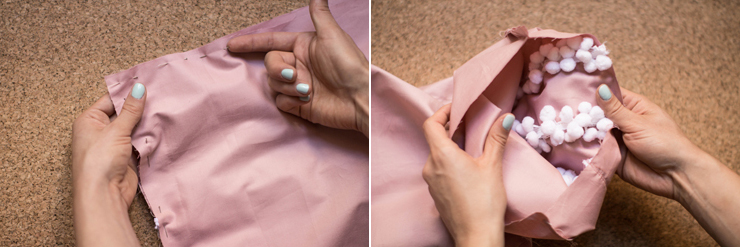
Slide the cushion into the cover. Pin the last side of the cushion, tucking the seam lines inside.
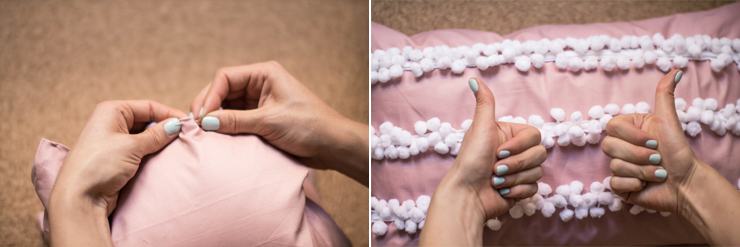
Close by hand using small stitches, or close with a final seam as discreet and close to the edge as possible (a ribbed stitch).
And TA - DA! I was such a fan that I made two...
For this DIY pinata cushion you'll need :
- - A cushion
- - Fabric (scraps will do just fine)
- - Scissors
- - Thread and needle
- - Ruler
- - Pins
- - Pen
Draw strips the length of your cushion and 5cm and/or 7cm wide for a little variety.
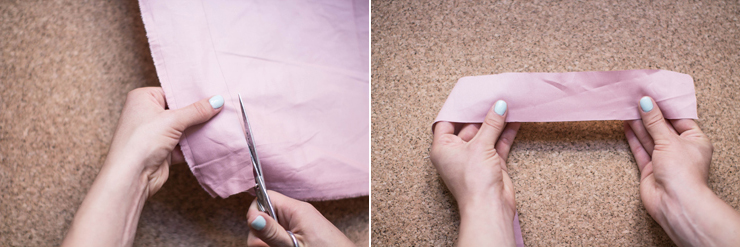
Cut your strip, remembering to leave a 1cm seam allowance on each end.
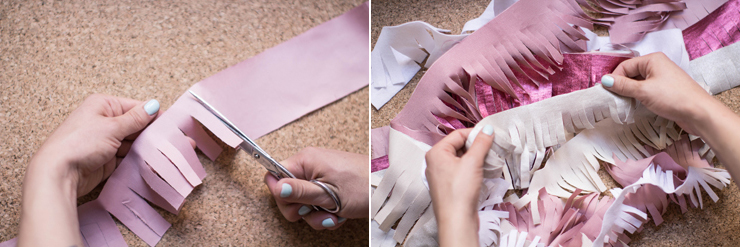
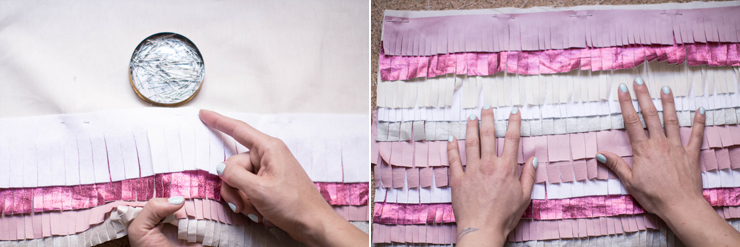
Edge your strip every 1cm or 0.5cm, using parallel scissor strokes, stopping about 1.5cm from the edge (where your seam will be). Repeat the operation until you have enough strips to cover your cushion (remember that they will overlap).
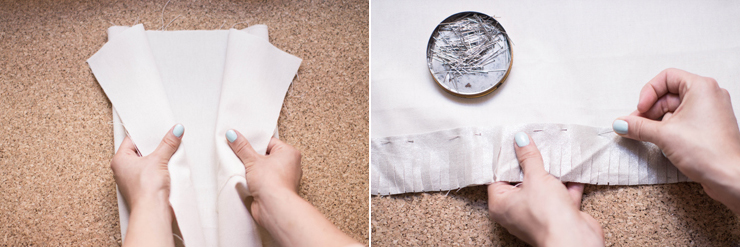
Cut two pieces of plain fabric to serve as the base for your cushion. Pin your first strip to your base, aligning the bottom of the strip with the bottom of your base.
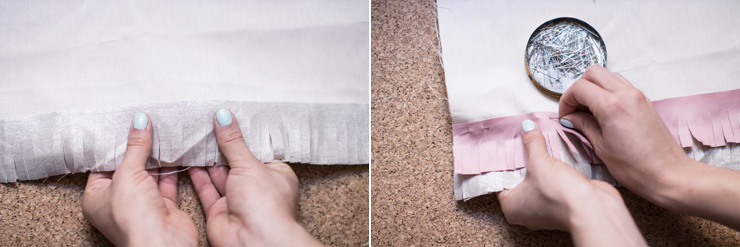
Machine-stitch a straight seam along the length of your strip. Pin the second strip, overlapping it slightly with the first.
Stitch and repeat. You've finished the front of your cushion (you can do the back too, if you like).
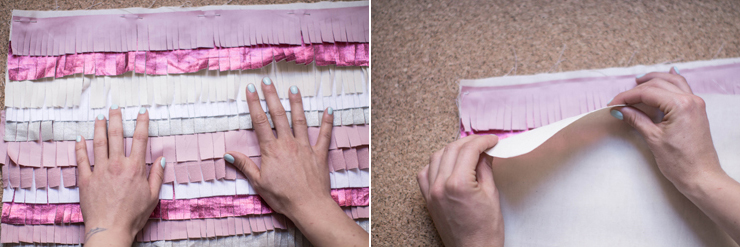
Pin the front and back pieces right sides together.
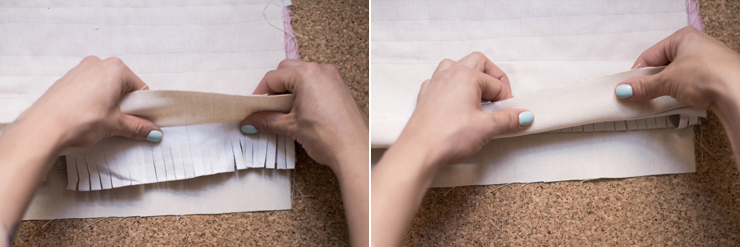
For the seam at your first band, remember to fold the bangs inwards.
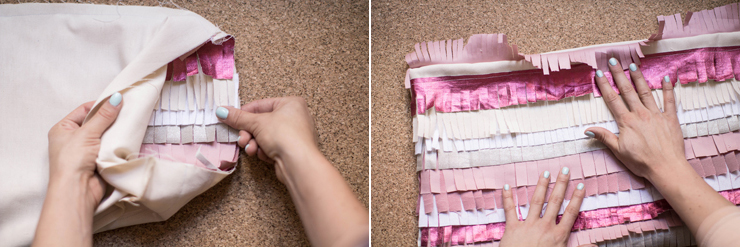
Sew 3 sides, leaving the last open. Turn your cover right side out.
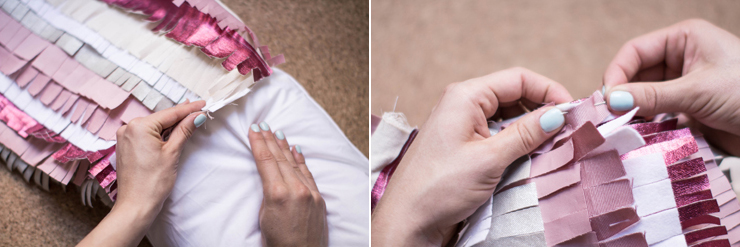
You can iron your cover one last time - it won't hurt it, and will make your work look neater. Slide your cushion inside. To close the last side, pin the open sides, tucking the seam values inside by hand.

Pin all the way through for easier sewing. Take your needle and thread and make small, tight stitches to join the back and front.
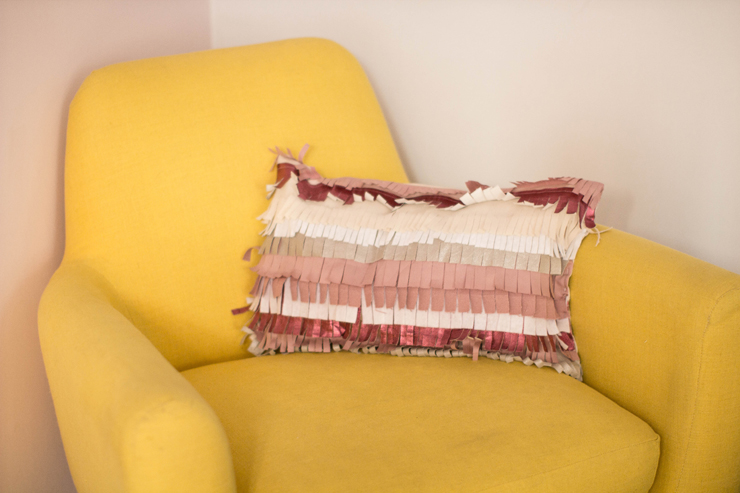
And TA-DA! and one last one for the road, because my Frida is just about the cutest cat on earth (in all objectivity, once again).

Find more unpublished DIYs on La Redoute's online magazine: Le mag des tendances!