


DIY DIAMONDS

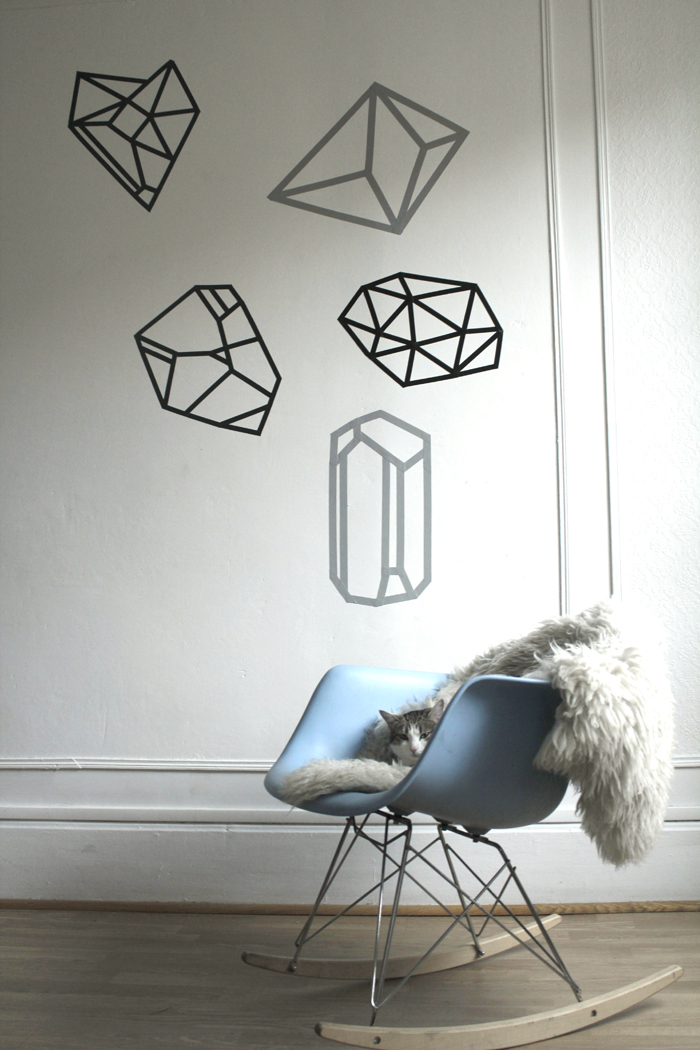
Wednesday's little DIY! Today I'm more into geometry than clicking diamonds. As you're beginning to see around here, I'm a big fan of Scandinavian design, retro and the clean lines you see invading the internets... So for me, this "do it yourself" became almost a matter of course when I stumbled upon this image... I thought "that's such a good idea, I've got to do that for them", and then the decorating tyrant I live with said to me, "are you really going to repaint a wall in the apartment, just to do a blog post?"I realized then that I was probably giving you too much and that I wanted to keep everyone happy, especially my beloved, because I'd still have liked to repaint a wall in the living room... I'll show you how to make the negative of this picture... What's more, it's a lot less time-consuming, and yes, I'm thinking of you little students who don't really have the right to repaint their apartment, so a quick swipe with a gaffer or masking tape and you're done... It's not the most ambitious DIY, but I know that the world doesn't have Mike Gyver with his ten fingers, so ENJOY!

To make this DIY, you'll need..:
- - scissors
- -an exacto
- - color gaffer (bought at Rubans de Normandie, Paris 75003)
- -or masking tape that holds well
- -and crystal designs you can download HERE.

Bonus:
