


DIY BOLDUC KNOTS

My little chestnuts!
Or rather, from where I'm writing you, I should say, my little koalas... For those of you who don't follow me on instagram, I've been in Australia lately... But I'll come back to that later... First of all, thank you for your anthology comments on my previous post, you're really great, I'm delighted to "have" you... Thank you! Today it's a DIY, yes, I wanted to offer you an "easy" DIY after last week's DIY milk bag which, even if I don't find it extremely complex, is, I grant you, very long to make.
I had prepared this DIY for my Make My Party book (in the mini version) and then I proposed it to the delicious participants of the last Tara Jarmon Workshop. I thought that a brooch to be worn in a scarf like a flower was a good alternative to jewelry. Since I've gone short-haired, I've been trying to go all out on feminine attributes, lipstick, heels, earrings (not all at once, of course), otherwise I quickly look like a little boy or a Justin Bieber Bad hair day' days... What's more, since earrings have made a comeback in my life, I've had a little "infection" and now find myself wobbly with one ear out of order (sorry, I'm telling you a bit about my life). Until I can find the time to go to an ear piercer, the scarf worn as a headband with a big brooch is my salvation and a new way of having fun being a girl... There are no problems: only solutions.
Cost: 10€ maximum, feel free to play with the width of the ribbons.
Time: 30 minutes, perfect if you've got nothing left to wear, it'll give any jacket a twist.
Difficulty: Easy, simplissimo, finger in the nose.
For this DIY you'll need:
-
- 2m satin ribbon (2cm or 2.5cm wide)
-
- 2m coordinating grosgrain ribbon (2cm or 2.5cm wide), there are even double ribbons with a grosgrain side and a satin side available from Shindo, for those in a hurry....
-
- Thread coordinated with the color of your ribbons
-
- A needle
-
- Scissors
-
- Pins
-
- Sewing pin attachment (available from Fil 2000)

Before you start, cut the following pieces from satin and grosgrain:
-
1 11cm piece
-
3 pieces of 25.5cm
-
3 pieces of 34cm
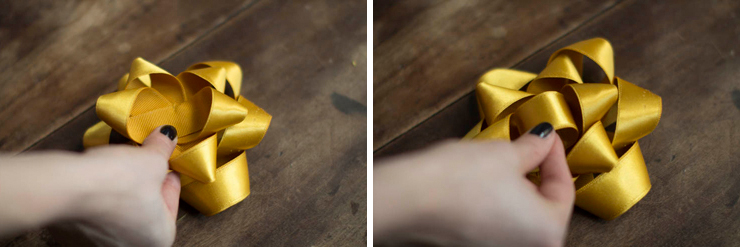
Pin the grosgrain and satin together, then machine-stitch them together. Make a rib stitch a few millimeters from the right edge along the entire length, and do the same for the left side.
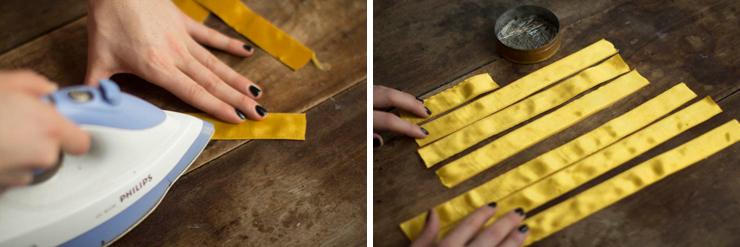
Once you've assembled your ribbons, iron them to flatten them properly, so that your sewing is neat and easy to fold.
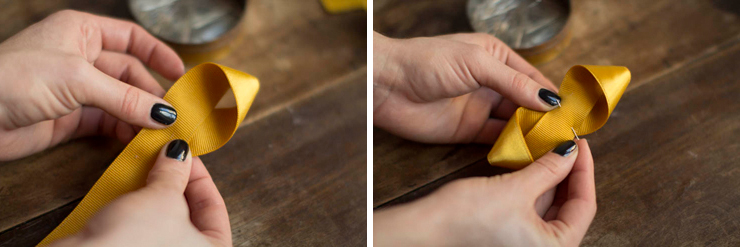
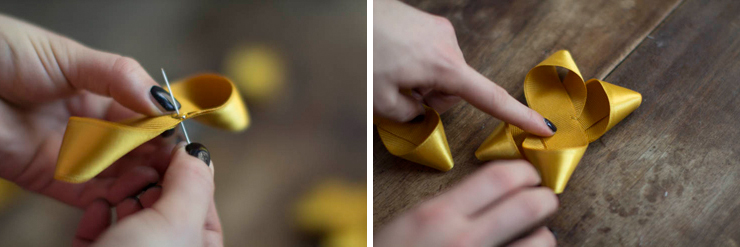
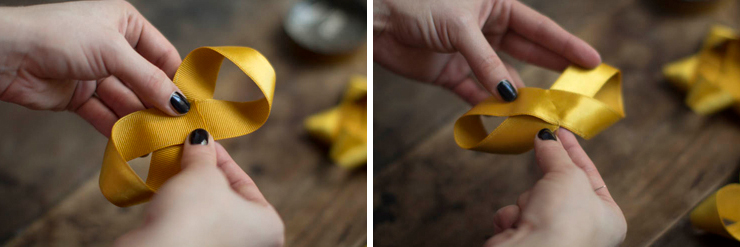
Starting with the 25.5cm ribbons, take one in the direction you want it to go, either coarse-grained on the inside or coarse-grained on the outside - it's up to you - then form a loop a bit like the Sidaction ribbon, and do the same with the other end, so as to form a "figure eight", then pin.
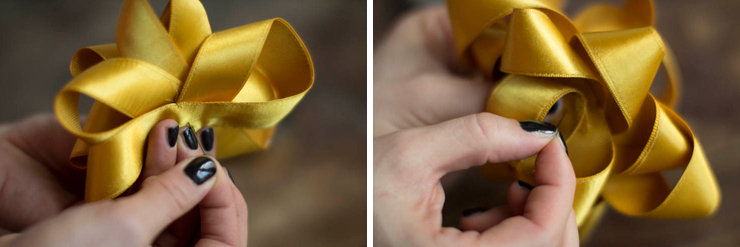
Repeat for the other two 25.5cm and 34cm pieces. Then for the smallest, roll the piece between your fingers to form a ring, and pin it (here the ribbon side is on the outside, but you can reverse with the grosgrain if you prefer... again).
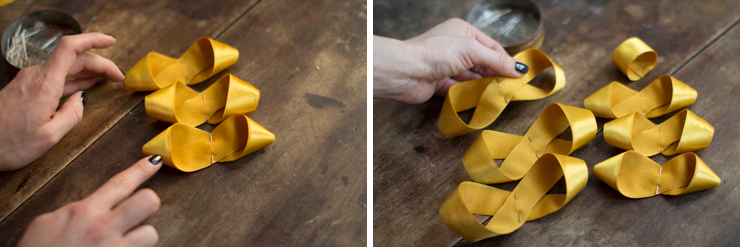
Now you can secure each of your "eights" by making small hand-stitches on either side of the center of your loops.
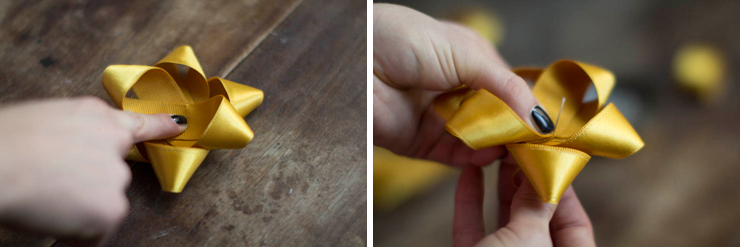
Start overlapping all your "eight" means in quincunxes, making a few hand-stitches to assemble this first part.
Don't forget the little 11cm ring, and secure it with stitches on each side of the ribbon's width. Place it at the heart of your "star/flower".
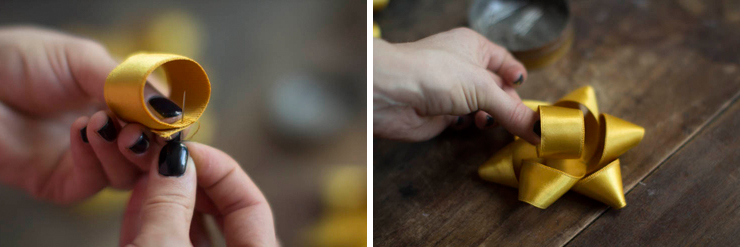
Repeat the above operations with the larger "eights", except that for the last of the large "eights", the joining point of the ends should be inside the "eight", so that the back of your brooch will be clean and you can then sew your fastener there.
Place each "star/flower" inside the others. Don't forget the final ring.
Using thread and needle, attach your two "stars/flowers", the medium one and the large and small rings together. I advise you to squeeze the different parts of the brooch between your hands, and to pass the needle through the center of each part, several times, to secure them firmly.

Remember to save some of your thread after sewing the different parts, as you'll need it for the final step: attaching the brooch clasp! And TA-DA!
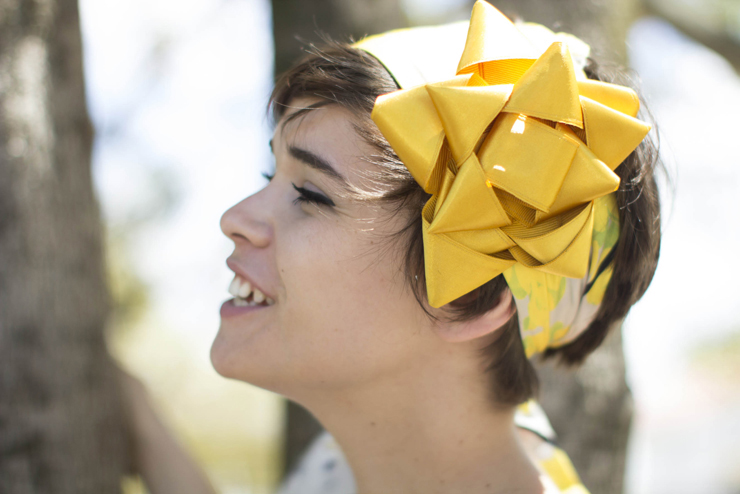
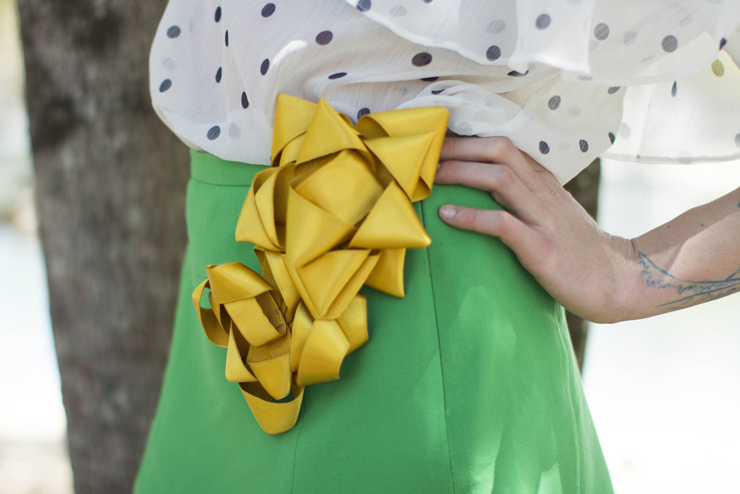
I'm wearing a skirt Zara skirt from last summer, an Asos top from an old collection and a scarf. Tara Jarmon.